Short acrylic nails can give you a clean, structured manicure without the long tips often shown in acrylic inspiration photos. The useful distinction is not simply square versus almond: an acrylic overlay that ends at your fingertip feels different from a small extension, and either can look bulky if the profile is poorly balanced.
These 20 designs stay genuinely short, with specific shapes, colors, finishes, and artwork placements you can compare before an appointment. You’ll also find a way to describe your desired length, decide whether ongoing fills make sense, and recognize when a different nail system may suit you better.
Decide How Much Acrylic You Actually Want
An acrylic overlay adds an enhancement over the existing nail without intentionally extending its length. A short acrylic extension builds a little free edge beyond the natural nail. Traditional acrylic generally uses a liquid monomer and polymer powder; it is not the same product as a glued-on press-on or a soft-gel extension.
For more general color, shape, and natural-nail options, start with NeoGlow’s Short Nails guide. This page focuses on acrylic-specific results and the upkeep that comes with them.
| Your priority | Acrylic direction to consider | Important tradeoff |
|---|---|---|
| Almost no added length | Fingertip-length overlay, square or squoval | Added product still needs maintenance and removal |
| A tidy, visible free edge | Small square or squoval extension | Check both corner comfort and side-profile thickness |
| A softer outline | Short round or shallow oval | Keep the curve distinct without stretching the length |
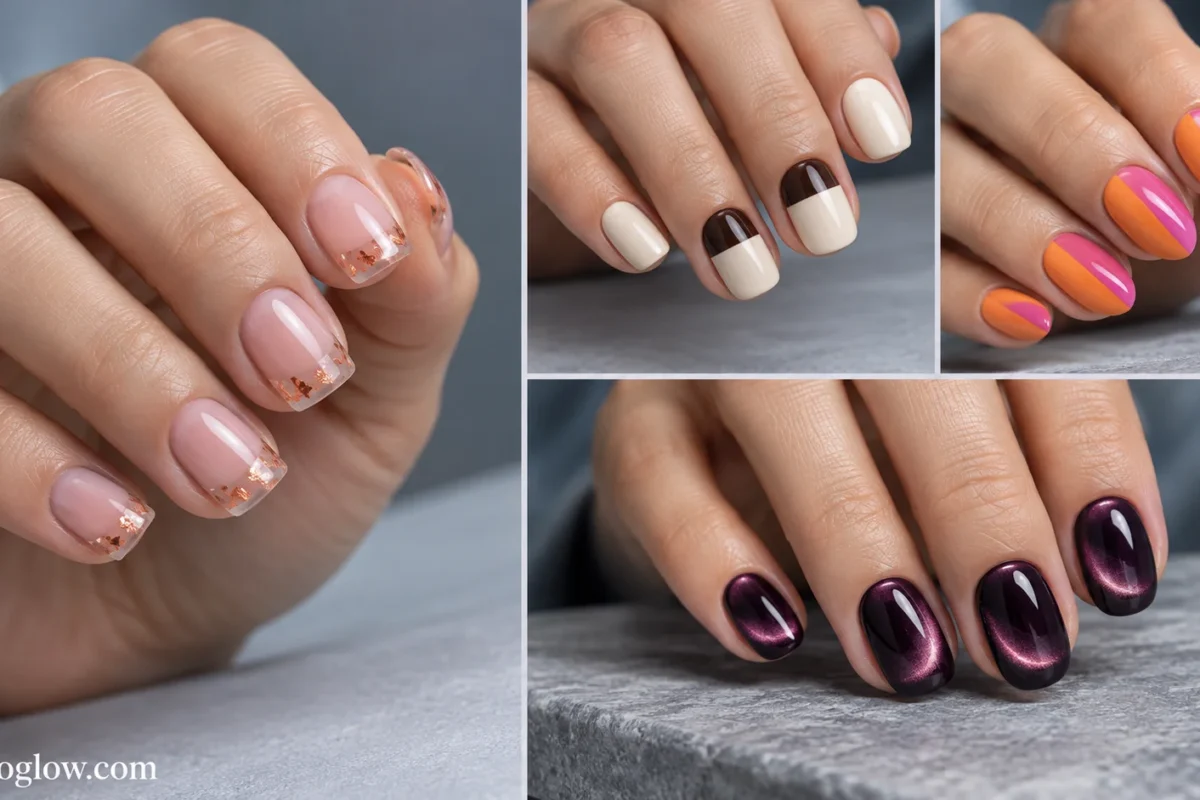
| A tapered look | Truly short almond extension | Needs enough projected tip to form a real, rounded peak |
| Low appointment commitment | Consider polish or a removable press-on instead | The visual effect may be similar; the system is different |
A reference photo should show the nails from above and from the side. Tell your technician where the tip should end relative to your fingertip, not just that you want the salon’s shortest preset length. Shape alone is not the whole decision; NeoGlow’s short-nail shape comparison explores the geometry in greater depth.
Fingertip-Length Square Acrylic Nails
These designs work with a nearly flush free edge. Square means a mostly straight front, though the corners can be softened for comfort.
1. Signal-Red Flush Squares
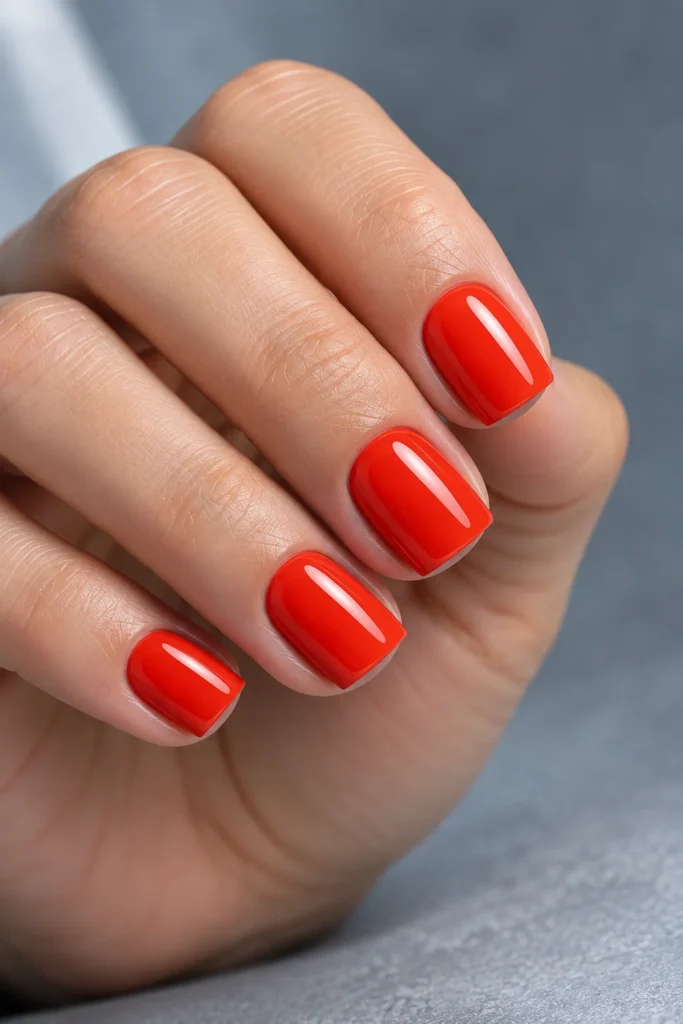
An opaque vermilion-red cream covers every extra-short square nail, with a glossy topcoat and no accent fingers. The flat front edge gives the color a confident, compact silhouette. It suits anyone who wants a strong manicure without allocating space to artwork; inspect the corners if your nails often catch on fabric.
2. Porcelain White With Cobalt Side Bars
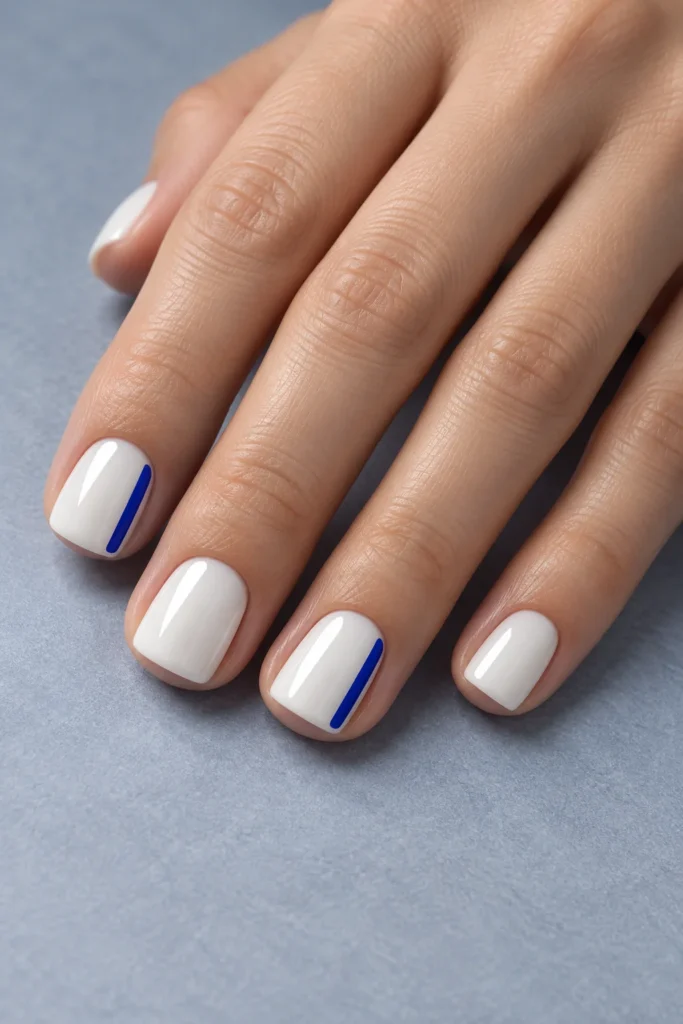
On very short square acrylics, use solid porcelain-white cream. Paint one narrow electric-cobalt line along the outer side of each index and ring nail, stopping before the cuticle. The vertical bars are not French tips; the other nails remain completely white. This graphic placement leaves the straight free edge visually undisturbed.
3. Charcoal Squares With Clear Corner Windows
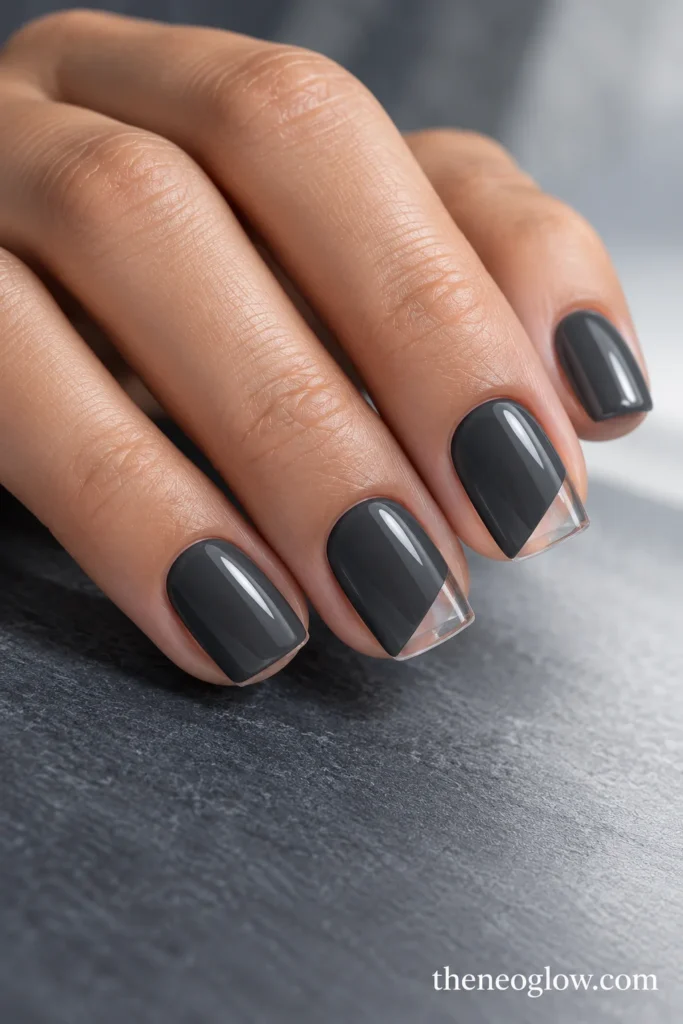
Make the main color an opaque glossy charcoal. On the middle and ring nails, leave a distinct transparent triangular window at one outer tip corner, using a suitable clear enhancement design beneath the finish. The windows reveal light through the tips rather than adding painted shapes. Check that the transparent portion is actually achievable at your requested length.
4. Powder-Pink Matte With Ink Corners
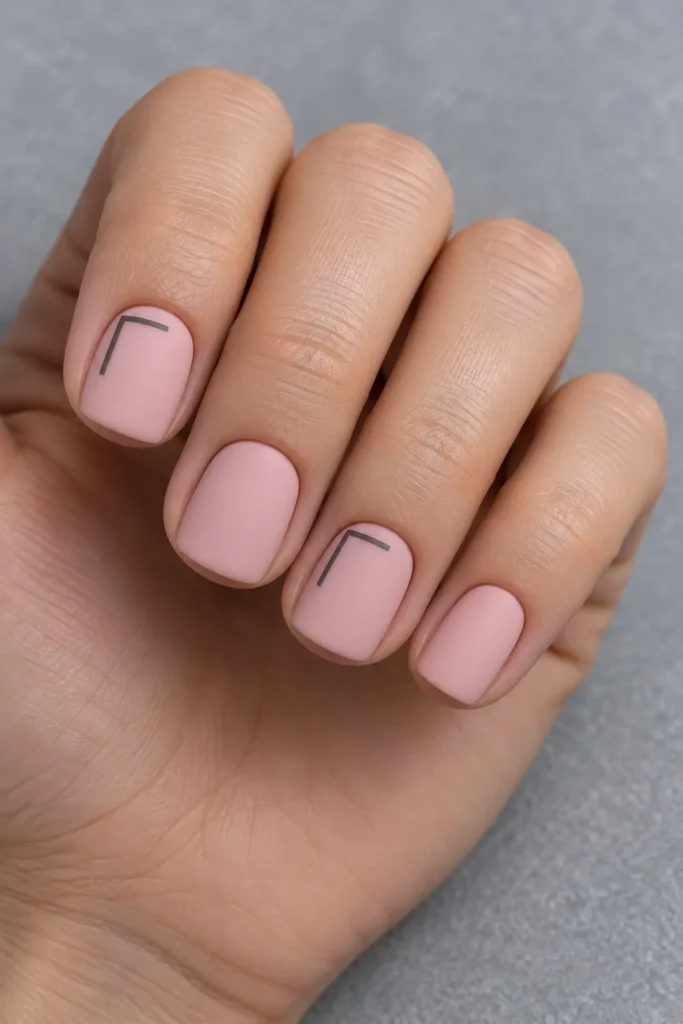
Choose an opaque cool powder-pink matte base on compact squares. Add a thin graphite L-shape framing the upper-left tip corner of each ring and index nail; every remaining nail stays plain matte pink. The small angular marks echo the square silhouette without becoming a full dark French band.
5. Copper Flecks in Clear Tip Caps
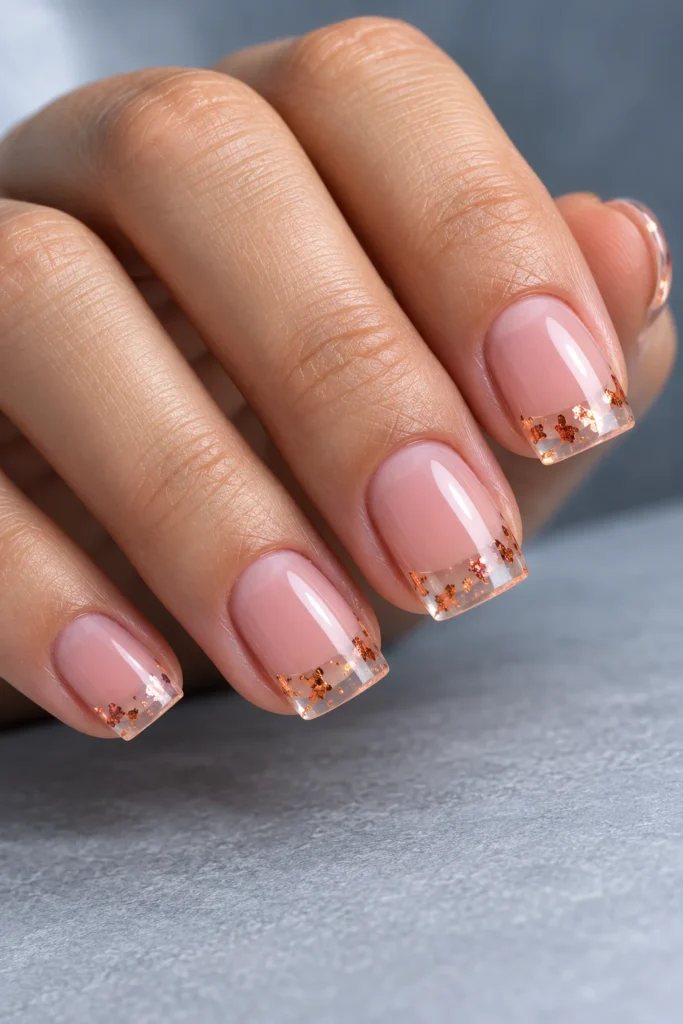
A semi-sheer rosy nail bed ends in a very short transparent acrylic tip containing a sparse scattering of flat copper-colored foil. Keep the foil inside the clear extension, not protruding above the surface. This idea depends on precise construction: there must be enough clear tip to show the flecks without making the entire nail longer than intended.
Soft-Square and Squoval Acrylics for Everyday Color
A squoval keeps the front mostly straight while rounding its corners. These five options differ in finish and where color sits, not just in shade.
6. Midnight-Blue Velvet Squovals
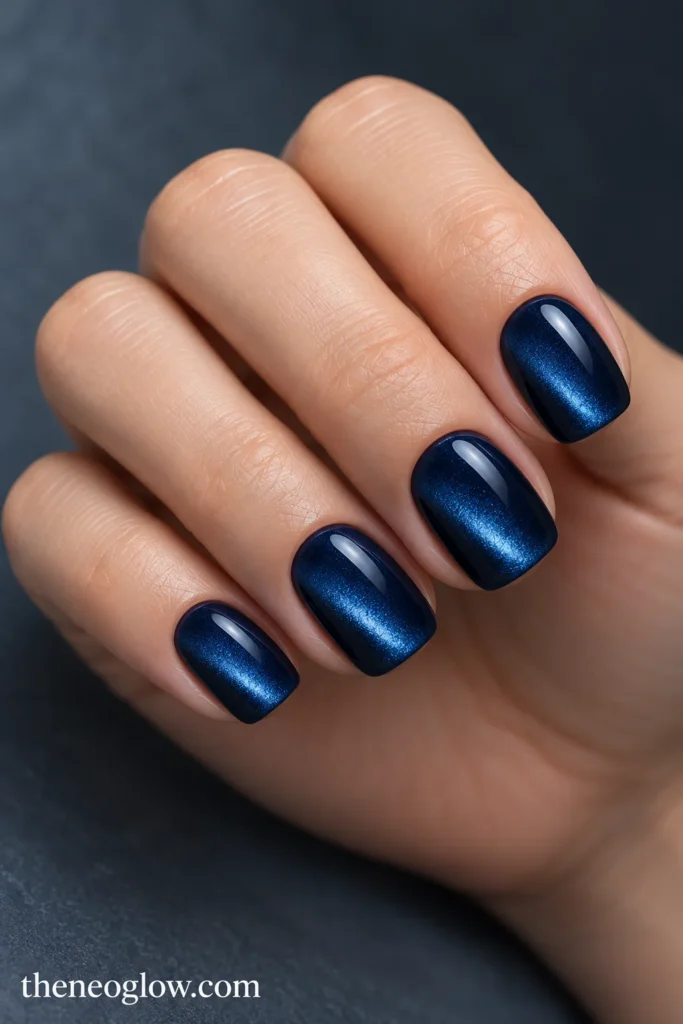
Deep ink-blue squoval acrylics have a smooth magnetic velvet effect with a soft, lengthwise light reflection across each nail. Keep the profile compact and the surface flat rather than textured. The shifting highlight supplies visual movement without a charm or obvious painted motif.
7. Papaya Offset French
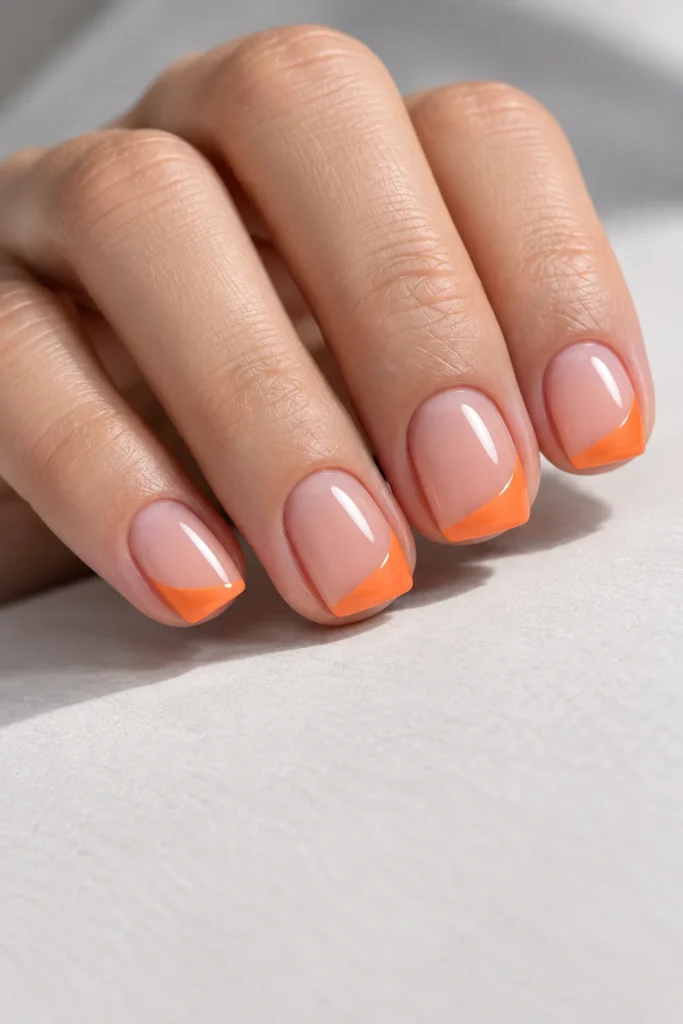
Start with a translucent caramel-pink base on short squovals. A vivid papaya-orange tip begins as a narrow line at the inner corner and widens slightly toward the outer edge, creating a deliberately off-center French sweep. Keep the widest point modest so the natural-looking base still dominates.
8. Forest Matte With an Ivory Center Lane
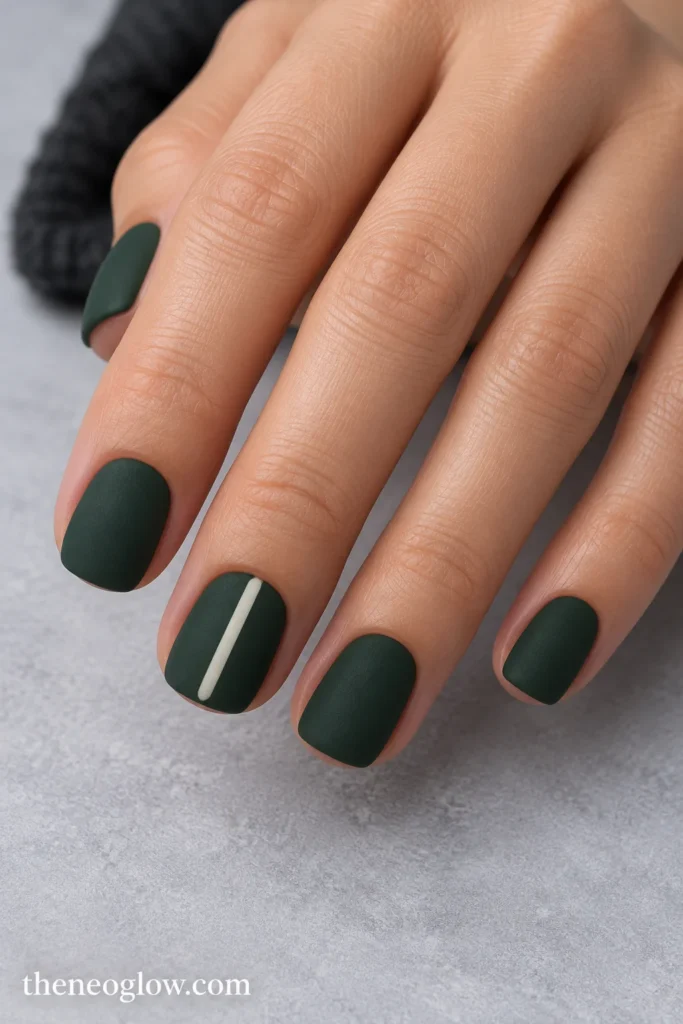
Use a muted forest-green matte finish across all short squovals. On each middle nail only, add one clean, narrow ivory stripe running vertically from just above the cuticle toward—but not across—the tip. The uninterrupted green on neighboring nails makes the center-lane detail obvious rather than busy.
9. Violet Jelly With Floating White Dashes
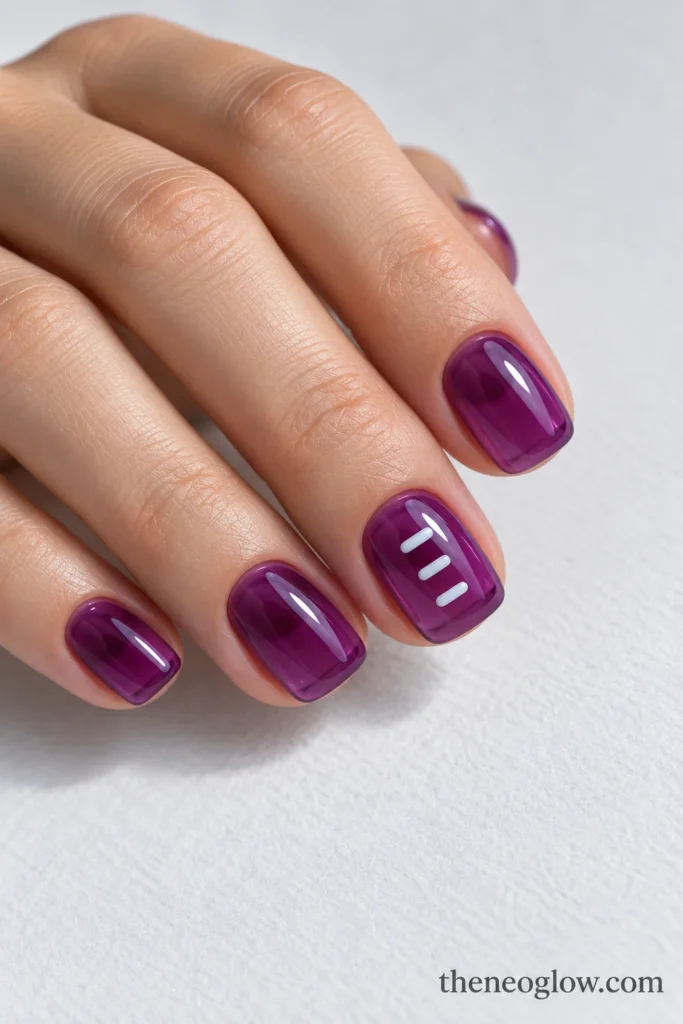
Give the full set a transparent grape-violet jelly finish, showing depth beneath the glossy surface. On the ring nails, paint three short opaque-white horizontal dashes stacked loosely down the center, with generous gaps between them. This is a small-scale graphic accent, not a glitter or floral manicure.
10. Oat Cream and Espresso Half-Dips
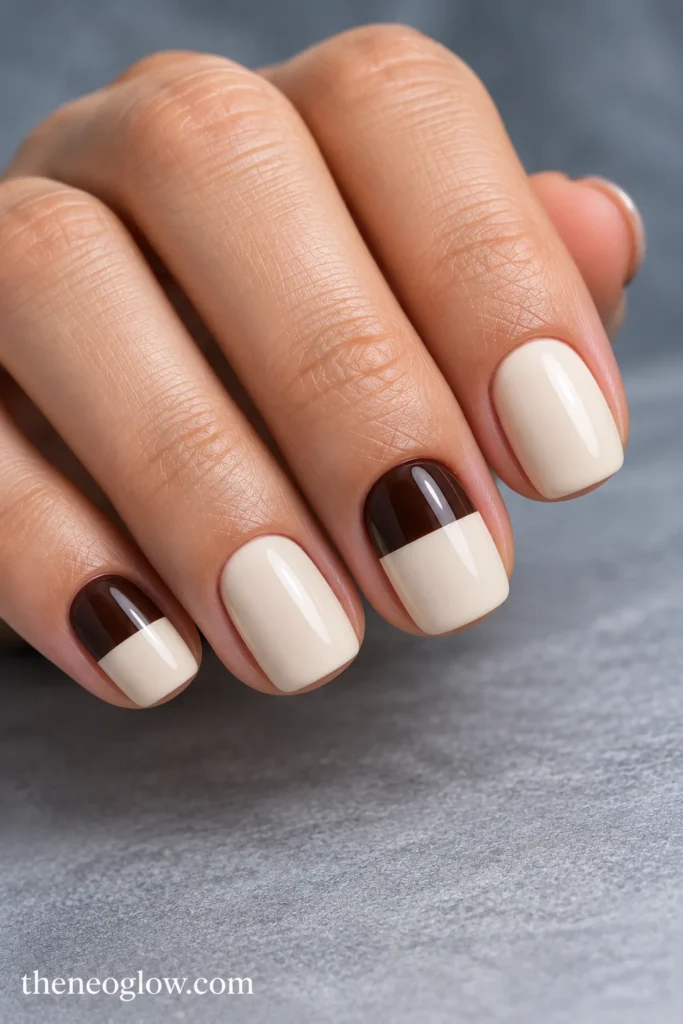
Apply opaque warm oat cream over short squovals. Cover the upper half of the index and ring nails in deep espresso brown, divided by one crisp, straight horizontal boundary. Leave the remaining fingers oat-colored. Unlike a skinny French edge, the brown occupies a broad, deliberate block of the nail plate.
Round and Shallow-Oval Acrylic Nails
Round and oval profiles replace squared corners with a curve. Keep any projection modest so these don’t become disguised medium-length extensions.
11. Tomato-Red Rounds With Open Half-Moons
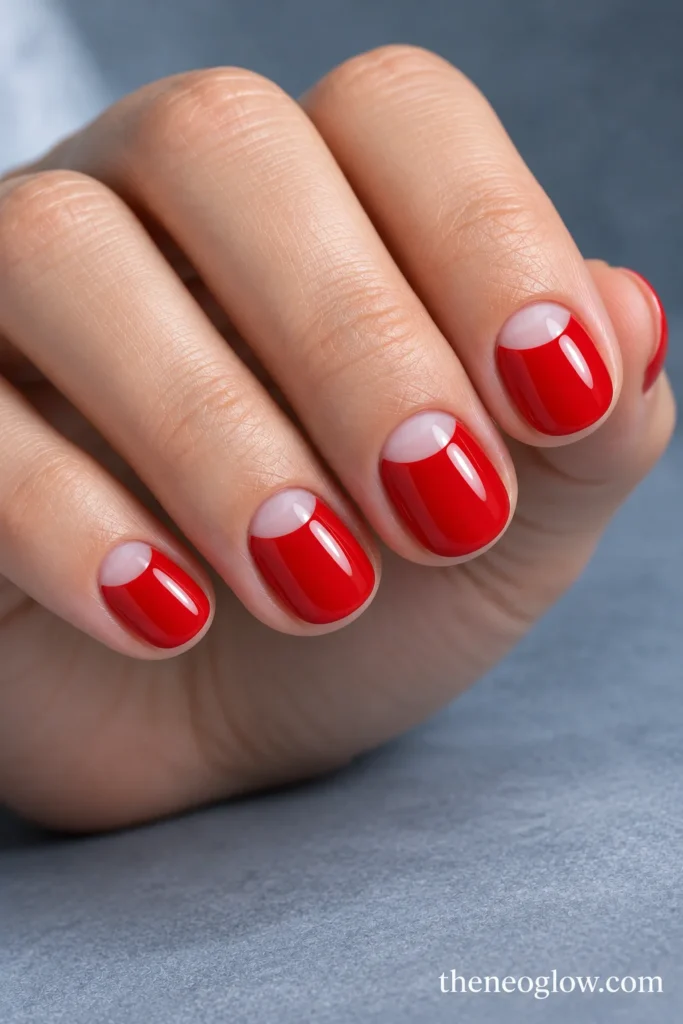
Each short round nail wears opaque tomato-red cream except for a neat translucent semicircle at the base. The open half-moon follows the cuticle curve without touching the skin. The bold red and visible base make a recognizable reverse-color design on a tiny surface.
12. Mist-to-Steel Blue Gradient
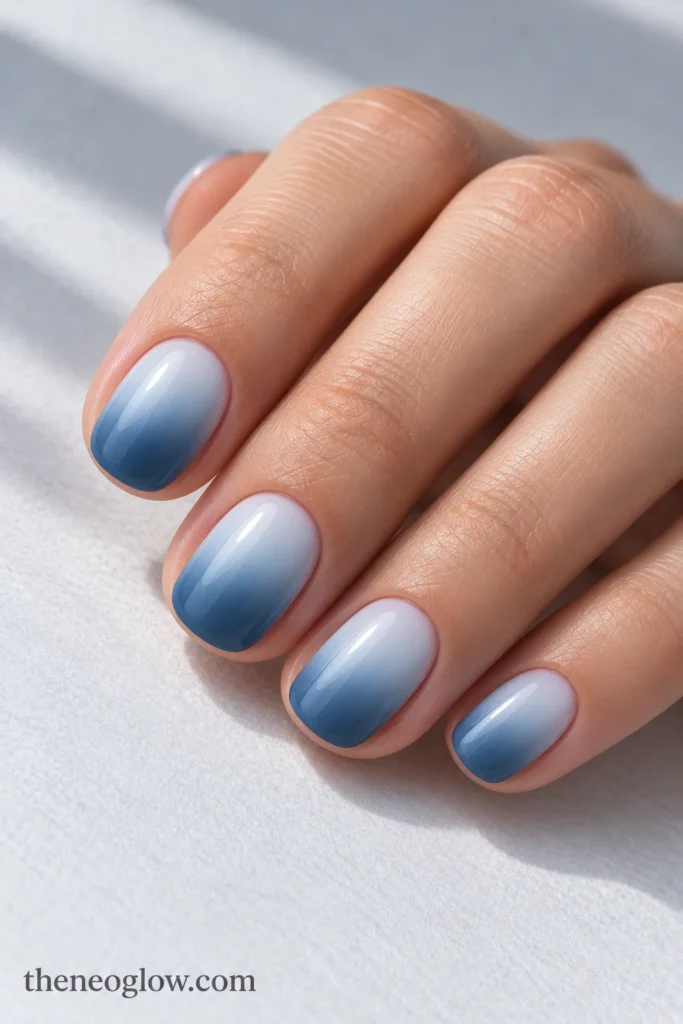
On short rounded nails, blend misty pale blue at the base into cool steel-blue at the tip. Keep the transition continuous from cuticle to free edge, with no glitter or outline. The gradient is the full design, and its soft curve complements rounded fingertips better than a rigid color block.
13. Olive Milk With Lilac Stone Flecks
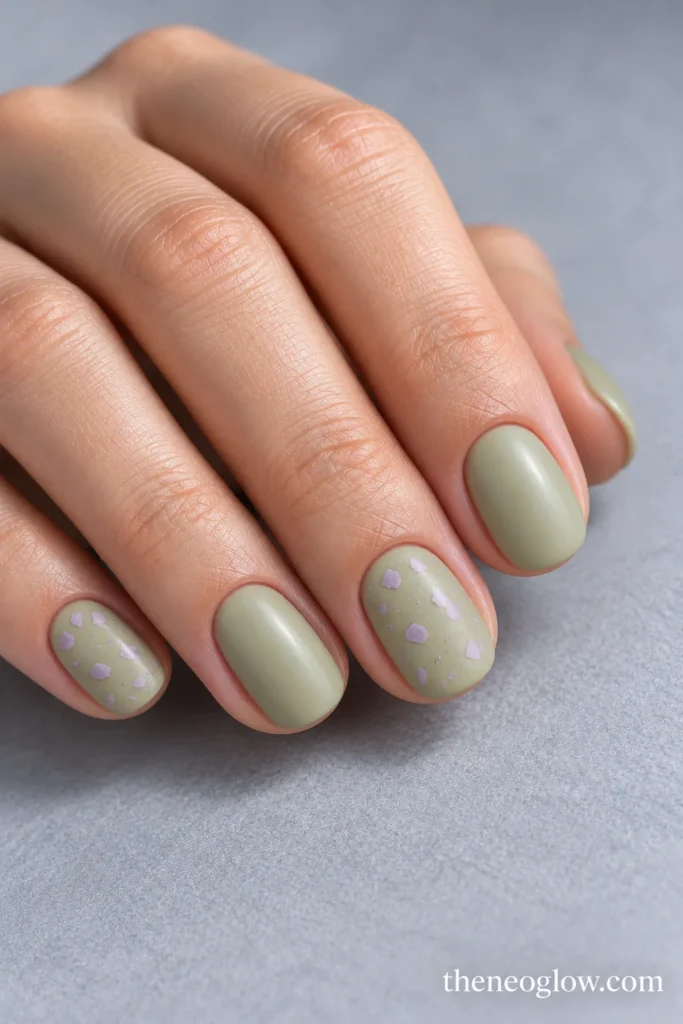
A cloudy pale-olive cream covers shallow-oval acrylics. Across the index and ring nails, scatter a few irregular, flat lilac speckles of visibly different sizes, like small chips in terrazzo. Finish satin rather than high-gloss. This playful speckled surface is distinct from a botanical or polka-dot motif.
14. Plum Cat-Eye Crescent Ovals
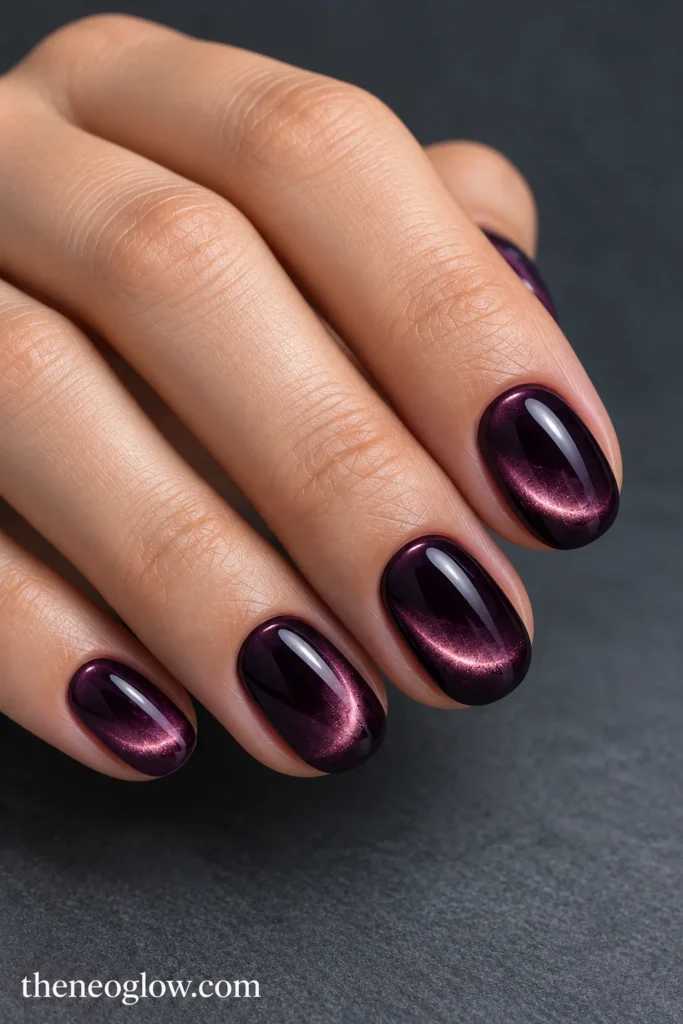
Choose deep blackened-plum glossy polish on compact ovals. A concentrated magnetic shimmer forms a curved luminous arc on each nail, following one side of the oval rather than cutting diagonally across the whole plate. Keep the arc inside the edges and the rest of the purple noticeably dark.
15. Opal Milk With a Burgundy Loop
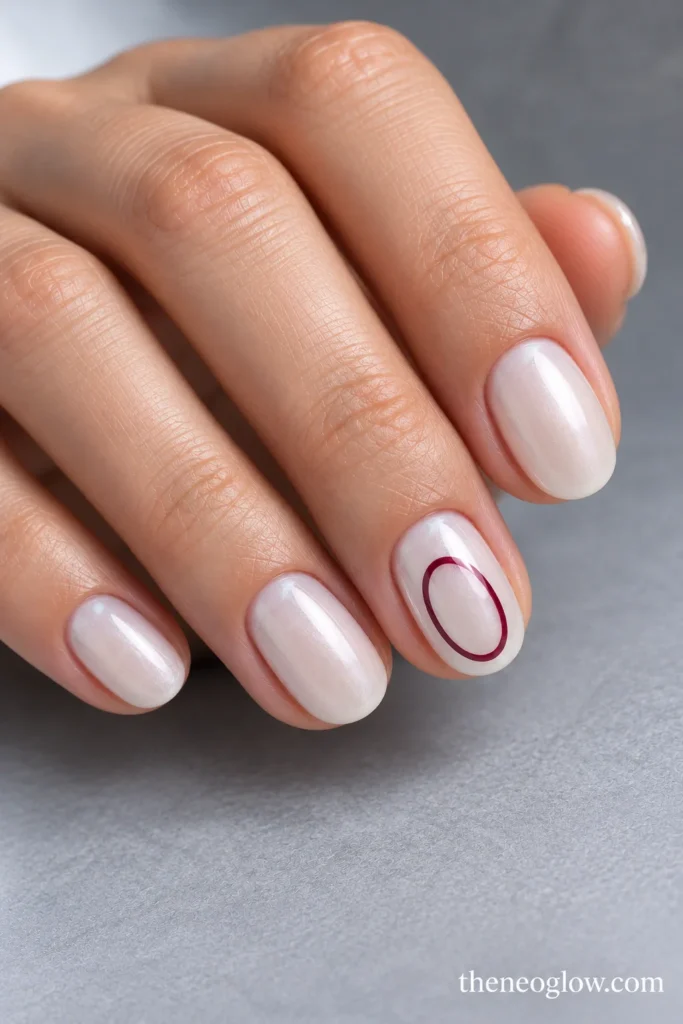
Use softly reflective opal-white pearl over shallow oval nails. On each ring nail, draw one fine, unfilled burgundy oval loop slightly below center; the pearl remains visible inside the loop. All other nails retain the uninterrupted pearly finish. The curved outline adds a precise focal point without raised detail.
Genuinely Short Almond Acrylics and Compact Statement Tips
A short acrylic almond needs a small extension that visibly tapers toward a softened central peak. If it ends flush with the fingertip and has no room to taper, a shallow oval is the more truthful shape.
16. Carmine V-Edge Almonds
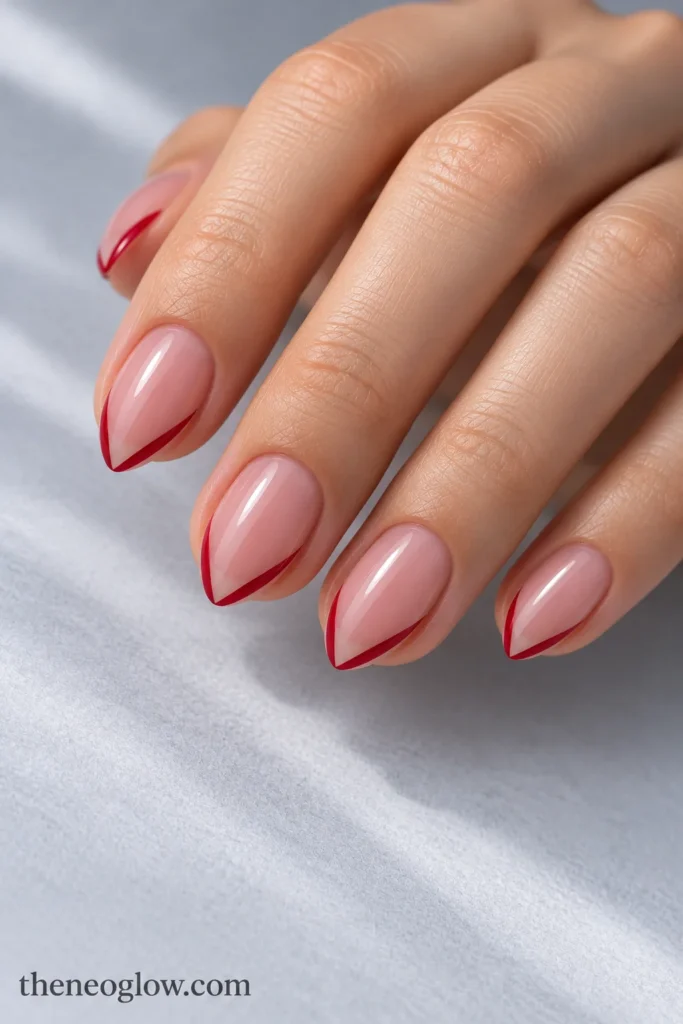
A muted translucent rose base leads into two crisp carmine-red diagonal strokes meeting at the rounded tip of each short almond. The strokes form a slender V-shaped tip frame, with the middle of the free edge left rosy. It feels sharper than a conventional curved French while keeping the length controlled.
17. Tangerine-and-Pink Vertical Splits
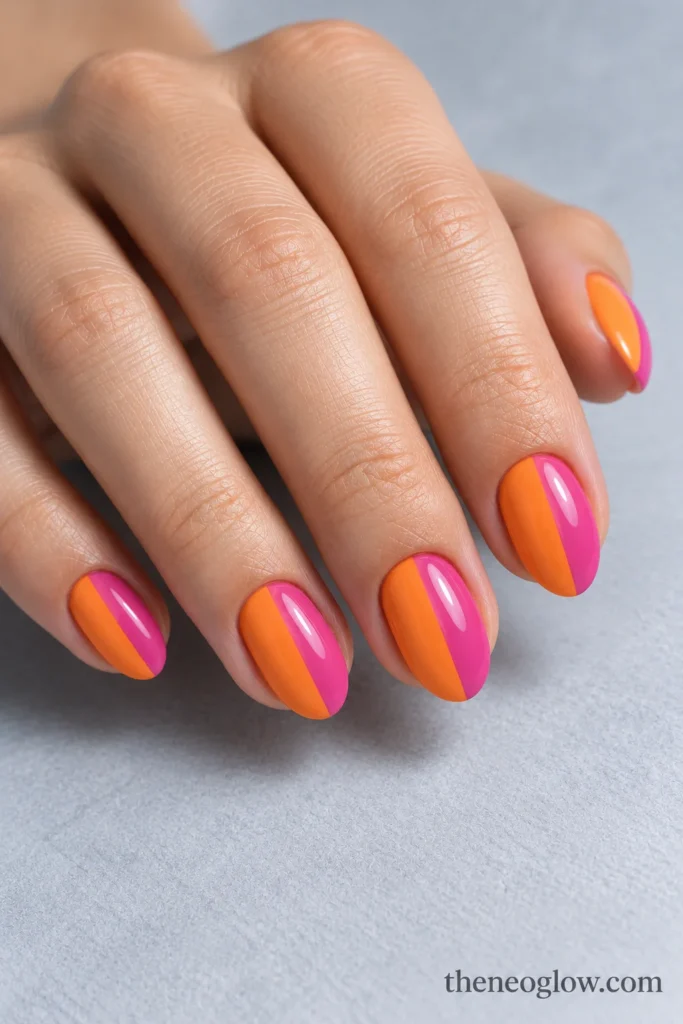
Cover each short almond with a straight, lengthwise two-color split: opaque tangerine on the left half and bright rose pink on the right. A single clean dividing line travels from base to softened point, without added stripes or glitter. The result is full-color graphic art, not a small accent.
18. Petrol Teal With Gold Root Foil
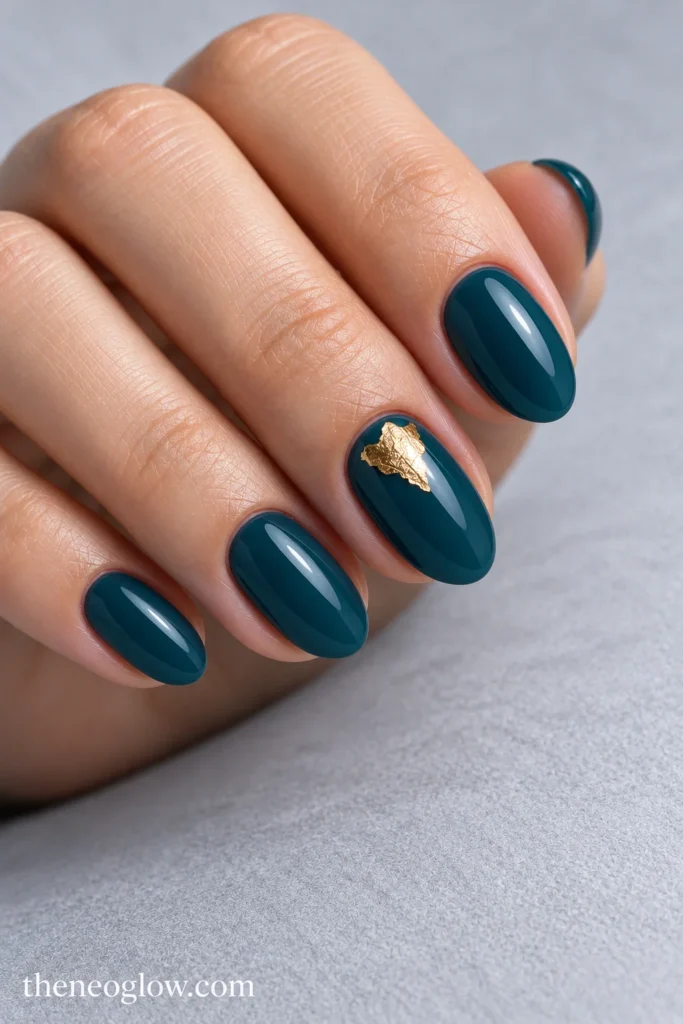
Choose a rich petrol-teal cream on small almond acrylics. Place one flat irregular gold-foil shape near the base of each ring nail, leaving a visible teal border on all sides. All other nails stay fully teal and glossy. The foil belongs beneath a smooth sealed finish, not as a raised metal charm.
19. Marigold Almonds With Plum Petals
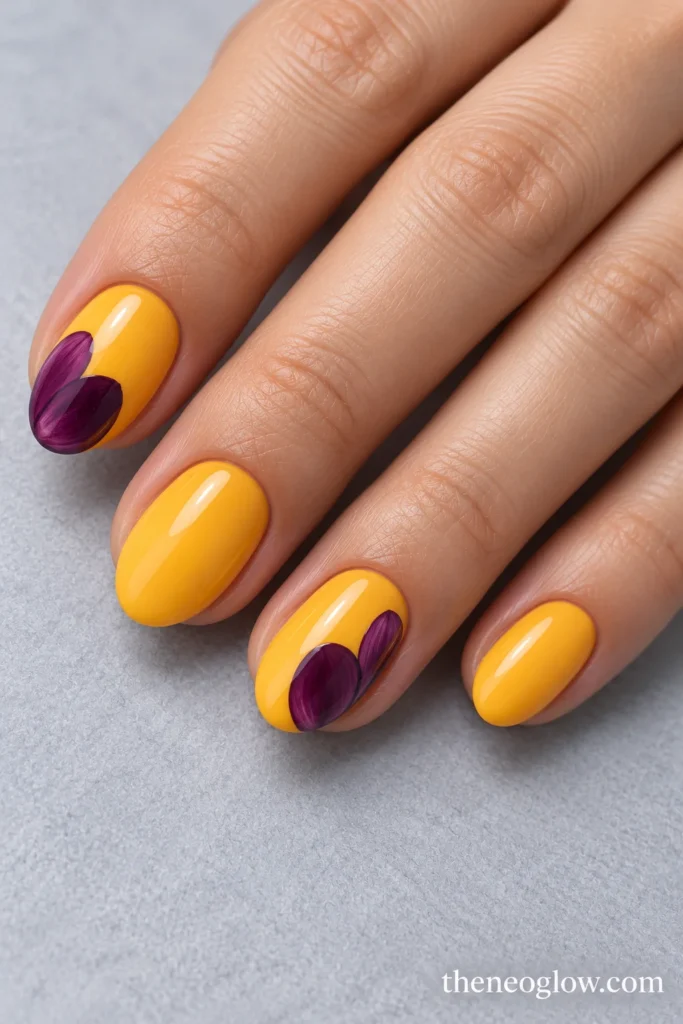
An opaque marigold-yellow finish fills the compact tapered shape. On the index and ring nails, paint one large rounded plum-colored petal entering from the lower outer side, with no stem or other flower parts. The oversized single petal remains legible even when the almond tip is very short.
20. Silver Caps With a Navy Shadow Line
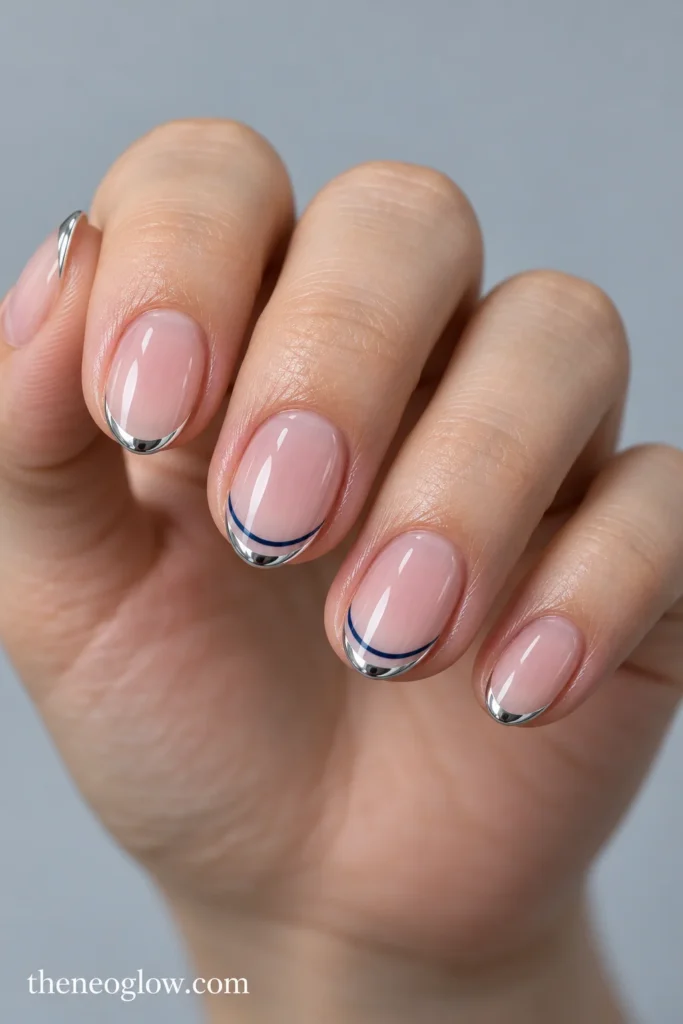
Use a cool translucent pink base with an ultra-thin mirrored-silver cap tracing each small almond tip. On the middle and ring nails, add one separate fine navy line immediately below the silver, leaving a narrow pink gap between the two. The metallic cap follows the rounded peak; the darker echo stays flat and precise.
Acrylic Upkeep: What the Inspiration Photo Cannot Show
A short set still involves product preparation, ongoing growth, and eventual removal. The American Academy of Dermatology’s artificial-nail guidance explains that acrylic application can involve filing the natural nail surface, and continued wear can require touch-ups as gaps develop. It cites fills every two to three weeks as a common pattern, not a guaranteed schedule for your nails.
Before your appointment, check three things:
- Nail condition: Do not cover a painful, damaged, irritated, or suspicious-looking nail to disguise the problem. Ask a dermatologist about concerning symptoms.
- The actual acrylic products: Ask what liquid, powder, primer, and finishing products the salon uses, especially if you’ve reacted before. The FDA’s nail-care product guidance discusses labeling, methacrylates, skin contact, and adverse reactions. Follow the specific product directions; don’t assume one brand’s instructions apply to another.
- Workstation care: Ask about tool cleaning and effective ventilation. CDC/NIOSH guidance for nail technicians explains why local exhaust ventilation helps control nail-dust and chemical exposure at workstations.
At a fill, the technician should assess the existing enhancement rather than automatically burying a lifted or damaged area under fresh product. Arrange professional maintenance or removal according to the products used and the condition of your nails. Never pry, peel, or forcibly lift acrylic off the natural plate.
A Clear Reference for Your Nail Appointment
Save the numbered look you like, then pair its top view with a side view showing thickness and the exact amount of free edge. Describe the acrylic system, intended fingertip position, shape, base opacity, decorative placement, and finish. For instance: “A short acrylic squoval ending close to my fingertip, translucent caramel-pink base, and narrow papaya French swept toward the outer corner—smooth surface, no raised art.”
If you only want a temporary change, NeoGlow’s natural-looking press-on guide covers that separate application route. Otherwise, choose the design you would happily wear through its next maintenance appointment—not just the one that looks best in a single photo.