Fall toe nails look most polished when the artwork is edited for the width of each nail plate. A plaid grid, metallic panel, leaf outline, or finish shift can stay clear on the largest nail, while the smallest toes need a simpler echo of the same idea. This guide treats placement as the starting point rather than color.
The palette is autumnal, but color is not the main decision here. If you are still choosing between mocha, cherry, olive, chrome, or another September-to-fall shade, use the September toe nail color guide first. Then come back here to decide where the art, texture, or finish should go.
Choose the toe layout before the motif
A fall pedicure is easier to read when every toe has a job. Use the big toe as the main design surface, then simplify as the nail plates get smaller.
| Design route | Big toe | Smaller toes | Sandal-distance effect |
|---|---|---|---|
| Minimal line or frame | Holds the full geometry | Solid color or one micro repeat | Clean and graphic |
| Texture or reflective finish | Shows the strongest shift | Simpler matching finish | Noticeable when light moves |
| Fall motif | Carries one recognizable symbol | Solid coordinating color | Seasonal without crowding |
| Pattern | Uses broad, low-count shapes | Repeats one color from the pattern | Clearer than miniaturized art |
If your main goal is a coordinated hand manicure, NeoGlow’s Fall Nails 2026 guide covers the broader manicure side of the season. This page stays focused on real toe nail plates.
18 fall toe nail designs for 2026
1. Espresso Offset Frame
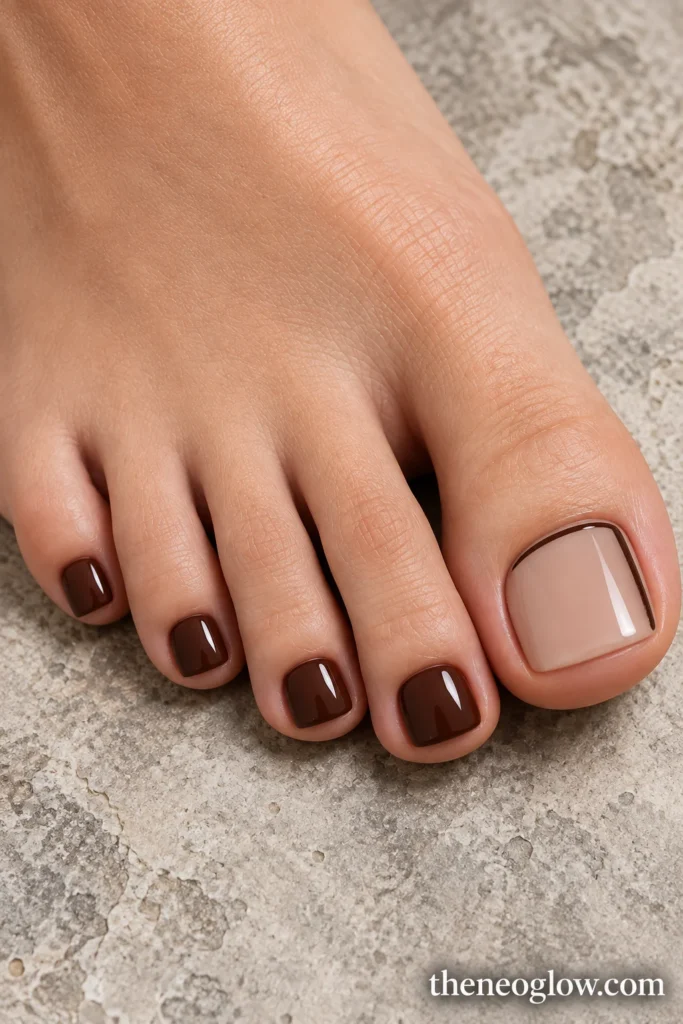
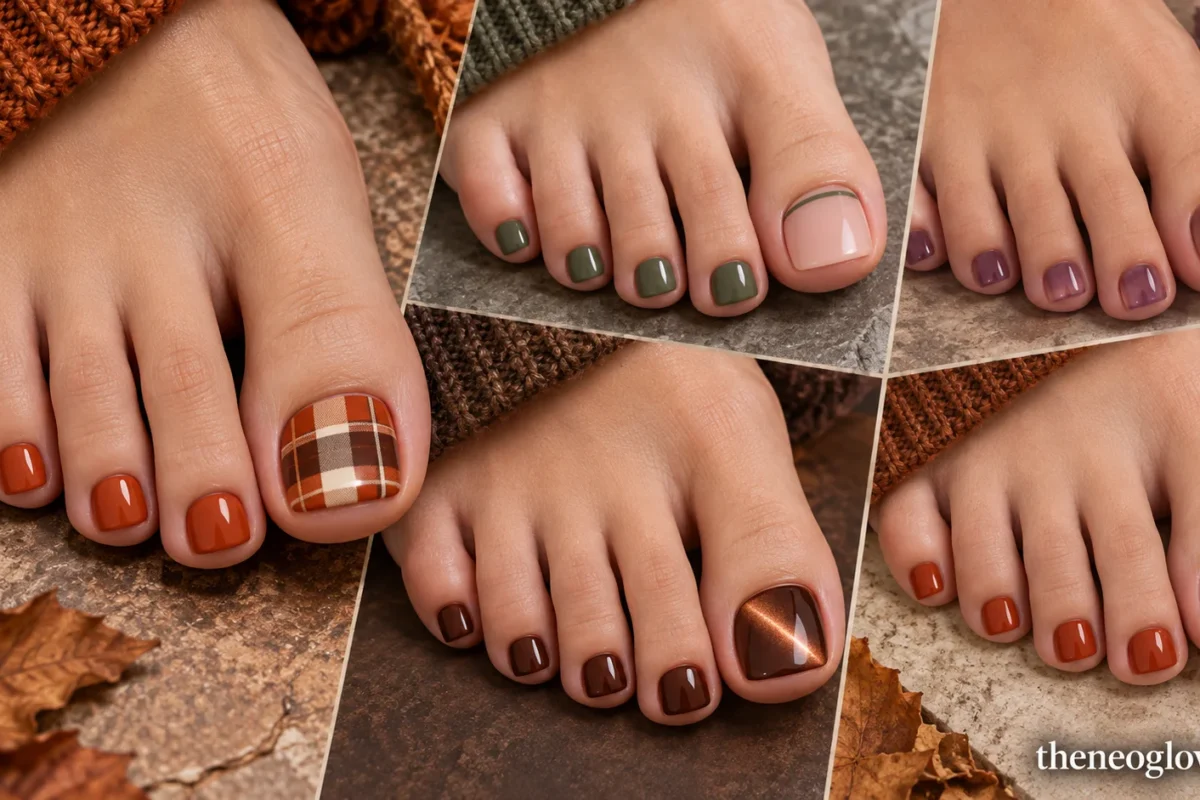
Start with a sheer taupe-beige big toenail and trace a fine espresso line along only the top and one side, creating an open two-edge frame. Paint the smaller toes glossy espresso. The empty center keeps the big toe light, while the dark border remains visible from sandal distance without becoming a full French tip.
2. Rust Double-Corner Stripes
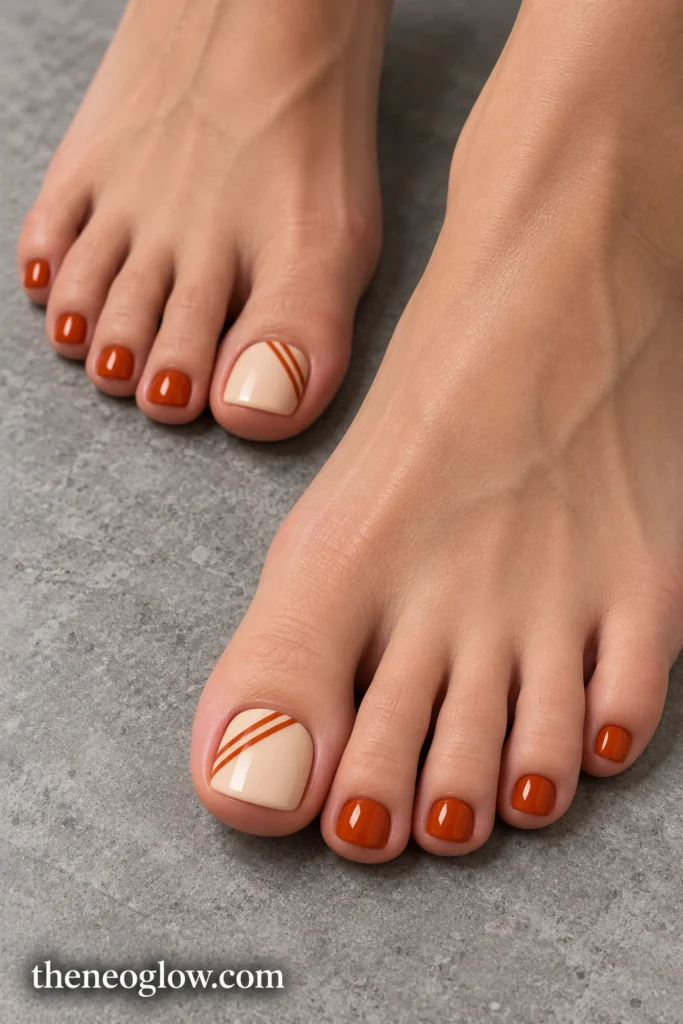
Use a warm oat base on the big toe, then add two narrow rust-orange diagonal lines in one outer corner. Keep the stripes parallel and leave most of the nail open. The smaller toes can stay solid rust. This gives you a directional fall accent without trying to repeat tiny diagonal artwork across every nail.
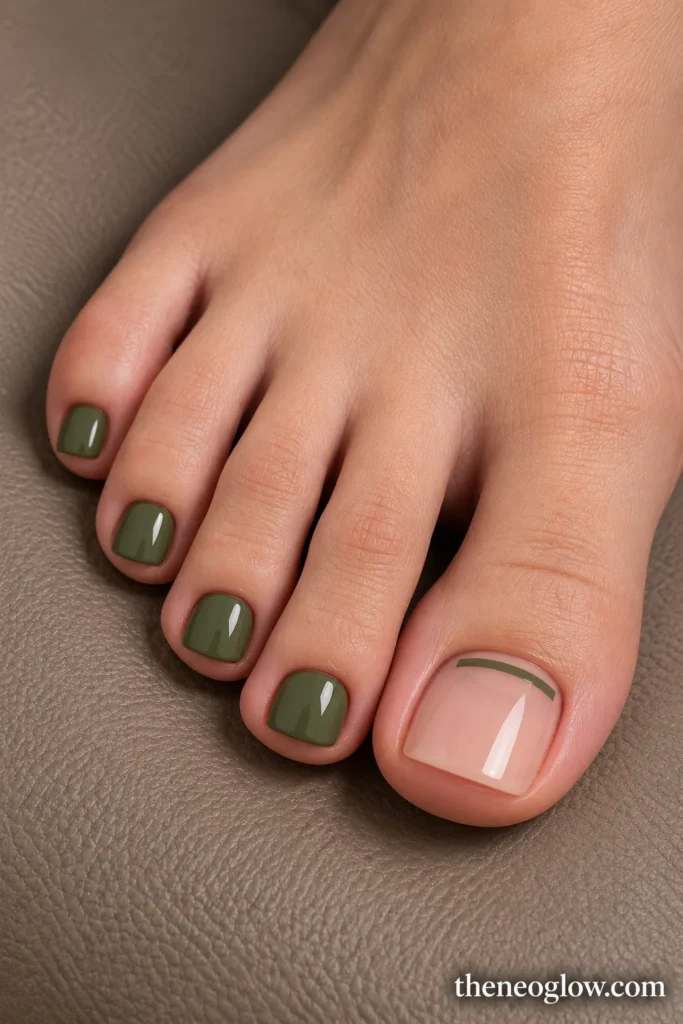
3. Olive Cuticle Bar
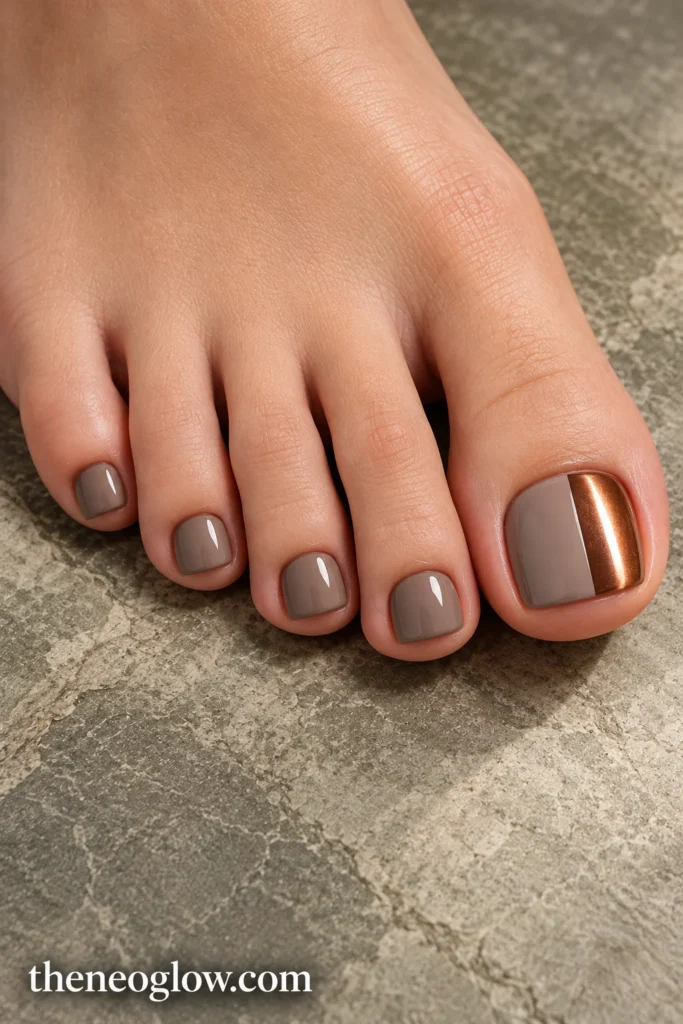
Leave the big toenail sheer pink-beige and place one slim muted-olive bar just above the cuticle, running horizontally but stopping before the sidewalls. Use opaque olive cream on the smaller toes. The low placement makes the design different from a tip, while the solid companions make the green read clearly at normal viewing distance.
4. Denim-Slate Silver Pinstripes
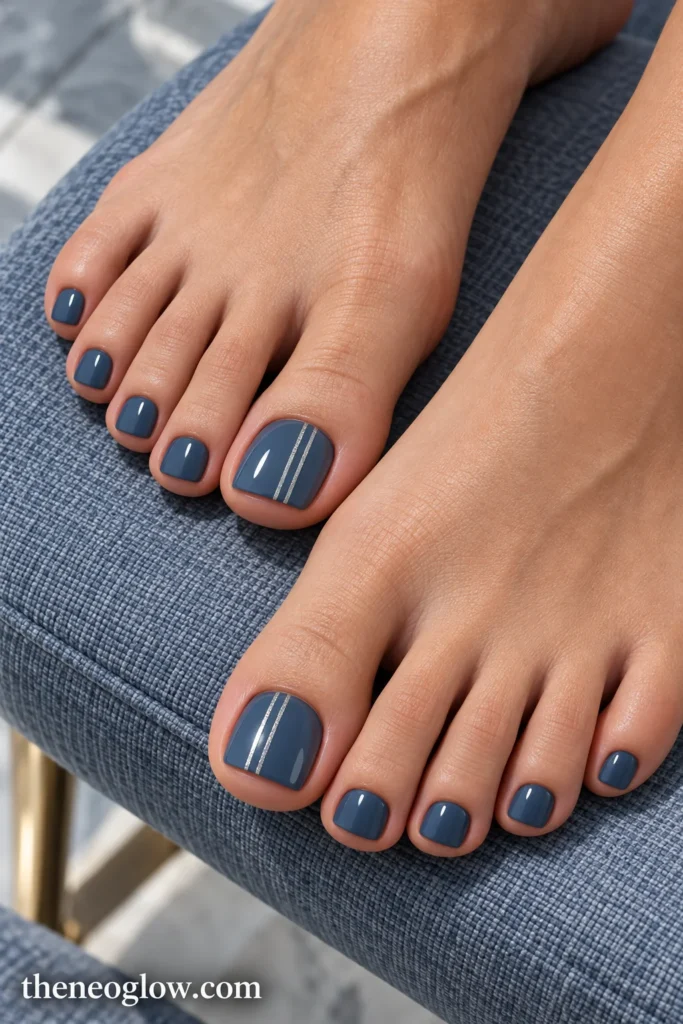
Paint all toes a muted denim-slate blue with a smooth glossy finish. On each big toe, add two very fine silver vertical pinstripes set slightly off-center. Keep the smaller nails plain. The cool metal sharpens the blue without turning the pedicure into full chrome, and the long lines visually organize the wider big-toe plate.
5. Goldenrod Dot Trail
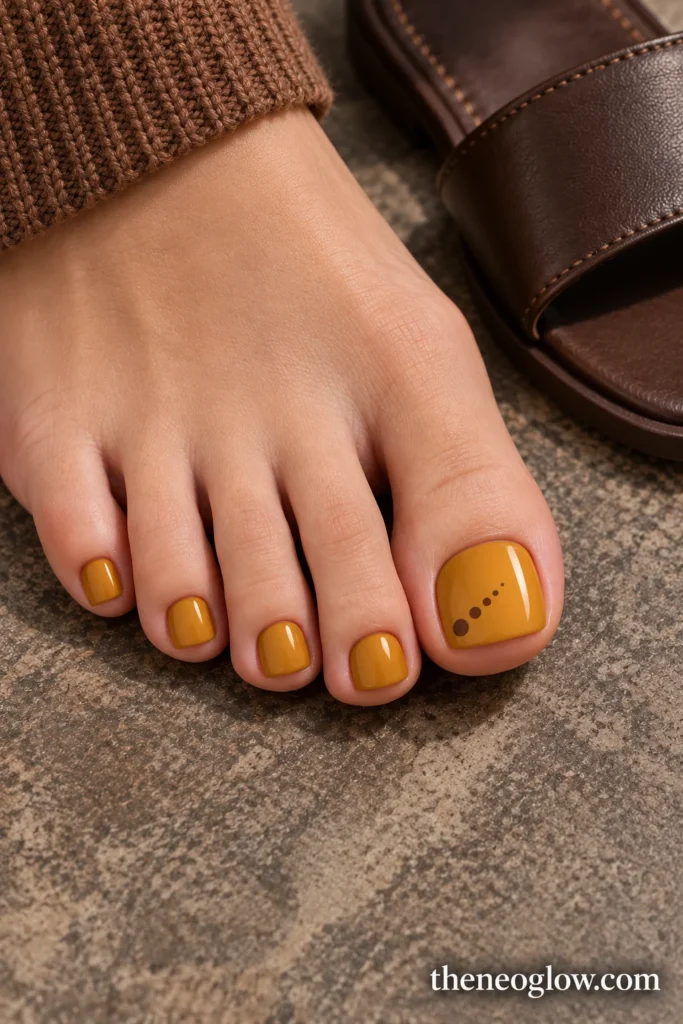
Choose a muted goldenrod cream on every toe. On the big toe only, curve a trail of tiny espresso-brown dots from the lower outer corner toward the center, gradually reducing the dot size. The pattern should feel sparse rather than polka-dot heavy. From a few feet away, the color reads first and the dotted trail becomes the close-up detail.
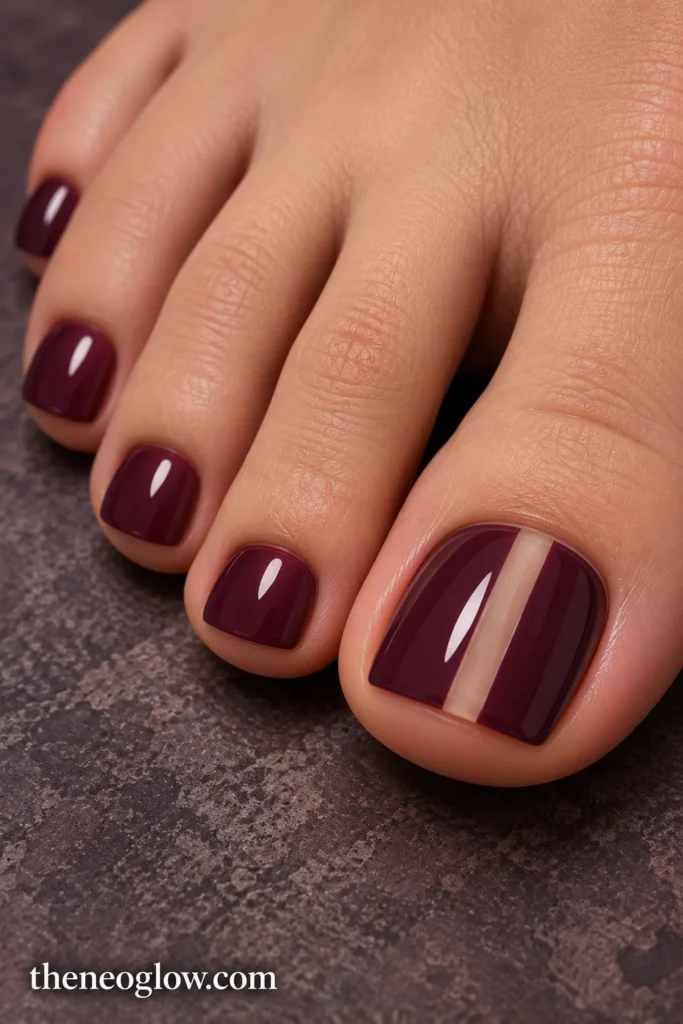
6. Plum Negative-Space Center Stripe
Cover the big toe in deep plum but leave one narrow vertical stripe of sheer base visible slightly off-center from cuticle to free edge. Paint the smaller toes solid plum in the same glossy finish. The negative-space line breaks up the dark color without adding another shade, and it gives the widest nail a clean architectural focal point.
7. Smoked Copper Cat-Eye Big Toe
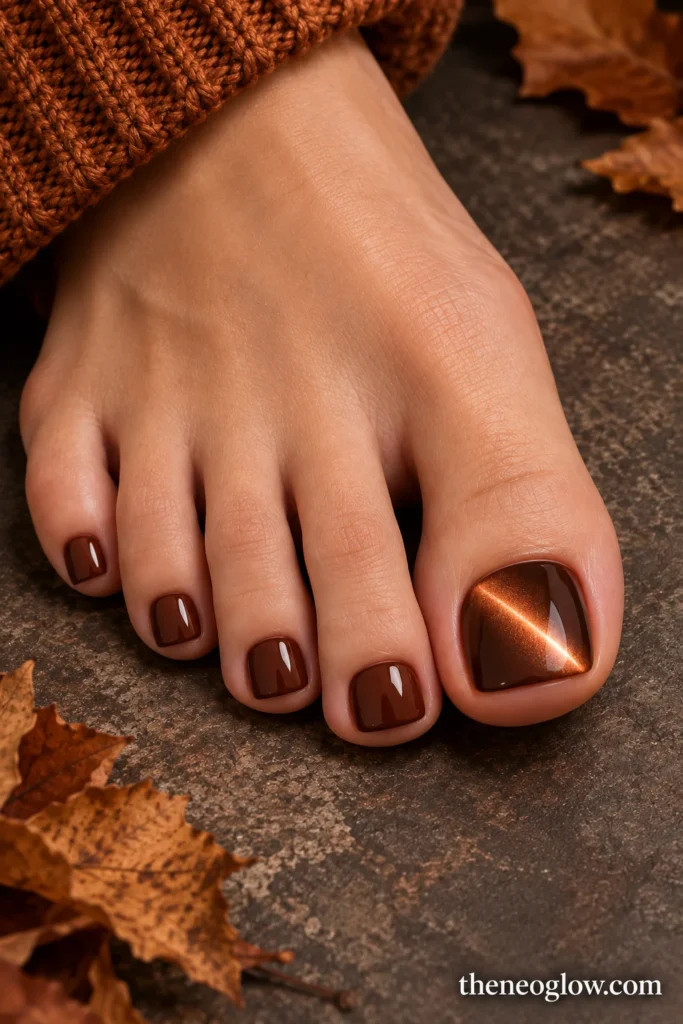
Use a cocoa-brown base on the pedicure, then give the big toes a smoked copper magnetic effect with one diagonal reflective beam. Keep the smaller toes glossy cocoa without the magnetic finish. The moving highlight has enough room to show on the big toe, while the solid brown toes stop the set from looking overly reflective.
8. Bronze Chrome Outer Panel
Start with muted taupe on every toe. On the big toe, cover only the outer third with a soft bronze-chrome panel separated by one crisp vertical boundary. Add a tiny bronze edge on the second toe if there is enough space; leave the rest plain. The design reads as a metallic side accent rather than an all-over chrome pedicure.
9. Olive Satin With a Glossy Leaf Vein
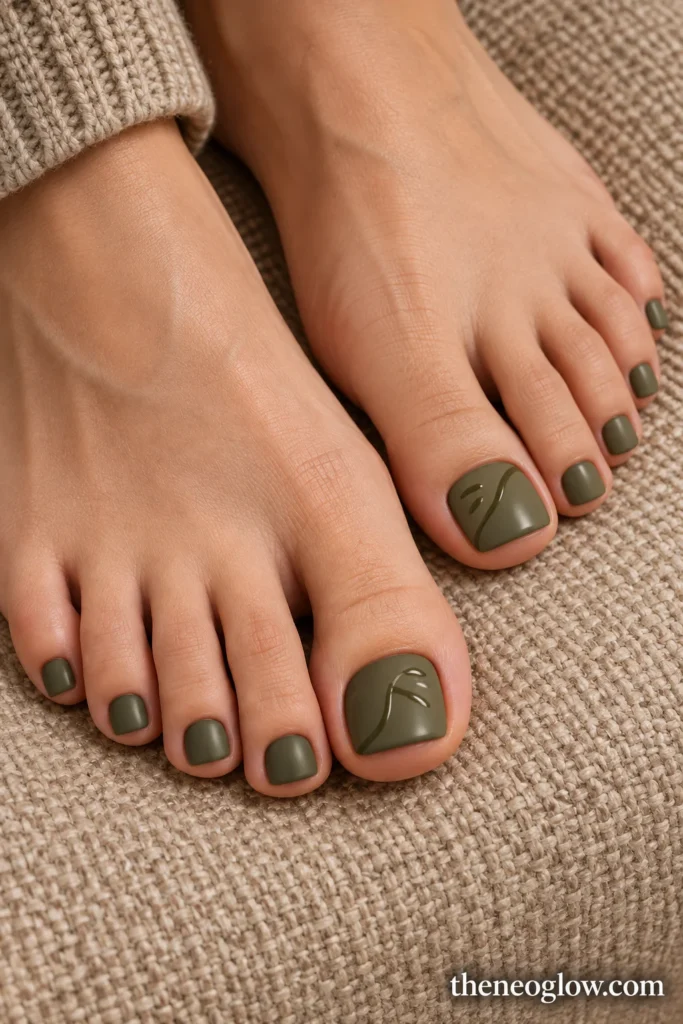
Paint the full pedicure in medium olive with a satin finish. On each big toe, draw one curved glossy line with two short offshoots so it suggests a leaf vein without becoming a literal painted leaf. The smaller toes remain satin olive. Because the design uses finish contrast instead of extra color, it stays subtle until light catches it.
10. Amethyst Jelly With Antique-Gold Foil
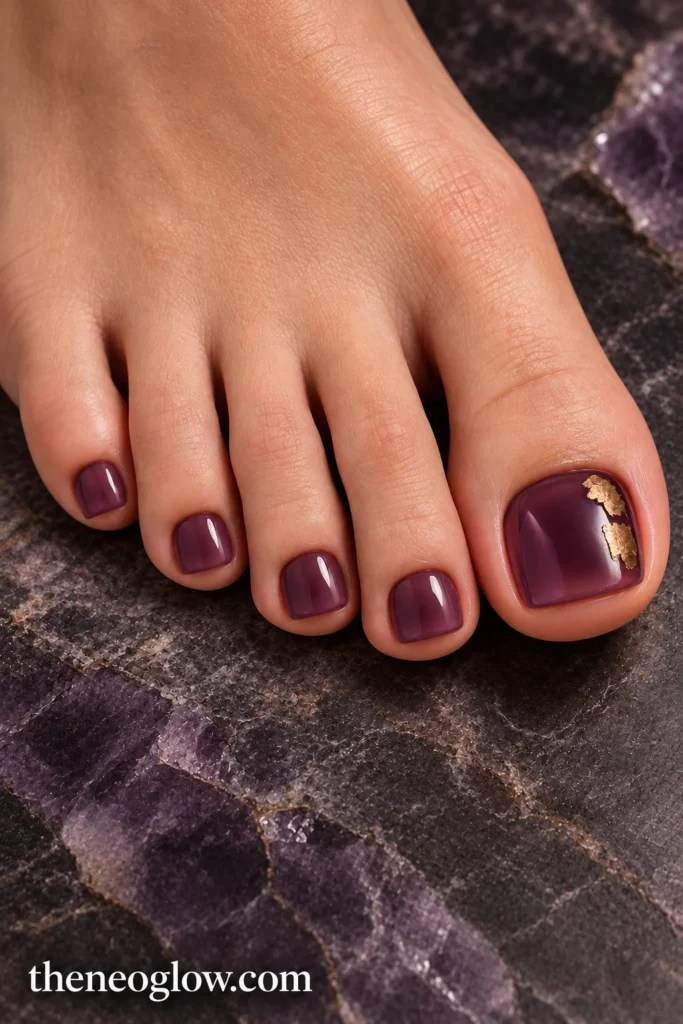
Use translucent amethyst jelly on all ten toes. Float two or three small, flat antique-gold foil fragments near one side of the big toenail, leaving plenty of purple transparency visible. Do not scatter foil over the smallest toes. The jelly provides depth, while the limited metal adds an evening-ready fall detail without becoming glitter-heavy.
11. Espresso Suede With a Patent Wave
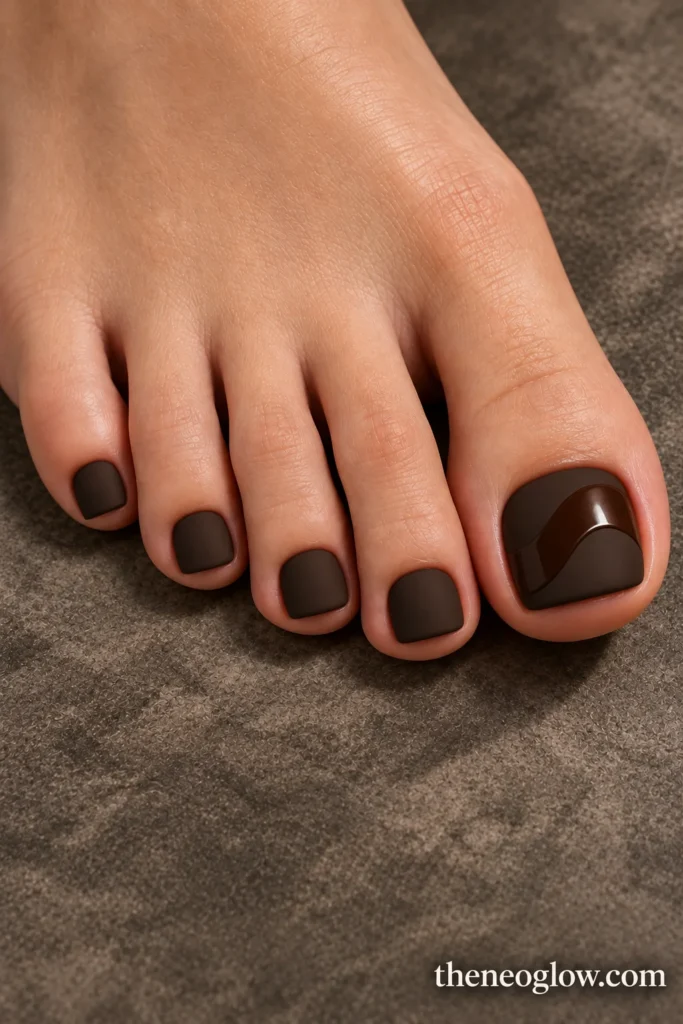
Choose deep espresso with a soft matte or suede-like finish on every toe. Across the big toenail, sweep one broad glossy espresso wave from one side to the other using the same color. The smaller toes stay fully matte. The design appears through surface contrast, so it feels more refined than adding a second shade or a cluster of embellishments.
12. Black-Cherry Pearl Fade
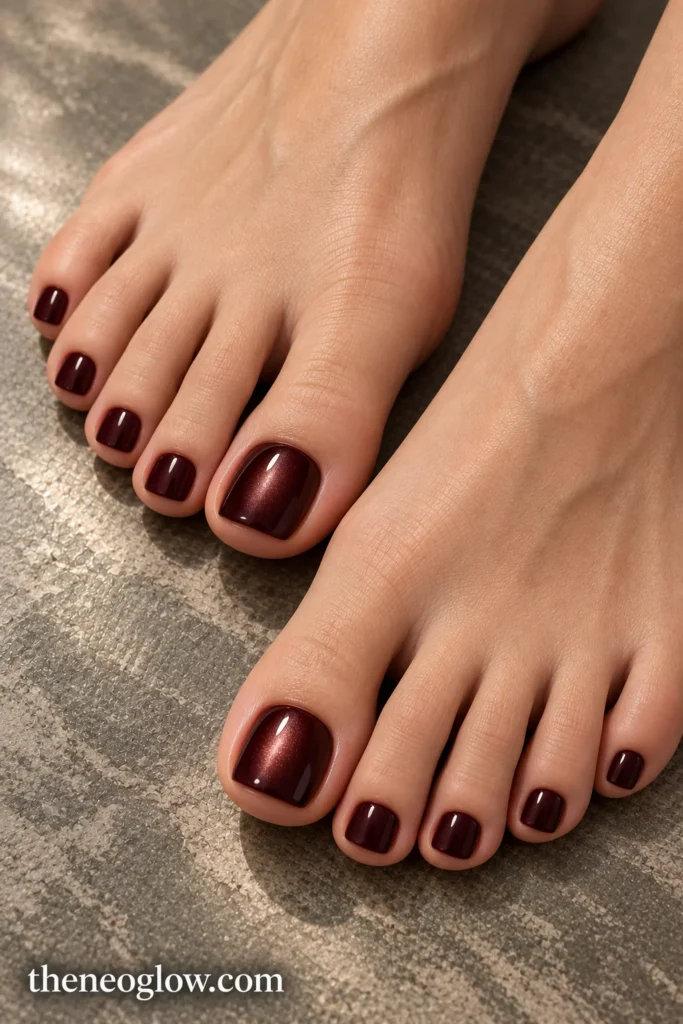
Paint the smaller toes glossy black cherry. On the big toe, keep the same deep red base but blend a restrained pearl sheen through the center, fading it before the sidewalls. The effect should glow rather than look mirror-metallic. This gives the big toe dimension while keeping the wine-red identity clear from normal viewing distance.
13. Burnt-Orange Plaid Big Toe
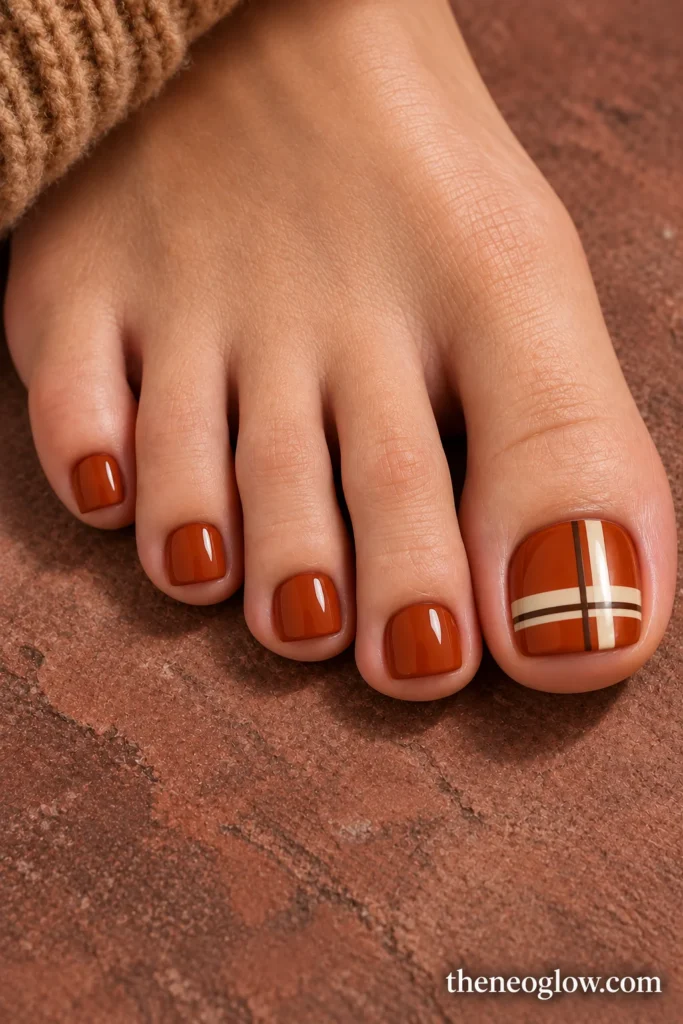
Use burnt orange as the main color, then build a low-count plaid on the big toe with one cream vertical stripe, one cream horizontal stripe, and two finer espresso lines. Keep the grid broad enough to read without crowding. Paint the smaller toes solid burnt orange so the plaid remains the single focal pattern.
14. Mocha Tweed Crosshatch
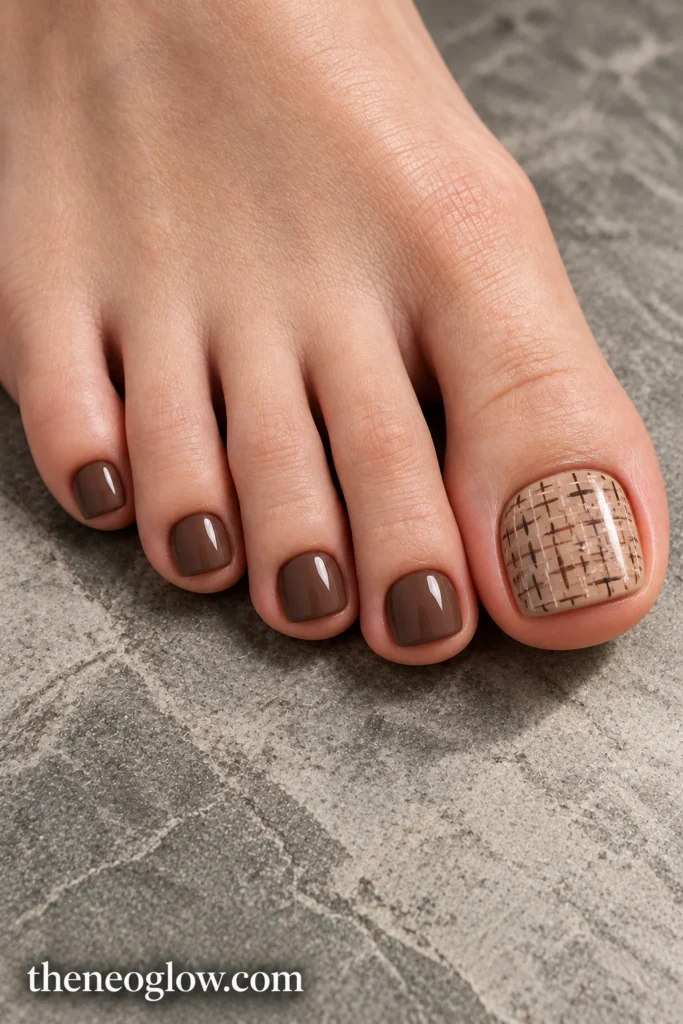
Start with a warm beige big-toe base. Add irregular fine mocha and near-black short lines crossing in different directions, leaving visible base between them so the texture suggests woven tweed rather than a checkerboard. Keep the smaller toes solid mocha. This works best when the crosshatch stays loose and slightly uneven instead of becoming a dense mini pattern.
15. Olive Branch Corner
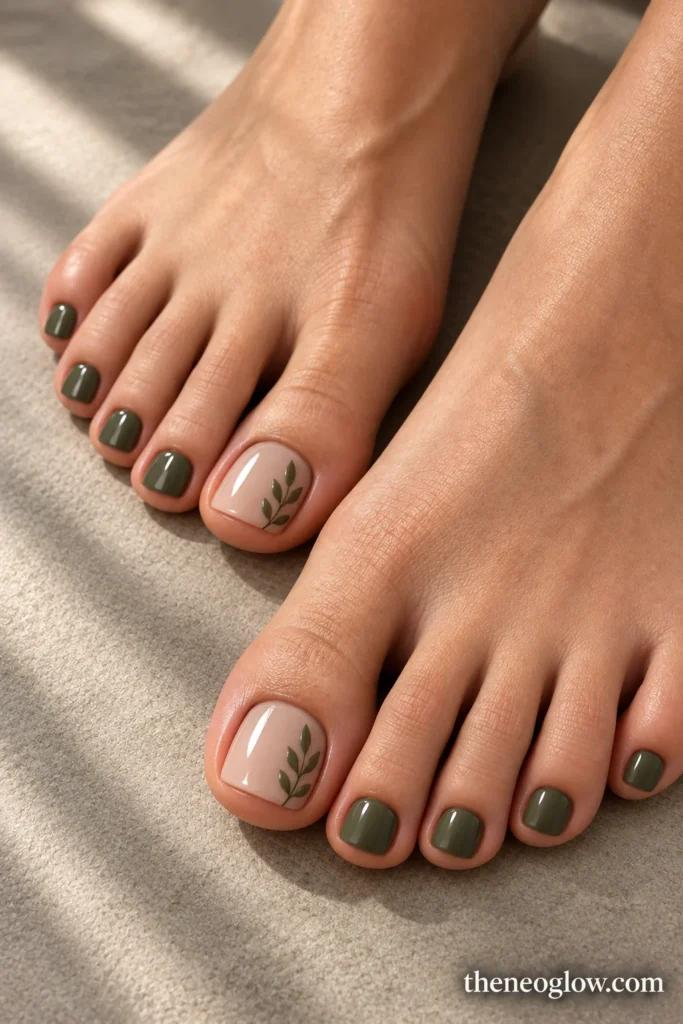
Use a soft oat or sheer beige base on the big toe and place one small olive branch silhouette along an outer corner, with a short stem and only a few leaves. Paint the smaller toes solid olive. Keeping the motif to one side preserves negative space and makes the botanical detail more readable than a full wreath or repeated leaf pattern.
16. Maple Leaf Outline
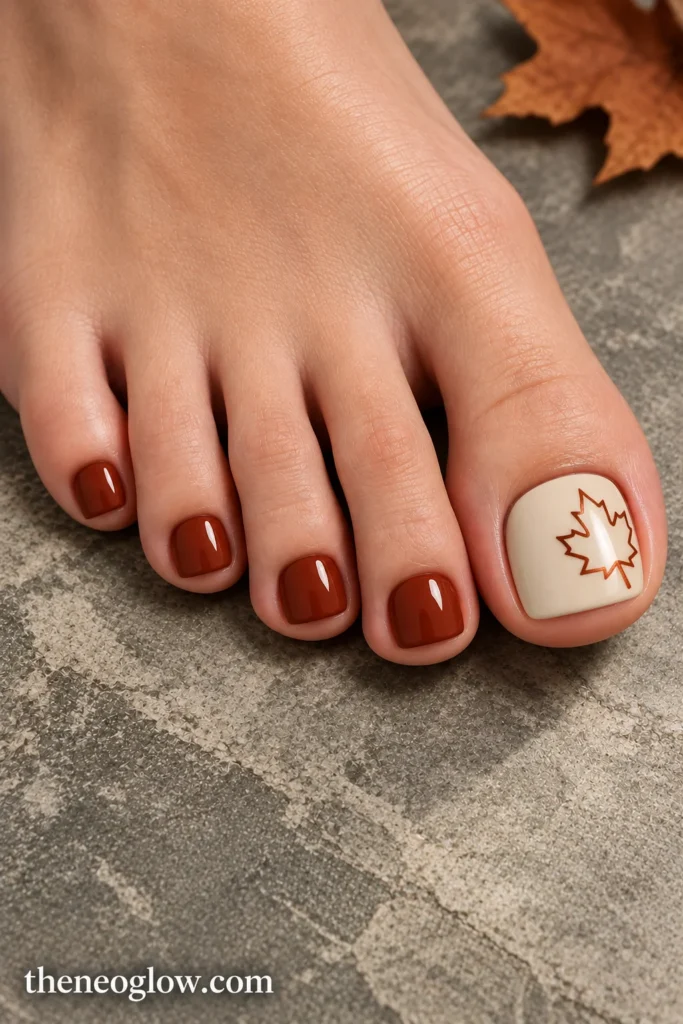
Paint the big toe a warm cream and add one simple rust or muted-copper maple-leaf outline slightly off-center. Keep the lines broad enough to stay recognizable and leave the leaf unfilled. Use rust cream on the smaller toes. This is the most literal autumn motif in the set, so one leaf per big toe is enough.
17. Caramel Acorn Accent
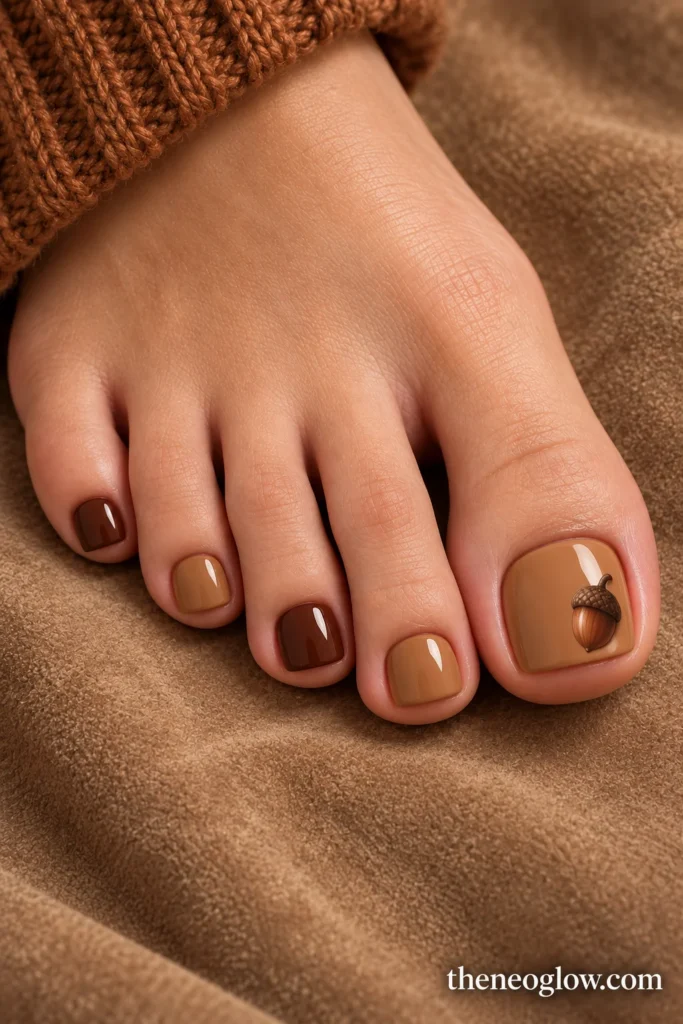
Use caramel cream on the big toe and add one small chestnut acorn with a darker textured cap near the outer third. Alternate caramel and chestnut solids across the smaller toes rather than repeating miniature acorns. The result feels seasonal and playful but still organized around one clear focal symbol.
18. Cinnamon-to-Espresso Gradient Big Toe
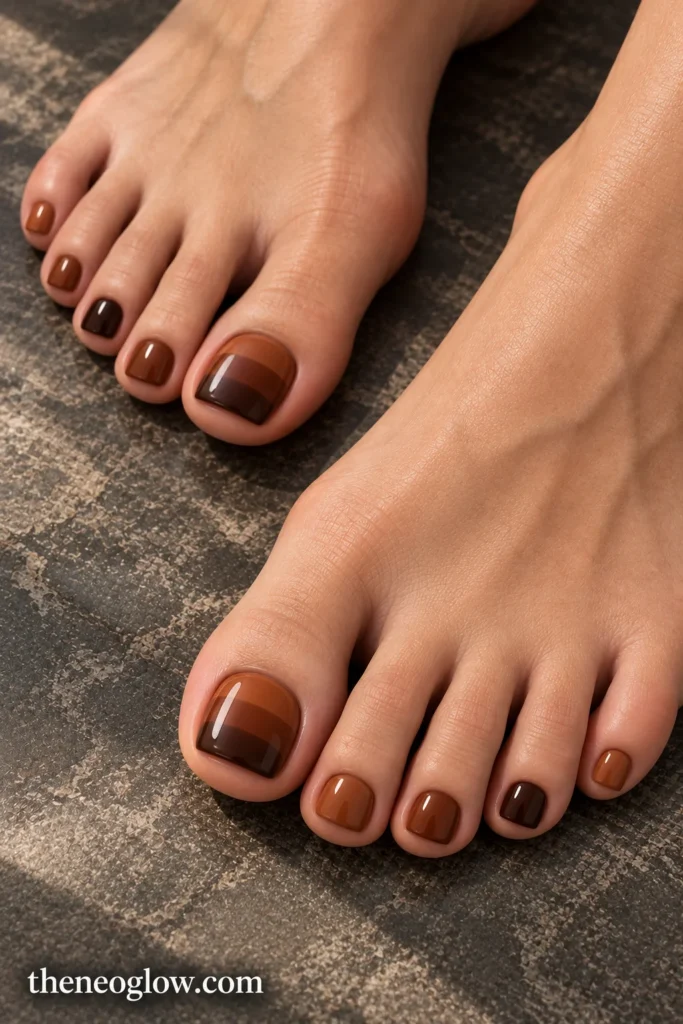
Blend cinnamon near the cuticle into chestnut and then espresso toward the free edge of the big toe. Keep the transition soft and horizontal. On the smaller toes, alternate solid cinnamon, chestnut, and espresso instead of forcing a three-color gradient onto tiny plates. The tonal progression gives the pedicure a fall finish without relying on a motif.
How to turn a saved design into a salon request
A useful salon reference should describe structure, not just a mood. A concise request can sound like: “short natural toenails, warm oat base, burnt-orange plaid on the big toes, solid burnt orange on the smaller toes, glossy finish, no extra art.” That tells the technician what must stay consistent even if your nail plates are smaller than the reference photo.
If you want bats, ghosts, drips, webs, or other October-specific symbols, use NeoGlow’s Halloween Toe Nails 2026 guide instead. Keeping those motifs on the Halloween page prevents a general fall pedicure from turning into a second spooky gallery.
For salon hygiene, the American Academy of Dermatology’s manicure and pedicure safety guidance recommends checking how tools and foot baths are cleaned and avoiding shaving the lower legs for at least 24 hours before a pedicure. That is separate from the design choice, but it is a useful check before a salon appointment.
Match the manicure without copying every detail
Your hands and toes do not need identical art. The easiest coordination is to repeat one element: the same color family, one metallic accent, one finish, or one motif.
A burnt-orange plaid pedicure can pair with solid rust or cream hands. Bronze side-panel toes can pair with a simple bronze micro accent on the manicure. If the pedicure already has a leaf, branch, or acorn focal point, keep the hands quieter so both sets do not compete.
Choose the design that still reads at toe scale
For the cleanest fall pedicure, pick one feature you want to notice first: line placement, texture, reflection, pattern, or motif. Give the big toe enough room to carry it, then simplify the rest of the set.
Save the idea that matches your preferred amount of detail, note the exact finish and big-toe placement, and bring that specification with your reference image. The strongest fall toe design is not the one with the most art; it is the one that still looks intentional on every toe.