Witch nails can feel mysterious without turning every finger into a costume illustration. The clearest designs choose one visual language—moonlight, stars, smoke, botanical silhouettes, crystal-like geometry, or a pointed-hat cue—and give it space to read. These 18 ideas move from celestial and earthy to darker graphic looks, with notes on motif size, placement, shape, and short-nail scaling.
If you want a wider mix of ghosts, pumpkins, vampire details, and other seasonal motifs, use NeoGlow’s Halloween Nails 2026 guide; this page stays focused on witch-inspired composition.
Build the Witchy Mood With Four Decisions
Before choosing a screenshot, decide what will do most of the work.
| Decision | Quieter route | Stronger route |
|---|---|---|
| Palette | taupe, smoke, moss, mauve | black, plum, midnight blue, forest green |
| Motif | one crescent, star, herb sprig | moon phases, hat silhouette, crystal geometry |
| Placement | one accent or corner detail | repeated center line or two-to-three-nail sequence |
| Finish | sheer gloss, jelly, satin | magnetic glow, chrome line, matte-gloss contrast |
You do not need every category at once. A silver crescent over smoky taupe already reads differently from a black hat over milky beige. Keep one feature dominant and let the others support it.
Celestial Witch Nails
1. Silver Moon-Phase Midnight Ovals
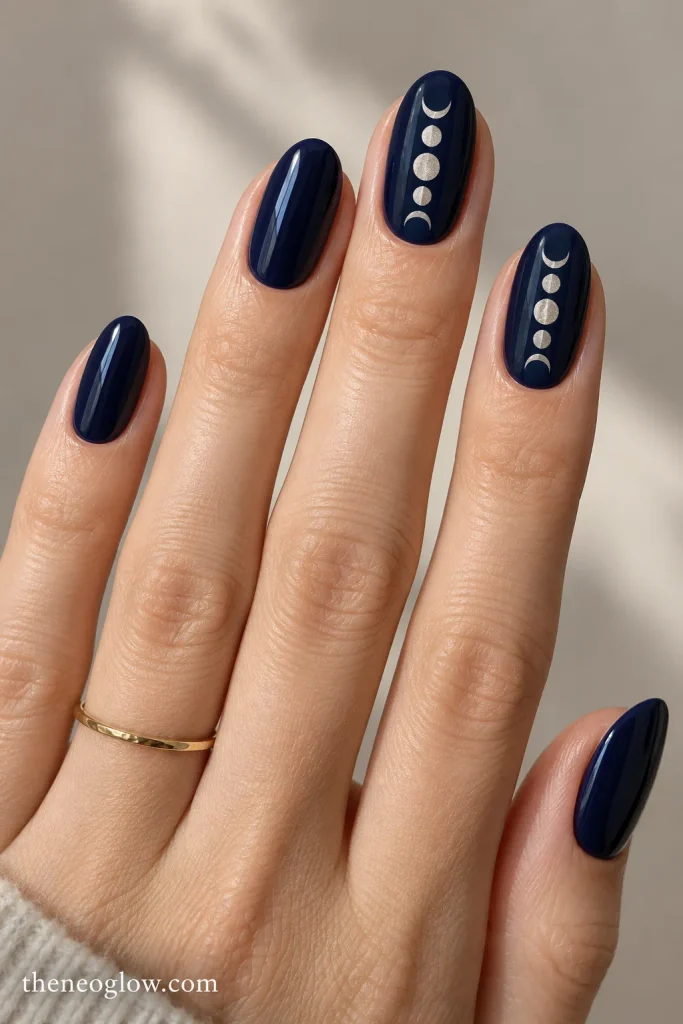
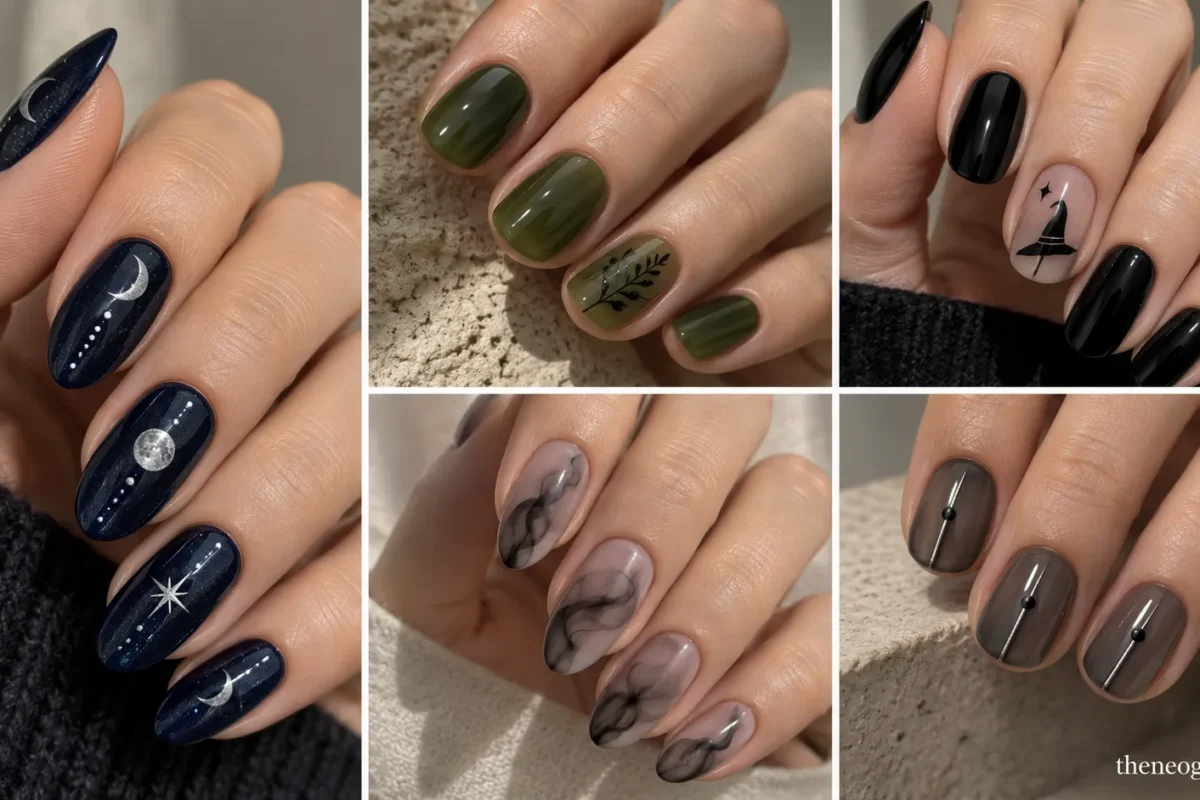
Use deep midnight-blue oval nails with a fine silver moon-phase sequence across two accent nails: small crescent, half moon, full circle, half moon, crescent. Keep the symbols thin and evenly spaced rather than filling the whole plate.
On shorter ovals, reduce the sequence to three phases on one accent. The design should read as a clean celestial pattern first, not a miniature astronomy chart.
2. Plum Eclipse Halo Almonds
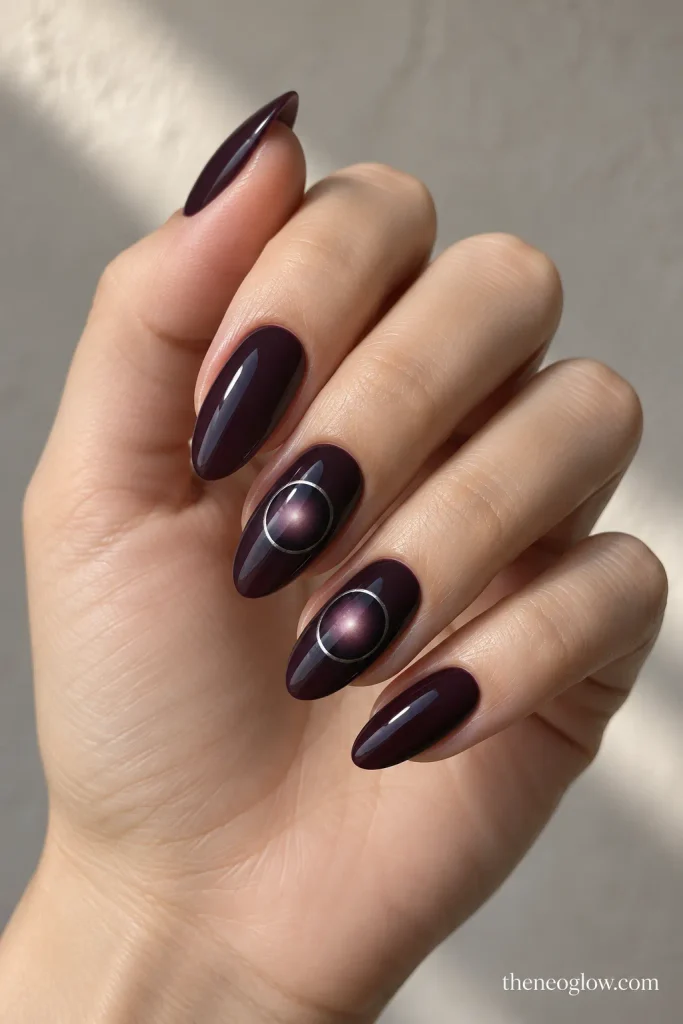
Start with a smoky plum base and diffuse a soft black halo around a small pale center on two medium almond nails. Add one narrow silver ring around the glow to create an eclipse-like focal point.
Keep the other nails solid plum or sheer black. The circular center makes this composition distinct from a standard aura manicure because the ring is deliberate and graphic.
3. Taupe Star Map Short Squares
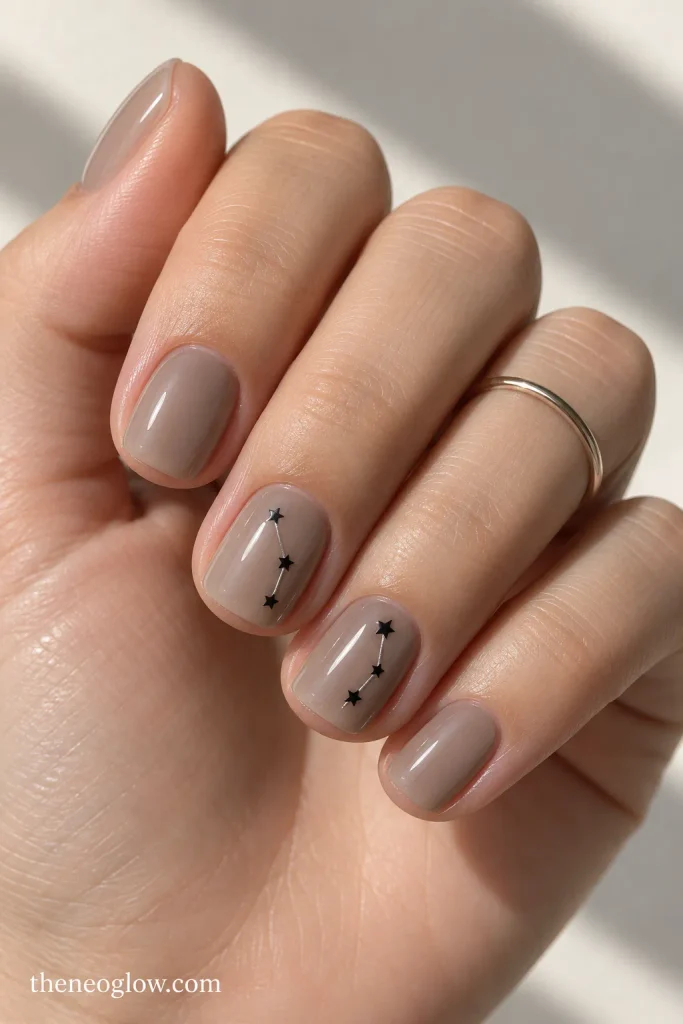
Paint short soft-square nails translucent taupe, then place three or four tiny black stars connected by one or two hairline silver segments on each accent. Keep the geometry abstract rather than naming a zodiac sign or constellation.
Use only one connected cluster per nail. On an extra-short plate, two stars and one short line are enough.
4. Crescent Cuticle Cuffs
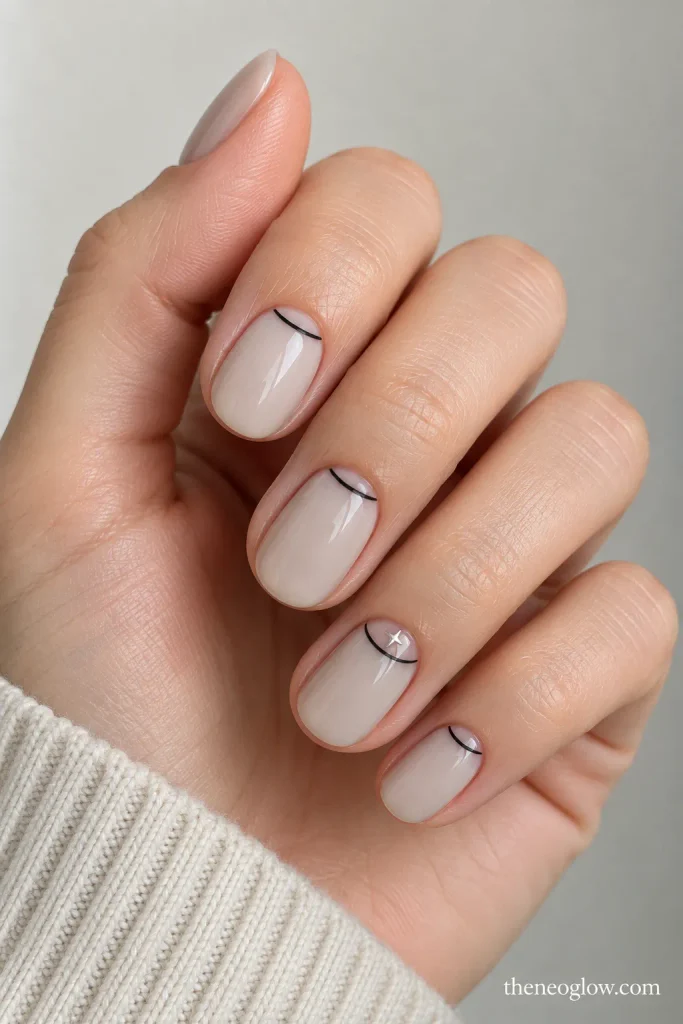
Choose a milky gray or beige base and paint a slim black crescent that follows the cuticle curve on two or three nails. Add one pinpoint silver star just above one cuff.
Because the motif sits low on the nail, it works well when there is almost no free edge. Keep the crescent shallow so most of the base remains visible.
5. Smoky Sky With Scattered Silver Pinpoints
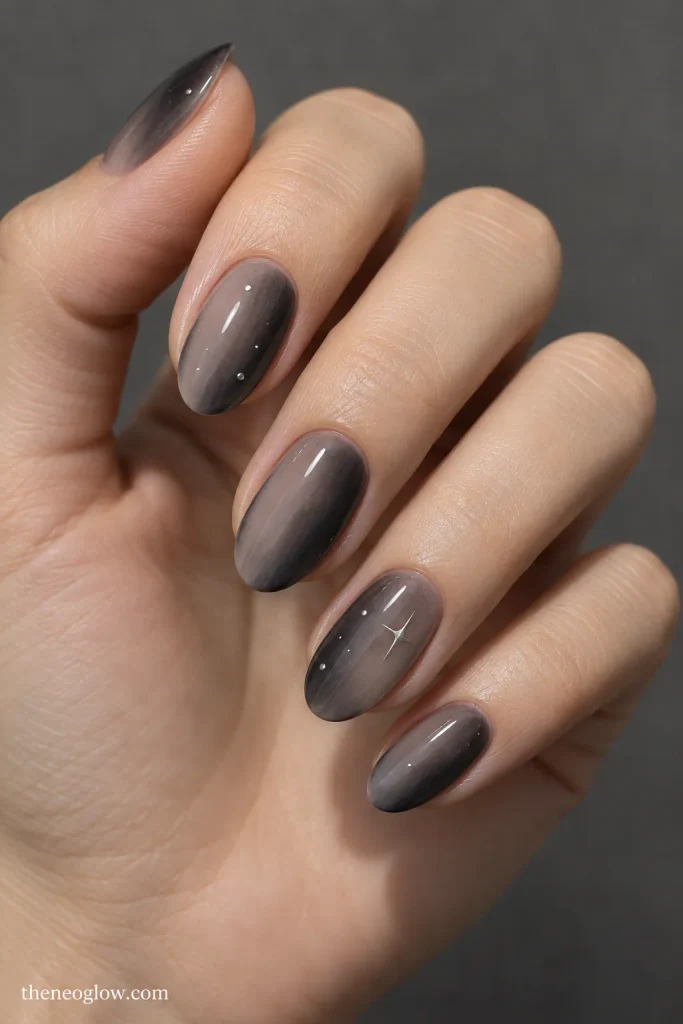
Build a translucent charcoal wash that is darker at one sidewall and fades toward the center. Add a few tiny silver pinpoints across only two nails, with one slightly larger four-point star.
The asymmetrical smoke creates movement while the tiny metallic marks supply the celestial cue. Avoid covering all ten nails with identical star placement.
Botanical and Crystal-Inspired Witch Nails
6. Moss Jelly With Fine Herb Silhouettes
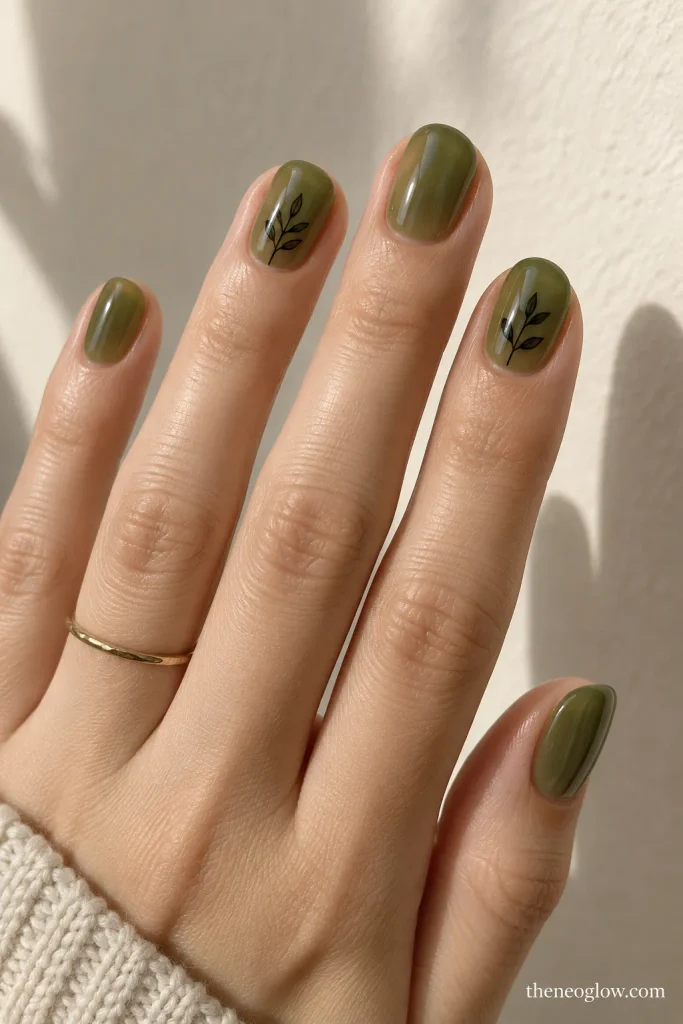
Use a translucent moss-green jelly on short ovals or squovals. On two accents, paint one narrow black botanical sprig with three or four simple leaves.
Keep the plant generic and graphic rather than labeling it with spiritual, medicinal, or ritual meaning. A single stem gives the set an earthy witch aesthetic without turning the nail into a detailed illustration.
7. Amber Glass With Black Facet Lines
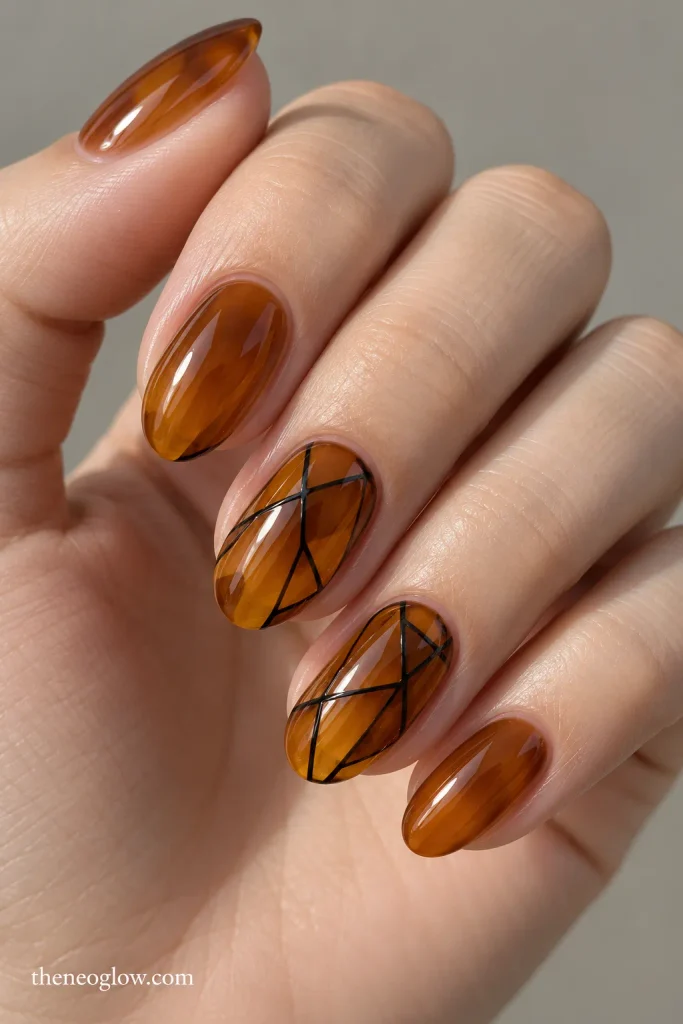
Layer warm translucent amber over medium ovals, then divide two accent nails with three or four thin black facet lines. Leave irregular clear-looking sections between the lines so the surface suggests cut glass or a generic crystal form.
The visual identity comes from transparency and angular structure. Skip claims about what a crystal represents.
8. Smoky Quartz Corner Geometry
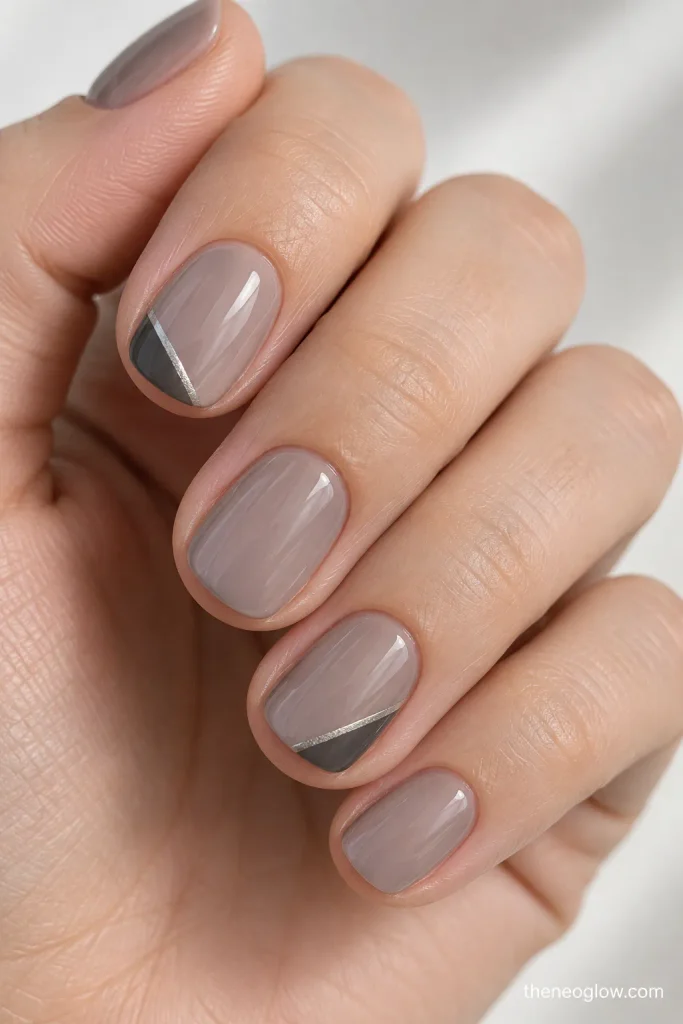
Start with a sheer mushroom-gray base and place a cropped charcoal polygon in one lower corner of two nails. Trace one edge in muted silver and leave the remaining plate clear.
This works on short nails because the “crystal” is implied by shape, not tiny interior detail. Keep the polygon under roughly one-third of the plate.
9. Forest Green Botanical Half-Moons
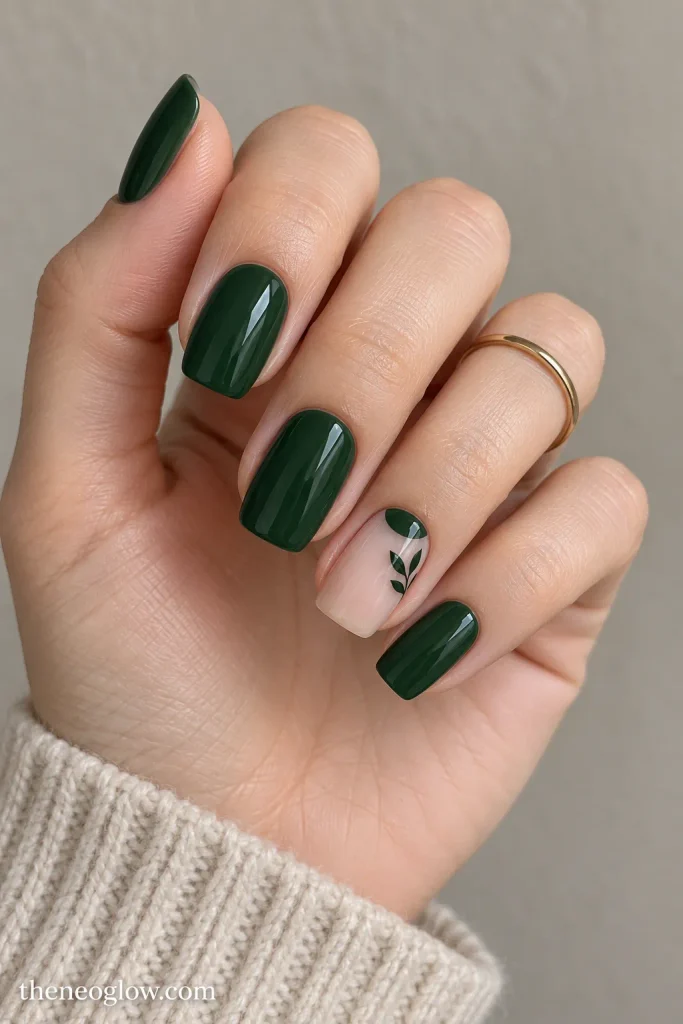
Paint medium squovals deep forest green, then use a sheer neutral base on the ring fingers. Add a narrow green half-moon near the cuticle with one tiny black leaf pair growing from one side.
The repeated green connects the accents to the solid nails. Keeping the botanical detail low on the plate prevents it from competing with the half-moon.
Witch Silhouettes and Graphic Motifs
10. Negative-Space Witch Hat Accent
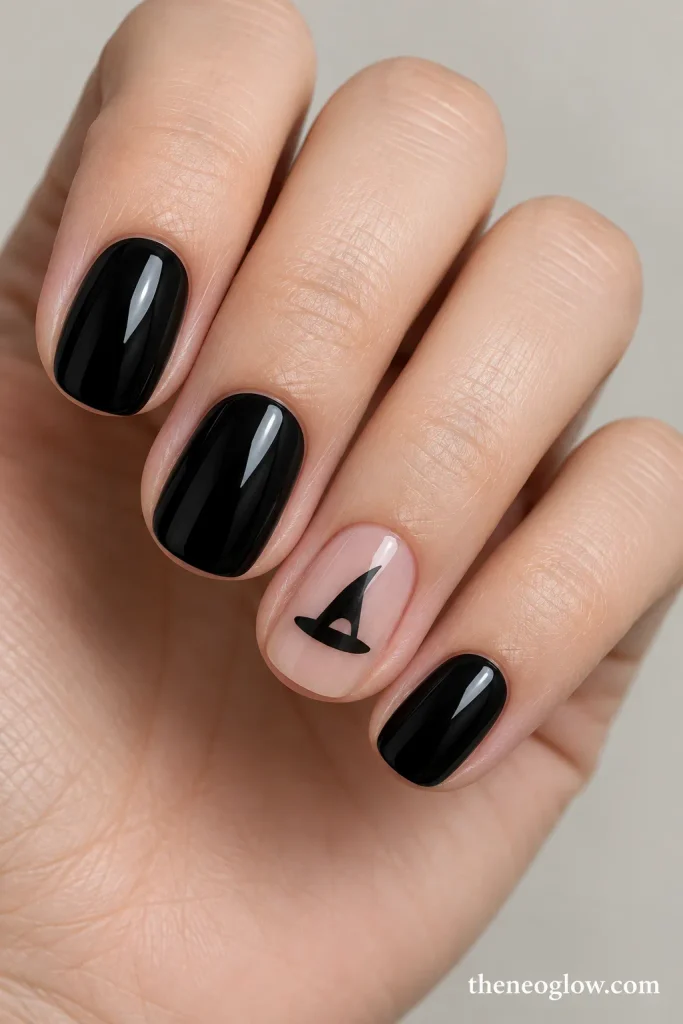
Use glossy black on most nails, then leave one sheer accent per hand. Paint a small pointed hat silhouette slightly off-center, with a narrow brim and one clear window through part of the crown.
That negative-space cutout separates this look from a basic solid hat. On short nails, reduce the crown height and widen the brim slightly so the silhouette stays recognizable.
11. Broomstick Diagonal Linework
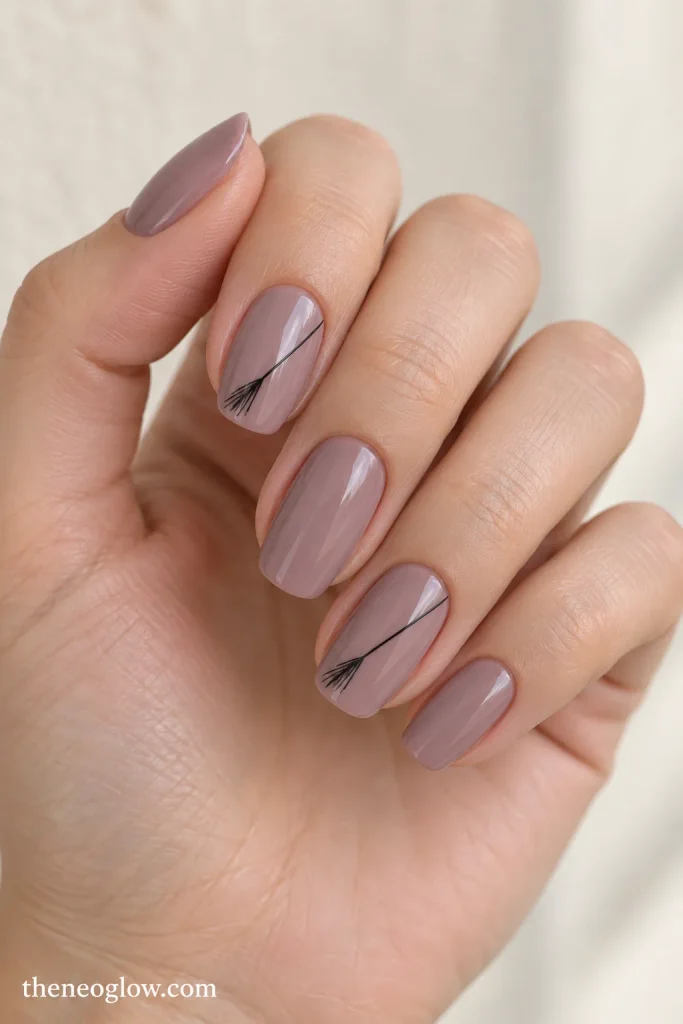
Choose muted mauve or smoky beige and draw one fine diagonal black line from the lower sidewall toward the opposite tip. Add a compact bristle shape at one end using three or four short parallel strokes.
Use the broom motif on only one or two nails. The long diagonal supplies movement without needing a character, moon, or scene around it.
12. Tiny Cauldron With Rising Smoke
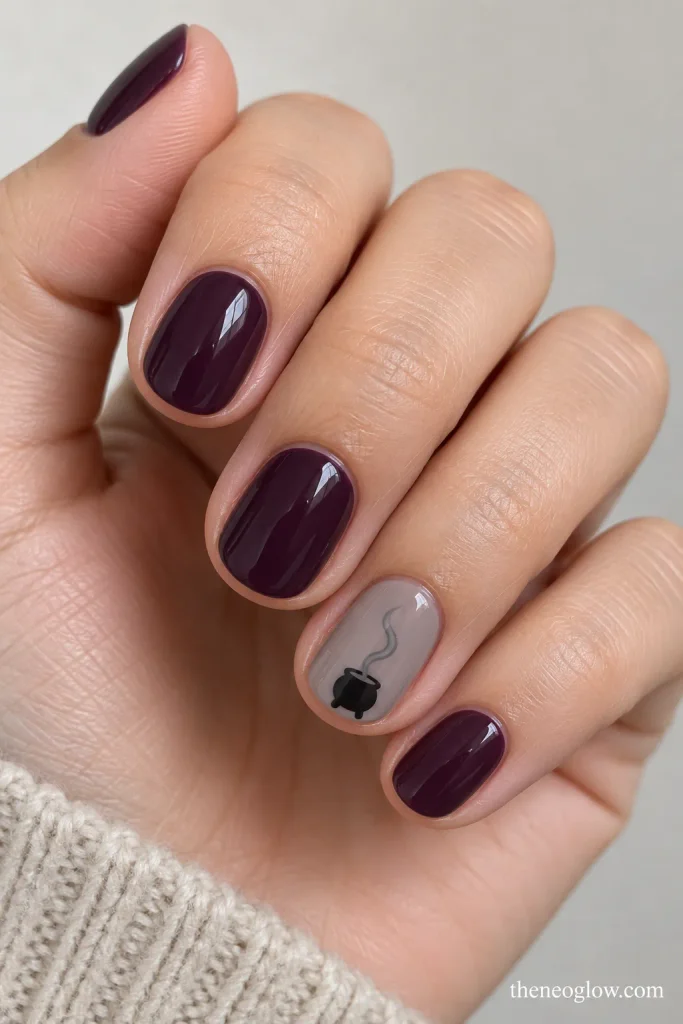
Paint short rounded nails deep plum and reserve one sheer gray accent. Near the tip, add a small black bowl silhouette with two tiny feet, then pull one thin gray smoke curl upward.
The smoke should occupy more vertical space than the cauldron itself. That keeps the motif readable on a compact nail without adding bubbles, labels, or potion text.
13. Pointed-Hat Silhouette Under a Crescent
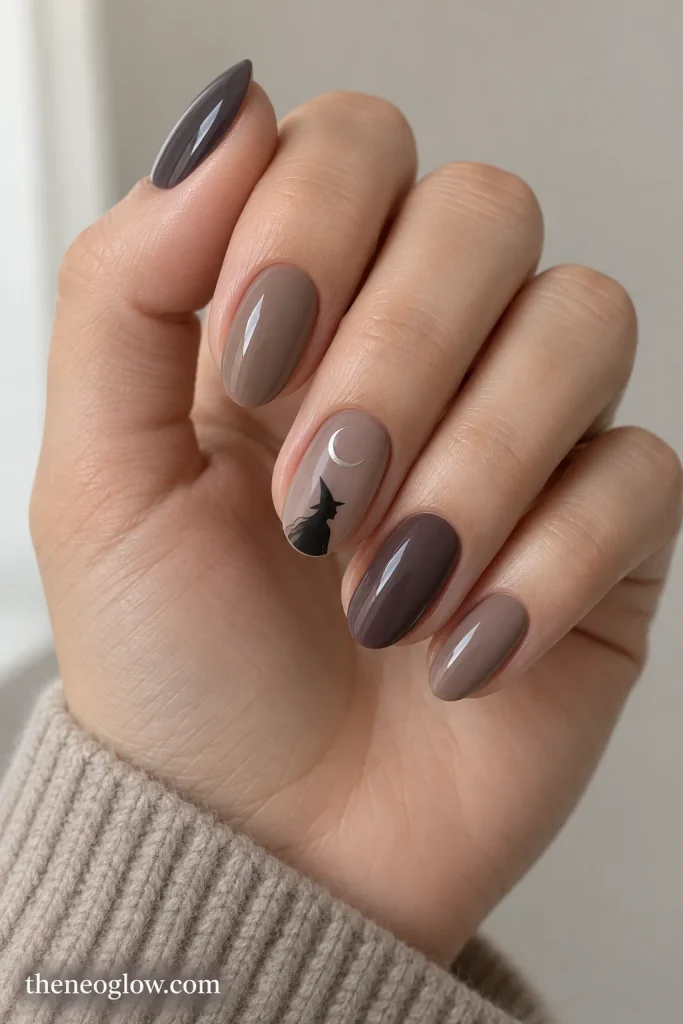
Use a smoky nude base on medium ovals. Place a small black pointed-hat profile low on one accent and a thin silver crescent above it, leaving a wide clear gap between the two.
Keep this illustrative look to one focal nail per hand. Leave the remaining nails charcoal, muted plum, or taupe.
Dark Smoke and Minimal Witch Nails
14. Black Smoke Sidewalls
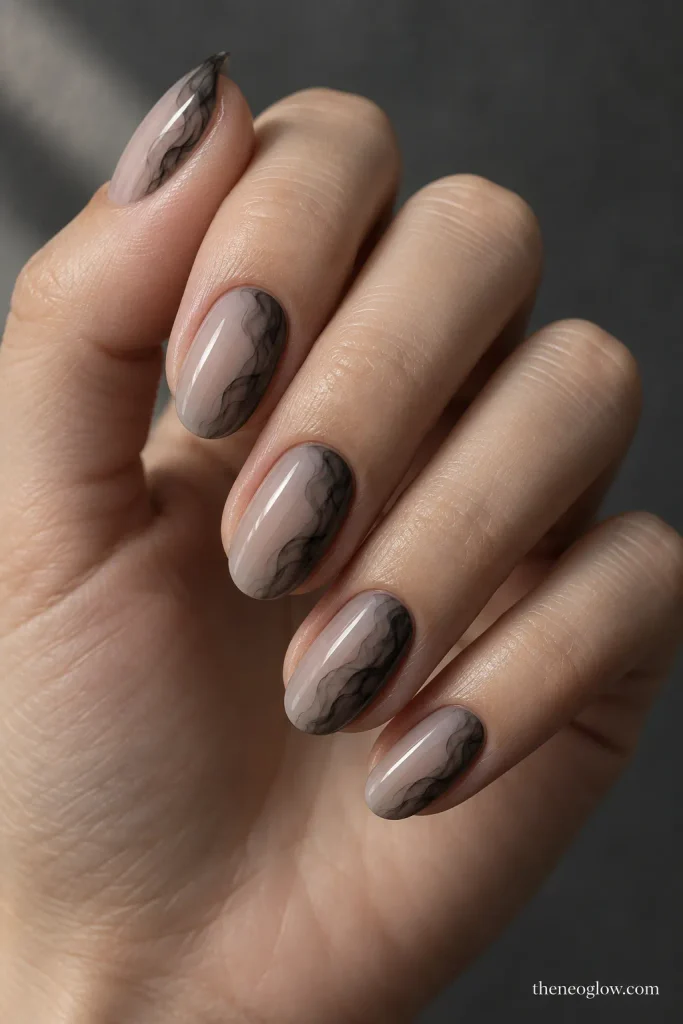
Start with a translucent nude or gray base and blend wispy black along only one sidewall of each nail. Keep the center mostly clear and vary the smoke slightly from finger to finger.
A medium oval gives the fade more room, but short squovals can carry a very narrow version. The witchy effect comes from atmosphere rather than a literal symbol.
15. Plum-to-Black Fog Gradient
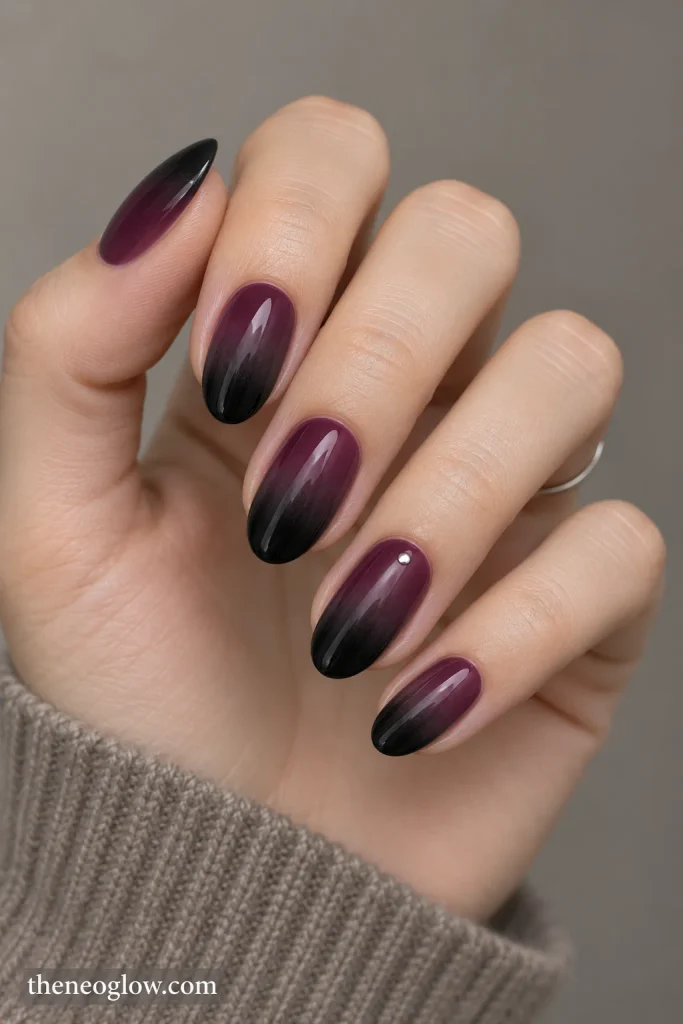
Use deep plum near the cuticle and dissolve it into smoky black toward the tip, keeping the transition soft rather than sharply ombré. Add no motif on most nails; one tiny silver dot on each ring finger is enough.
This is a darker option for readers who want witch-inspired color without stars, hats, or line art.
16. Matte Onyx With Glossy Arc-and-Dot Geometry
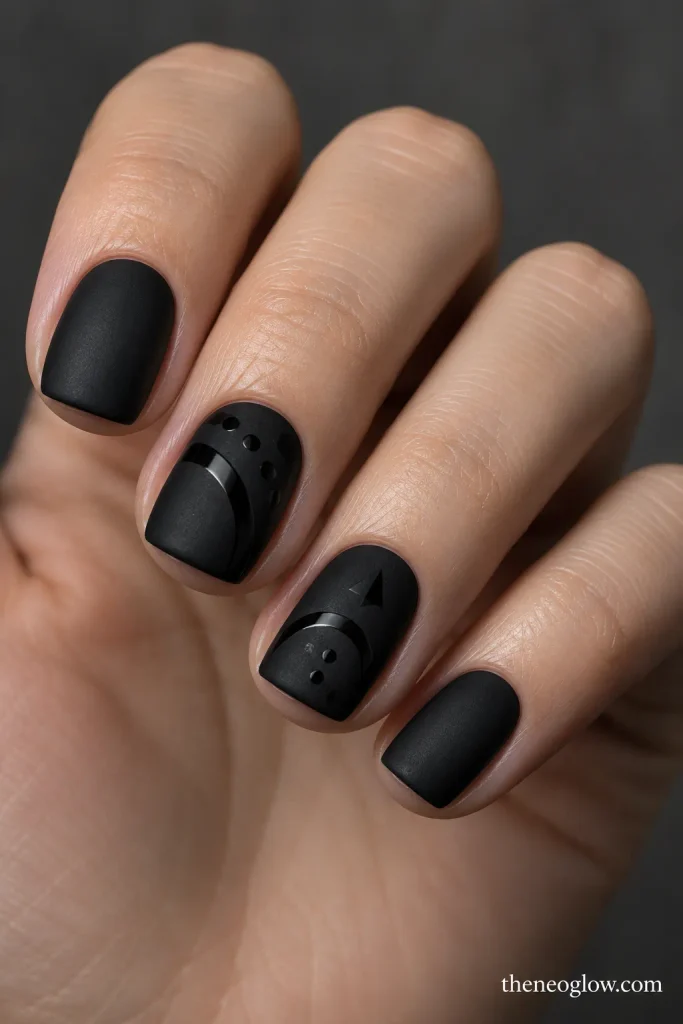
Paint short square or squoval nails matte black. On two accents, add glossy black arcs, tiny dots, and one slim triangle so the pattern appears only when light hits it.
Keep the geometry abstract and decorative rather than copying a specific religious, spiritual, or occult symbol. Tone-on-tone finish contrast makes the design visible without introducing another color.
17. Micro Crescent and Star Pair on Short Nails
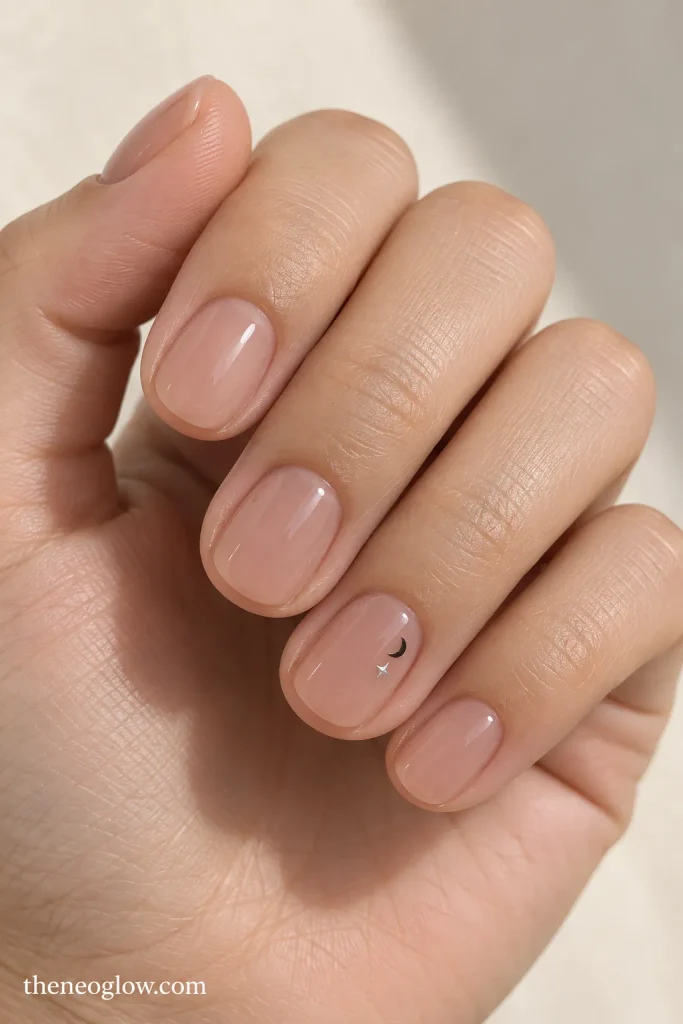
Use a sheer pink-beige, caramel-beige, cocoa sheer, or smoky nude base on genuinely short rounds. Place one tiny black crescent and one pinpoint silver star near the outer sidewall of each ring finger.
Keep both motifs together inside one small zone. This is the easiest way to preserve a witchy celestial cue when the nail plate cannot comfortably hold a full moon phase or star map.
18. Charcoal Veil With Silver Vertical Thread
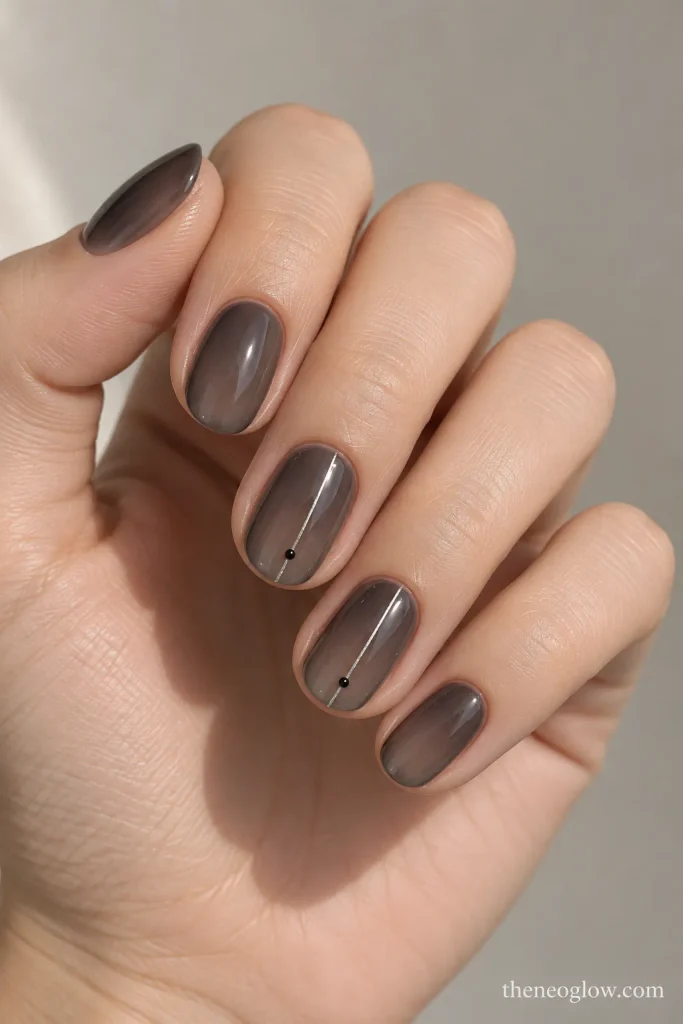
Apply a translucent charcoal veil over short ovals, keeping the color soft enough to show depth. Add one hairline silver vertical thread slightly off-center on two nails, then finish each line with a tiny black dot.
The result is minimal and slightly mysterious without using a named symbol. It also gives you a strong visual break from the moon, hat, botanical, and crystal ideas elsewhere in the list.
How to Scale Witch Nail Art for Short Nails
Short nails need fewer visual elements, not simply smaller versions of long-nail art.
| Nail space | Motif size | Best placements |
|---|---|---|
| Extra short | one micro symbol | sidewall, cuticle, center |
| Short | one small motif or cropped geometry | corner, low center, shallow cuff |
| Short to medium | two-part motif | crescent + star, sprig + half-moon |
| Medium or longer | multi-step sequence | moon phases, halo, smoke + silhouette |
If you are shaping natural nails before painting, the American Academy of Dermatology’s nail-trimming guidance recommends cutting fingernails almost straight across, slightly rounding the corners, smoothing rough edges with a file, and leaving the cuticles alone. Choose the witch design after you know how much real nail space you have.
For a short nail, think in zones. Pick the tip, cuticle, sidewall, corner, or center—then keep the other areas quiet. If the design uses a hat, crescent, or botanical sprig, do not also add a deep French tip, scattered stars, and glitter around it.
How to Request a Witch-Inspired Manicure
Save one reference and describe five things: base color, nail shape, motif, motif size, and exact placement. “Short smoky squovals with one tiny silver crescent at the outer cuticle on each ring finger” is more useful than asking for “witch aesthetic nails.”
If you are recreating the design yourself and want tools, timing, decals, or beginner shortcuts, NeoGlow’s Easy Halloween Nails guide covers the technique side in more detail. This article is for choosing the composition.
Choose One Visual Language
The strongest witch nails usually commit to one story. Choose celestial if you want moons and stars, earthy if you prefer moss and botanical lines, graphic if you want hats or geometry, or smoky if you want the mood without an obvious symbol.
Save the idea that fits your actual nail length, then note its scale and placement before your appointment or DIY session. If you later want to compare other Halloween motif families, return to NeoGlow’s Halloween Nails 2026 guide rather than adding ghosts, fangs, and pumpkins to the same set.