Choosing Halloween nails 2026 should be easier than sorting through hundreds of unrelated screenshots. This guide organizes 27 genuinely different looks by how they fit into real life: quiet details for work, playful motifs for weekends, dark romance for parties, graphic tips, and short or quick-change options. You will also find cues for regular polish, gel, acrylic, and press-ons, plus wording you can take to a salon. Halloween falls on Saturday, October 31, so one manicure can stay restrained on Friday and feel fully intentional for Saturday night.
Choose Your Halloween Wearability Lane
Decide how loudly you want the manicure to signal Halloween before choosing a motif. That single decision prevents a saved design from feeling wrong at work, too quiet at a party, or too detailed for your available nail space.
| Lane | Best for | Design rule |
|---|---|---|
| Barely spooky | Offices, college, everyday wear | Use one dark color, tiny marks, or a single accent |
| Cute | Brunch, casual weekends, handing out candy | Keep faces and icons small, flat, and evenly spaced |
| Dark-romantic | Dinners, costumes, parties | Let depth, texture, or shape lead instead of adding every motif |
| Graphic | Salon art, gel, statement press-ons | Make the tip or metallic finish the focal point |
| Quick-change | DIY polish and press-ons | Choose dots, decals, sponging, or a printed set |
If you want spooky details while the weather still feels like summer, browse these Summerween nail ideas instead. The options below leave pool colors and tropical motifs behind and move into a true October palette.
Before saving a nude-base design, choose the sheer shade you actually like against your hands. Cool pink, neutral beige, peach, caramel, and cocoa bases can all create negative space; no single “nude” is universal. Check the swatch in daylight, then decide whether you want the art to blend softly or create deliberate contrast.
Subtle Details for Work and Everyday Plans
These wearable Halloween nails rely on close-up details, controlled shine, and practical shapes. They can move from a weekday desk to a low-key October evening without a costume change.
1. Blackberry Jelly Short Squovals
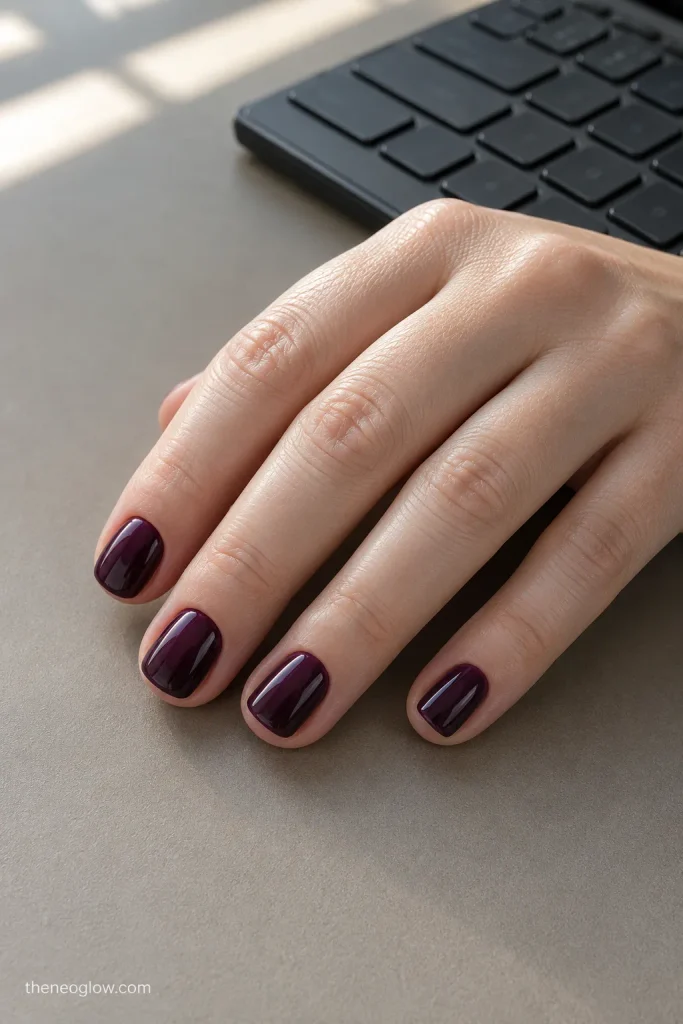
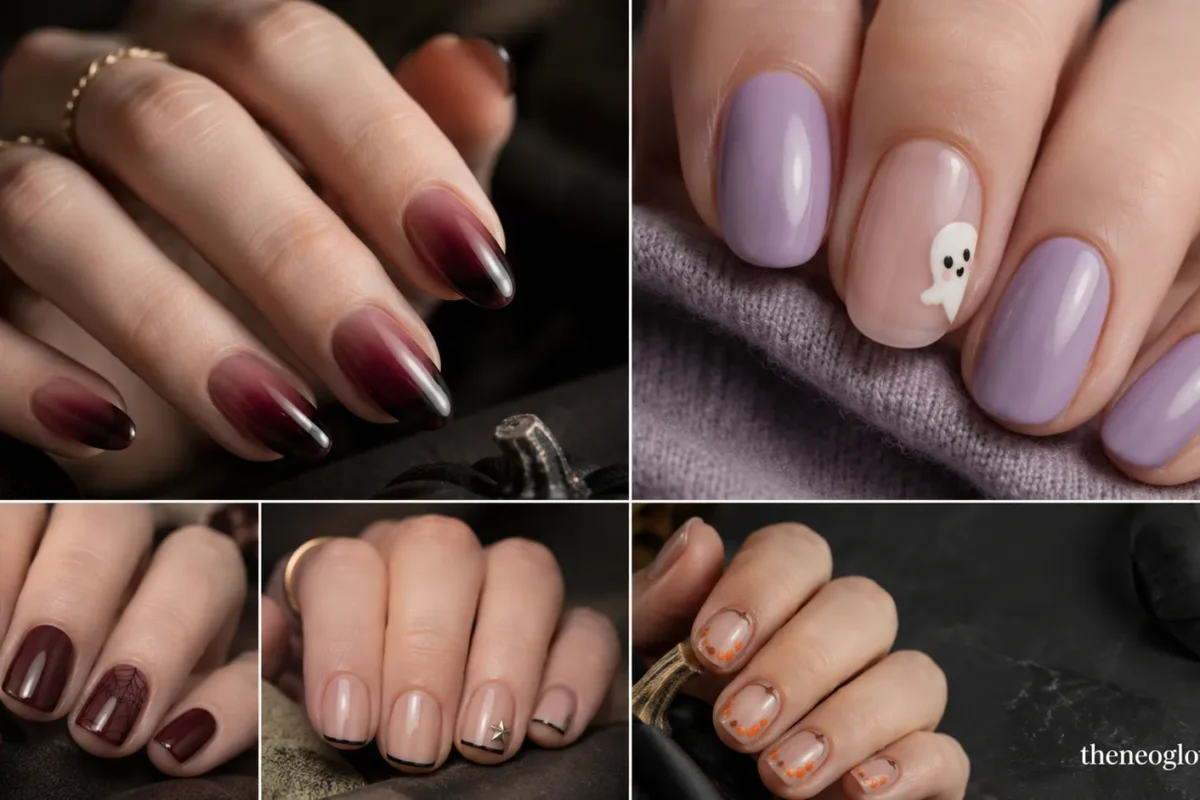
Layer translucent blackberry over short squoval nails so the color reads plum in daylight and nearly black indoors. The smooth, motif-free surface keeps the look office-friendly. Choose a cooler berry or warmer black cherry according to the contrast you enjoy, not a rigid skin-tone rule.
2. Sheer Beige With Black Pin-Dot Cuticles
Place one tiny black dot above each cuticle on a pink-beige, peach-beige, caramel, or cocoa sheer base. Uniform spacing makes the manicure feel graphic rather than costume-like.
3. Smoky Taupe Crescent Accents
Paint short ovals in translucent smoky taupe, then add one slim silver crescent on each ring finger. The moon reference is visible up close but does not dominate an outfit.
4. Cocoa Tortoiseshell Accent Pair
Keep eight nails glossy espresso and use amber, cocoa, and translucent black tortoiseshell on two accents. The warm depth feels autumnal without a literal Halloween character.
5. Burgundy Cobweb Corners
Start with a muted burgundy cream and draw one fine black web into the outer corner of each ring finger. Cropping the web preserves open color and makes the detail readable on short nails.
If keyboard comfort is part of your decision, use this guide to nails for typing to compare free-edge length, shape, thickness, and smooth finishes before committing to art.
Playful Motifs That Still Feel Polished
Cute Halloween nails look more intentional when one character or symbol repeats in a limited palette. Give each tiny motif breathing room rather than turning every nail into a different scene.
6. Blushing Ghost Peekaboo Nails
Let one small white ghost peek in from the side of a sheer blush accent nail, then paint the rest soft lavender. Add two black eyes and a tiny pink cheek, keeping the character flat and simple. This previews the ghost route without turning the parent guide into a full ghost gallery.
7. Creamy Mini Pumpkin Garden
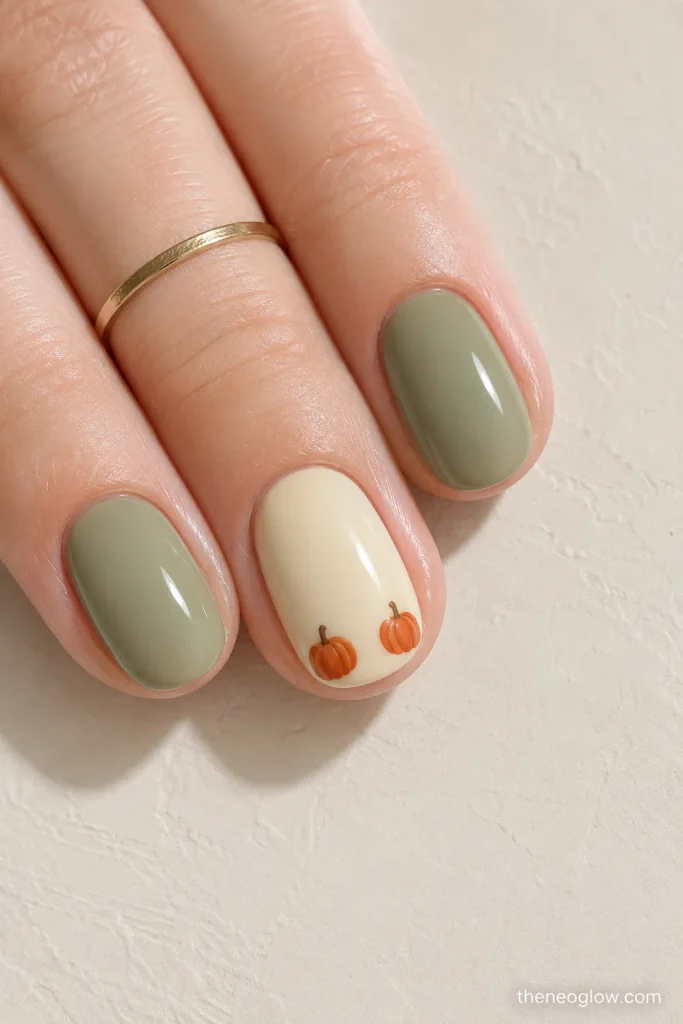
Place two miniature terracotta pumpkins near the tips of cream accent nails and paint the remaining nails sage. Thin brown stems connect the palette without heavy black outlines. On rich or deep brown skin, a brighter cream creates crisp contrast; caramel beige gives a softer effect.
8. Candy-Corn Diagonal Confetti
Scatter a few tiny white, orange, and yellow triangles across two clear or milky nails, leaving the other fingers glossy orange. Rotate the shapes instead of stacking full candy-corn stripes.
9. Lavender Eyeball Dot Accents
Use a dotting tool to build one white dot, a violet iris, and a black center on each accent nail. Pair them with solid lavender and glossy black nails.
10. Sage Patchwork Stitch Nails
Paint sage and dusty-lilac color blocks across two nails, then join the shapes with short black stitch marks. Leave the remaining nails solid to support the pattern.
Dark Romance for Parties and Night Plans
This lane creates spooky Halloween nails through color depth, reflected light, lace, and sculptural accents. It suits readers who want drama without a literal mix of pumpkins, ghosts, and candy.
11. Oxblood Velvet Cat-Eye
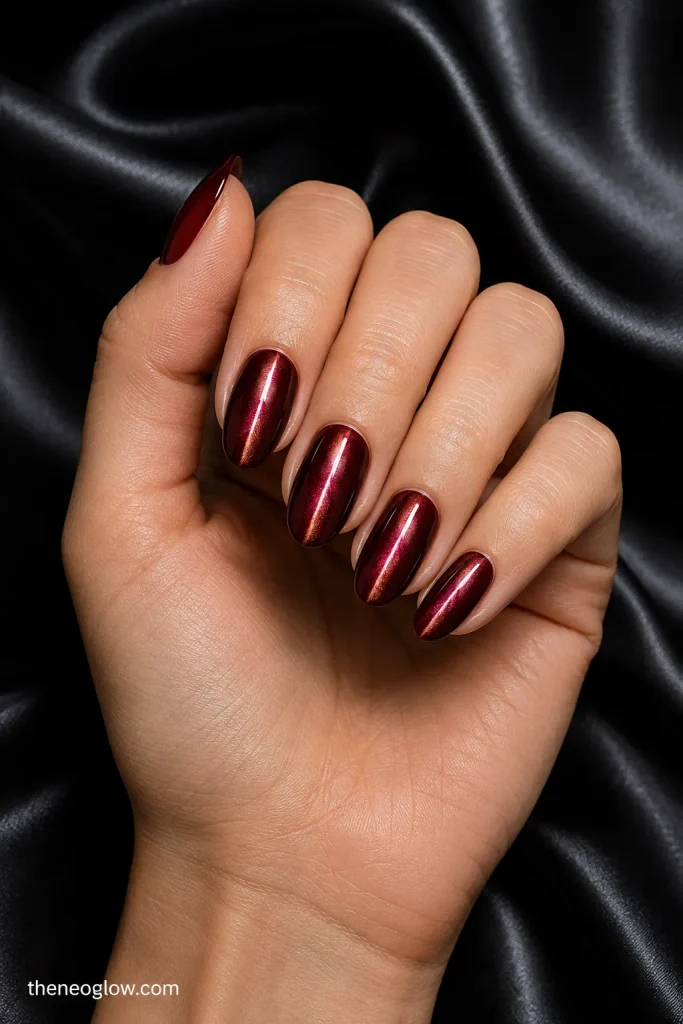
Choose a deep oxblood magnetic polish with a narrow velvet beam through the center. Medium oval or almond nails give the reflection room to move, while a short version looks like polished garnet. Ask for the light line to run in the same direction across all ten nails.
12. Black Lace Over Translucent Nude
Paint delicate black lace along one side of a translucent base, leaving the opposite side open. Alternate full lace accents with glossy black solids for rhythm.
13. Red Aura With Black Glass Tips
Diffuse wine red through the center of a sheer nail and fade it before it reaches translucent black tips. The glow suggests vampire styling without fangs or painted blood.
14. Gunmetal Shattered-Foil Nails
Float irregular gunmetal foil fragments inside a smoky gray jelly base, keeping space between the pieces. The broken-light effect feels party-ready without rhinestone bulk. Silver creates cooler contrast, while antique pewter or bronze can warm the result on any complexion.
15. Plum-to-Black Ombré With Crystal Cuticles
Blend deep plum near the cuticle into black at the tip, then place two miniature crystals on one nail per hand. The gradient supplies the drama; the stones only catch light.
16. Sculpted Black Rose Coffin Set
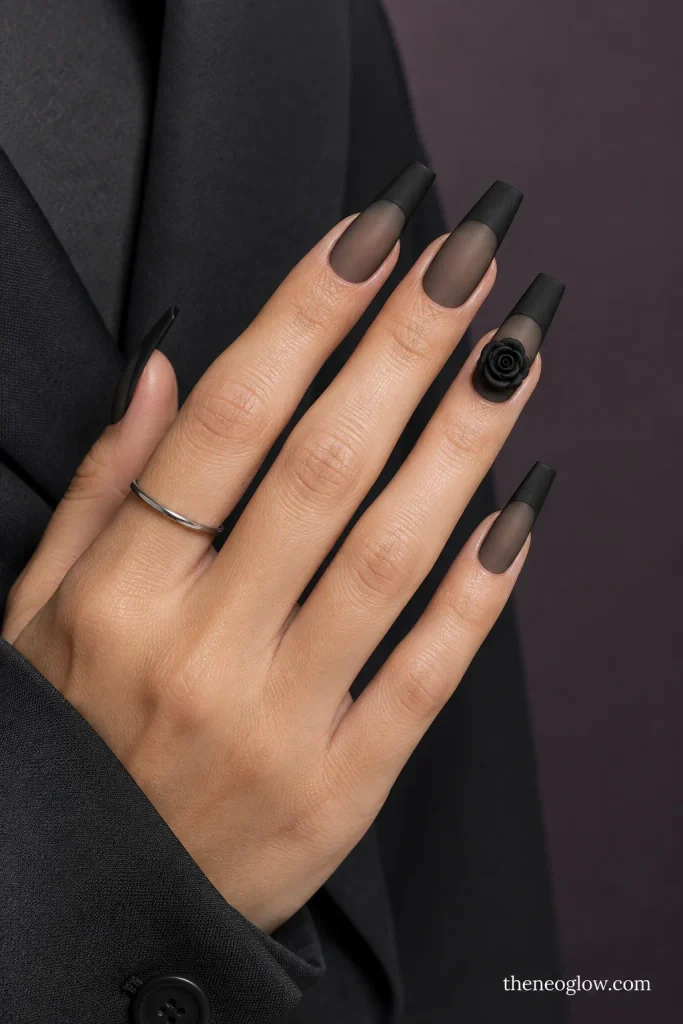
Use long coffin acrylics with sheer black bases, matte black tips, and one low-profile sculpted rose per hand. This is the highest-maintenance option in the guide and best reserved for a planned statement. Ask the salon to explain shape, upkeep, and removal before the service.
Graphic Tips and Metallic Finishes
These designs keep the base visible while concentrating color or reflection at an edge. They preview the specialist French route without repeating a complete tip-only gallery.
17. Black Micro Tips With One Silver Star
Trace hairline black tips over a sheer base and add a single silver star near one sidewall. The slim edge works on short squoval or oval nails and remains restrained enough for work.
18. Copper Chrome Reverse Arcs
Place a narrow copper-chrome curve above each cuticle instead of coating the free edge. Leave the center clear or softly tinted. Copper and rose gold offer warm light; silver or pewter creates cooler contrast, and neutral or olive undertones can choose either effect.
19. Blood-Red Chrome V-Tips
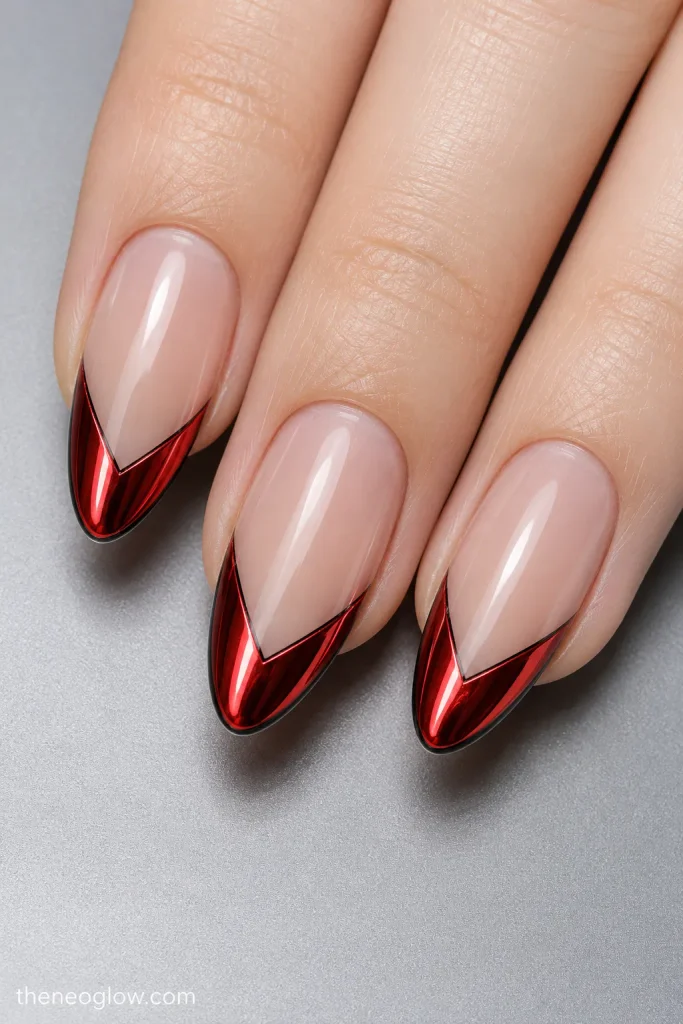
Shape reflective red into a shallow V on medium almond nails, preserving plenty of translucent base below it. A fine black outline sharpens the geometry.
20. Smoky Ombré Tips With a Gloss-Matte Split
Fade charcoal from the free edge into a clear center, seal the full nail glossy, then add one matte accent. The change in finish—not extra art—creates contrast. A sponge can form the regular-polish fade, while a salon airbrush produces the softest transition.
21. Gunmetal Eclipse Tips
Curve gunmetal chrome around only one side of each tip, like a partial eclipse, over a milky taupe base. Mirror the direction on opposite hands for balance. This asymmetrical placement suits medium ovals and gives black Halloween nails a lighter, more reflective alternative.
Short, DIY, and Press-On Options
You do not need long extensions or advanced brushes to create recognizable Halloween nail designs. Complete normal prep first; NeoGlow’s at-home manicure routine covers shaping, thin lacquer layers, drying, and regular-polish removal in the correct sequence.
22. Pumpkin-Orange Micro Dots
Paint short rounds with a sheer beige base and arrange three tiny pumpkin-orange dots near one side of each nail. Add a single brown stem line to only two dots if you want the pumpkin hint. Terracotta feels muted; tangerine creates brighter contrast.
23. Matte Black With Glossy Polka Dots
Apply black polish, finish it matte, and place clear glossy dots over the dry surface. The tone-on-tone pattern appears when light moves across it, so no detailed drawing is needed. Keep the dots evenly spaced on short square or squoval nails.
24. Charcoal Dry-Brush Smoke
Wipe most gray polish from a flat brush, then drag wispy strokes across a sheer base. Add one translucent black layer only where you want extra depth. Practice on a spare tip first; an imperfect, broken edge is part of the smoky effect.
25. Mauve Moon-and-Star Decals
Use dusty mauve on short ovals and place one tiny black moon or star decal on alternating fingers. Sealing flat decals is simpler than painting matching celestial symbols by hand. Limit the set to two decal shapes so the result stays edited rather than busy.
26. Smoky-Glass Short Press-Ons
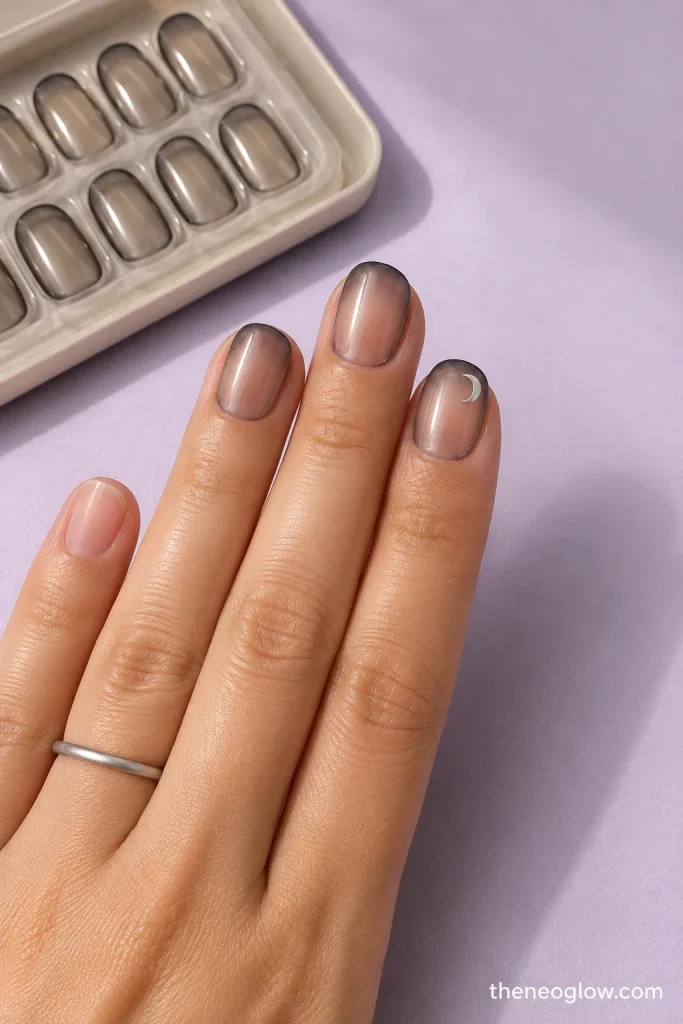
Choose short oval press-ons with transparent charcoal edges and clear centers, then add one printed silver crescent per hand. Before adhesive, use the press-on nail sizing guide to check width and curve. Every tip should cover sidewall to sidewall without pinching or touching skin.
27. Black-and-Cream Harlequin Press-Ons
Pick a short soft-square set with black-and-cream diamonds on two accent nails and glossy solids elsewhere. Printed geometry gives you crisp detail without a salon appointment. Follow the exact set and adhesive directions, then use the natural-looking press-on application guide for prep, placement, and removal principles.
Choose Regular Polish, Gel, Acrylic, or Press-Ons
The same Halloween nail idea can feel very different depending on the system. Choose the route that matches your time, skill, desired length, and removal plan—not simply the photograph you saved.
| Route | Best fit | Make the request specific |
|---|---|---|
| Regular polish | Short natural nails, DIY dots, decals, solids, and simple gradients | Name the base, two accent colors, motif size, and glossy or matte finish |
| Gel polish | Smooth layered art or shine on your current nail length | Confirm the exact gel system, curing method, design placement, and removal plan |
| Acrylic | Added length, sculpted shapes, and detailed statement art | Agree on length, shape, profile, accent count, upkeep, and professional removal |
| Press-ons | Fast changes, printed art, or a party set you can select in advance | Dry-fit all ten tips and follow the specific adhesive’s application and removal directions |
If you choose gel, the American Academy of Dermatology’s dermatologists’ gel-manicure tips include checking salon hygiene, protecting hands from curing-lamp UV with recommended sunscreen or opaque fingerless gloves, and not picking off the coating. Follow the directions for your exact gel and lamp rather than mixing systems.
For any home or salon route, read product labels and keep the space ventilated. The FDA’s nail-product safety overview explains why warnings and directions matter and notes that some products can cause allergic reactions or infections. Stop using a product if a significant reaction develops, and seek professional care for persistent redness, swelling, pain, or another concerning nail change.
Frequently Asked Questions
What Halloween nail colors are easiest to wear after October 31?
Black cherry, blackberry, espresso, smoky taupe, charcoal, plum, copper, and sheer neutral bases transition easily into November. Keep literal motifs on one or two removable accents, or choose dots, lace, cat-eye, chrome, and ombré that do not depend on the holiday.
Can Halloween nails look professional at work?
Yes. Choose a practical length, smooth surface, one restrained motif, or a dark solid with close-up detail. Blackberry jelly, black pin dots, taupe crescents, tortoiseshell accents, and cropped cobweb corners all signal October without dominating a work outfit.
Which ideas work on very short natural nails?
Micro dots, pin-dot cuticles, tiny decals, tone-on-tone polka dots, cropped cobwebs, short ombré, and one side accent use limited space well. Keep art small and leave visible base color instead of shrinking a complex long-nail composition onto every finger.
What should I tell my nail technician?
Describe the base opacity, shape, length, palette, motif scale, accent count, placement, and finish. For example: “Short squoval nails, translucent cocoa base, burgundy micro tips, one fine black web in each ring-finger corner, and a smooth glossy finish.”
Can these designs be done with regular nail polish?
Many can. Solids, micro dots, decals, dry-brush smoke, simple gradients, and matte-versus-gloss patterns are the most approachable. Magnetic velvet, airbrushed aura, precise chrome, sculpted roses, and complex lace are more realistic as salon services or printed press-ons.
How do I choose between cute and spooky Halloween nails?
Choose what you want noticed first. Small pumpkins, friendly ghosts, candy colors, and patchwork stitches read playful; black lace, oxblood velvet, smoky glass, sharp V-tips, and sculpted roses feel darker. When uncertain, combine one cute accent with otherwise simple dark solids.
Save One Design That Fits Your Real Plans
Begin with the lane you will wear most: subtle for a full workweek, cute for casual October plans, dark-romantic for a party, graphic for a salon statement, or quick-change for DIY and press-ons. Save one clear reference, note the base shade and accent placement, and choose the application route before booking or buying. The most successful manicure is not the one with the most Halloween symbols; it is the one you will enjoy wearing through Saturday night.