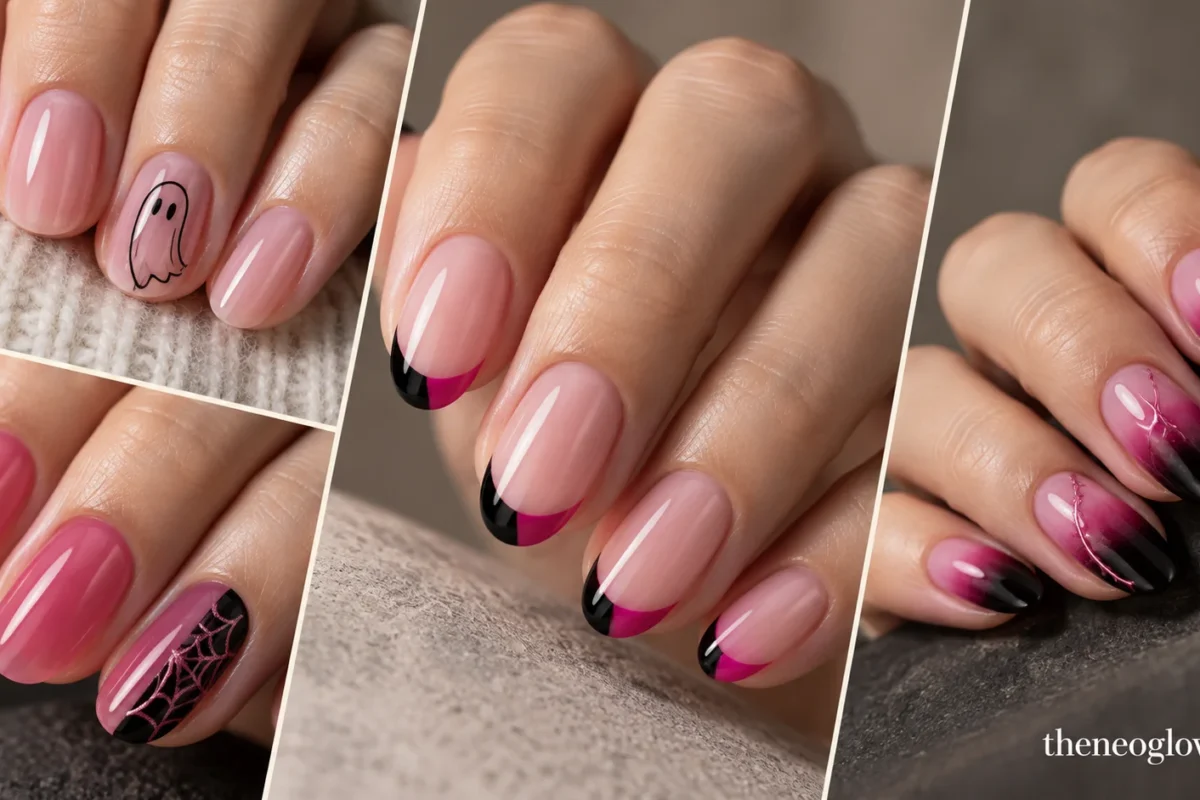
Pink Halloween nails work best when pink is the main design system, not a last-minute color swap on a standard orange-and-black manicure. Blush can keep spooky motifs soft, hot pink can make graphic details feel sharper, and mauve can push the palette into a darker October mood. The 18 ideas below use ghosts, webs, French edges, negative space, magnetic finishes, and one-accent layouts without turning every nail into a different character. If you want a wider mix of Halloween colors and motifs, use NeoGlow’s Halloween Nails 2026 guide; this page stays focused on building the whole manicure around pink.
Choose the Pink Lane Before the Motif
A pink Halloween set feels more intentional when the shade controls the mood first and the spooky detail comes second.
| Pink direction | Best supporting color | Strongest use | Overall feel |
|---|---|---|---|
| Sheer blush or milky pink | Black, charcoal, soft white | Micro motifs, negative space | Soft and wearable |
| Hot pink or fuchsia | Glossy black | Graphic tips, checks, drips | High contrast |
| Dusty rose or mauve | Black, pewter, silver | Cats, moons, smoke, chrome | Darker and polished |
| Pink jelly | Black glass, foil, magnetic pigment | Aura, web panels, layered effects | Dimensional |
Keep one visual rule consistent across the hand: the same pink family, the same black line weight, or the same finish. That gives you room for a Halloween cue without losing the color-led idea.
Soft Pink Halloween Nail Ideas
1. Blush Jelly With One Black Ghost Outline
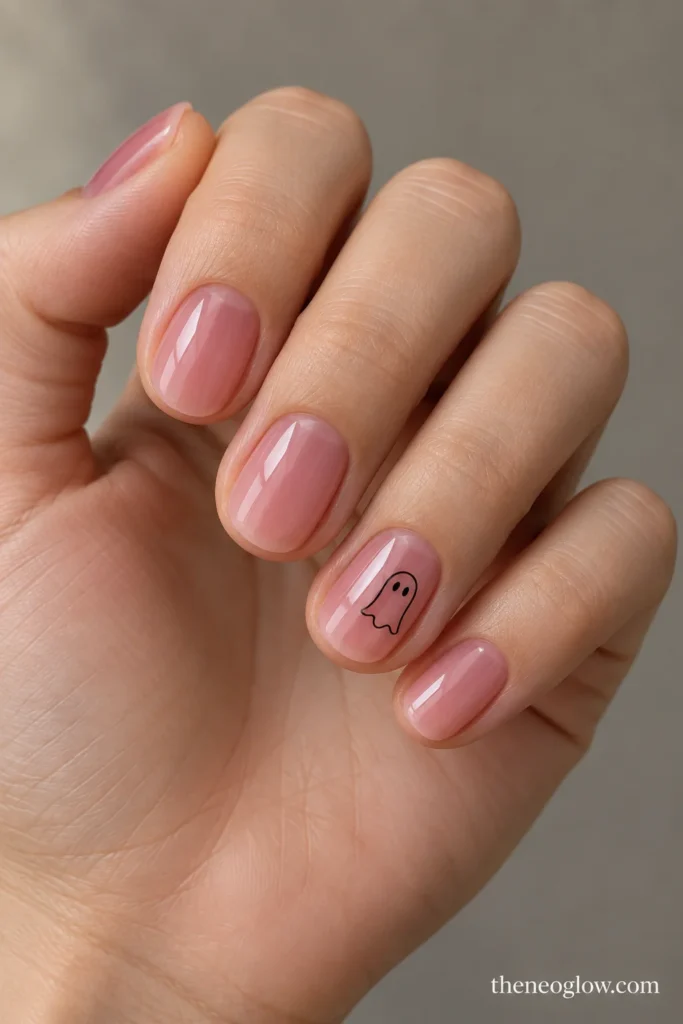
Use translucent blush jelly on short oval nails and reserve one ring finger per hand for a fine black ghost outline. Keep the ghost narrow, with two tiny eyes and plenty of pink visible around it. This version makes the palette lead while the ghost acts as one recognizable Halloween marker.
If the ghost itself is the part you want to explore in depth, NeoGlow’s Cute Ghost Nails guide covers ghost-first palettes, French layouts, short nails, and press-ons without forcing this pink article to repeat them.
2. Milky Pink With Tiny Black Bat Cuticles
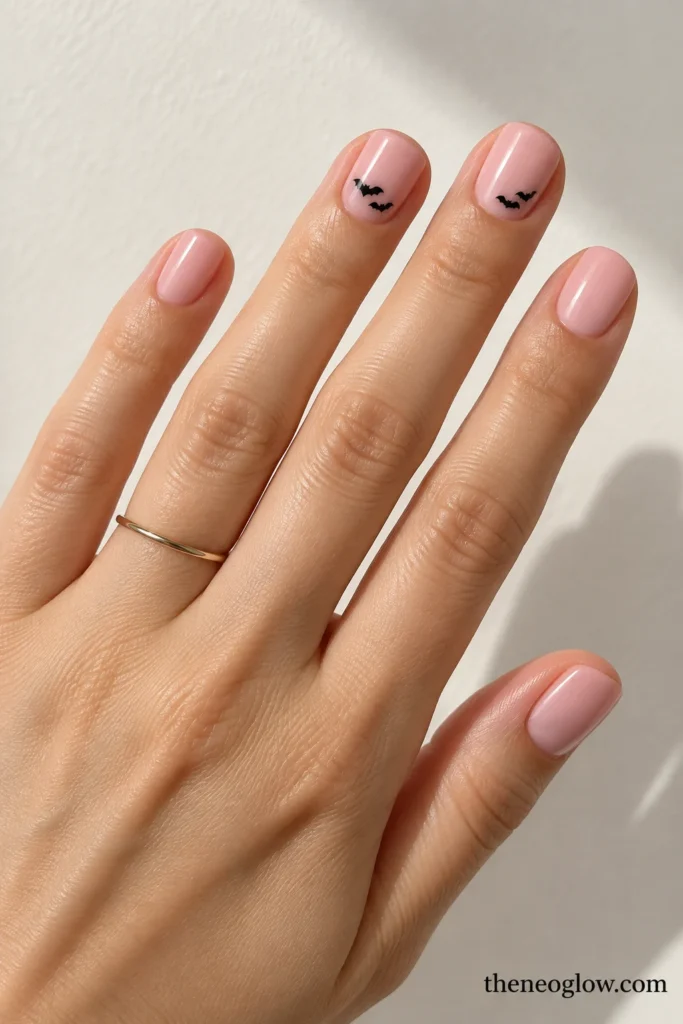
Paint short squoval nails milky pink, then place two miniature black bat silhouettes just above the cuticle on one or two accents. Keep the wings flat and compact rather than stretching them across the plate. The low placement leaves most of the pink untouched and works especially well when you want short pink Halloween nails that still look clean from a distance.
If nail length is your main decision, the Short Halloween Nails guide goes deeper on scaling motifs to genuinely short square, squoval, and oval nails.
3. Hot Pink Jelly With a Vertical Web Panel
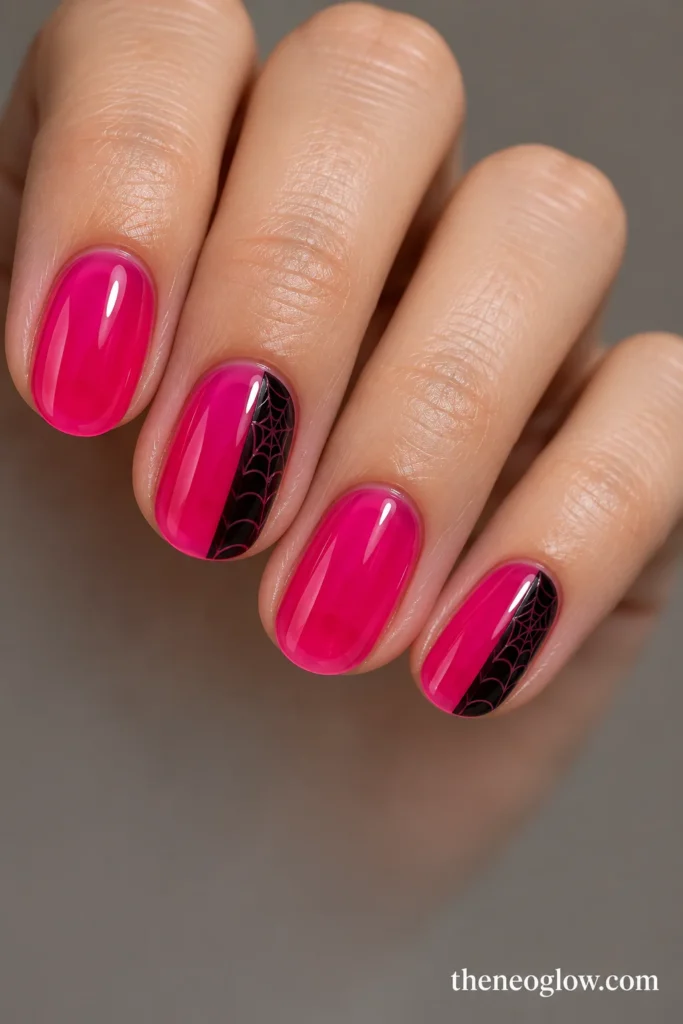
Instead of a corner spiderweb, reserve the outer third of two nails for a narrow black vertical panel. Draw the web lines inside that dark strip while the remaining two-thirds stay translucent hot pink. The panel makes the web feel architectural rather than delicate, and it separates this look from full-nail or corner-web designs.
4. Dusty Rose With a Cropped Black Cat Accent
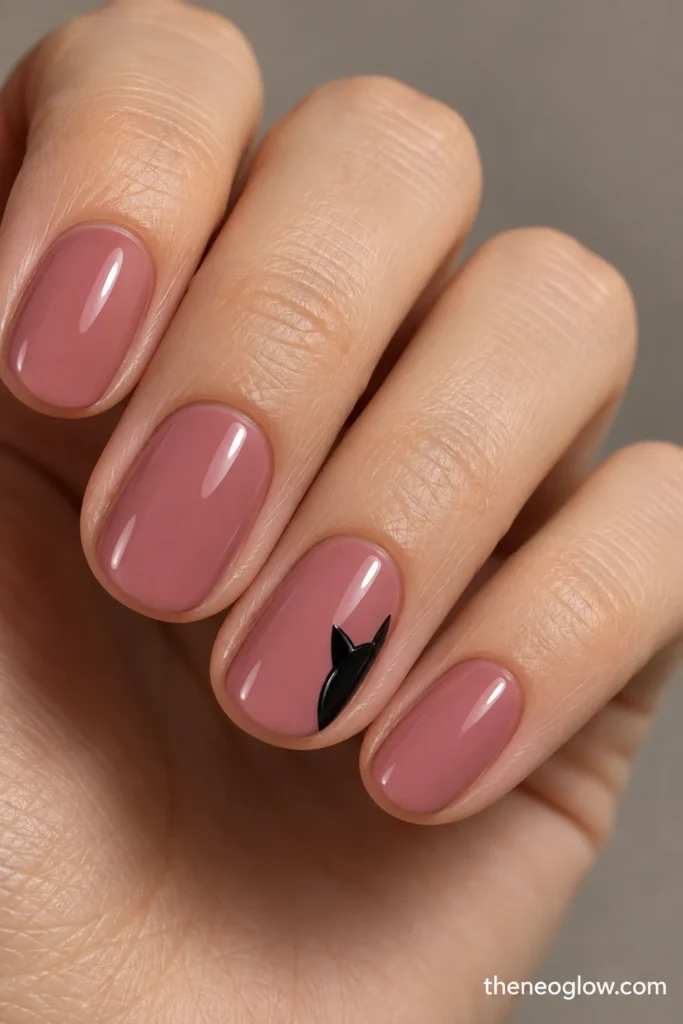
Use dusty rose cream on medium-short rounded nails. On one accent, let only the ears, forehead, and one curved cheek of a black cat enter from the sidewall. Cropping the silhouette keeps it graphic, while the solid rose nails stop the set from turning into a character gallery.
5. Mauve Jelly With Silver Moon and Black Stars
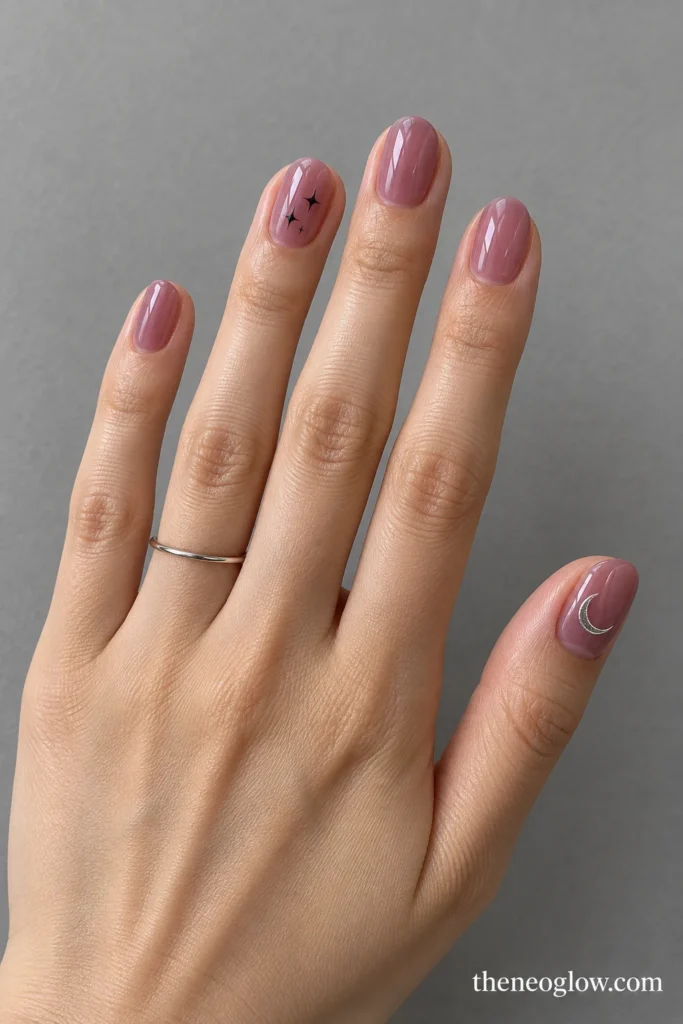
Layer a translucent mauve jelly over short ovals, then place one slim silver crescent on each thumb and two or three pinpoint black stars on one accent nail. Keep the celestial pieces separated rather than scattered across every finger. Mauve supplies the Halloween mood, while the metallic crescent catches just enough light for evening plans.
Graphic Pink-and-Black Halloween Nails
6. Hot Pink Cream With One Black Checker Accent
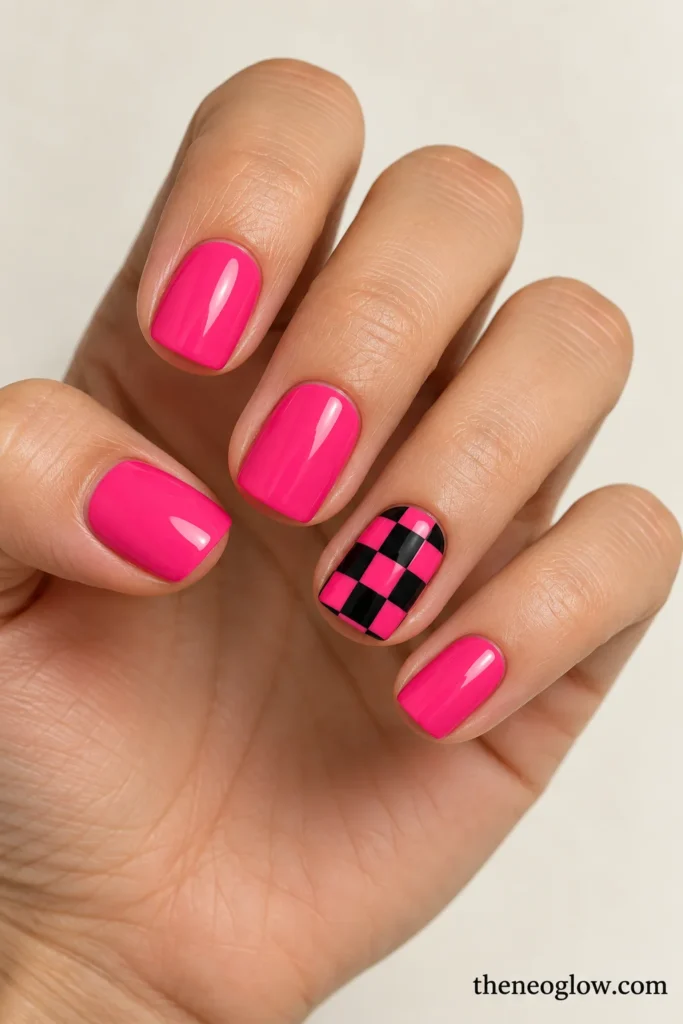
Paint nine nails in opaque hot pink cream and use one ring finger for a clean black-and-pink checker pattern. Keep the squares medium-sized and flat, with no pumpkins, ghosts, or glitter added on top. The single graphic accent is enough to make the manicure feel event-specific without losing the saturated pink field.
7. Fuchsia Aura With a Smoky Black Rim
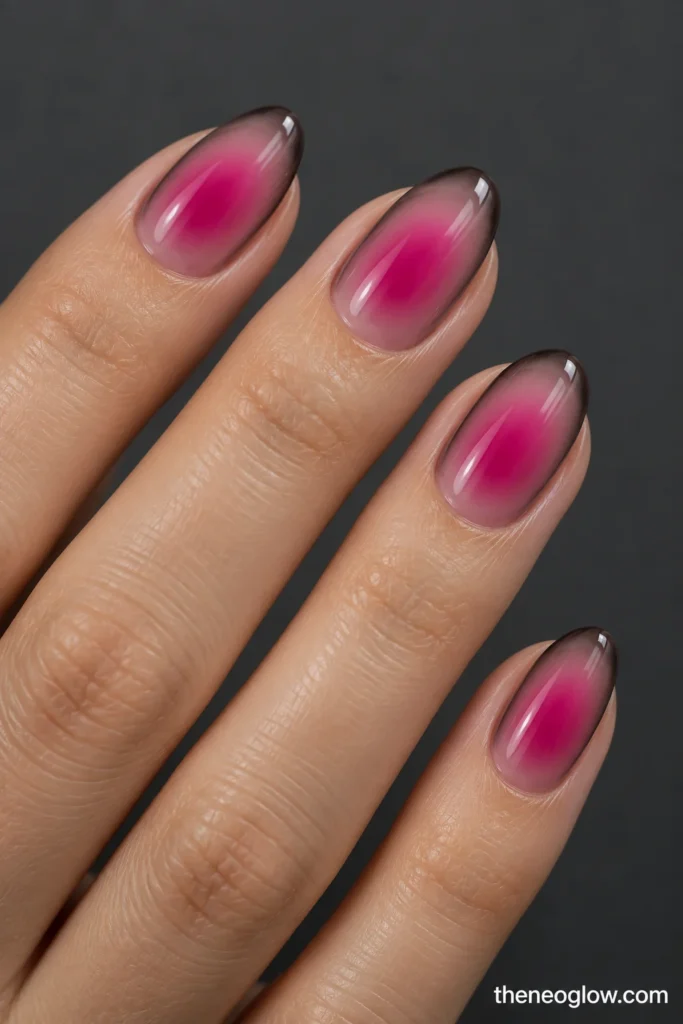
Start with a sheer pink base, diffuse fuchsia through the center, and deepen only the outer edge with translucent smoky black. The center should look bright and softly blurred while the dark rim stays thin and glassy. This is a motif-free option for readers who want Halloween atmosphere through color depth rather than literal art.
8. Hot Pink Velvet Magnetic Nails With a Black Micro Frame
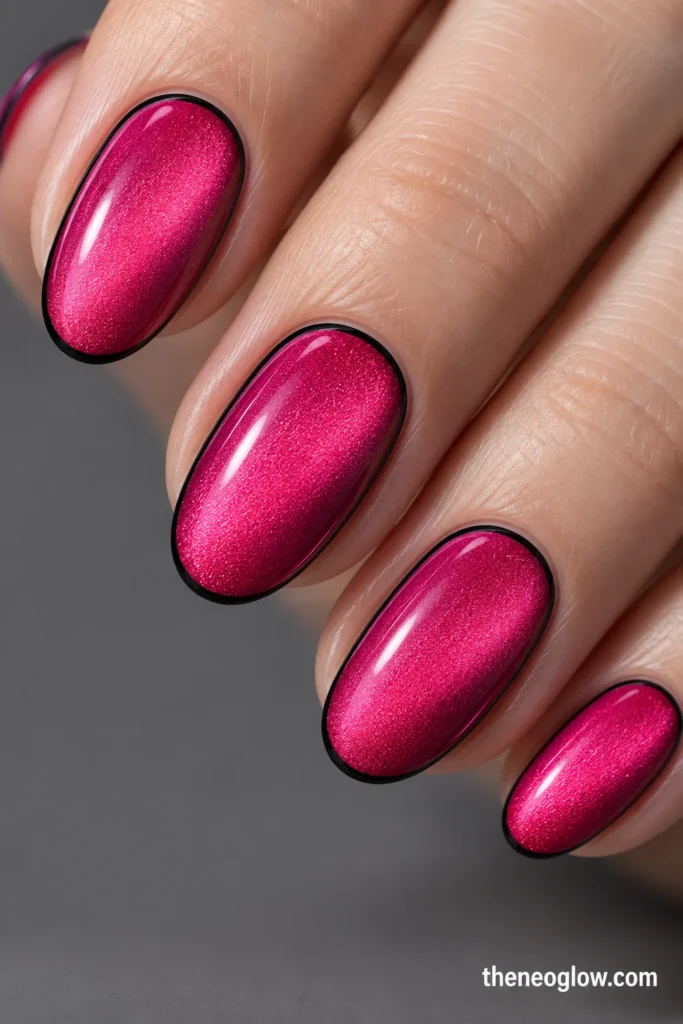
Use hot pink magnetic polish with a broad velvet reflection instead of a sharp cat-eye stripe. Add a hairline black frame just inside the edge of each nail, leaving the magnetic pink visible across the center. Medium oval nails give the reflective field enough room to move, while the fine border makes the finish feel darker and more deliberate.
9. Glossy Black With Fuchsia Drip Accent Pair
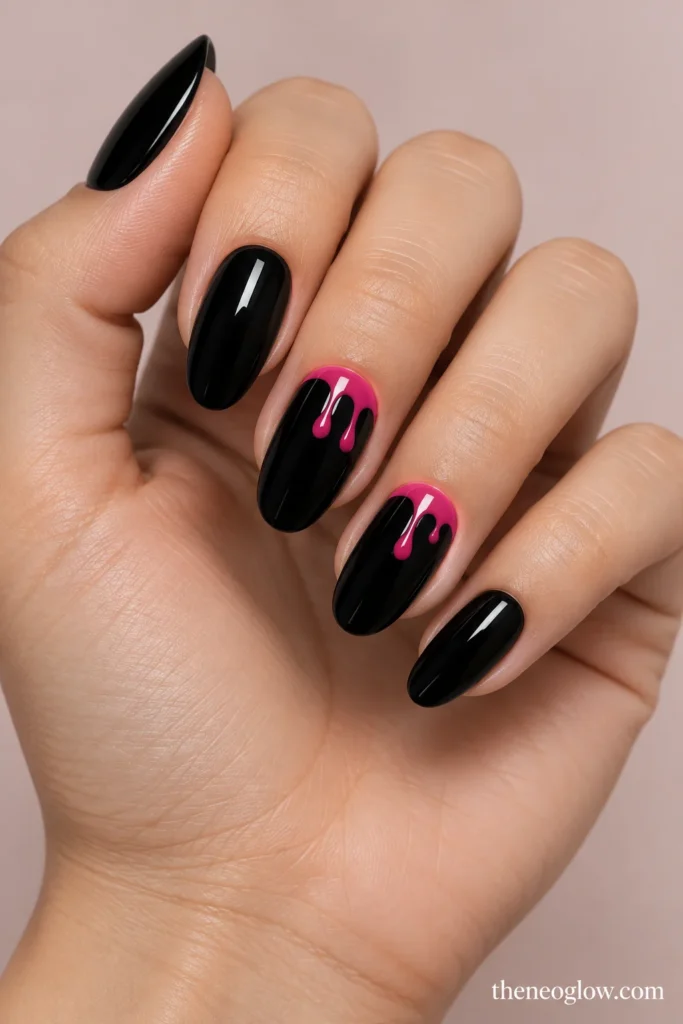
Keep most nails glossy black, then use two accent nails with a fuchsia band at the free edge and two rounded drips falling into the black. Limit the dripping effect to the accent pair so the pink remains a controlled focal color rather than a repeated cartoon effect.
10. Neon Pink With Black Eye Half-Moons
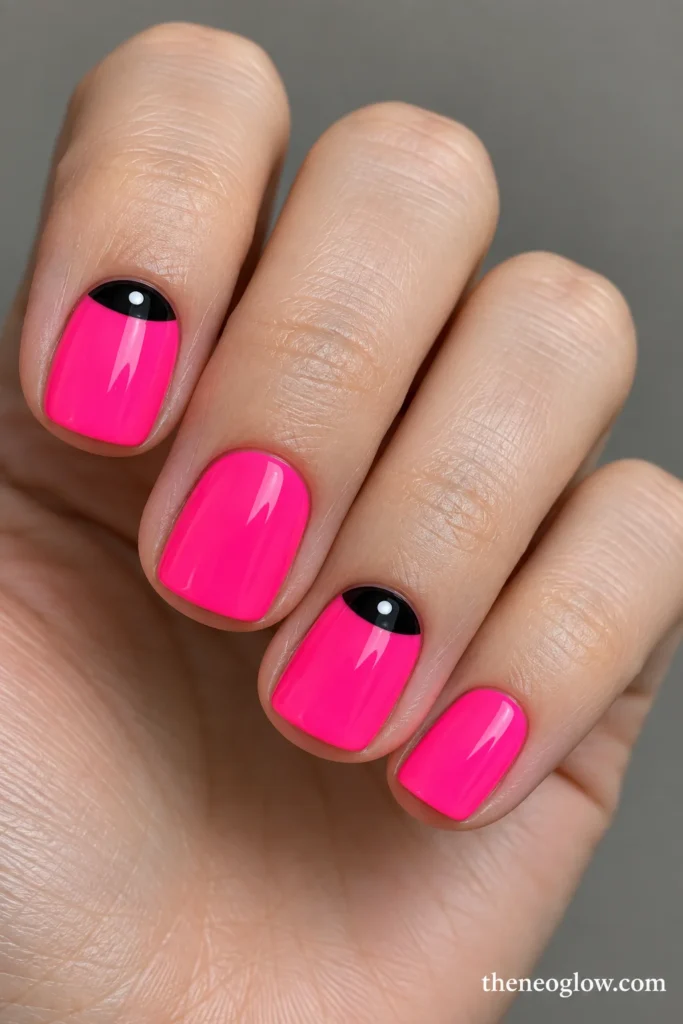
Paint short soft-square nails neon pink, then place one black half-moon shape at the cuticle of two accents. Add a tiny white dot inside each half-moon so it reads like a stylized eye when viewed close up. The design stays geometric at arm’s length and becomes more playful only when someone notices the detail.
French and Negative-Space Pink Halloween Nails
11. Blush Base With Split Black-and-Fuchsia Micro French
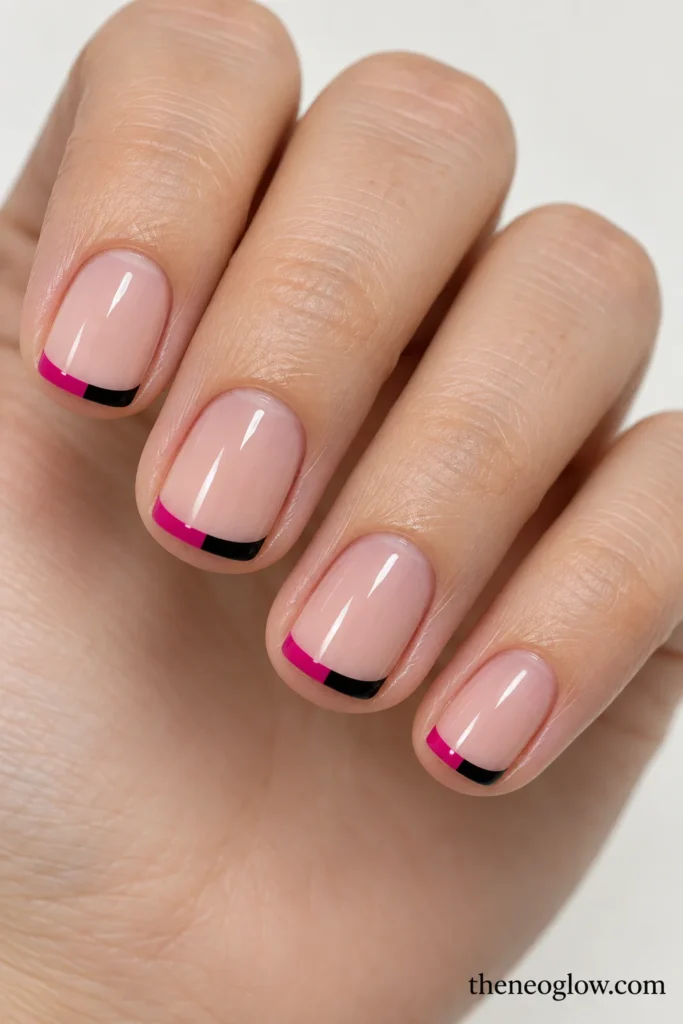
Use a translucent blush base and divide each micro French tip into two narrow sections: glossy black on the outer half and fuchsia on the inner half. Keep the tip shallow enough that the blush base still dominates. This gives you clear pink-and-black Halloween nails without copying a full motif into the edge.
For an at-home version, Essie’s French manicure tutorial shows the useful basic sequence: map the smile line with a fine detail brush, refine the curve, then complete the tip. If you want more spooky edge constructions rather than a color-led pink set, NeoGlow’s Halloween French Tip Nails guide owns that deeper route.
12. Mauve Nails With a Hot Pink Reverse Cuff
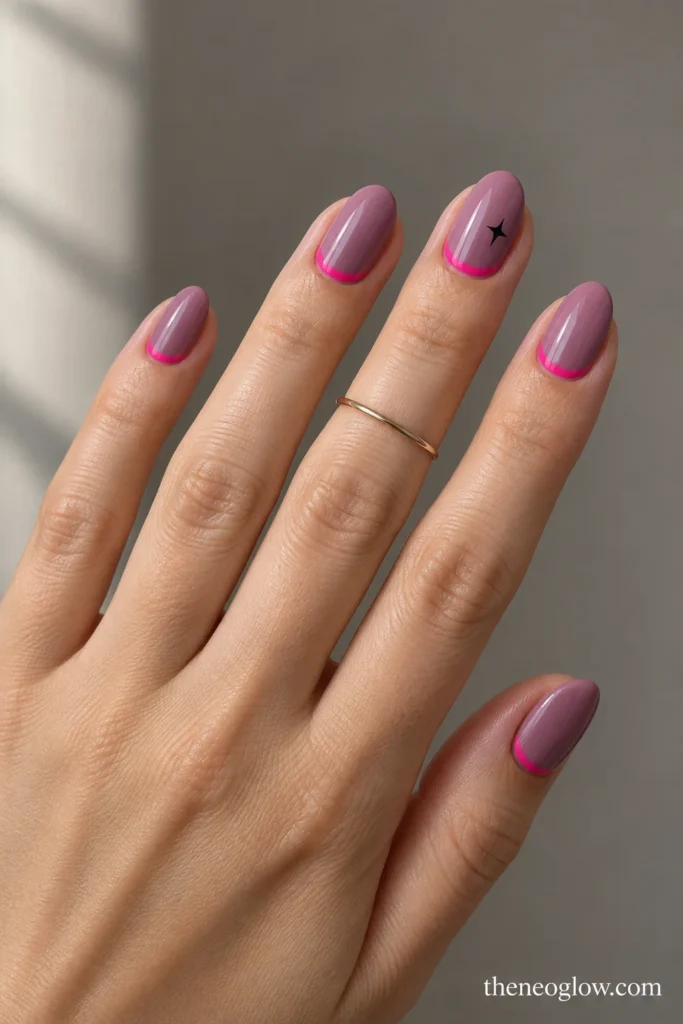
Cover medium-short almond nails in muted mauve and add a narrow hot pink curve just above the cuticle. Place one tiny black star off-center on each ring finger. The color boundary sits at the base instead of the free edge, so the set feels structured without becoming another conventional French-tip gallery.
13. Sheer Pink With Black Bat-Wing Windows
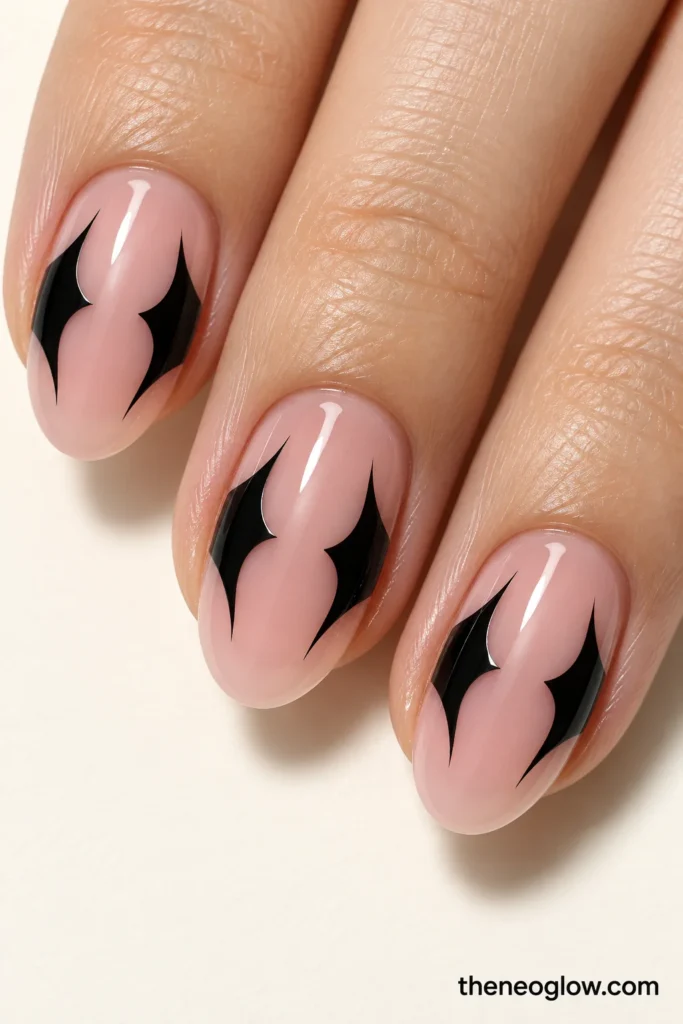
Use a sheer pink base and paint two black wing shapes from opposite sidewalls on selected nails, leaving a clear pink gap between them. The empty center is the main feature. Keep the wing points simple and symmetrical enough to read as intentional negative space rather than a full bat illustration.
14. Milky Pink With a Clear Diagonal Slash and Black Stitch Seam
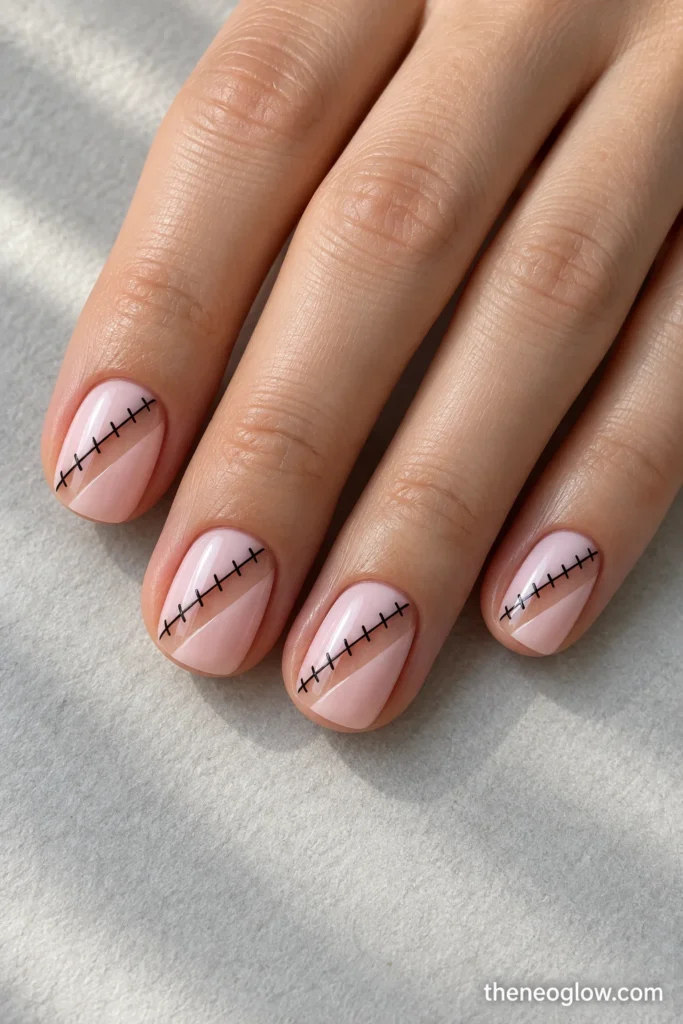
Paint milky pink across the nail but leave one clean diagonal strip transparent. Trace only one side of that clear strip with short black stitch marks. Short squoval nails make the geometry crisp; medium ovals soften it. The clear slash prevents the pink from feeling too solid while the seam supplies the Halloween reference.
Mauve and Statement Pink Halloween Nails
15. Dusty Mauve Chrome With One Matte Black Spider
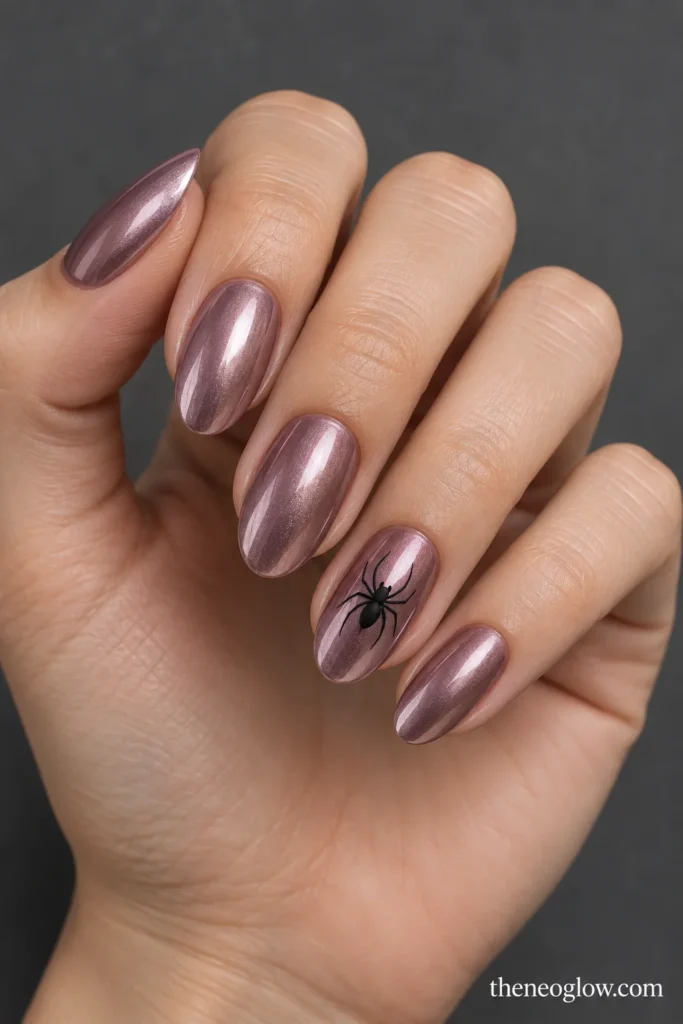
Use dusty mauve chrome on medium oval nails, keeping the reflection pearly rather than mirror-bright. On one accent per hand, place a small matte black spider slightly below center. The contrast between reflective mauve and flat black does the visual work, so skip webs and extra gems.
16. Hot Pink Jelly With Black Shattered-Foil Windows
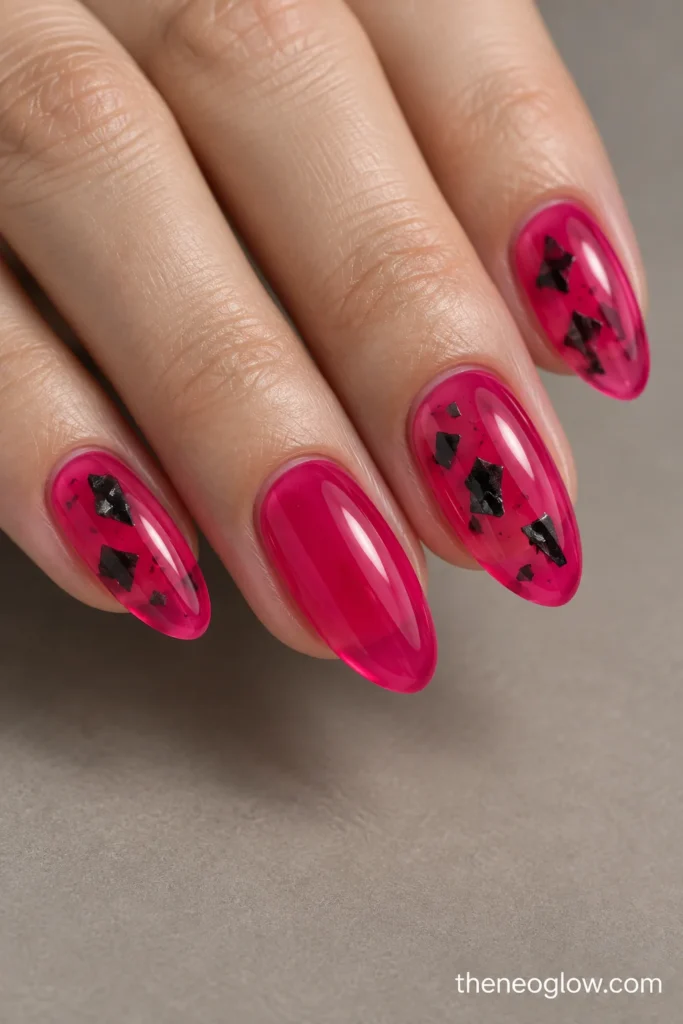
Layer hot pink jelly over medium almond nails, then float a few irregular black foil fragments inside two or three nails. Leave clear gaps between the pieces so the effect looks suspended rather than fully metallic. The broken dark shapes give the manicure a party-ready edge without turning it into a standard black manicure with pink accents.
17. Muted Rose With a Micro Skull Grid Accent
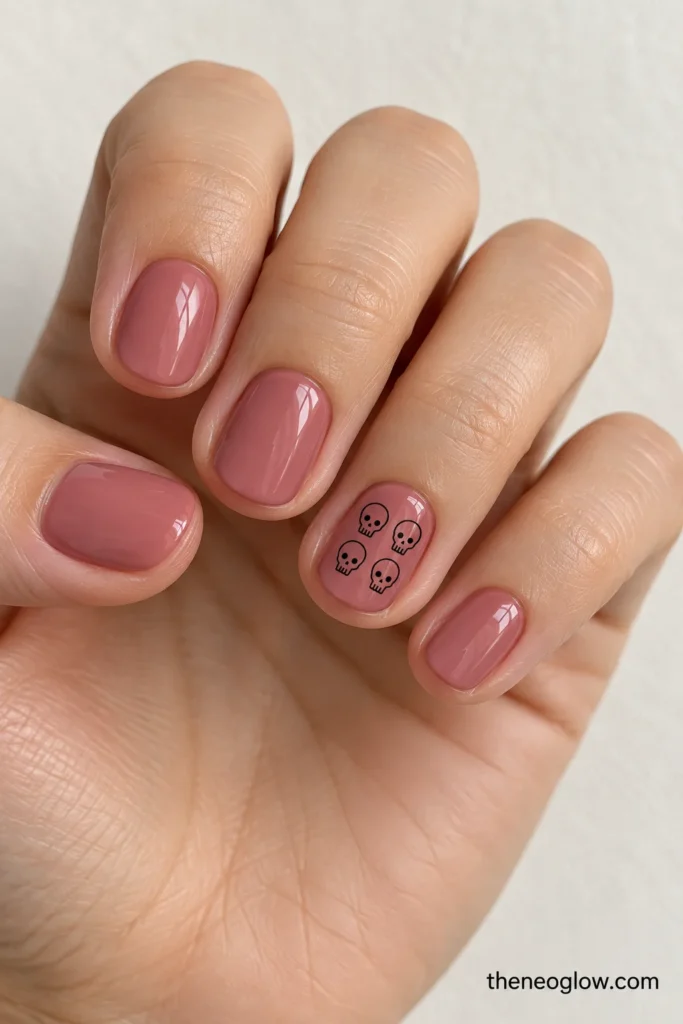
Paint short rounded nails muted rose and reserve one accent for a tiny two-by-two grid of black skull outlines. Keep each skull simplified to an oval, two eye marks, and a short jaw line. The repeated mini scale makes the idea graphic and controlled rather than novelty-heavy.
18. Black-to-Magenta Ombré With a Pink Chrome Thorn Line
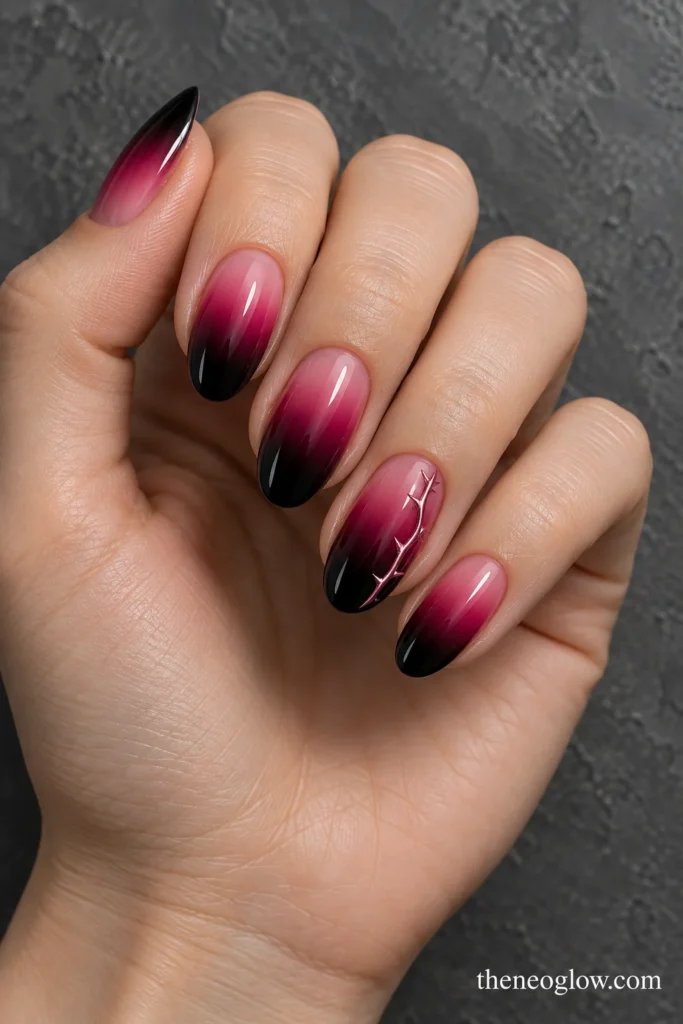
Blend glossy black from the free edge into deep magenta toward the center, then let the color fade into a softer pink near the cuticle. Add one slim pink-chrome thorn line along the side of a single accent nail. The gradient carries the dark-romantic Halloween mood, while the metallic thorn gives the set one sharp focal detail.
How to Keep Pink Halloween Nails From Looking Too Busy
Choose one thing to carry the Halloween message: a motif, a dark edge, a finish, or a graphic contrast. If the set already has a web, you do not also need ghosts, bats, drips, and chrome on the same hand.
Also decide whether pink or black should dominate. For a softer manicure, let blush, rose, or mauve cover most of the nail and confine black to fine details. For a stronger party look, use black as the background and let hot pink or fuchsia appear in concentrated accents.
If you want the same restrained mood without making pink the defining color, NeoGlow’s Classy Halloween Nails guide is the better next step.
Pick the Pink Route You Will Actually Wear
Choose blush if you want soft contrast, hot pink if you want graphic energy, mauve if you want a darker finish, or pink-and-black if you want the clearest Halloween signal. Then save the exact placement—not just the color. A tiny bat at the cuticle, a vertical web panel, a split micro French, or one chrome spider accent will give a nail artist or DIY attempt a much clearer target than “cute pink Halloween nails.”