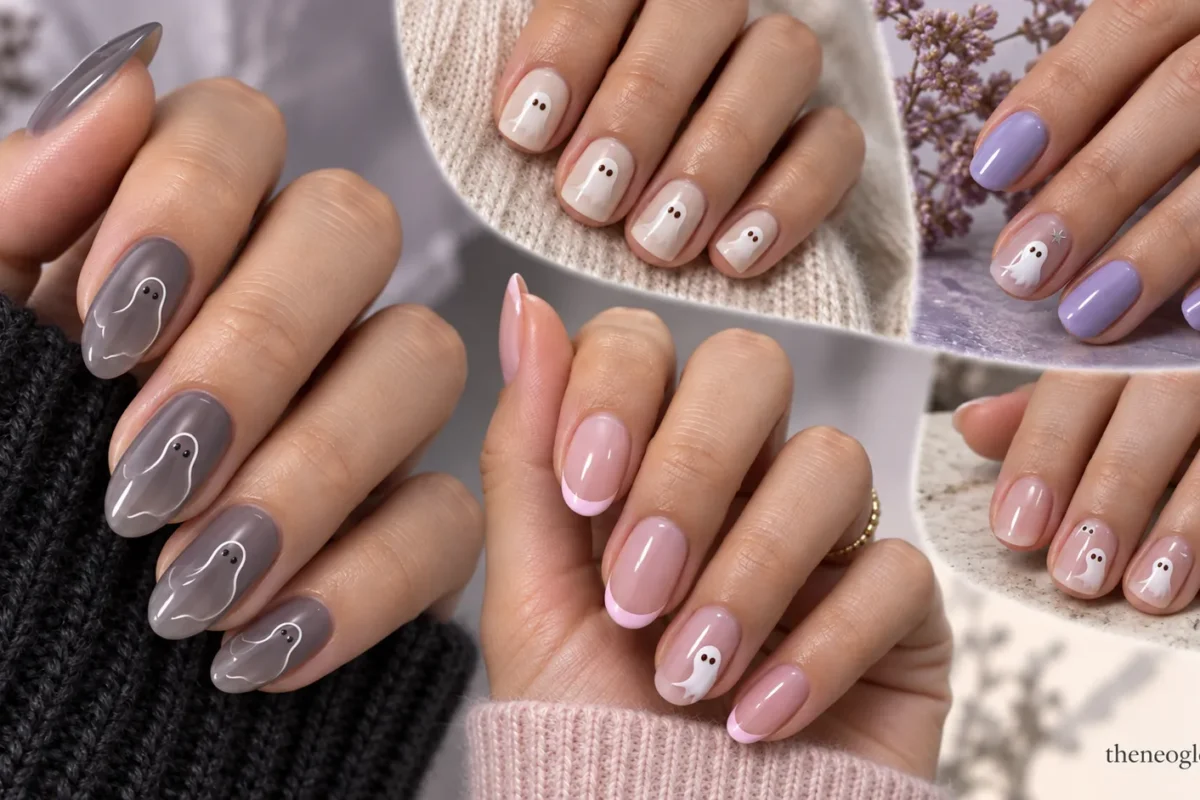
Cute ghost nails can feel playful without turning your manicure into a full haunted-house scene. The easiest way to keep the motif wearable is to control three things: the ghost’s scale, the base color, and how much empty nail you leave around the art.
This guide gives you 21 ghost-first ideas across classic black and white, blush and neutral palettes, celestial details, French-tip layouts, short nails, and press-ons. If you want a broader Halloween starting point before choosing one motif, compare the Halloween Nails 2026 guide, then come back here to pick the ghost palette and length that fit your plans.
Choose Your Ghost Nail Palette First
A ghost reads differently depending on what sits behind it. Milky white over black feels graphic; white over blush feels soft; cream over taupe feels understated; lavender and silver create a dreamy nighttime effect.
| If You Want | Base Palette | Ghost Treatment | Best Supporting Detail |
|---|---|---|---|
| Classic | Sheer nude, black, smoky gray | Opaque white | Tiny black eyes |
| Soft and cute | Blush, milky pink, peach-beige | White or cream | One micro bow or heart |
| Neutral | Taupe, cocoa, caramel, milky beige | Cream | Fine brown or black eyes |
| Celestial | Lavender, blue-gray, midnight navy | White or pale gray | One moon or star |
| Graphic | Clear or sheer pink | White and black | French edge or outline |
| Quick-change | Sheer press-on base | Printed or decal ghost | Minimal accent art |
Keep supporting motifs secondary. If stars, bows, moons, bats, or pumpkins become more noticeable than the ghost, the manicure has drifted away from the page’s main idea.
Classic White and Black Ghost Nails
1. Milky White Peekaboo Ghosts
Start with a translucent nude or soft-pink base and let one small white ghost peek in from the sidewall on two or three nails. Two tiny black eyes are enough to make the shape readable. Keep the remaining nails glossy and mostly bare so the ghost feels intentional instead of crowded.
2. Black Nails With White Floating Ghosts
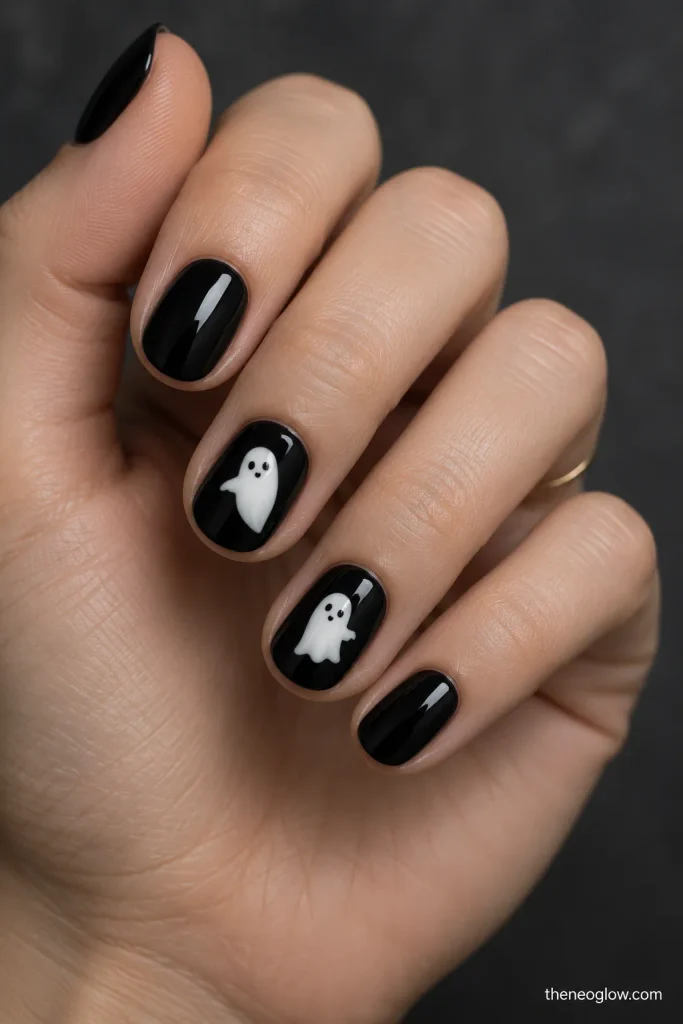
Use glossy black on short oval or squoval nails, then place one compact white ghost near the center of each accent nail. Vary the arm direction slightly rather than changing the whole character. The high contrast makes even a very simple silhouette visible from a distance.
3. White Ghost Outlines on Smoky Gray
Paint a translucent smoky-gray base and draw narrow white ghost outlines instead of filling the shapes. Leave the faces minimal with two dot eyes. This version feels lighter than opaque white art and works especially well when you want a Halloween manicure that still looks polished with neutral outfits.
4. Matte Black With Glossy Ghost Faces
Cover the nails in matte black, then use clear gloss to create soft ghost-shaped silhouettes that appear when the light moves. Add only two tiny glossy eyes inside each shape. The tone-on-tone finish keeps the set ghost-led without relying on bright white polish.
Pink and Neutral Ghost Nail Ideas
5. Blush Pink Ghosts With Tiny Cheeks
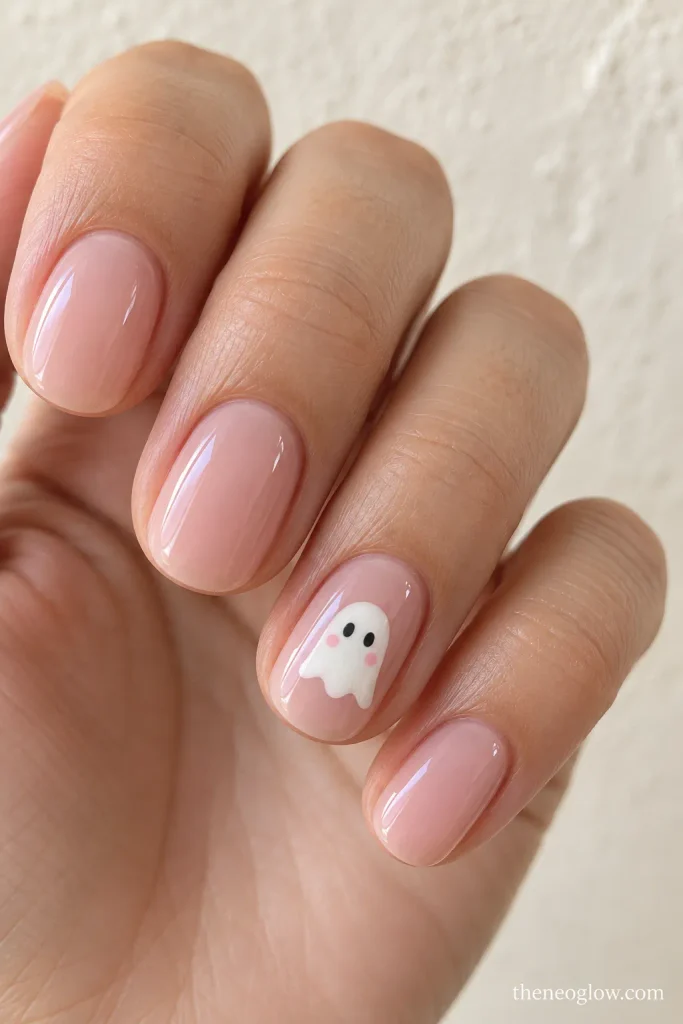
Choose a sheer blush base and paint one small white ghost on each ring finger. Add two black eyes and a pinprick of muted pink on each cheek. The face stays cute because the expression is controlled; skip a large mouth or extra cartoon details that would make the motif feel busy.
6. Milky Beige Ghosts With Cocoa Eyes
Use a milky beige base and cream-colored ghosts with tiny cocoa-brown eyes instead of black. The softer contrast gives the manicure a warm neutral look while keeping the character unmistakable. Short squoval nails suit this version because the compact shapes leave enough open space around each ghost.
7. Dusty Rose Ghost Accent Pair
Paint most nails dusty rose and reserve two sheer accents for narrow white ghosts rising from the free edge. Keep the figures slightly cropped so they look like they are entering the frame. One tiny rose-colored heart can sit beside a ghost, but the character should remain the largest detail.
8. Soft Taupe Ghosts With Micro Bows
Start with translucent taupe and paint simple cream ghosts on two accent nails. Add one miniature black or muted-burgundy bow above a single ghost, not every figure. The restrained accessory gives the set a sweet editorial touch without turning the manicure into a bow theme.
Celestial Ghost Nails
9. Lavender Ghosts With Silver Stars
Use soft lavender solids beside one or two sheer accents carrying small white ghosts. Place a single silver star near one sidewall and leave the rest of the nail clear. The cool palette makes the ghosts feel dreamy rather than cartoonish, especially on oval or softly rounded nails.
10. Midnight Blue Moon-and-Ghost Nails
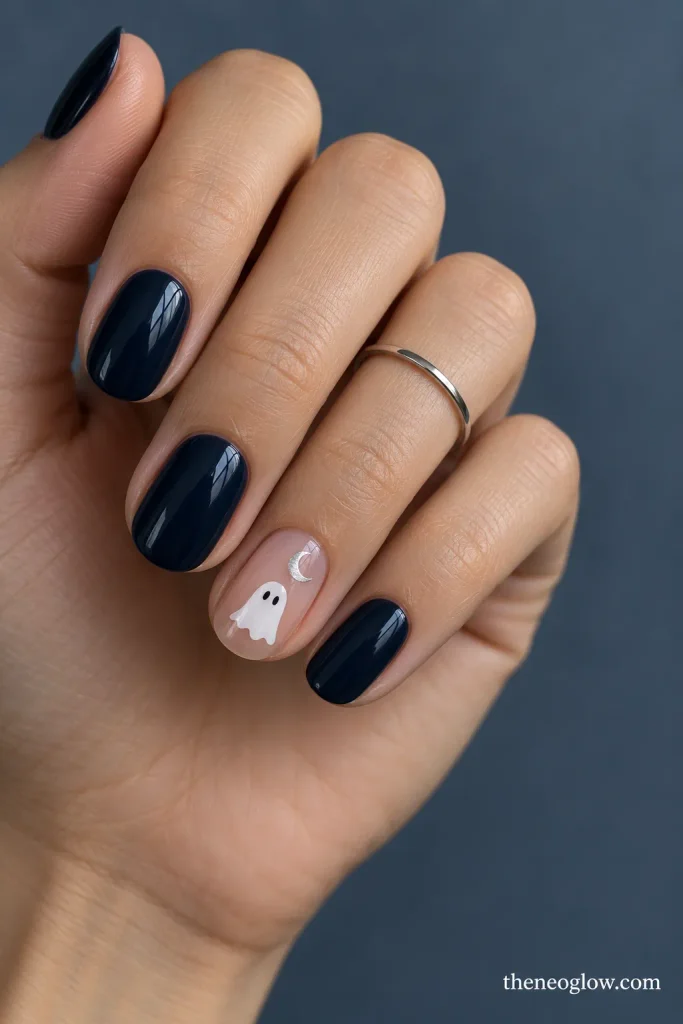
Paint deep navy or blue-black nails and use one translucent accent with a white ghost beneath a slim silver crescent. Keep the moon small and high on the nail so the ghost stays visually dominant. This is a stronger night-sky option for readers who want cute without using pink.
11. Milky Gray Ghost Constellations
On a milky gray base, paint two tiny white ghosts on one or two nails and connect a few pinpoint silver stars with hairline dots. Do not turn the entire nail into a constellation map. The open background keeps the tiny figures readable and makes the celestial detail feel like atmosphere rather than a second theme.
Ghost French Tip Nails
12. White Ghost French Tips
Replace a regular French edge with a wavy white tip that rises into one rounded ghost on each accent nail. Add two tiny eyes near the highest point and keep the base sheer. The design reads as a French manicure first from far away, then reveals the ghost shape up close.
13. Black French Tips With Ghost Cutouts
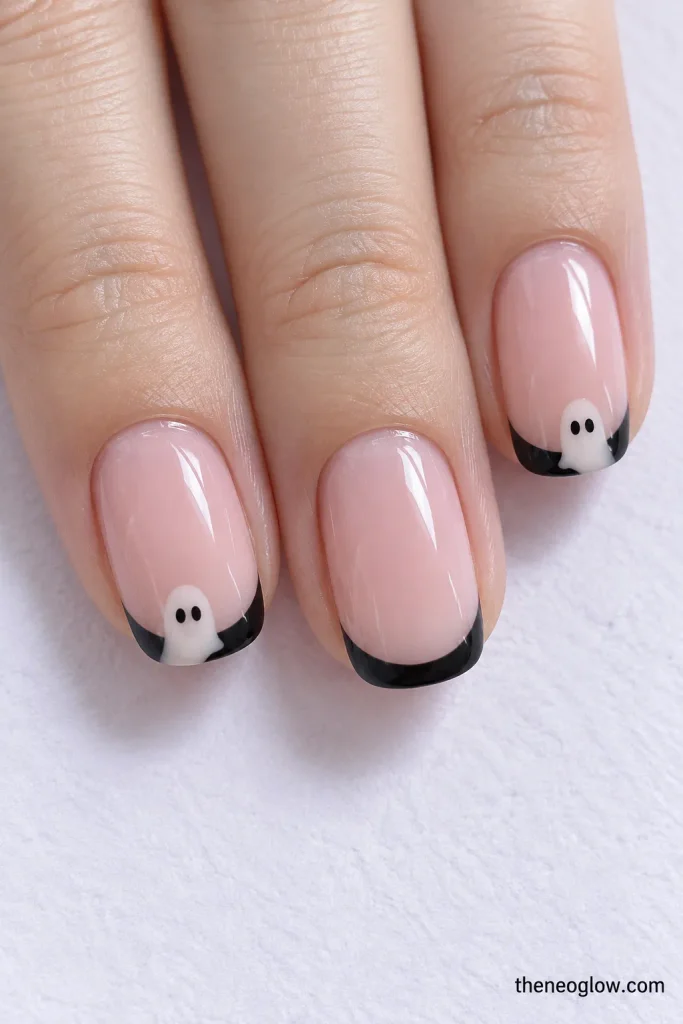
Paint narrow black French tips over a translucent pink base, then leave one rounded white or clear ghost-shaped break inside the tip on two nails. The negative-space character keeps the free edge graphic while preserving the ghost-first idea. A glossy finish helps the cutout look crisp.
14. Pink French Tips With Mini Side Ghosts
Use soft pink micro French tips and place one miniature white ghost just below the tip near a sidewall. Keep the ghost smaller than the pink edge but give it enough contrast to remain the focal motif. This works well when you want a cute Halloween detail without replacing the entire French structure.
Cute Ghost Nails for Short Nails
15. Side-Peek Ghosts on Short Squovals
Very short nails do not need a full-body ghost. Paint only the curved head and one little arm entering from the side edge, then add two eyes. A sheer pink or milky nude base gives the cropped shape breathing room and prevents the design from feeling compressed.
16. Micro Ghost Dots on Short Rounds
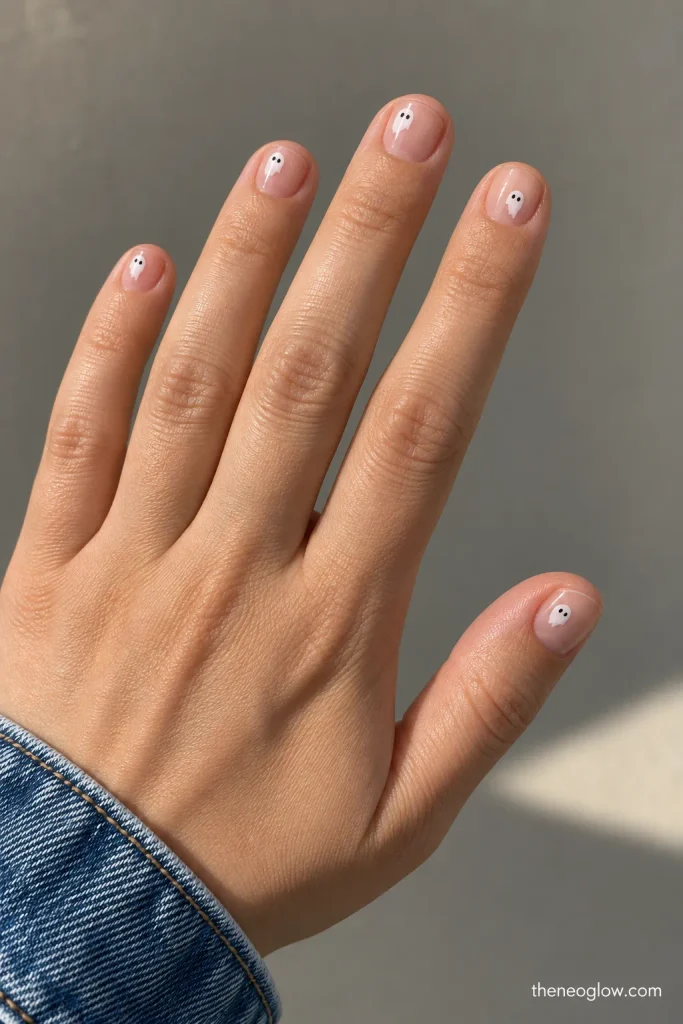
Use a dotting tool to build tiny white ghost heads near the cuticle, then pull a short tail with a fine brush. Keep one ghost per nail and vary placement slightly. Because the design uses very little vertical space, it suits genuinely short round nails without shrinking a complicated illustration.
17. One-Ghost Accent With White Micro Tips
Paint hairline white tips across short squoval nails, then add one compact ghost to each ring finger. This is a practical route when you like the Halloween motif but do not want character art on all ten nails. The repeated micro tips tie the set together without competing with the accent.
18. Cropped Ghost Pair on Milky Pink
On two short oval accents, place a pair of tiny white ghost heads close together near one sidewall, each with two dot eyes. Keep the other nails milky pink and glossy. The paired composition adds personality while remaining simpler than a full mixed-motif Halloween set.
For home-painted versions, finish your normal shaping, base coat, color, and drying steps before adding tiny details. NeoGlow’s at-home manicure routine explains the full regular-polish sequence so this page can stay focused on the ghost design itself.
Ghost Press-On Nail Ideas
19. Sheer Blush Ghost Press-Ons
Choose short or medium press-ons with a sheer blush base and one printed white ghost on two or three tips. Keep the rest as glossy blush or narrow white tips. The limited motif count makes the set easier to wear after a costume party and avoids the look of a repeated sticker sheet.
20. Black-and-White Ghost Press-On Mix
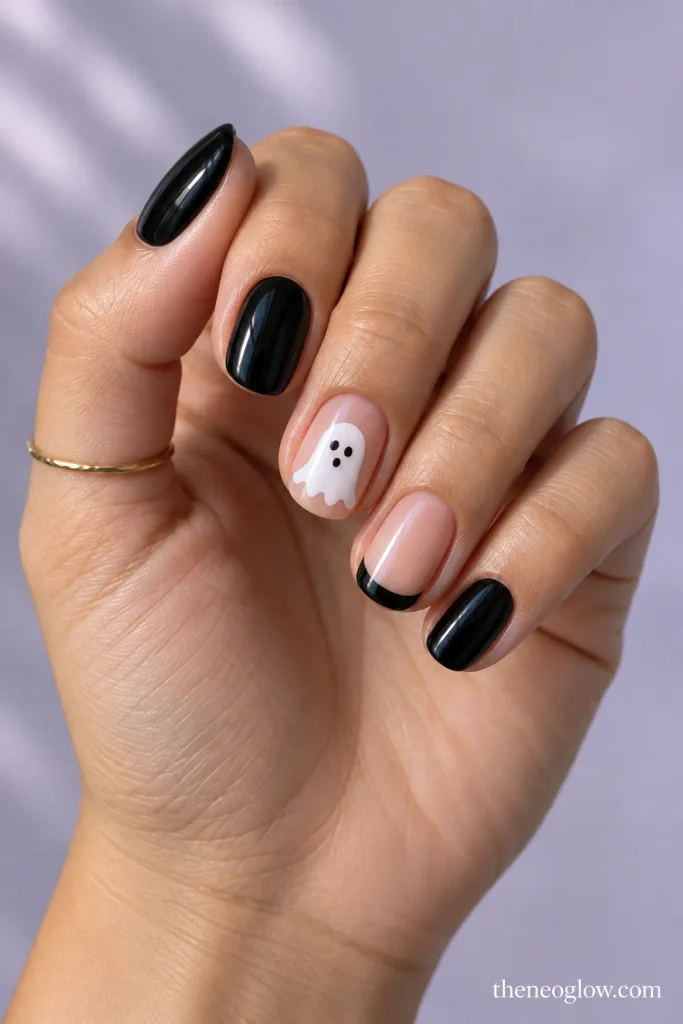
Use a coordinated set with glossy black solids, sheer nails with white ghosts, and one black micro French accent. Every decorative nail should still feature a ghost or support one nearby. Dry-fit all ten tips before adhesive so the printed design does not tempt you to accept a poor fit.
21. Lavender Celestial Ghost Press-Ons
Pick a lavender or blue-gray press-on set with tiny white ghosts and only a few silver stars or crescents. Choose a consistent ghost scale across the hand so the set looks designed rather than random. This is the quickest route to a detailed celestial manicure when you do not want to hand-paint tiny characters.
If you use press-ons, check the fit and application method before thinking about the artwork. NeoGlow’s press-on application guide walks through sidewall coverage, placement, adhesive-specific directions, and removal principles.
The FDA also advises following nail-product labels and warnings and using nail products with good ventilation; its nail-care product guidance is a useful deeper reference if you are using polish, adhesive, remover, or another nail cosmetic at home.
How to Keep Ghost Nail Art Cute Instead of Busy
Choose one expression style and repeat it. Two dot eyes, a tiny curved arm, or a single blush cheek is enough; large mouths, multiple faces, and several accessories can quickly change the tone.
Scale the ghost to the available nail space. Short nails usually look cleaner with side peeks, cropped heads, or one compact figure. Medium and longer nails can handle a full ghost body, French-tip transformation, or a little more negative space around the character.
Finally, repeat one visual rule across the set: the same base color, the same ghost size, the same eye style, or the same finish. That repetition is what makes a playful motif look like a deliberate manicure.
Choose the Ghost Set You Will Actually Wear
Start with the palette you already enjoy wearing. Pick black and white for contrast, blush or beige for a softer look, lavender for a dreamy version, French tips for a structured manicure, short-nail peeks for minimal space, or press-ons for a quick change.
Save one reference that clearly shows the ghost size, base opacity, and accent placement you want. The best cute ghost nails are not the busiest ones; they are the ones where the ghost is instantly recognizable and everything else supports it.