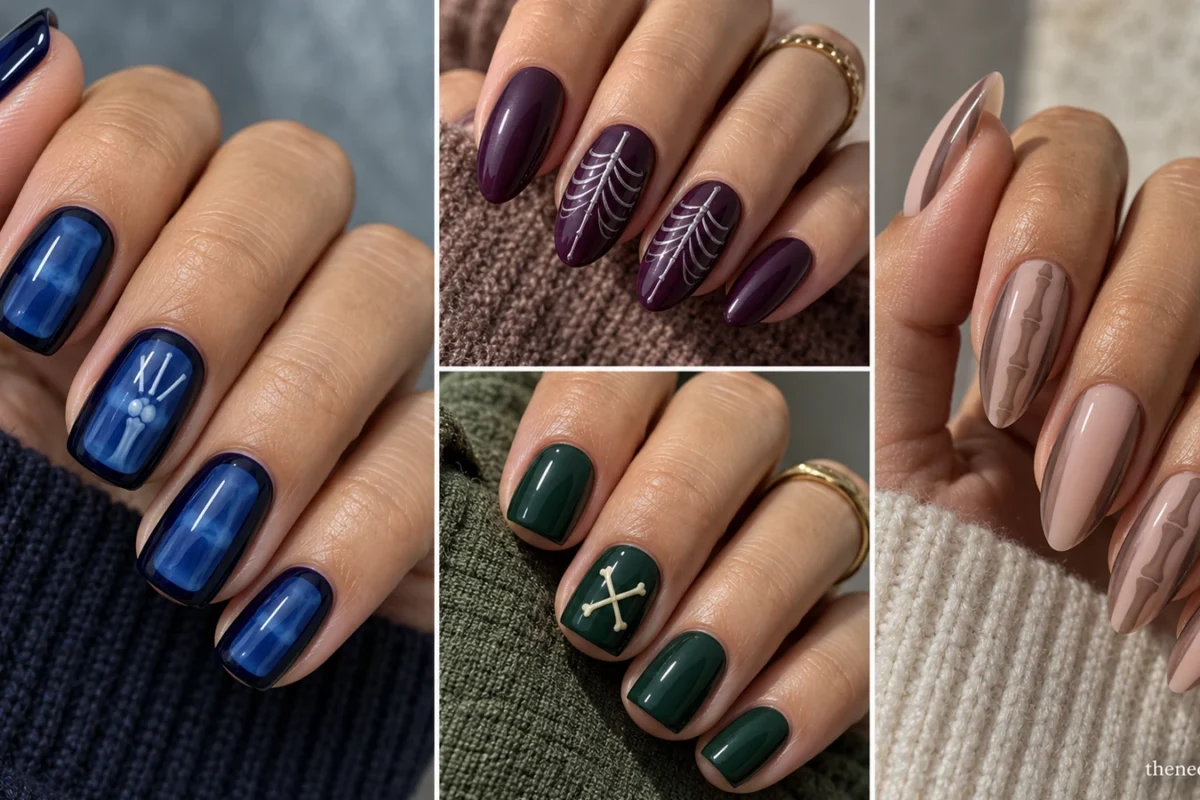
Skeleton nails work best when the bone shapes stay recognizable at a glance. That might mean two tiny crossed bones on short squares, a full skeletal-hand illustration on one accent, or a blue-tinted panel that suggests an X-ray without trying to reproduce a medical image. The difference is often scale: a narrow nail cannot hold the same number of joints and lines as a medium almond.
These 16 designs keep bones—not skulls, spiders, or an exaggerated nail shape—at the center. Use the quick comparison below to choose the artwork, then match its contrast, finish, and placement to the length you actually want. For other motifs, start with NeoGlow’s Halloween nail ideas for 2026.
Choose Your Skeleton Nail Style First
| Your priority | Best motif approach | Start with |
|---|---|---|
| A subtle Halloween detail | One or two small bones with open space | Ideas 5, 6, 11 |
| Clear bone anatomy-inspired graphics | Segmented finger lines or a rib fan | Ideas 2, 7, 10 |
| A statement accent | A handprint-like skeleton or full figure | Ideas 4, 8 |
| A translucent or reflective finish | X-ray tint, pearl, or metallic outlines | Ideas 3, 10, 12 |
| Short nails without crowded artwork | Crossed micro bones or offset marks | Ideas 1, 11, 14 |
For a bone icon, a rounded bar with slightly wider ends usually reads more clearly than a straight stripe. For a skeletal finger, leave small gaps at the joints. For rib-inspired art, use a central stem with curved paired marks; it should feel illustrative rather than anatomically exact. High contrast helps tiny details; lower-contrast shadows work better when the bone outline is large.
Bone Tracks, Finger Lines, and X-Ray Details
1. Offset Bone Tracks on Black Squares
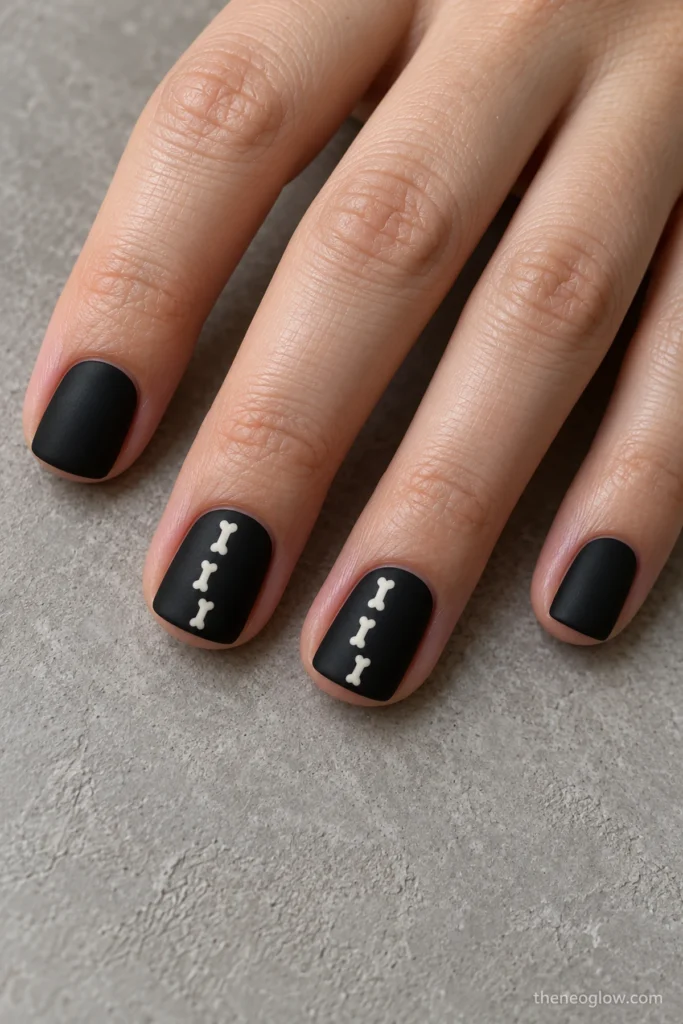
Paint short square nails opaque black with a soft matte finish. On the middle and ring fingers, place three small ivory bone segments in a staggered vertical track slightly left of center. Each segment has two rounded ends and a gap before the next, so the composition resembles separated bones rather than a solid stripe.
Keep the perimeter unpainted. Unlike a border made of scattered dashes, this design has a distinct central track and enough empty black around each bone to register on a compact nail.
2. Ivory Finger-Bone Fans
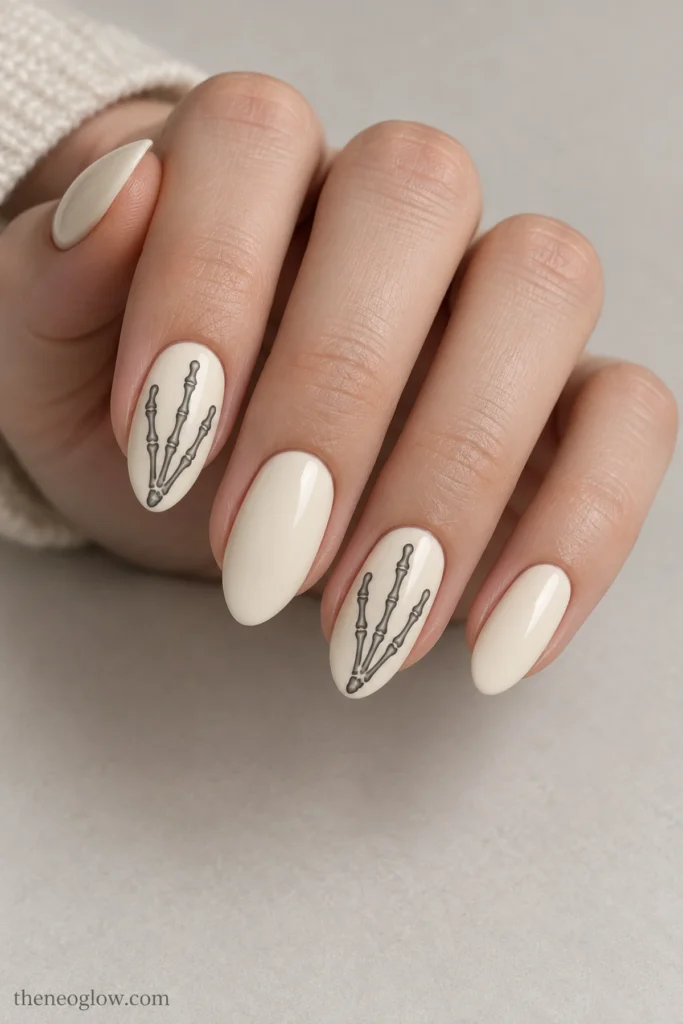
Medium almond nails give this illustration room to open outward. Use a soft-gloss, opaque warm-ivory base and thin charcoal strokes that split into three simplified finger-bone paths from the lower third toward the tip. Put the detailed fan on the index and ring fingers; leave the remaining nails ivory.
Keep the line ends softly rounded and the joints visibly separated. This is a stylized skeletal-hand fragment, not a technical anatomy drawing.
3. Blue-Smoke X-Ray Windows
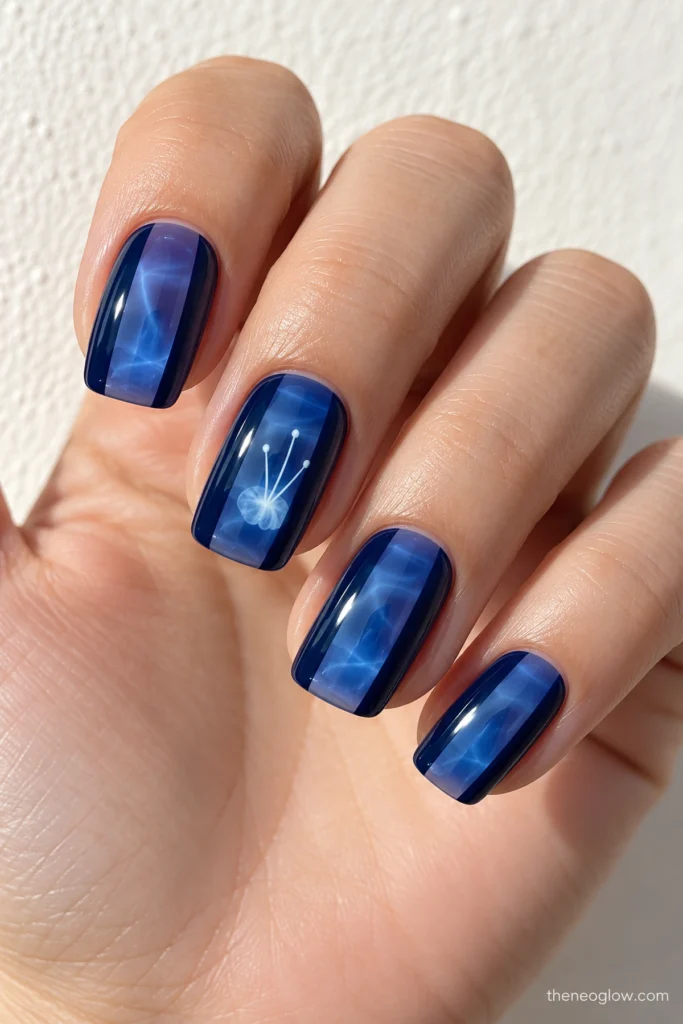
Build a cool, radiographic effect with medium squoval nails, deep-navy side frames, and a glass-gloss, translucent cobalt-blue center window. Under the blue tint, three narrow white rays fan upward from a small pale joint cluster on each middle nail. The other fingers carry navy frames and unillustrated blue windows.
The fan-shaped lines and defined blue panel distinguish this from two floating bone bars on a gray acrylic base. Ask for a clear-looking glaze, not a fully opaque blue that hides the art.
4. White Skeletal Palm on Charcoal
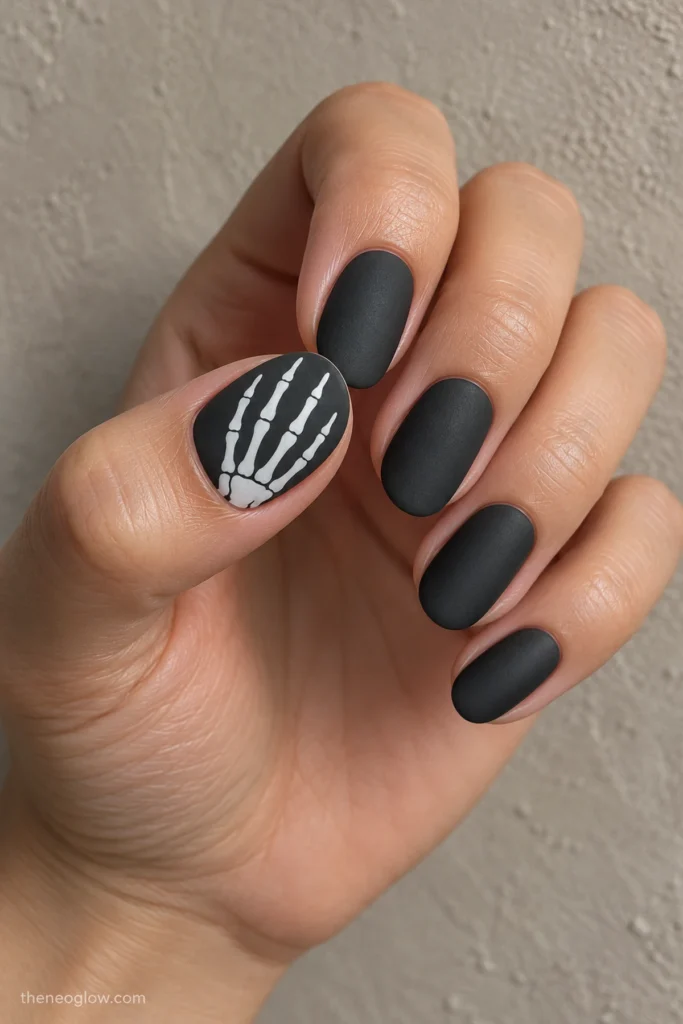
Make the thumb the focal canvas. Over matte charcoal on a medium oval nail, paint a simplified white palm arch with four separated finger branches reaching toward the free edge. Keep the wrist cropped at the lower edge and let the other nails remain charcoal with no illustration.
A single broad palm graphic has a different visual rhythm from a small pink skeleton on white. It is also easier to explain at an appointment: one full skeletal-hand accent, not a hand motif repeated ten times.
Soft Bone Icons, Rib Arcs, and Full Figures
5. Mauve Bone Pairs on Milky Beige
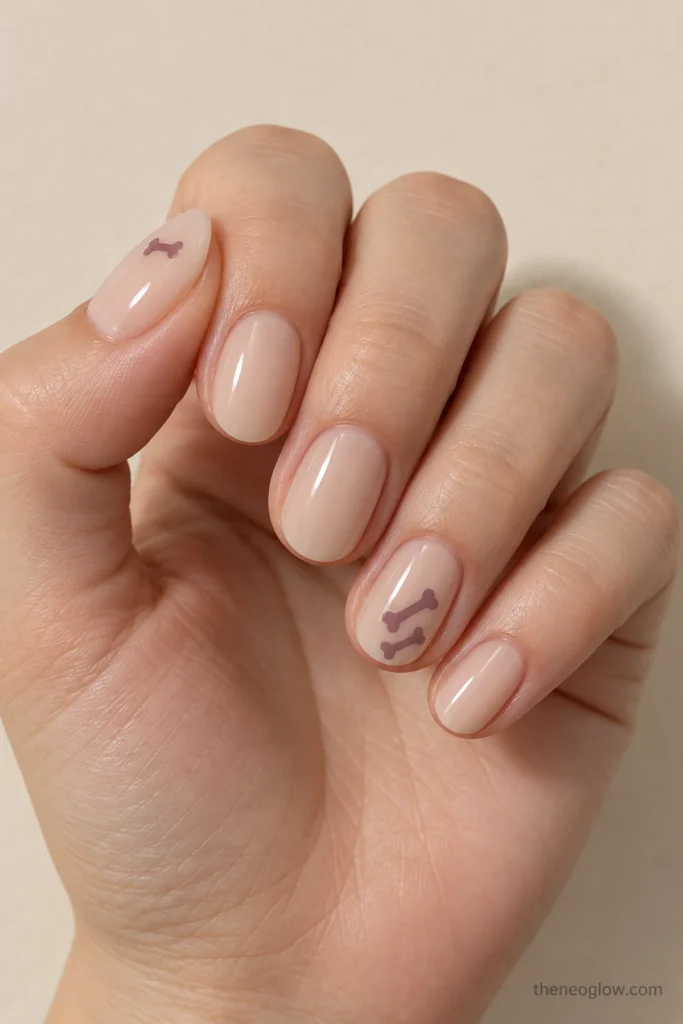
For a quieter palette, choose short oval nails in glossy translucent milky beige. Place two dusty-mauve bone icons diagonally across the lower half of each ring fingernail, leaving the upper half almost bare. A second, smaller mauve bone can sit near the tip of the thumb.
This design uses separate, solid icons instead of fine finger anatomy. Adjust the milky base from cool pink-beige to warm caramel-beige to suit the contrast you prefer against your own skin.
6. Bone-Notched French Tips
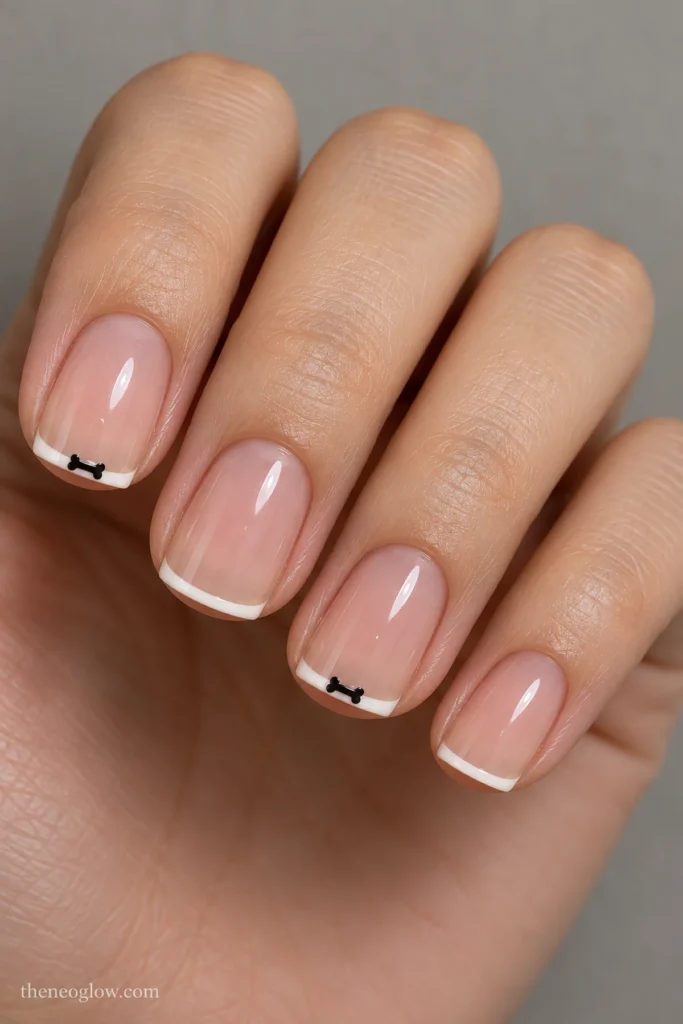
On medium soft-square nails, paint an unusually thin cream French edge over a sheer glossy neutral-pink base. Interrupt that edge on the index and ring nails with one miniature black bone sitting horizontally across a small central notch. Leave the other tips uninterrupted.
The bone should look like a tiny icon inserted into the French line, not like a row of evenly spaced stripes. If the nail plate is narrow, reserve the interruption for one accent.
7. Silver Rib Fans on Plum Ovals
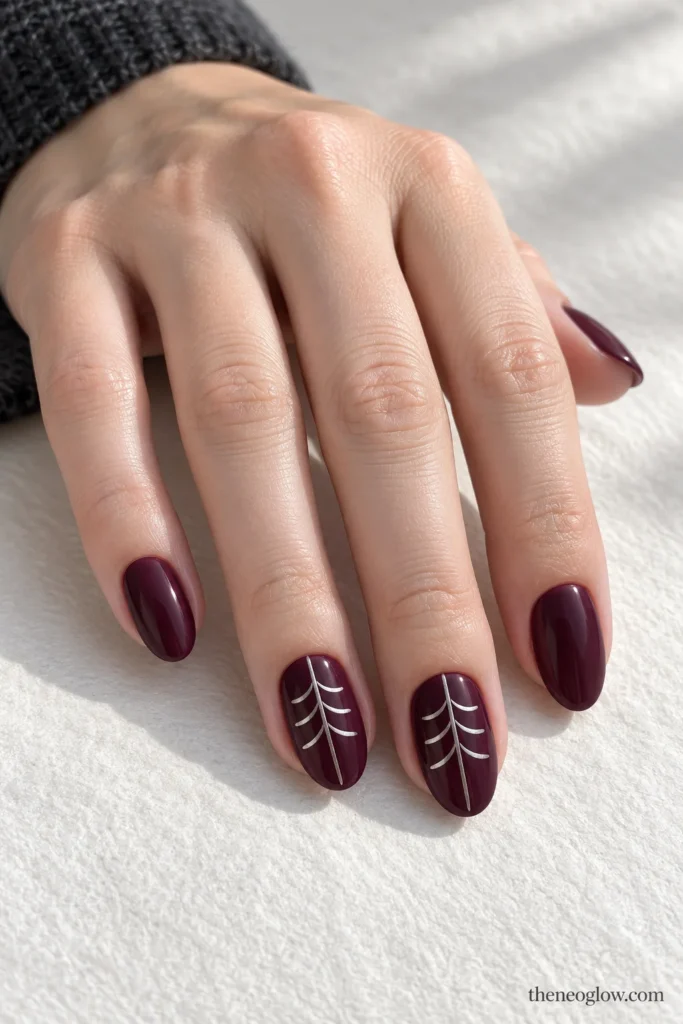
Deep-plum satin polish provides a dark ground for a compact silver ribcage reference. On the two middle nails, draw a short vertical silver stem and four curved paired ribs branching outward toward the sides. Stop the outer ends well before the sidewalls.
This is a rib-shaped fan, not a literal torso illustration. Keep the silver flat and fine rather than building raised metal details that would distract from the curves.
8. White Skeleton Figure on Black Jelly
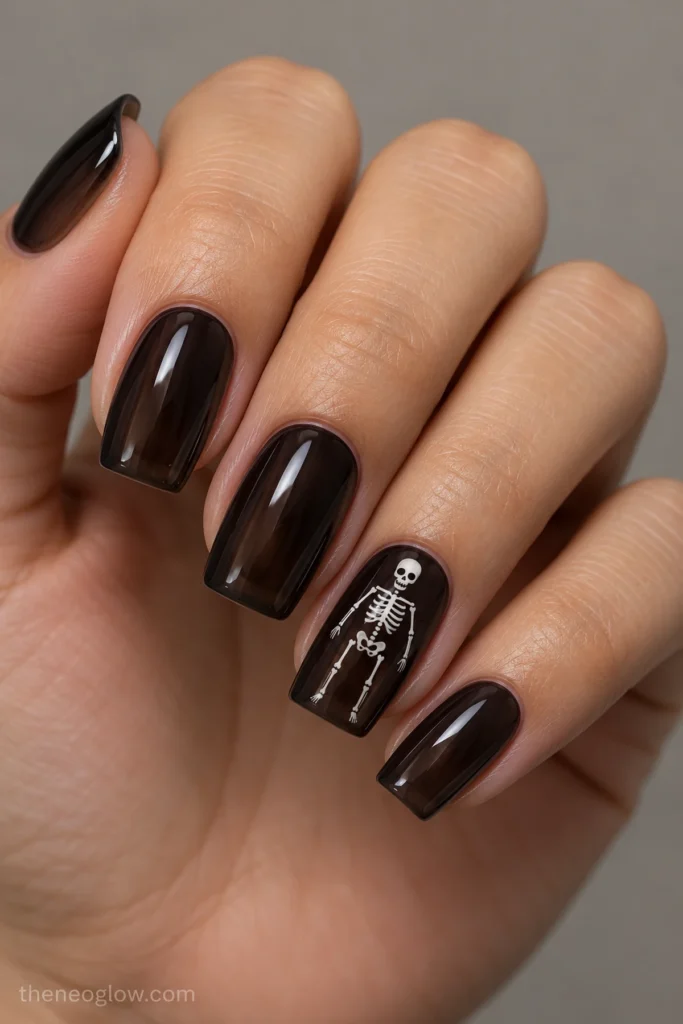
A medium tapered-square accent nail can carry one complete, playful skeleton figure. Use black jelly polish, then paint a white rib oval, short connecting spine, two angled arms, and two separated leg lines on the ring nail. Add only a tiny rounded head so the body—not a large skull—remains the point.
The surrounding nails stay translucent black. The figure is deliberately graphic and slightly cartoon-like, with no gruesome or medically precise details.
Cutouts, Pearl Lines, and Metallic Outlines
9. Black Bone Cutouts in Ivory Panels
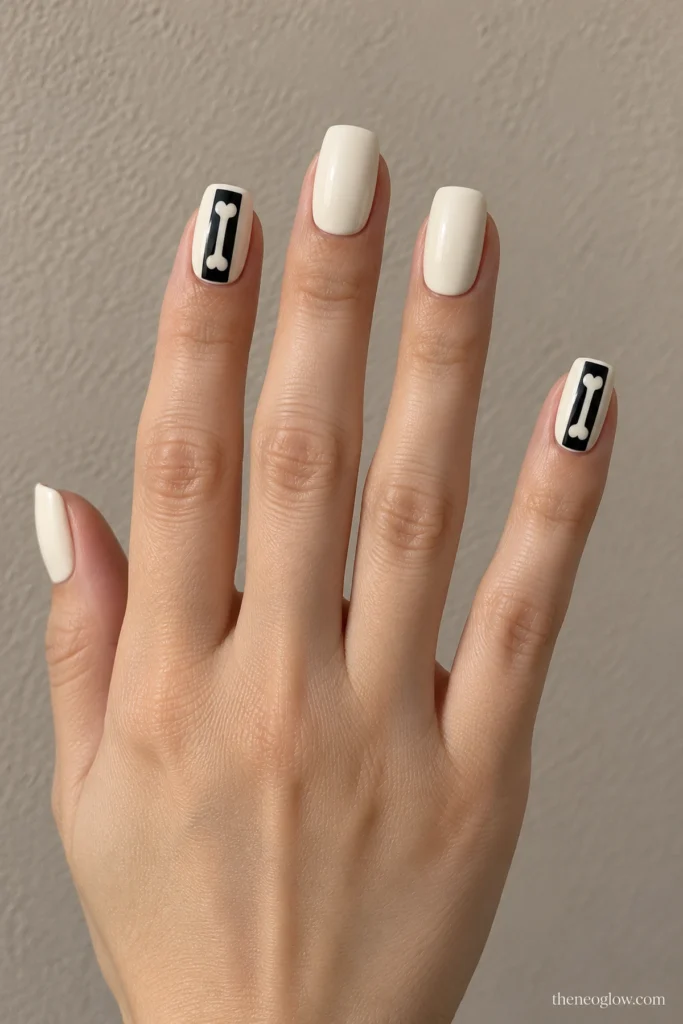
Use medium square nails with opaque glossy ivory polish and one narrow jet-black vertical panel on the index and pinkie. Inside each black panel, reserve a clean ivory bone-shaped cutout, with rounded ends and a narrow middle. The other fingers remain solid ivory.
Here the bone comes from the light shape left inside a dark block, rather than from a bone painted on top. Sharp panel edges give the negative-space illusion its impact.
10. Pearl-Jointed Center Spines
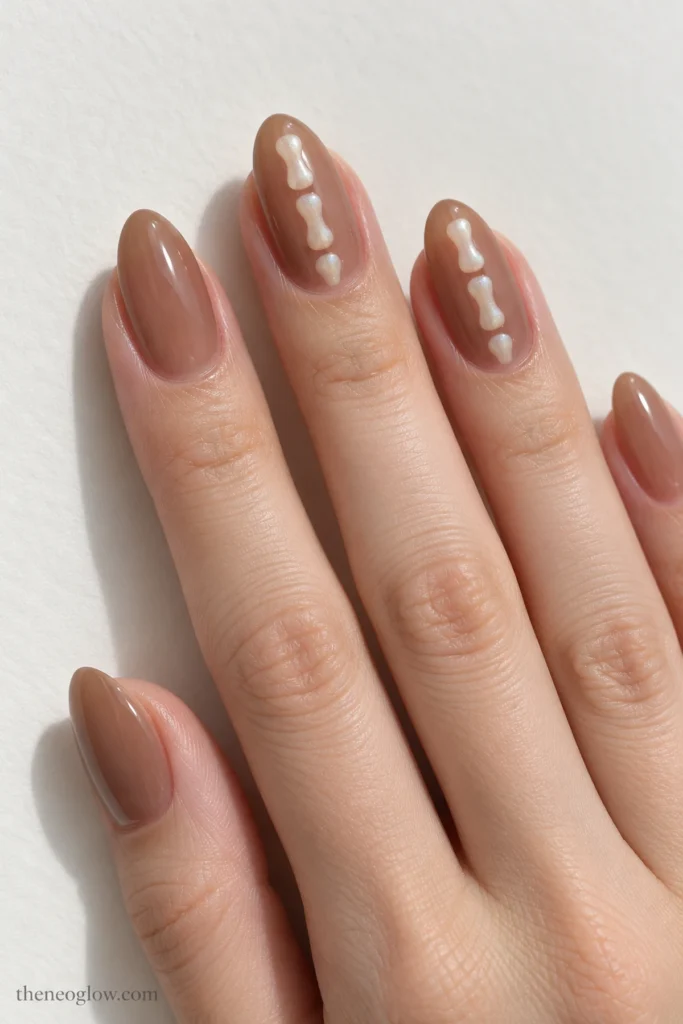
Start with glossy translucent cocoa-beige on medium almond nails. Down the center of the middle and ring nails, stack three short pearly ivory strokes with tiny taupe gaps between them, then add a thin iridescent sheen over only those strokes.
This reads as a jointed, bone-like spine of light, not a realistic backbone. The soft reflection gives a gentler alternative to stark white-on-black art, especially if you prefer a neutral manicure.
11. Crossed Micro Bones on Forest Squares
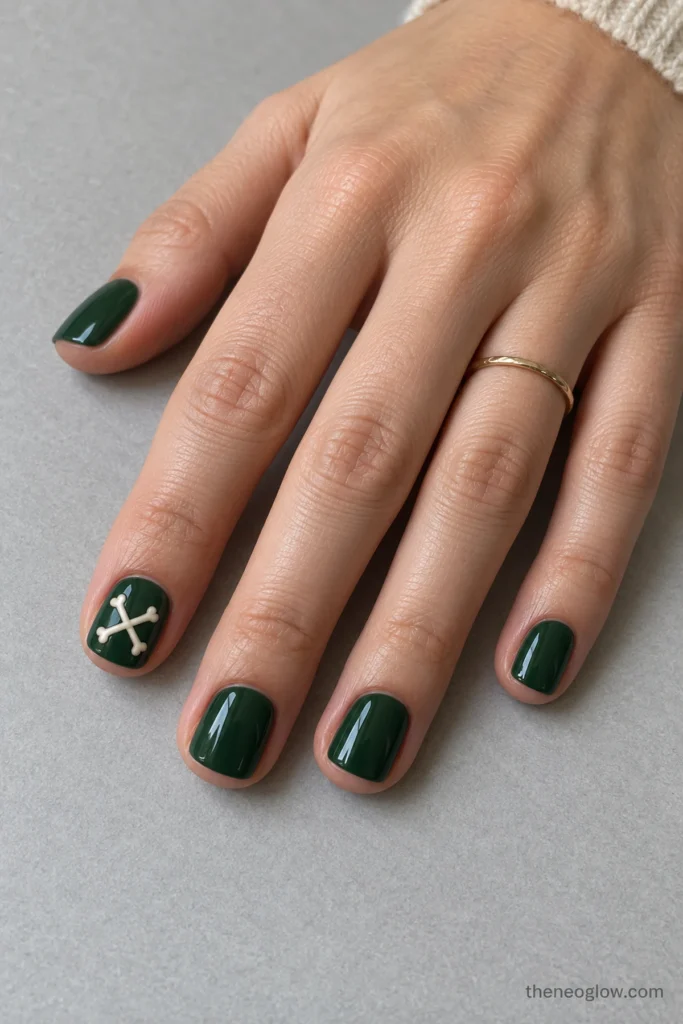
Short, natural-looking square nails can still display an unmistakable skeleton motif. Coat the nails in glossy deep forest green, then cross two small cream bones into an X on the index finger. Repeat on the opposite hand and keep all other nails solid green.
Give the crossed shapes enough width to show rounded ends. If the X becomes too tiny, simplify the edges rather than adding more marks. For a broader short-length gallery, see short Halloween nail ideas.
12. Chrome Skeleton Knuckle Outlines
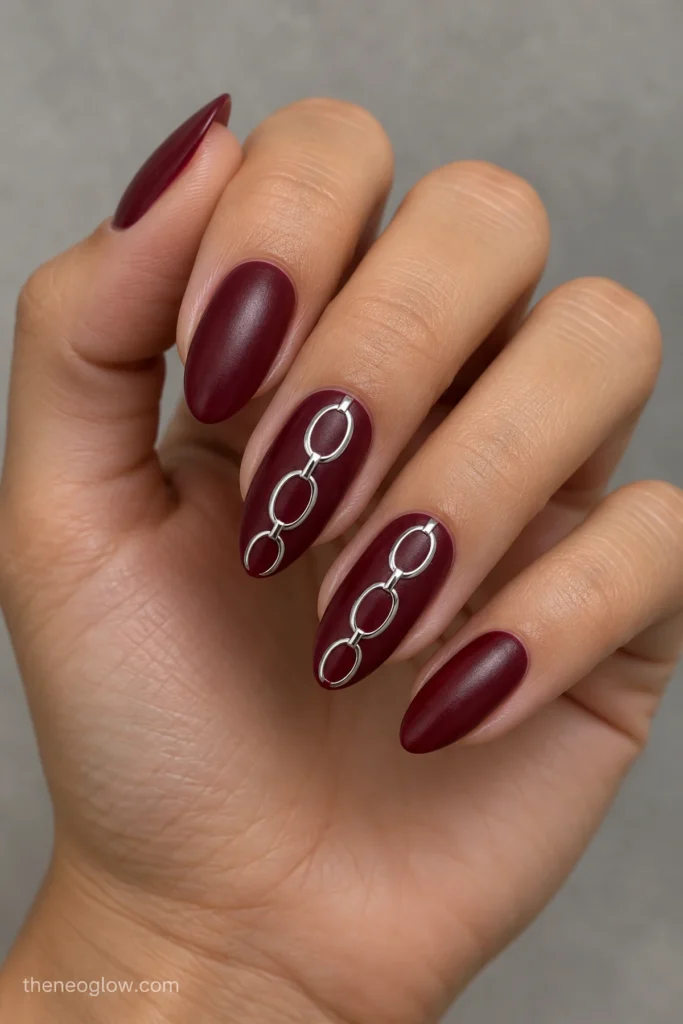
Choose medium almond nails in satin burgundy. On the middle and ring fingers, paint three connected hollow silver ovals, with narrow linking lines and small breaks between them, to suggest the knuckles of a skeletal hand. The mirror-metal appearance should stay confined to the outlines.
Hollow chrome strokes look different from filled ivory bones: the burgundy base remains visible through every oval. Keep the artwork flat rather than adding bulky metallic charms.
Half-Tip Bones, Stencils, and Shadow Panels
13. Bone-Ladder Half Tips
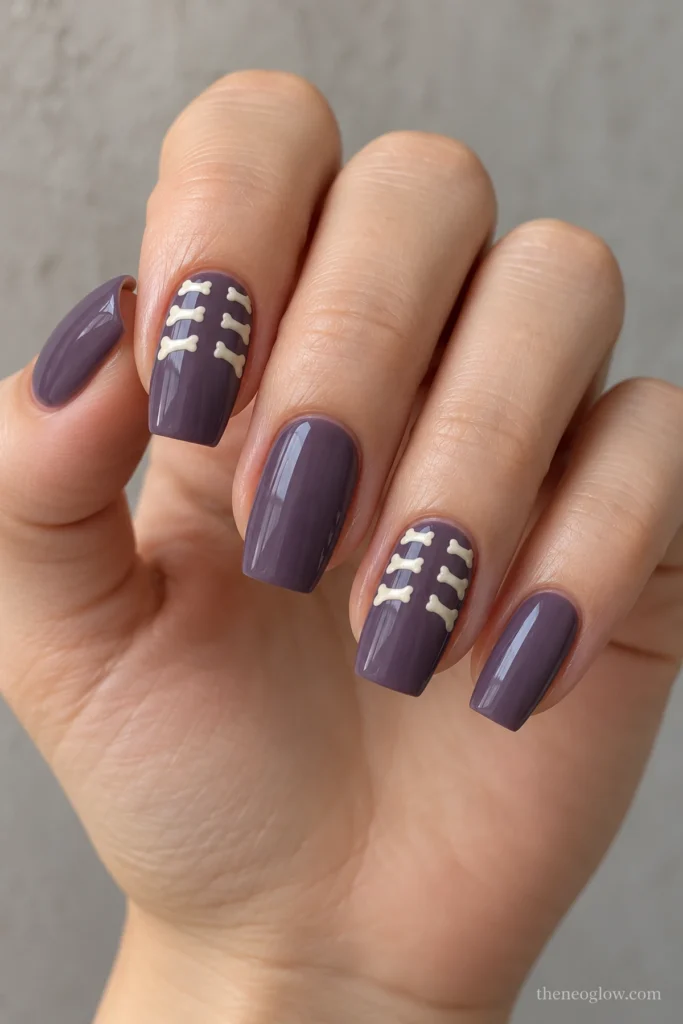
On medium tapered-square nails, apply smoky-violet gloss and fill only the upper half of the index and ring tips with a ladder of three paired cream bone rungs. Each rung angles slightly downward toward a central open channel, leaving the lower half plain violet.
The repeated pairs create an architectural rhythm without looking like French-tip piping. Medium length is useful here because the rungs need visible separation.
14. Ash-Gray Stencil Bones
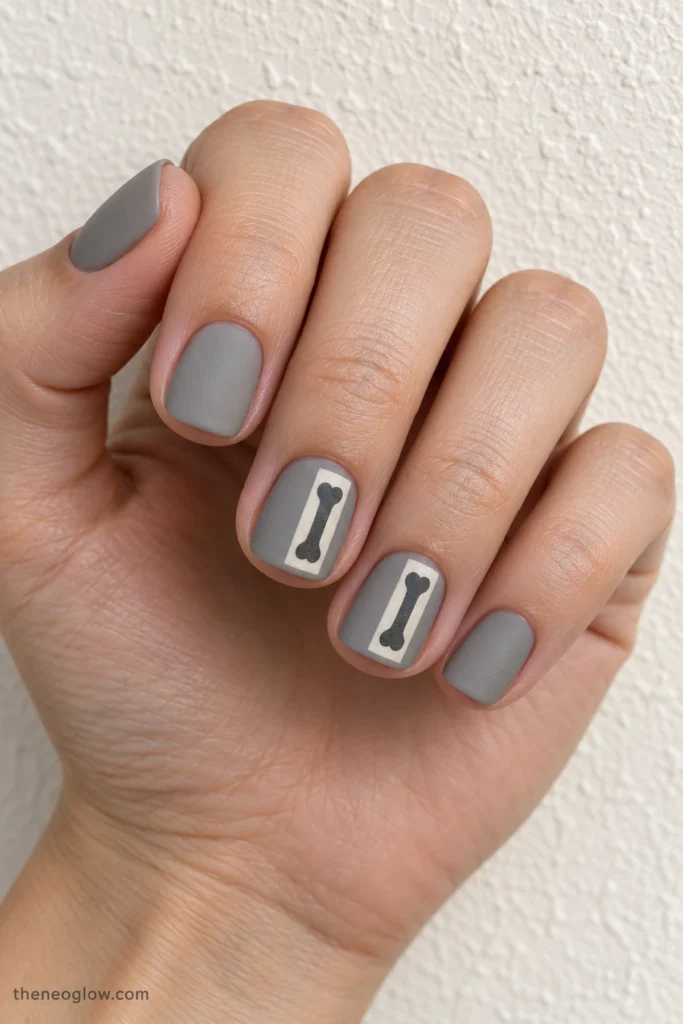
Paint short squovals opaque ash gray with a powder-matte surface. On two accent nails, create one off-center vertical ivory rectangle, then place a bold charcoal bone silhouette within that rectangle. Keep the edges deliberately sharp, as if the art were cut from a paper stencil.
The rectangle and single thick silhouette help this design stay legible where fine linework would merge. Do not add smaller surrounding fragments.
15. Electric-Lime Glow-Look Bones
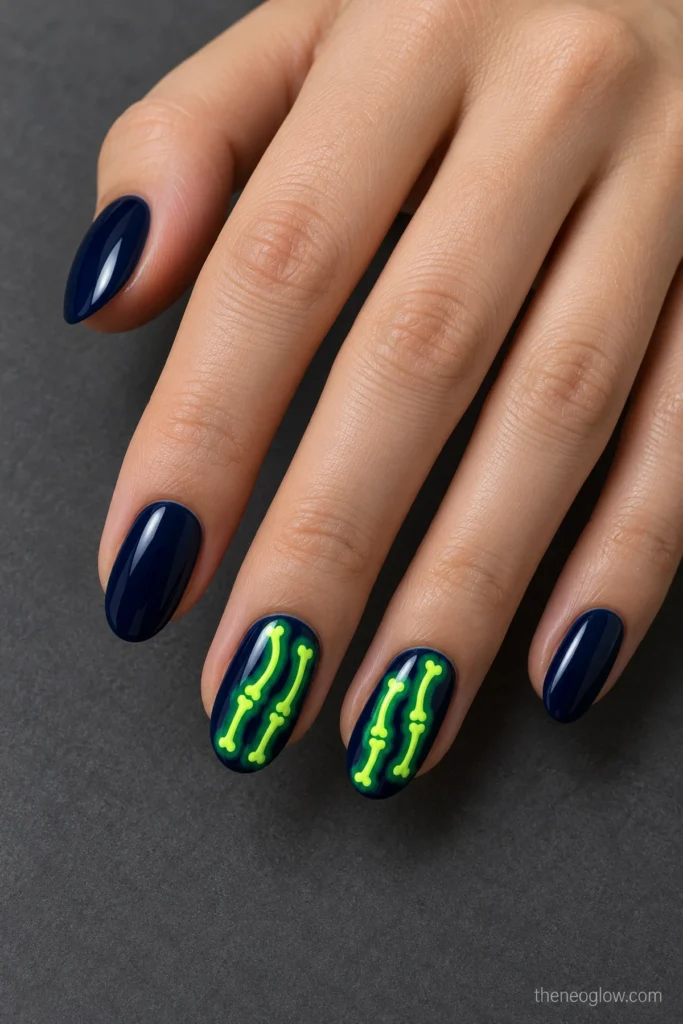
Use glossy midnight-indigo oval nails and draw two curving bone trails in pale yellow-green on the ring and middle fingers. Add a slightly wider, softer green outline behind the sharp center strokes to suggest a neon halo against the dark polish.
This creates the appearance of glowing artwork in ordinary light. It does not promise actual glow-in-the-dark performance; that would depend on a specifically labeled product and its directions.
16. Blush Skeletal Shadow Panels
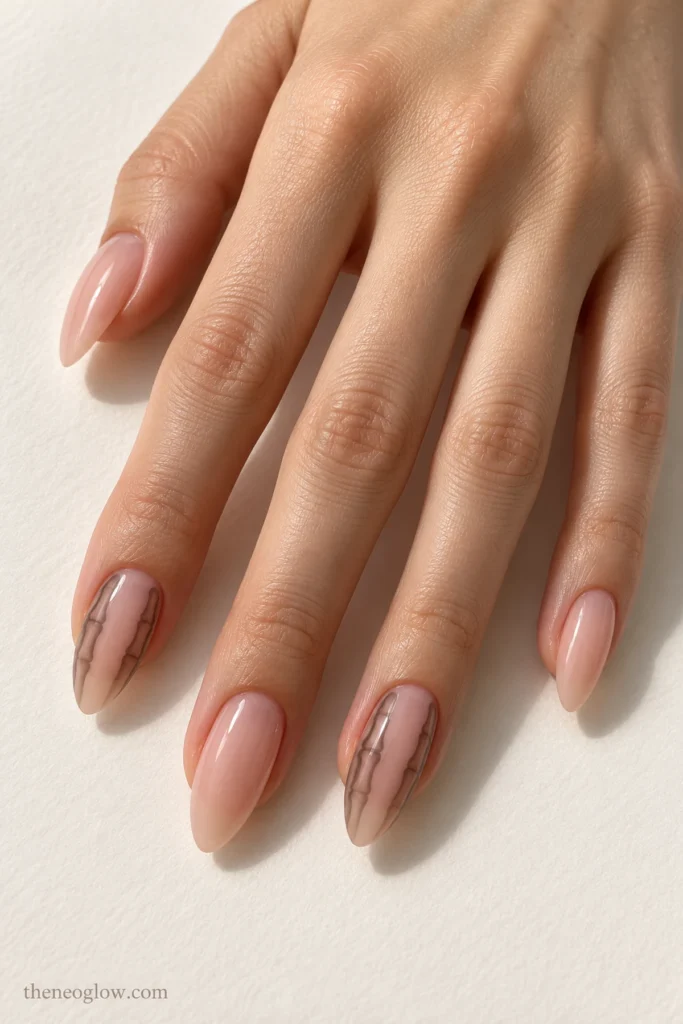
Use glossy medium almond nails with a sheer blush base and translucent cocoa-taupe side panels. Inside each panel on the index and ring fingers, paint a cropped shadow of three long skeletal finger lines in a slightly deeper brown, fading their ends before the tip.
The color-on-color effect feels like a shadow passing behind glass, rather than the high-contrast white skeletal palm in Idea 4. Preserve a broad strip of clear blush down the center so the panels remain easy to distinguish.
Match Bone Scale to Nail Shape and Length
Short square and squoval nails give the clearest stage to one icon, one crossed pair, or a bold stencil. Medium oval and almond nails can hold several joints, curved rib lines, or a palm fragment. Longer tapered squares provide room for a full figure or repeated half-tip rungs, but extra length is not a requirement for this motif.
When comparing references, look at the motif’s share of the nail, not just its detail level. A single bone filling one-third of a short nail can be more legible than an intricate skeleton spread edge to edge. Keep a small strip of base visible around thin linework and make joint gaps wider when scaling an illustration down.
If you want the sculpted extension itself to be the main decision, use NeoGlow’s Halloween acrylic nail guide. If your priority is a dramatic tapered silhouette regardless of motif, the separate gothic coffin nail guide covers that choice in depth.
What to Tell Your Nail Technician
Bring one clear reference for the exact bone composition you want, not only a photo labeled “skeleton nails.” Then make these details explicit:
- “Medium almond, satin burgundy, with hollow silver knuckle outlines on just two nails” for Idea 12.
- “Short forest-green squares with one cream crossed-bone X on each index finger” for Idea 11.
- “Translucent blue center windows, navy side frames, and white fan-shaped X-ray lines” for Idea 3.
Ask whether the artwork will be painted, stamped, or applied as a decal, and which polish system will be used. Fine art should remain legible from normal viewing distance; it is reasonable to request a simplified joint or fewer rib arcs if the sample is too dense. Before an appointment, the American Academy of Dermatology’s manicure and pedicure safety guidance offers a practical checklist for cleanliness, tools, and cuticle care.
Keep the Bone Art Crisp Through Halloween
Tiny white joints and dark panel edges are the details most likely to reveal a noticeable chip, so keep your chosen topcoat finish consistent and avoid picking at a lifting edge. If you are using regular polish, follow the base, color, and topcoat directions for that product. For gel or extensions, follow the specific system’s maintenance and removal instructions rather than trying to pry the design off.
The American Academy of Dermatology’s gel manicure care and removal tips explain why picking at gel, ignoring cuticle care, or using repeated gel treatments without care can be hard on nails. If you notice persistent nail or skin changes, seek professional medical advice rather than hiding the problem under another set.
For the clearest first skeleton manicure, start with one high-contrast accent—Idea 11 for very short nails or Idea 4 for medium nails. Choose a larger X-ray or rib design only if you want the artwork itself to become the focus, then save the exact reference and scale notes for your appointment.