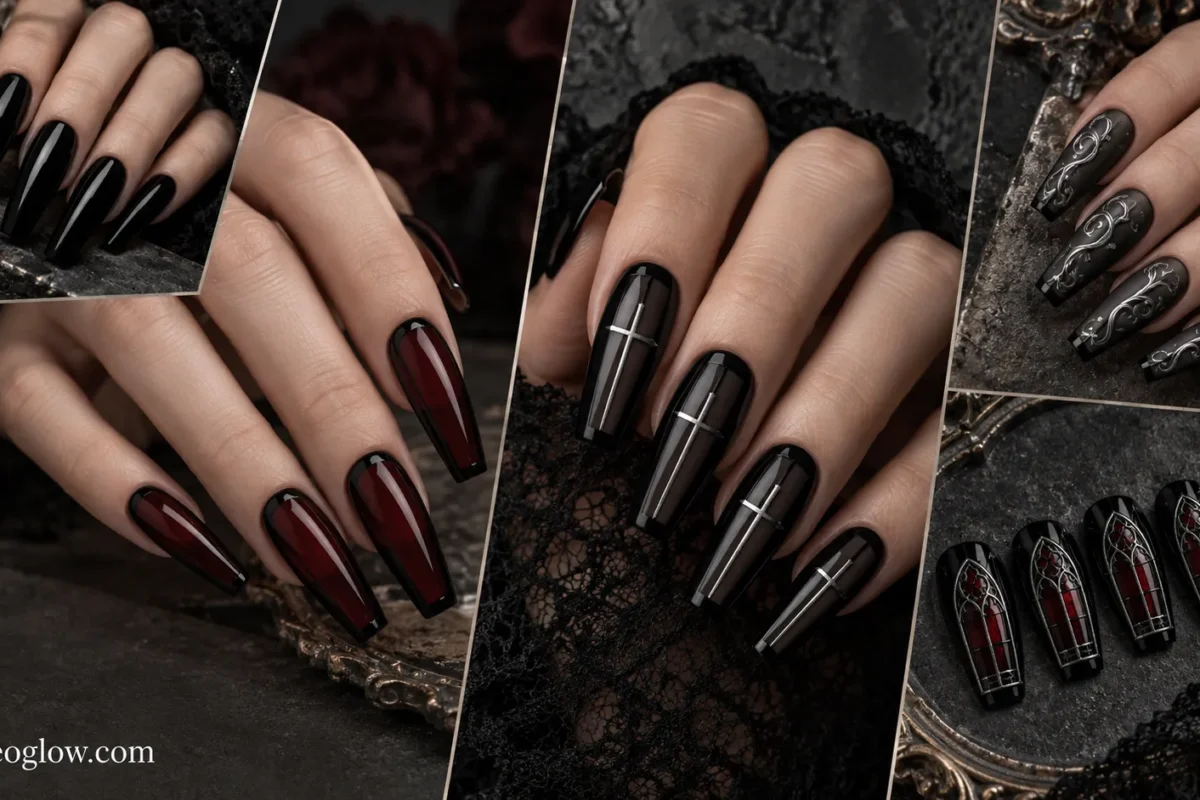
Gothic coffin nails are built around one non-negotiable feature: the silhouette. The sides taper inward and finish in a straight, squared-off tip, so a rounded almond or short square manicure does not become “coffin” just because it is black. This guide keeps that shape boundary clear while giving you 17 genuinely different black, red, silver, cross, spider, rose, baroque, and press-on directions. You will also get a practical way to choose length, judge typing comfort, and decide whether a salon extension or temporary press-on set makes more sense for your Halloween plans.
Choose Your Coffin Length and Nail System First
OPI describes coffin nails as long, slim, and squared at the tip, with coffin sides slightly more angled than the related ballerina shape. OPI’s nail-shape guide That long tapered outline gives gothic art room to breathe, but it also changes how the free edge meets a keyboard, phone, pockets, and everyday tasks.
There is no universal “typing-safe” coffin length. If you work or study at a keyboard, test a comparable free edge before booking a dramatic extension; NeoGlow’s nails for typing guide explains how length, shape, thickness, and your typing technique interact.
| Route | Best when | Main tradeoff |
|---|---|---|
| Salon acrylic | You want a strong, deliberately sculpted coffin profile and detailed art | More appointment commitment, maintenance, and a planned professional removal route |
| Other salon extension systems | You want added length with a technician-selected system | Application, curing, maintenance, and removal depend on the exact system used |
| Coffin press-ons | You want a predesigned statement set without committing to a salon-built shape | Fit and adhesive instructions vary by set; some removal methods may prevent reuse |
| Natural nails | You already have enough free edge to preserve visible taper plus a flat tip | Forcing a short nail into an exaggerated coffin can weaken the visual shape |
Black Gothic Coffin Nails
1. Mirror-Black Architectural Coffins
Use opaque jet black on long coffin nails and let the silhouette do the work. A glassy surface makes the straight free edge and tapered sidewalls look especially graphic.
Ask for consistent taper from nail to nail and a clean, flat tip rather than adding charms. This is the simplest route if your outfit already carries lace, velvet, silver jewelry, or other strong gothic detail.
2. Matte Black With Glossy Cathedral Frames
Start with velvety matte black, then trace a narrow glossy pointed arch down the center of two accent nails. The tone stays monochrome, but changing the finish reveals the cathedral-inspired shape when light moves across it.
Keep the arches flat and fine. The design feels more architectural than illustrative, which makes it distinct from cross or spider motifs later in the list.
3. Sheer Smoke With Opaque Black Sidewalls
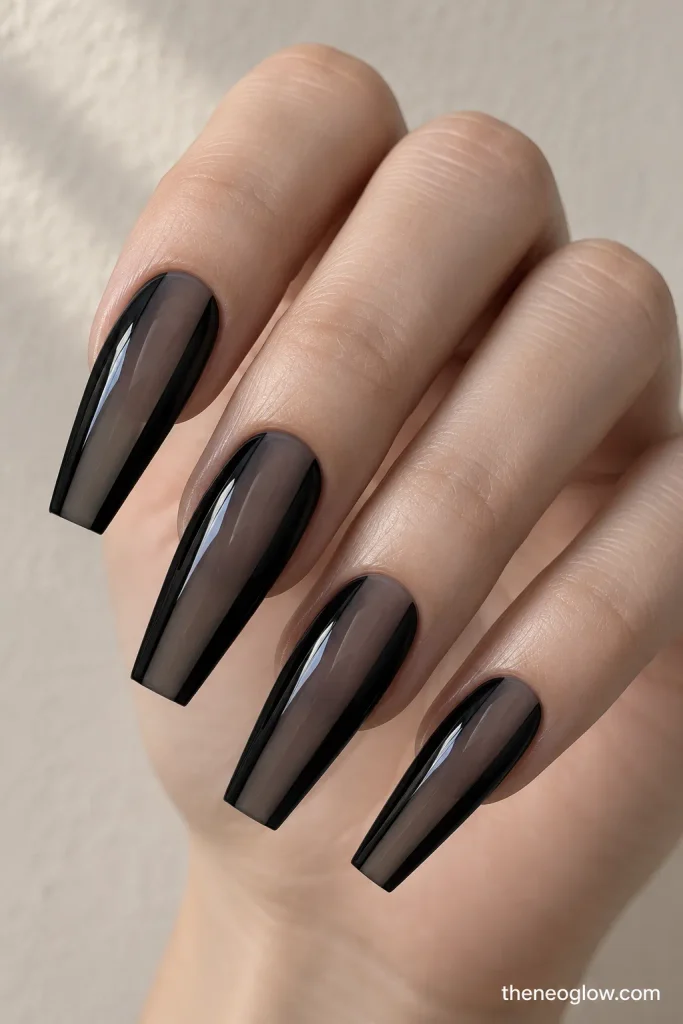
Use translucent charcoal through the center and paint opaque black panels along both tapered sides. Leave a narrow smoky window visible from cuticle to tip.
This structure emphasizes the coffin outline because the darkest color follows the side profile. It is also a useful choice if you want black coffin nails with depth rather than ten fully opaque nails.
4. Black Chrome Spine Lines
Choose a soft-black base and run one narrow gunmetal or black-chrome line lengthwise through each nail. The reflective “spine” should stay slim enough that the tapered silhouette remains the main feature.
A medium-long coffin length can carry this more comfortably than an extremely long set while still giving the vertical chrome enough room to read.
Red Gothic Coffin Nails
5. Oxblood Glass With a Black Perimeter
Layer translucent oxblood so light can move through the center, then outline the sidewalls and flat tip with a very narrow black border. The result feels darker than a conventional red manicure without relying on blood drips or fang art.
Ask for the red to remain visibly translucent. If it becomes fully opaque, the black perimeter loses much of its stained-glass effect.
6. Crimson Stained-Glass Coffins
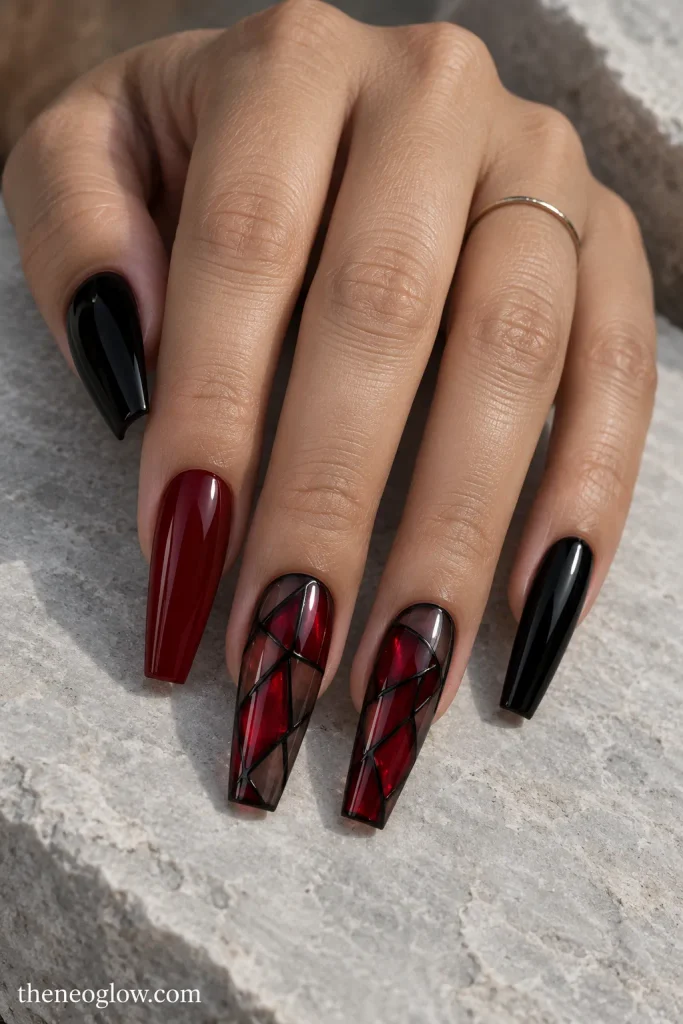
Divide a sheer smoky base into irregular crimson panes with fine black lines, concentrating the pattern on two or three nails. Keep the remaining nails deep red or black so the set does not become visually crowded.
The squared coffin tip helps the panel geometry feel intentional. Use larger panes rather than tiny mosaic fragments if you want the design to remain readable from normal viewing distance.
7. Red Chrome Gothic Arches
Paint deep wine nails, then place reflective crimson or dark-red chrome in a tall pointed arch near the center. The metallic section supplies the drama, so skip extra gems and webbing.
For a cooler result, edge the arch with a whisper of gunmetal. For a warmer one, keep the chrome red-on-red and let the reflection create separation.
Silver Hardware and Armor Details
8. Gunmetal Chain-Edge Coffins
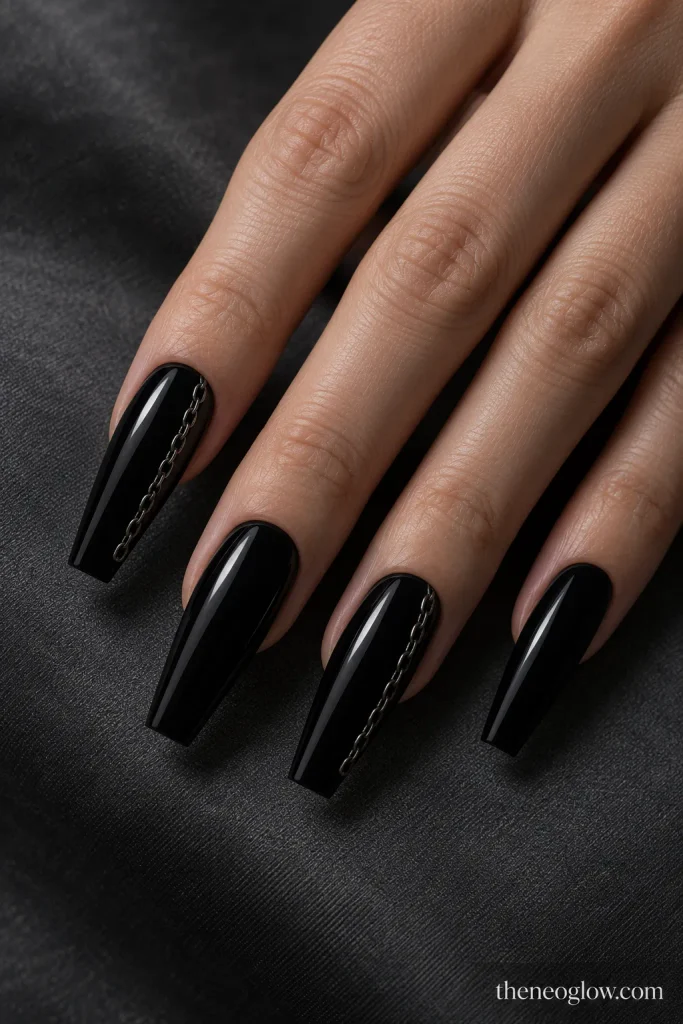
Keep the base glossy black and place a thin chain-like silver line along only one sidewall on selected nails. Painted links or very flat metallic details preserve a smoother surface than bulky dangling hardware.
Let the detail stop before the free edge. That keeps the flat coffin tip clearly visible and prevents the chain motif from turning into a full border.
9. Silver Rivet Cuticle Frames
Arrange tiny flat silver dots in a shallow frame near the cuticle over black or charcoal nails. Leave the rest of the plate open and glossy.
This creates an industrial hardware reference without covering the entire set in charms. Keep the dots evenly sized and use one or two framed accents per hand for the cleanest result.
10. Pewter Armor Panels
Break a charcoal coffin nail into two or three angular pewter panels separated by narrow black gaps. A satin metallic finish looks more like worn armor than mirror chrome.
Use the strongest panel design on the middle or ring finger and simplify nearby nails to a single diagonal plate. The variation keeps the set coordinated rather than duplicated ten times.
Spiders, Crosses, and Roses
11. Single-Thread Spider Coffins
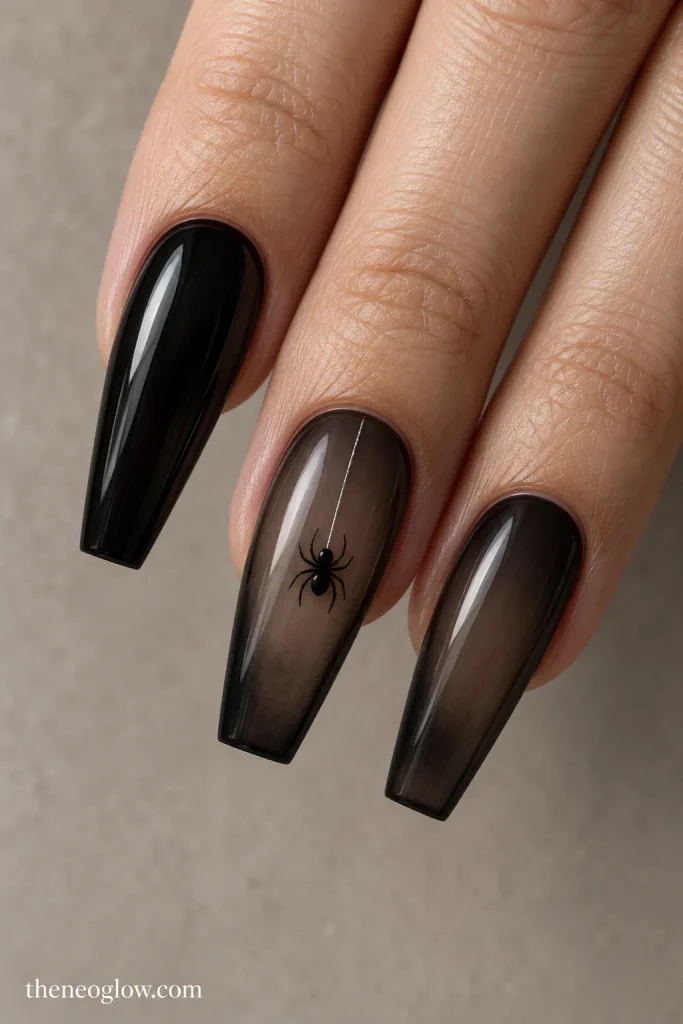
Paint a sheer smoke or neutral-black base, add one hairline silver thread from the cuticle, and suspend a small black spider near the center of one accent nail. Keep the other nails solid black or smoky.
The long coffin canvas gives the hanging line enough vertical space to read clearly. Avoid adding webs to every finger; the single suspended motif is the focal point.
12. Smoked-Glass Cross Windows
Create a translucent charcoal center panel on black coffin nails, then place a narrow silver or opaque-black cross inside two of those “windows.” Keep the cross straight, slim, and centered.
This is a graphic gothic cross nail rather than a jeweled religious-icon collage. If you want more reflection, use one metallic cross and leave the second matte.
13. Deep-Wine Painted Rose Panels
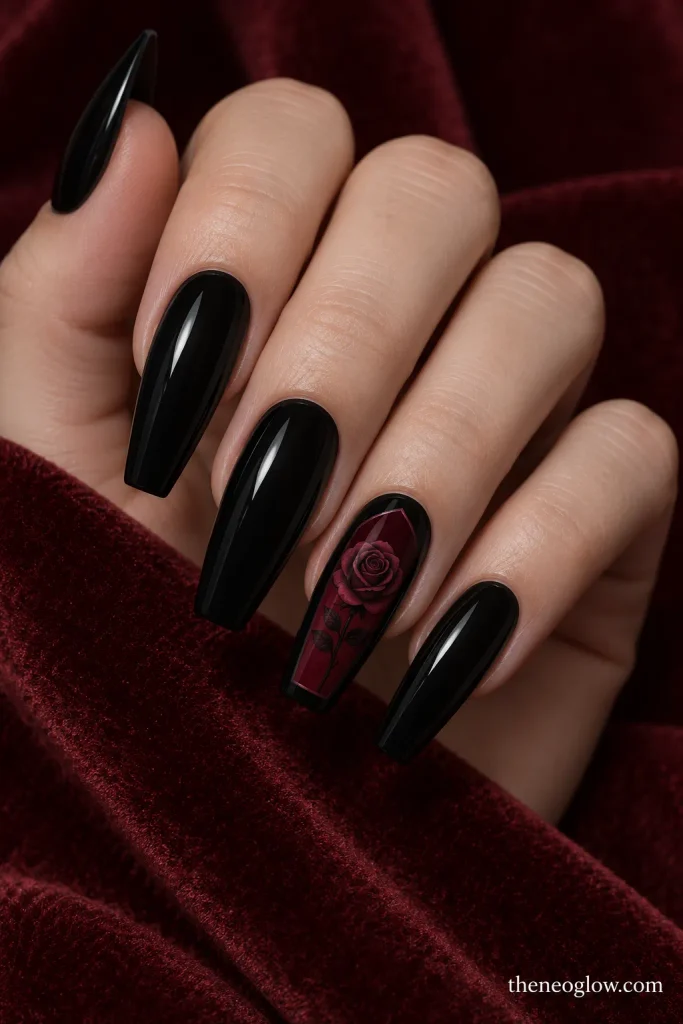
Paint black coffins with one deep-wine rectangular or arched panel on each ring finger, then add a flat, tonal rose inside the panel. Use burgundy highlights rather than a bright red outline.
Painting the rose instead of sculpting it keeps the surface flatter while preserving the gothic floral effect. Pair it with plain black nails so the rose remains the one romantic focal point.
Baroque Texture Without Losing the Shape
14. Black-on-Black Damask Velvet
Begin with matte black and add glossy damask curls to two or three nails. The pattern should appear through reflected light rather than high color contrast.
Scale the scrollwork up enough to suit a long coffin nail; microscopic curls can turn muddy. Leaving several nails plain matte also gives the ornate accents visual breathing room.
15. Antique-Silver Scrollwork on Charcoal
Use a charcoal base with thin antique-silver curls that begin near one lower corner and travel diagonally upward. Keep the metal muted rather than bright glitter.
This version makes the baroque pattern visible at first glance while the diagonal placement follows the coffin taper. Ask for flat linework if you want to reduce snag-prone surface detail.
Gothic Coffin Press-On Versions
16. Black Lacquer Coffin Press-Ons With Flat Silver Accents
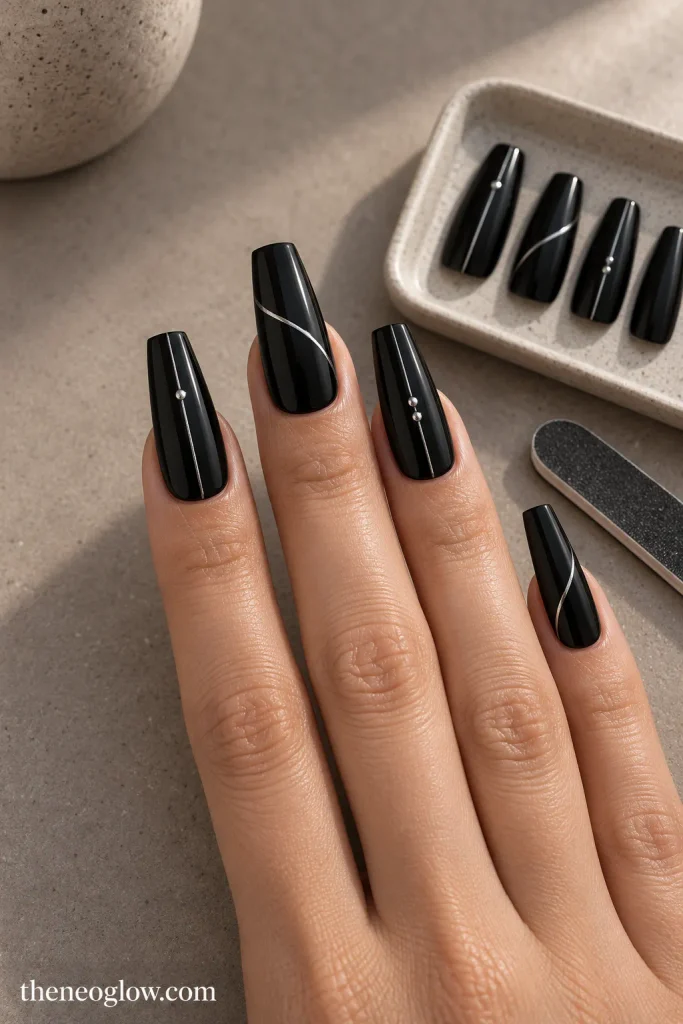
Choose a coffin press-on set with consistent taper, opaque black lacquer, and flat silver detailing rather than oversized 3D charms. Before adhesive, dry-fit all ten tips. NeoGlow’s press-on nail sizing guide explains why each tip should cover the natural nail from sidewall to sidewall without pinching or overlapping skin.
Check both width and curve, not just the printed size number. A dramatic design will still look off if the sidewalls expose gaps or the tip feels forced.
17. Printed Gothic-Window Coffin Press-Ons
Look for a printed coffin set with black window tracery, dark red panes, or restrained silver arch details. Printed art can give you crisp symmetry without asking a technician to hand-paint every panel.
If reuse matters, check the exact set and adhesive instructions before application. Removal methods are not interchangeable: for example, Olive & June’s press-on removal instructions separate a warm-water method intended to preserve that brand’s press-ons from its remover-system method, which it says does not allow reuse. Never pry or force off a resistant nail.
Salon Acrylic or Press-Ons: Which Route Fits You?
Choose salon acrylics when the silhouette itself is the priority and you want a technician to build the length, taper, and flat free edge for your hands. Before the appointment, save a side-profile reference as well as a top view, then state the length, amount of taper, tip width, base opacity, motif placement, and finish you want.
Artificial nails are a commitment, not just a design choice. The American Academy of Dermatology’s artificial-nail guidance notes that acrylic application involves roughening the natural nail surface and that artificial-nail removal may involve soaking or filing; it also advises against covering damaged nails with artificial nails. If your nails are already damaged or the surrounding skin is irritated, prioritize nail health rather than using an extension to conceal the problem.
Press-ons make more sense when you want a dramatic Halloween shape without building that length permanently into your routine. They also let you inspect the artwork and silhouette before wearing it. The tradeoff is fit: a beautiful coffin set still needs the right width and curve for every natural nail, plus application and removal that follow the exact adhesive manufacturer’s directions.
Why Gothic Coffin Nails Fit Halloween 2026
Pinterest Predicts 2026 places “gothic coffin nails” inside its Vamp Romantic beauty trend and reports a +180% change in normalized English-language global searches for the term. Pinterest says the comparison uses September 2024–August 2025 versus September 2023–August 2024, so that figure is a relative-interest signal rather than an absolute search-volume estimate. Pinterest Predicts 2026 Vamp Romantic report
That evidence supports gothic coffin nails as a timely Halloween 2026 direction, but this page stays shape-led rather than becoming a broad vampire-nail gallery. If coffin shape is not essential to your decision, NeoGlow’s Halloween Nails 2026 pillar offers wider spooky, cute, short, graphic, and dark-romantic routes.
Choose the Detail You Want Noticed First
For the cleanest gothic coffin manicure, choose one lead feature: the tapered coffin silhouette, a dark translucent color, silver hardware, one symbolic motif, or a baroque texture. Then let the other nails support it.
Save a top view and side view, note your workable length, and decide on salon extensions versus press-ons before focusing on tiny art details. A successful gothic coffin set should still read as coffin nails from across the room—the black, red, crosses, spiders, roses, and silver are there to sharpen that shape, not replace it.