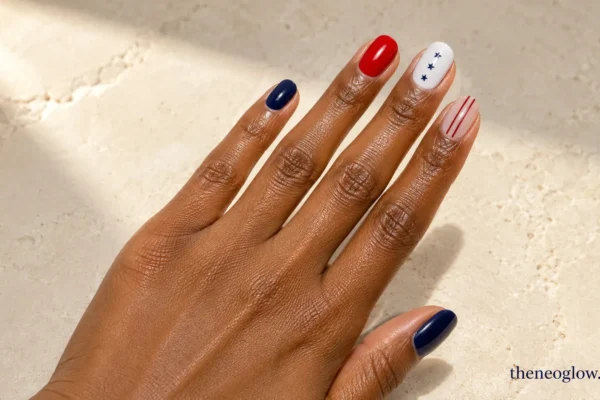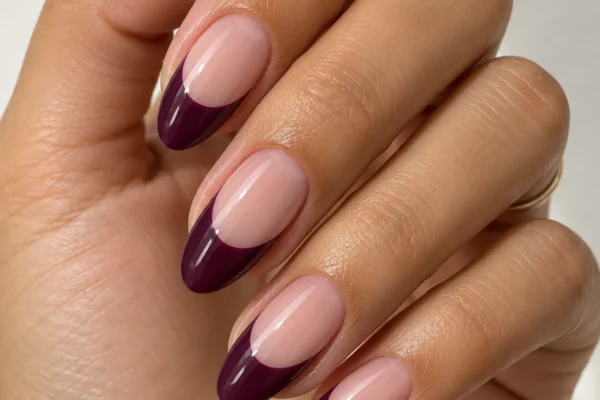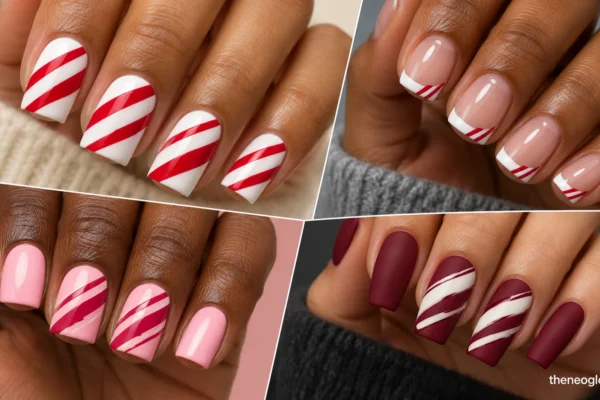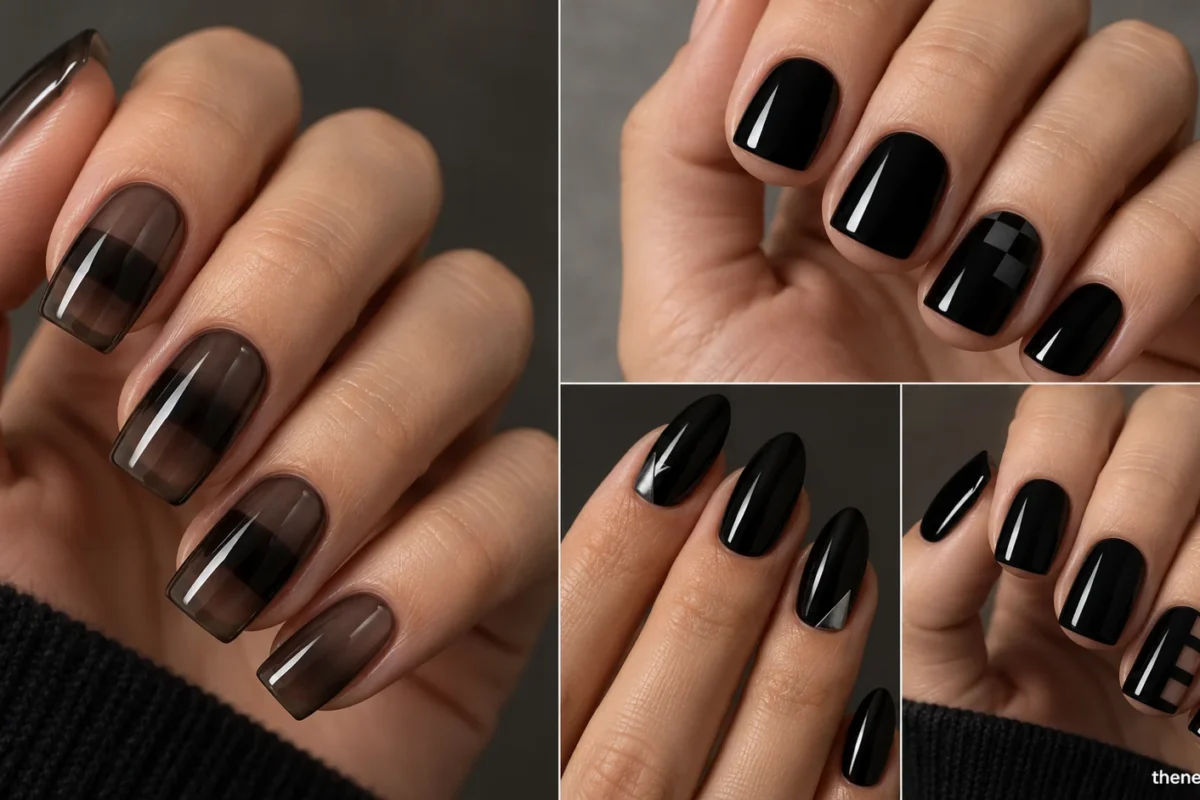
Black Halloween nails can look dramatically different even when almost every visible nail surface stays black. A liquid-shine oval reflects light like lacquered glass; a sheer black jelly reveals depth; matte and satin absorb light; and gunmetal chrome creates a colder, almost metallic edge. You do not need orange polish, long coffin extensions, or a tiny Halloween character on every finger to make the manicure feel right for October.
These 18 designs focus on what the black finish actually looks like, where the detail sits, and which shapes give it room. Start with the finish comparison, then save one numbered idea as a precise salon reference.
Choose the Black Finish Before the Art
| What you want to see | Start with | Best nail canvas | Main tradeoff |
|---|---|---|---|
| Wet, solid-black shine | Ideas 1 or 4 | Short oval | Strong highlights show surface irregularities |
| Tinted-glass depth | Ideas 2 or 3 | Medium square or almond | Sheerness changes with the number of layers |
| Quiet, black-on-black pattern | Ideas 5 or 6 | Short square or squoval | Detail may disappear in dim light |
| Diffused, near-black texture | Ideas 7–9 or 14–15 | Oval or squoval | Soft effects need even blending |
| Cold reflected light | Ideas 10–13 | Medium almond, square, or oval | Metallic and magnetic effects vary by viewing angle |
| A small opening in solid black | Ideas 17 or 18 | Square or squoval | Clear cutouts need crisp boundaries |
If the manicure must read black from across a room, keep the design area small and let any jelly, graphite, silver, or clear section support the black base rather than replace it. For a broader color-and-motif mix, NeoGlow’s Halloween Nails 2026 guide covers the looks this finish-focused gallery intentionally leaves out.
Glossy Black and Layered Jelly
1. Ink-Glass Short Ovals
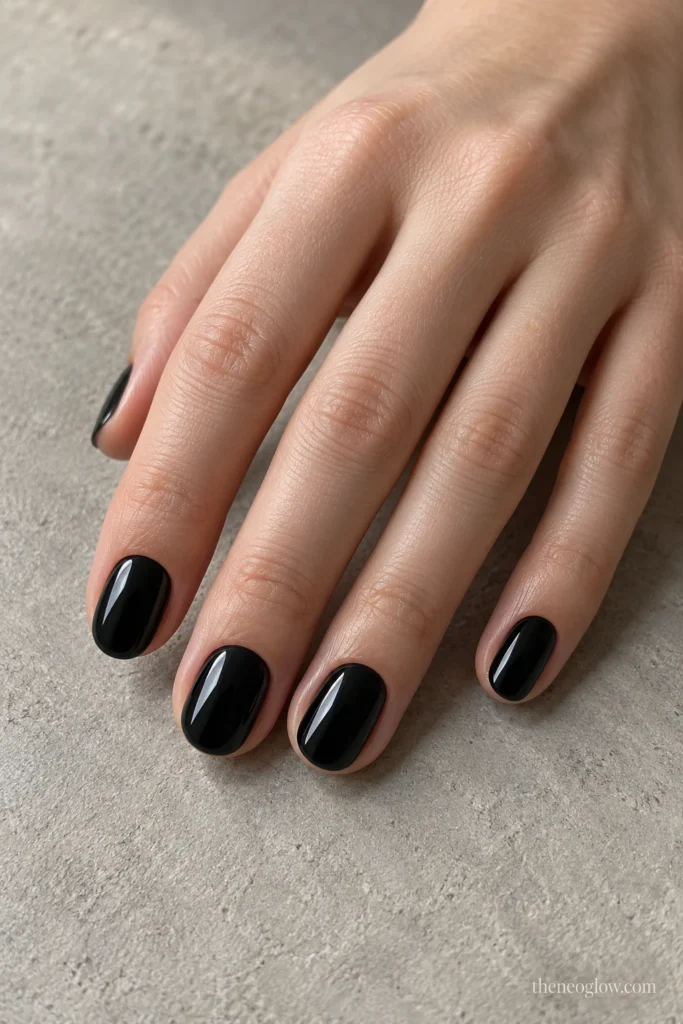
Keep naturally short oval nails fully covered in opaque, neutral jet-black cream with a smooth, high-gloss finish. The bright curved highlight across each nail is the only decoration. Rounded edges make the set compact rather than costume-like, and the clean color is easy to pair with almost any October outfit.
Choose this over jelly if you want zero visible nail-bed translucency. Avoid shimmer, smoky gradients, or accent nails: the uninterrupted black surface is the whole point.
2. Stacked Black-Jelly Squares
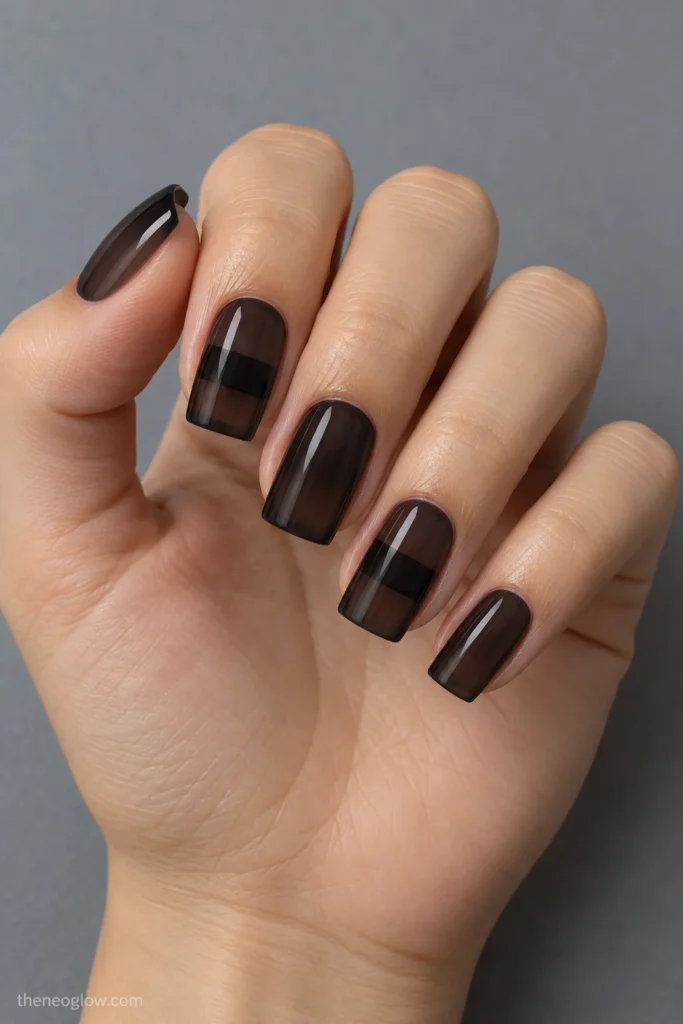
On medium square nails, use translucent black jelly across every nail, then add a deeper horizontal band of the same black jelly through the middle third of the index and ring fingers. The overlap should look like tinted glass placed over tinted glass, without an opaque black stripe.
Leave the nail tips squared and the finish glossy so the change in opacity stays visible. This is a layered window effect, not the plain, uniformly sheer black squoval look.
3. Opaque-to-Jelly Dark Tips
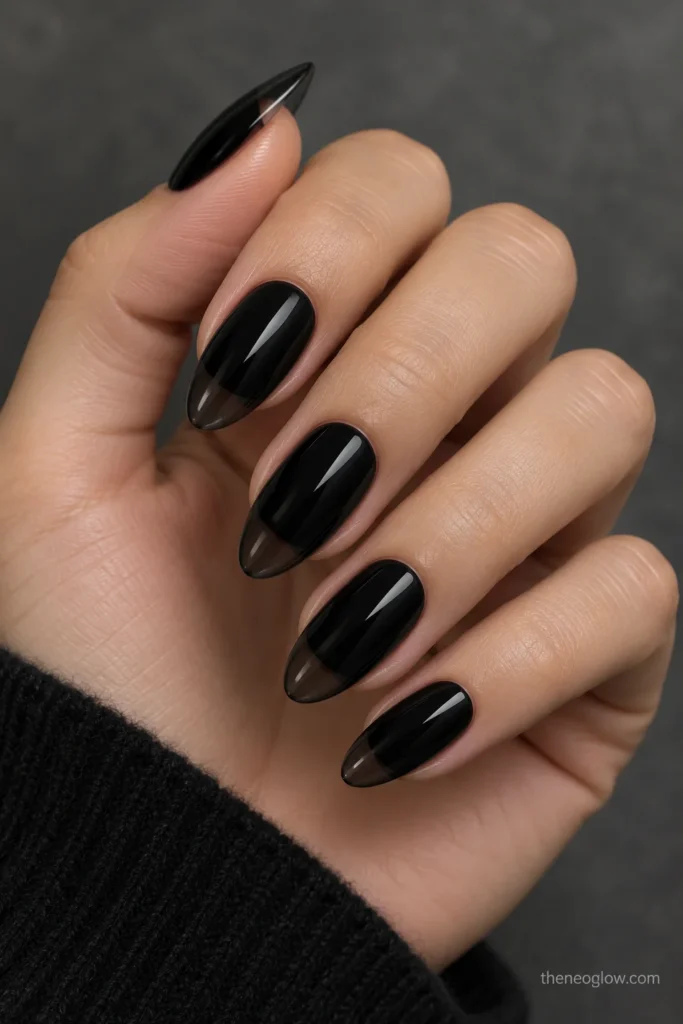
Give medium almond nails an opaque black nail bed and a narrow, translucent smoky-black section at the final portion of the free edge. The transition is a clean boundary between two black opacities—not a nude-base French manicure or an ombré.
The main nail remains pitch-black. The tiny glassy end becomes noticeable when light passes through it, especially if the tip has sufficient natural length or a professionally selected clear extension.
4. Blackened Plum Glass
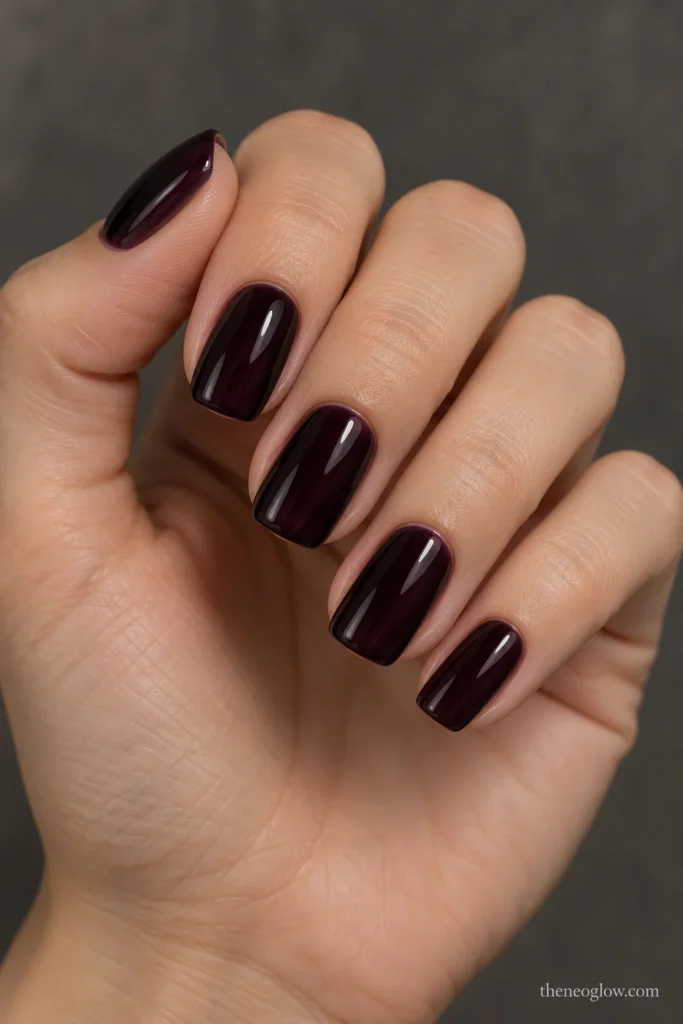
This color reads black first and reveals a trace of cool plum only in strong light. Use a deep, nearly black plum-jelly finish on short ovals, with no obvious burgundy gradient, gems, or painted roses. Keep the coverage dark enough that the whole manicure still looks like a black set indoors.
If you want an unmistakably purple manicure, pick another color guide. Here, the undertone is a subtle alternative to neutral jet black.
Matte, Satin, and Black-on-Black Texture
5. Matte Onyx With One Gloss Chevron
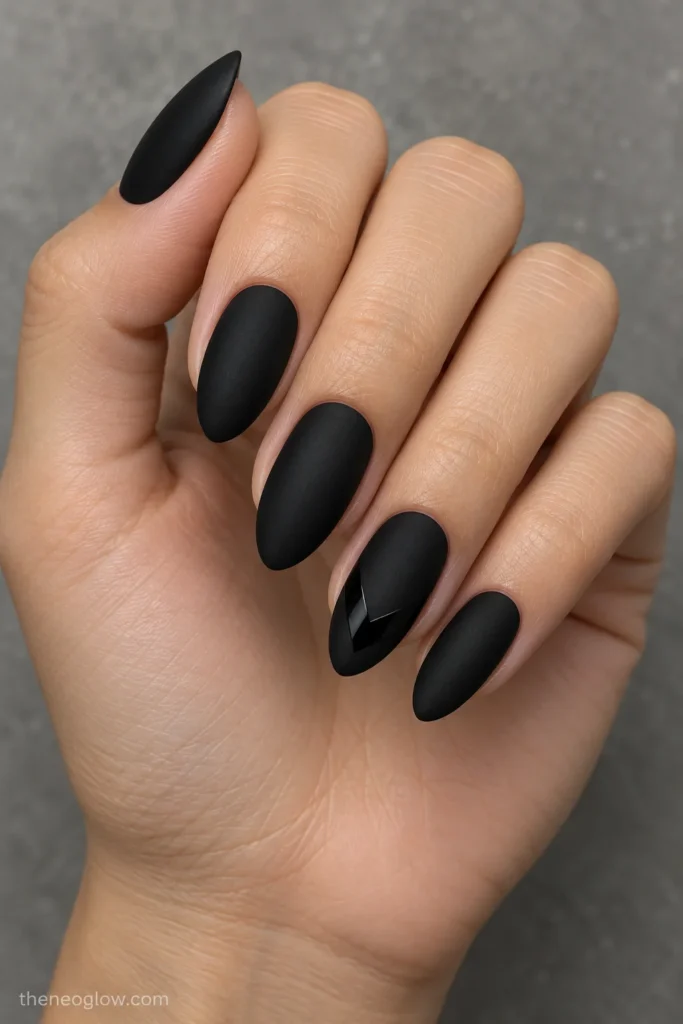
Paint short squovals opaque matte black. On each ring fingernail, place just one shallow, glossy black chevron across the upper third, with the two arms meeting at a small downward point. All remaining nails stay uninterrupted matte.
The geometric mark should be a simple V, not a pointed gothic window, crescent, or cluster of dots. Ask to see the design under side lighting so the gloss actually separates from the matte base.
6. Gloss-Matte Checker Corners
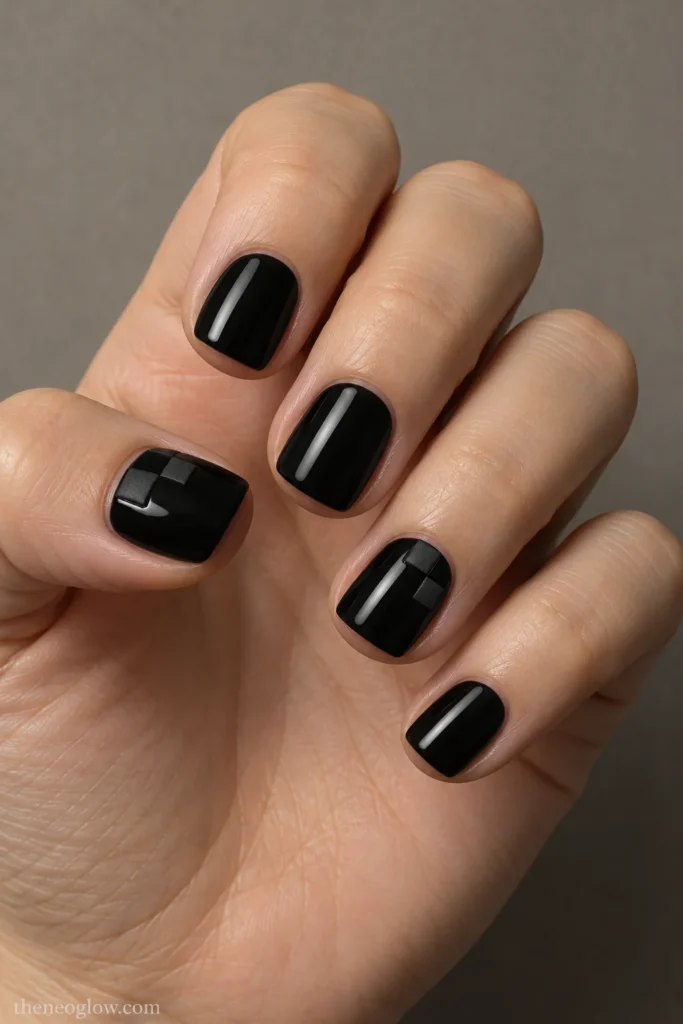
Use short square nails with a solid black base. Confine a four-cell checker pattern to the upper outside corner of the thumb and ring nails, alternating matte-black and glossy-black squares; leave the other nails fully black and glossy.
Because both finishes share the same pigment, this looks like a subtle shift in reflection rather than a brightly colored checkerboard. Larger cells are clearer on compact nail plates than a tiny repeated grid.
7. Deep Graphite Satin Ovals
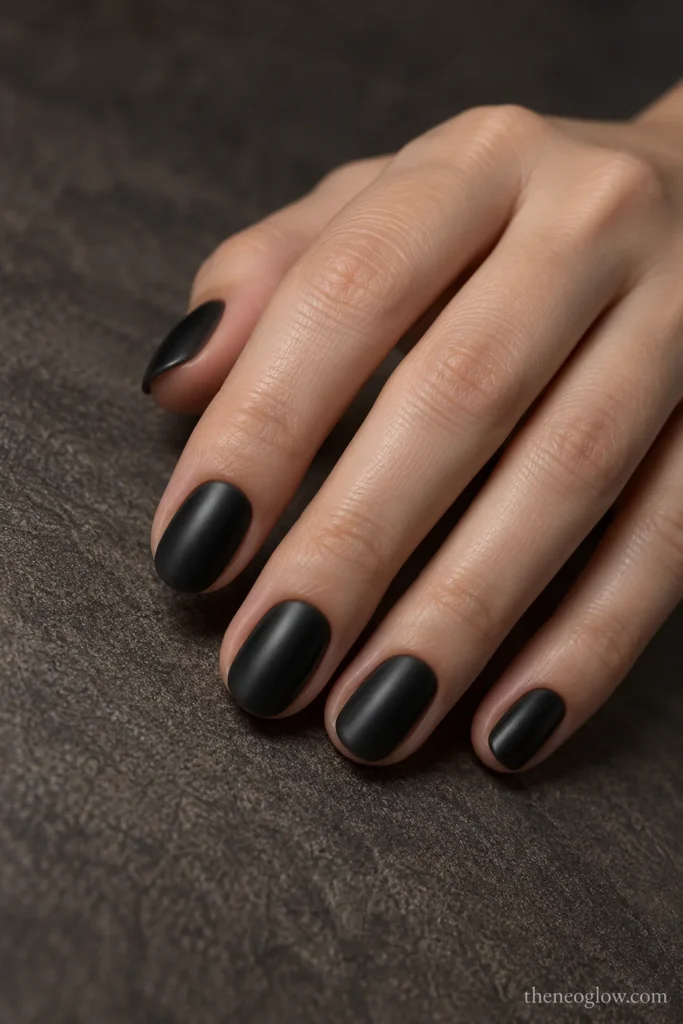
Choose short, softly rounded ovals coated in an almost-black graphite cream with a continuous satin finish. It should have a low, soft sheen—not chalky matte and not a visible silver sparkle. No design is necessary; the difference from Idea 1 is how light rolls gently across the surface instead of reflecting in hard white streaks.
Compare the polish in daylight before deciding: medium gray is too light for this black-dominant brief.
8. Black-Sand Accent Texture
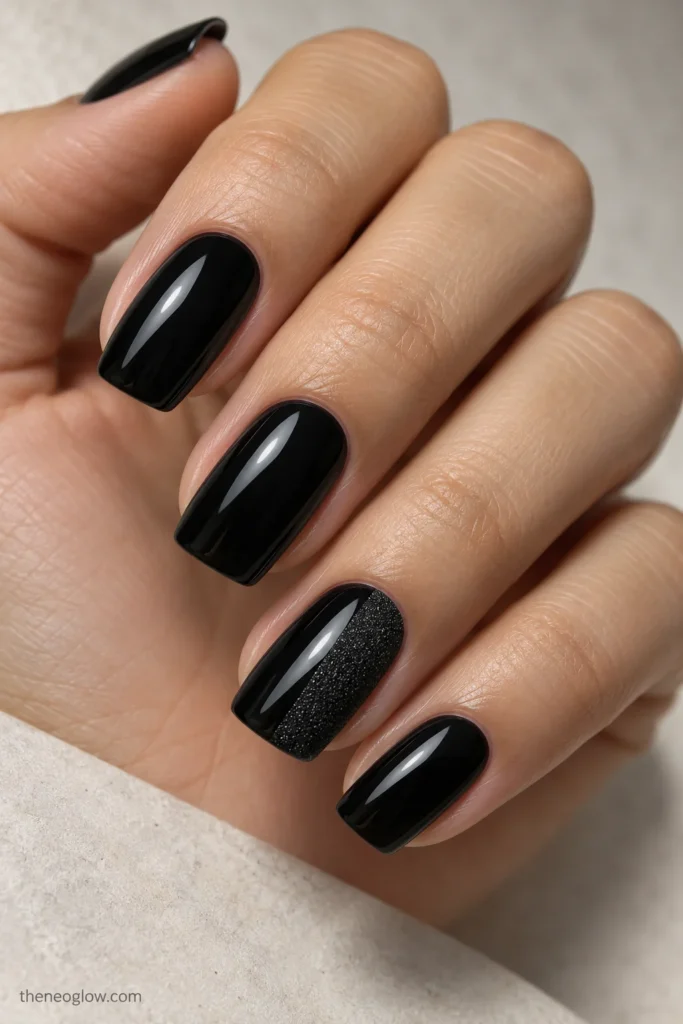
Keep medium squovals glossy black, except for a compact panel of matte, fine-grain black texture across the outer half of each ring fingernail. The texture should resemble tightly packed black sand, not large glitter particles or raised spikes.
Leave the cuticle half of each accent smooth and glossy. The finish boundary gives the texture a deliberate shape without introducing another color or a bulky charm.
9. Black-Pearl Whisper Almonds
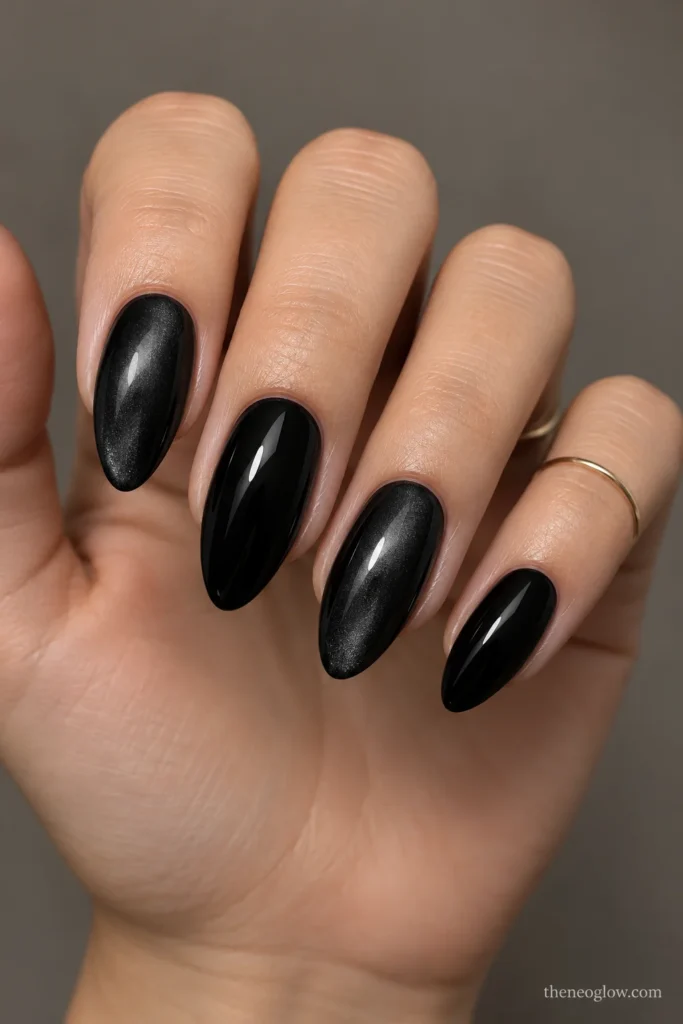
Start with opaque black medium almonds. On the index and ring nails, add a very thin smoky-graphite pearlescent veil that catches cool, subtle highlights over the black; the other nails remain solid black gloss.
This is not white pearl chrome or a full silver mirror. A faint shifting surface is enough, particularly if you like reflective details but want a quieter option than a metallic band.
Gunmetal, Chrome, and Moving Reflections
10. Gunmetal Clipped Corners
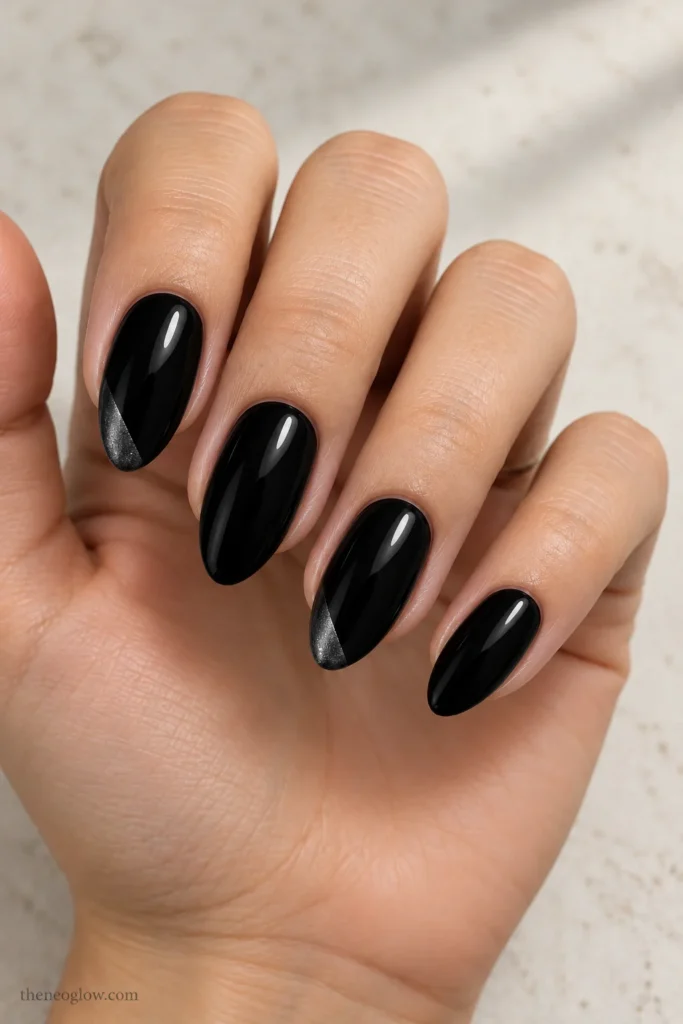
On glossy black medium almonds, paint one small, sharp gunmetal triangle at the left outer tip corner of the index and ring fingernails. Mirror the corner placement on the opposite hand. The rest of each nail stays smooth, opaque black.
The cool pewter edge should cover only a small portion of the plate; a broad silver tip would turn this into a different design.
11. Black-Mirror Cuticle Rails
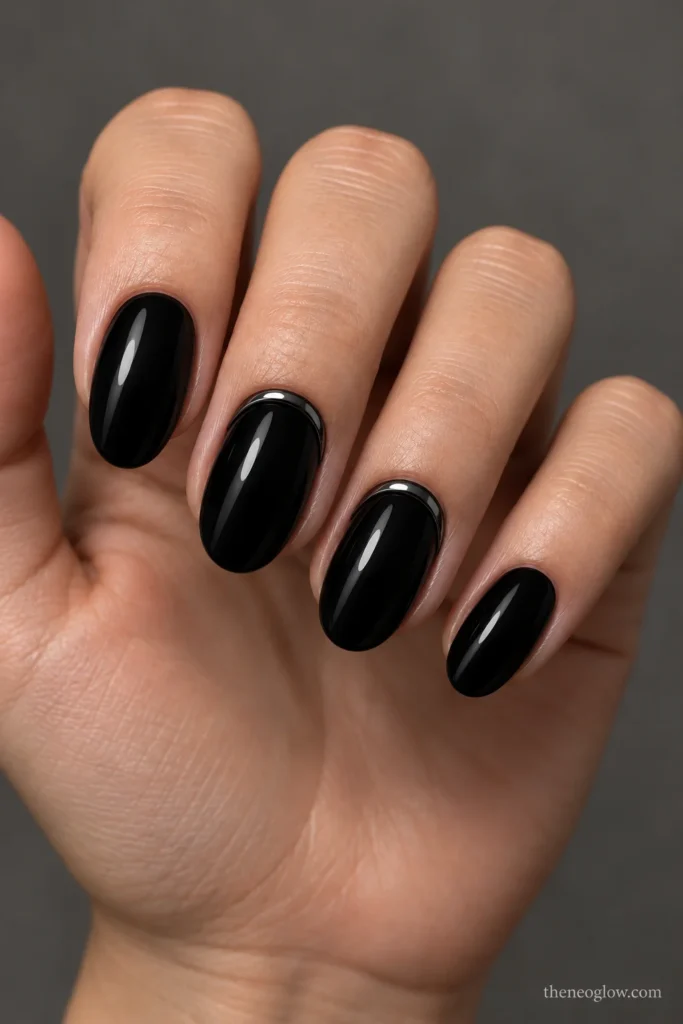
Coat short oval nails in dense black gloss. Add a narrow black-chrome rail that follows only the bottom curve beside the cuticle on the two middle fingernails, stopping before either sidewall. It should look like dark reflected metal against lacquer, not a silver or gold half-moon.
This is best viewed from slightly different angles: the mirror rail appears, disappears, and reappears as the hand moves.
12. Twin Black-Chrome Crossbars’
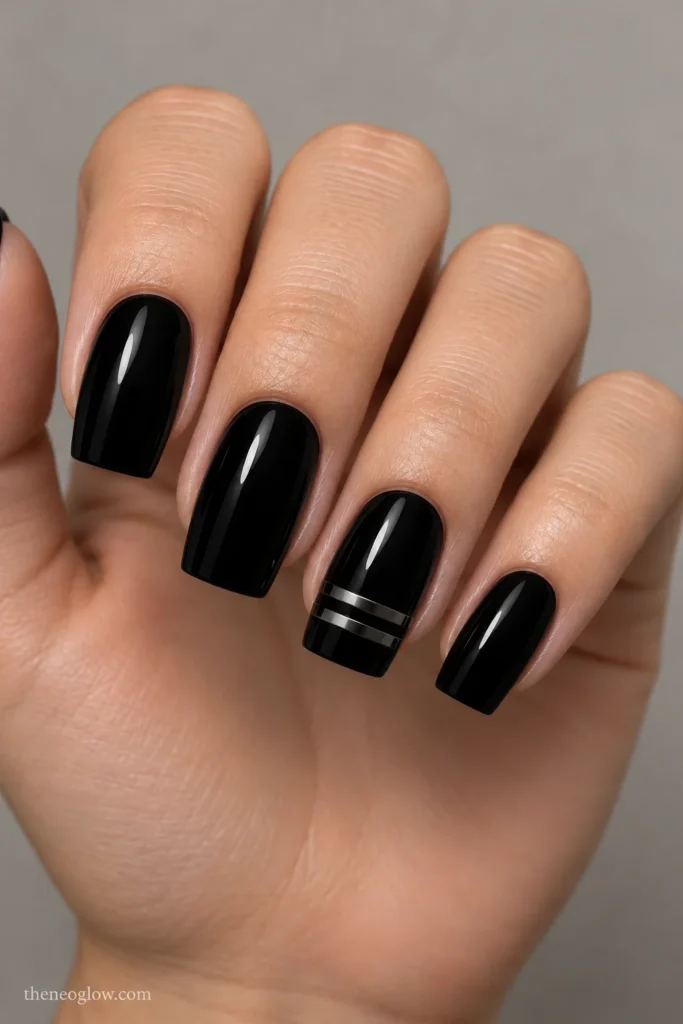
Medium square nails carry a flat jet-black base. Across each ring nail, place two thin, parallel black-chrome horizontal bars close to the outer third, leaving a visible black gap between them. Keep the bars straight rather than curving them into French smiles.
Horizontal repetition is the defining feature. Avoid vertical center spines, chains, rhinestones, and all-over mirror powder, which belong to different looks.
13. Velvet Onyx Side-Light
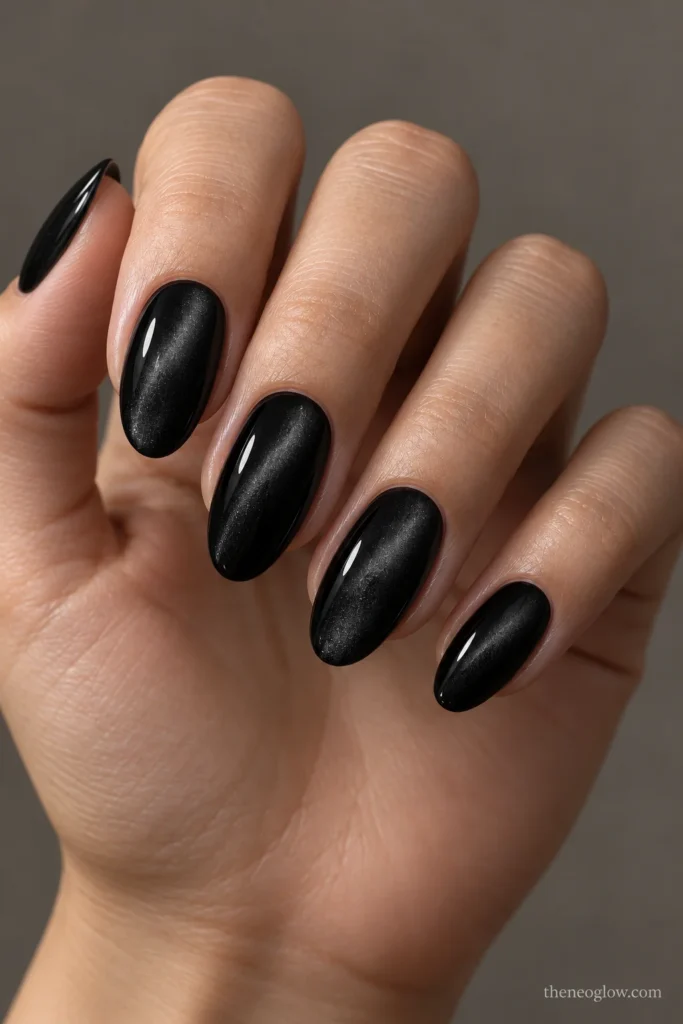
On medium oval nails, use a near-black magnetic finish with a soft charcoal reflection concentrated along one off-center diagonal. The highlight should look suspended within the polish, not painted as an opaque stripe. Let the opposite side of every nail remain visibly dark.
Ask for a subdued, velvet-like side glow rather than a bright silver beam. The motion of the reflection distinguishes magnetic polish from fixed chrome artwork.
Smoke, Hairline Metal, and Small Clear Cutouts
14. Diagonal Smoke Pass
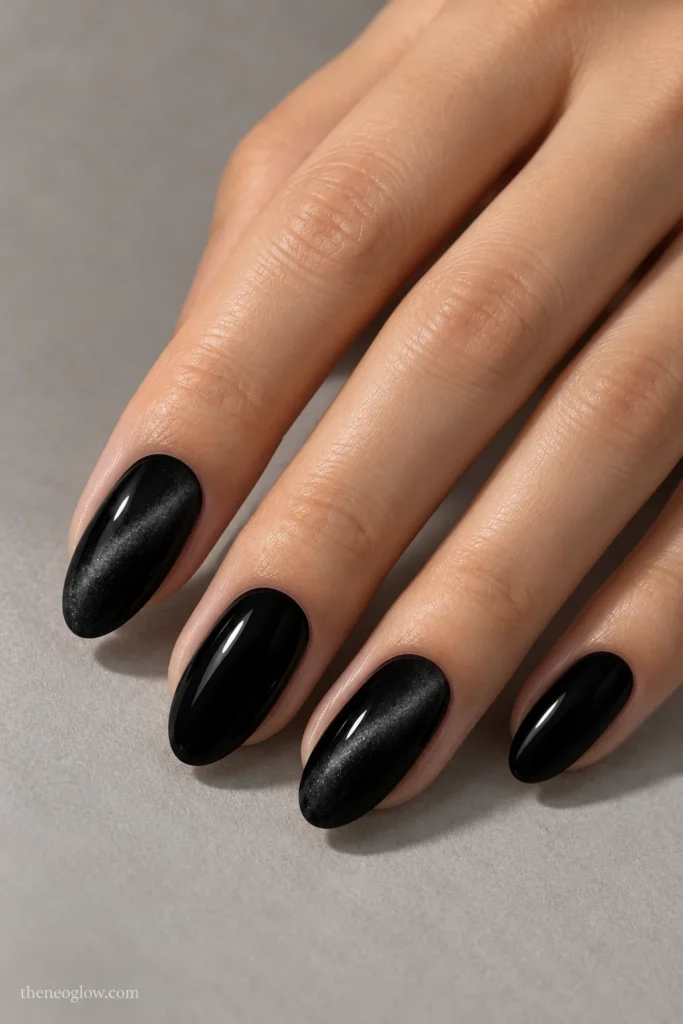
Keep medium oval nails glossy and solid black. Across the index and ring fingernails, blend a narrow diagonal pass of very dark smoky charcoal from one lower side to the opposite upper side. The haze should sit over black, never over a nude or bare center.
Leave the thumb, middle finger, and pinky completely black. Unlike a sidewall fog manicure, the blurred mark travels across the nail as one controlled diagonal.
15. Charcoal-Dust Black Ombré
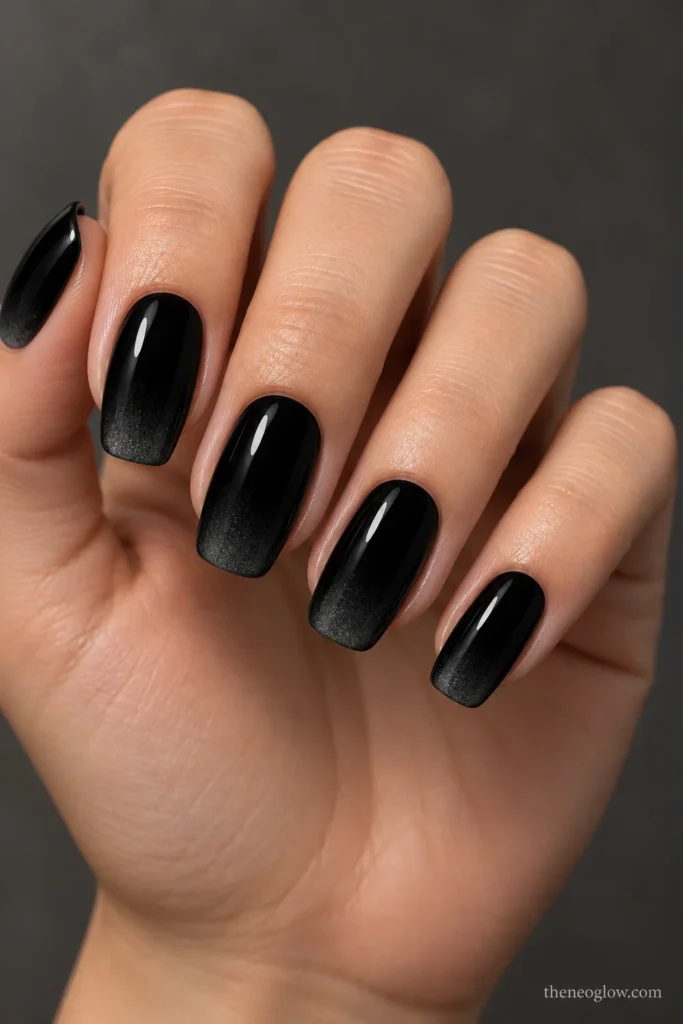
On medium squovals, start with dense glossy black at the cuticle and through most of the nail, then fade into a soft, nearly black charcoal at only the last quarter of the free edge. Keep the gradient vertical and continuous across all nails.
Skip silver glitter and visible gray tips. The black-to-charcoal fade should be detectable up close without turning into a two-tone manicure.
16. Silver Static Fracture
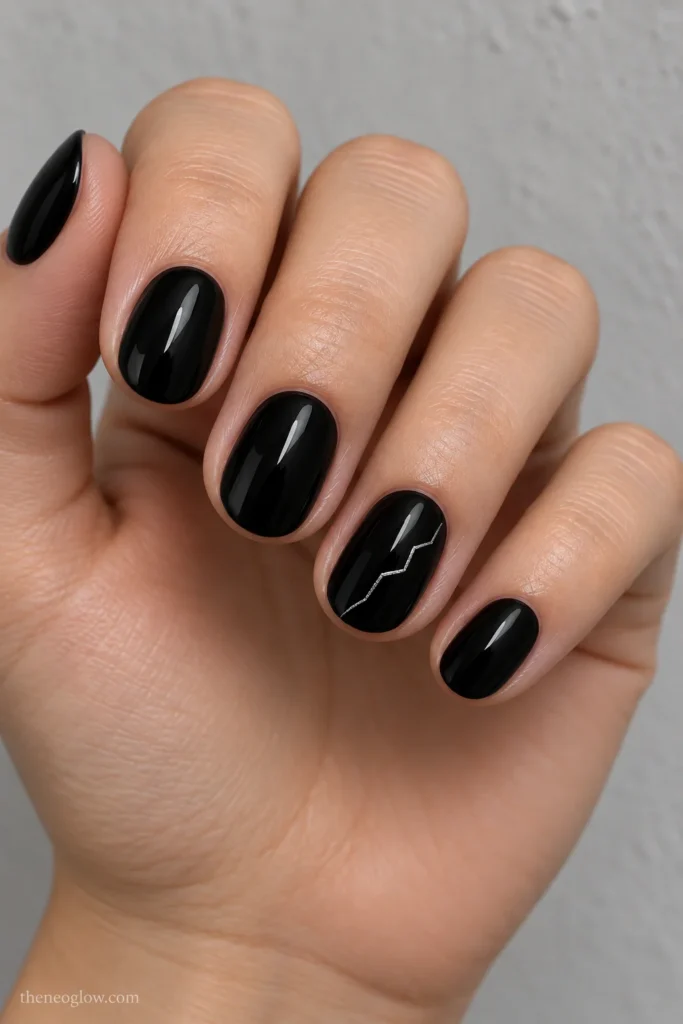
Choose genuinely short ovals in opaque ink-black gloss. On one ring finger per hand, add a single broken, angular silver hairline: three short connected zigzag segments crossing part of the nail diagonally, with no branching bolts.
The line is meant to resemble a fleeting static flash, not a spider thread, lightning-filled sky, or jewelry chain. Every other nail stays plain black.
17. Three Clear-Window Notches
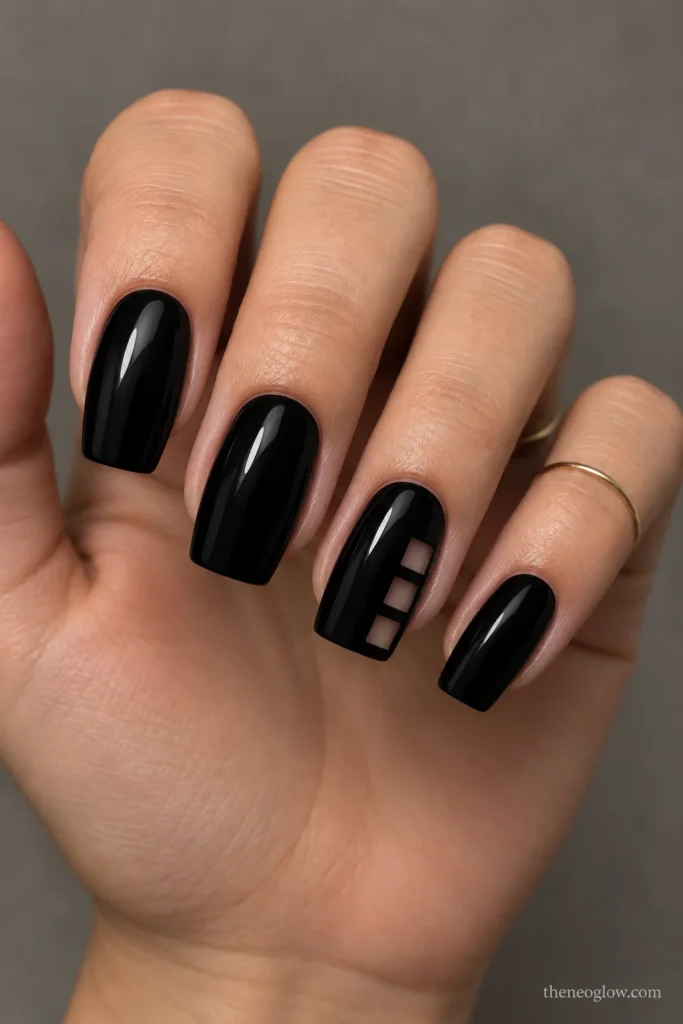
Use medium square nails coated in glossy black. On the ring nails only, leave three tiny, separate sheer rectangular notches arranged like descending steps along the outer side. Black remains visible between the windows and around the entire perimeter.
Keep the combined clear area very small so the accent still reads as a black nail. These stepped openings differ from a full bare stripe or one isolated square cutout.
18. Root-Slit Black Squovals
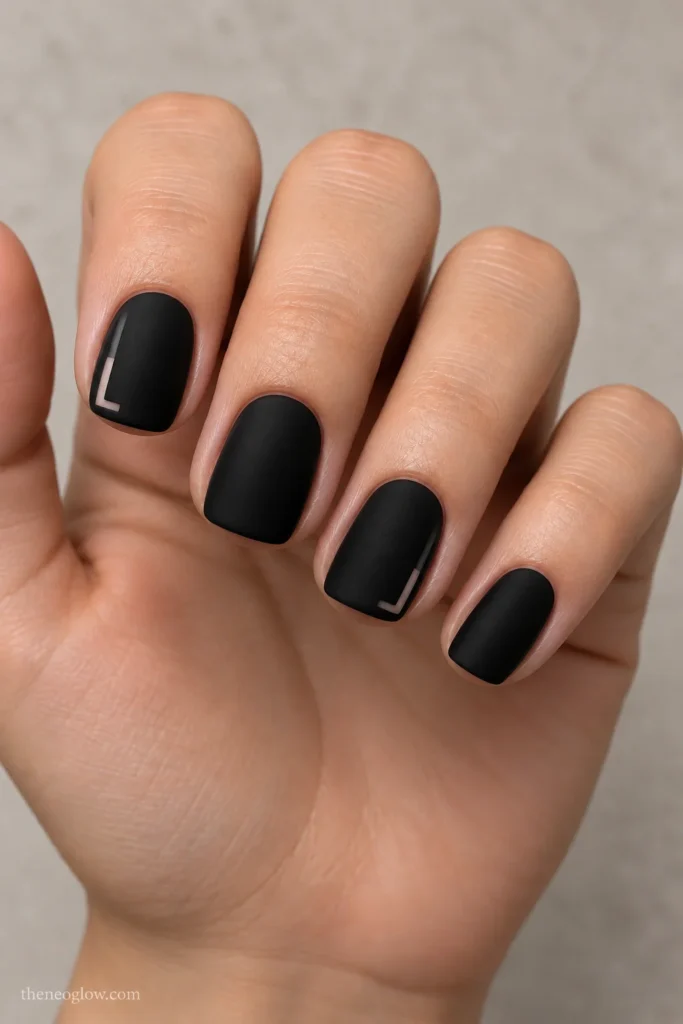
Finish short squovals in smooth matte black, leaving one fine, L-shaped negative-space slit hugging the lower outside corner of the index and ring nails. One segment runs briefly along the cuticle side; the other rises just a few millimeters along the sidewall.
The gap should look like a precise open seam in black polish, not a crescent moon or a centered half-moon. Keep it narrow enough that the hand still reads overwhelmingly black.
Match the Shape and Length to the Finish
Very short nails usually show broad finishes more clearly than tiny patterns. Try Idea 1 for high gloss, Idea 6 for one checker corner, or Idea 18 for a small negative-space seam. Medium squares are better for the clear boundaries in Ideas 2, 12, and 17; medium ovals and almonds give the shifting reflections in Ideas 9 and 13 space to move.
If you need a design for typing or daily hands-on work, choose your actual comfortable free-edge length first. A photograph of a dramatic almond tip does not require you to wear that length. For longer tapered extensions and full gothic motifs, NeoGlow’s gothic coffin nails guide covers that separate shape-first choice. Ask the salon to adapt these black finish details to your own nail plate instead of shrinking every line.
What to Say at the Salon
A finish-first reference is more useful when you specify opacity, shape, placement, and final topcoat. For a quiet option, say: “Short squovals, almost no free edge, fully opaque jet black, matte on all ten nails, and one shallow glossy V on each ring finger. No other symbols or raised art.”
For a reflected option, try: “Medium ovals, black magnetic lacquer that reads dark, with a soft charcoal side-light running diagonally. No silver painted stripe, no gold, and no charms.” For a jelly option, name the exact transparent area and ask to see a swatch before application; “black jelly” alone does not define how sheer the final nails should look.
Keep the Black Finish Looking Intentional
Deep polish can make tip wear and uneven edges easier to notice. For regular lacquer, use the base, color layers, and compatible topcoat directions from the products you actually own; matte and glossy accent areas may need different final finishes. Do not assume a chrome or magnetic gel method works with an unrelated polish system.
At an appointment, check the salon’s tool-cleaning practices and avoid cutting or forcefully pushing back cuticles. The American Academy of Dermatology has a practical manicure and pedicure safety checklist for questions worth asking before a service.
If you choose gel, plan its removal before the manicure is applied. Do not pick, pry, or scrape off lifting product; the Academy also explains how dermatologists recommend removing gel polish. Follow the instructions for your particular system or arrange professional removal when you are unsure.
Choose the Black Detail You’ll Actually Wear
For a clean everyday look, save the opaque ink gloss of Idea 1 or the satin depth of Idea 7. If you want light to create the drama, compare the gunmetal corner in Idea 10 with the moving reflection in Idea 13. For an October accent with almost no extra color, Idea 17 or 18 uses negative space while keeping black firmly in charge.
Save the one image that matches your preferred shape, black opacity, finish, and accent position. If you decide the set needs pumpkin orange after all, NeoGlow’s black-and-orange Halloween nails guide owns that two-color route. This gallery stays focused on the black finish itself.