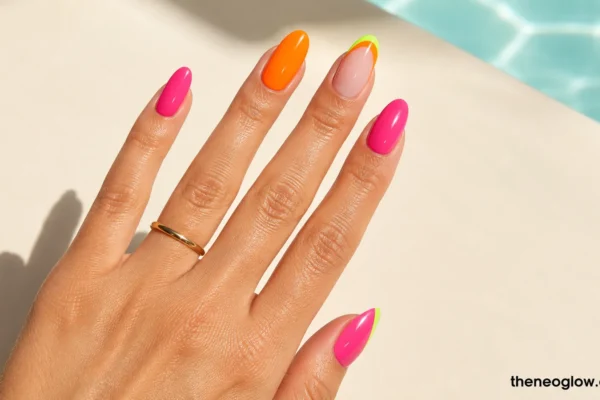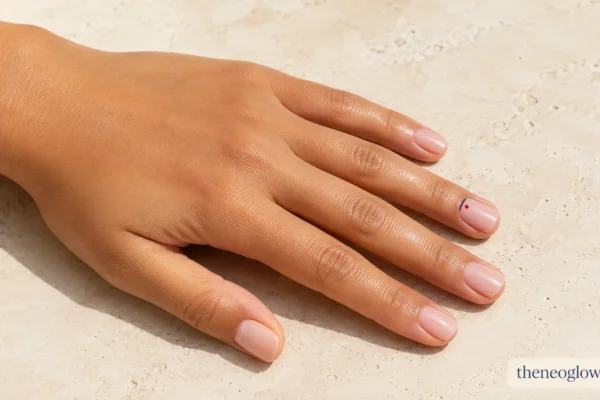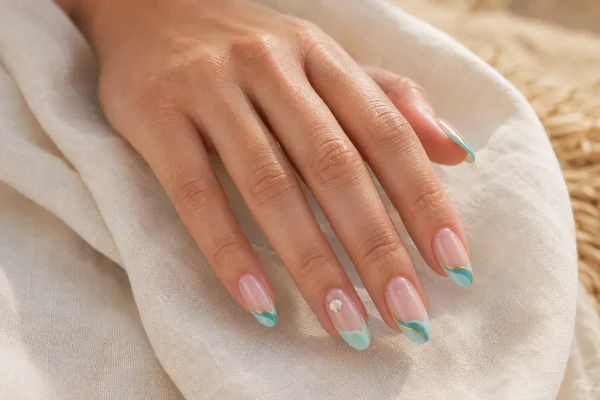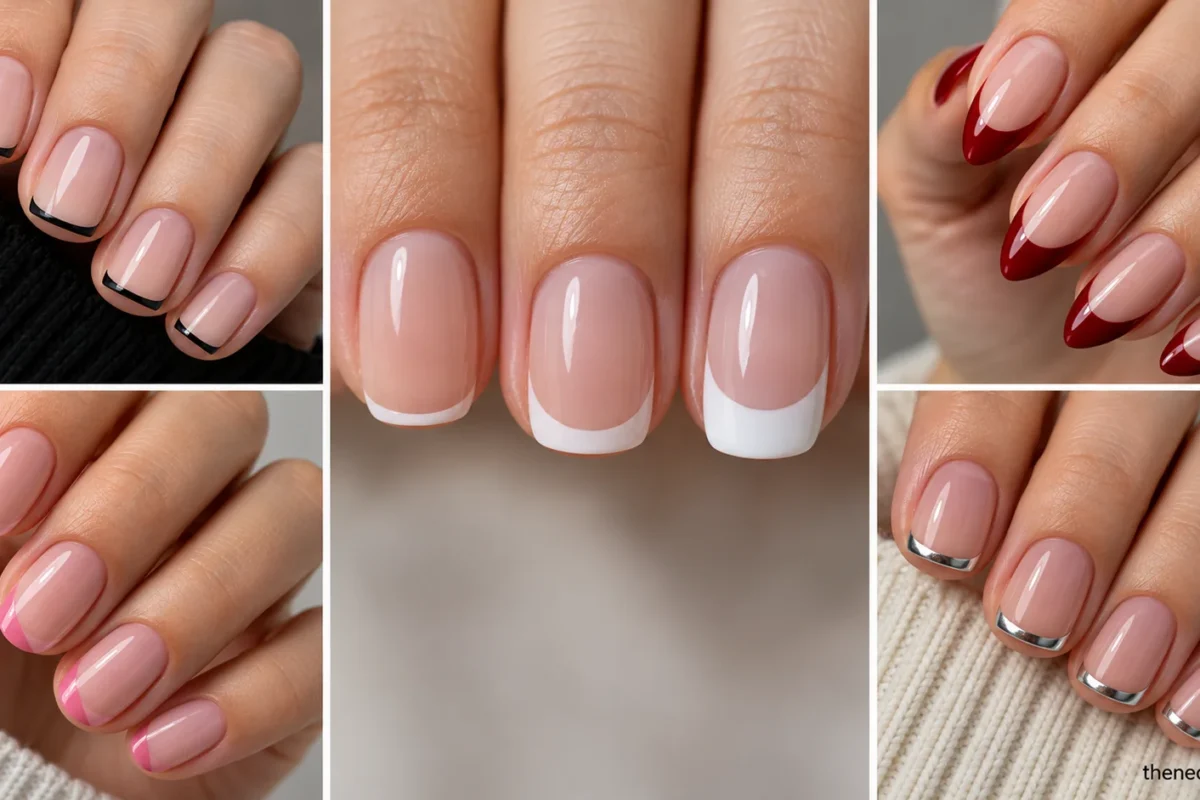
Two French manicures can use the same white polish and still look completely different. One may be a hairline edge on a short squoval nail; another may sweep deeper down the sides of a medium almond nail. What changes is not just color. Tip width, smile-line depth, visible base, nail shape, placement, and finish all affect the result.
This french tip nails guide puts those decisions in order. You will compare micro, classic, deep, side, reverse, double, diagonal, chrome, and negative-space structures, then match them to short nails, almond nails, color, salon wording, and simple at-home planning.
The French Decision: Boundary Before Color
A French manicure needs a deliberate boundary. In the classic version, that boundary separates a sheer or natural-looking base from a contrasting free edge. Modern versions can move, split, thin, widen, angle, outline, or reflect that boundary while still keeping the tip architecture recognizable.
Use this quick comparison before you save a reference:
| French structure | Tip placement | Best when you want | Watch for |
|---|---|---|---|
| Micro | Hairline at the free edge | Minimal contrast or short-nail scaling | A line so thick it becomes a classic band |
| Classic | Curved tip following the free edge | Familiar, balanced French structure | Uneven smile-line depth |
| Deep | Wider tip with a more pronounced curve | More visible tip color | Too much tip coverage on a short plate |
| Side | Contrast concentrated on one side of the tip | Asymmetry and negative space | Losing the free-edge connection |
| Reverse | Arc near the cuticle instead of the tip | A French-inspired inversion | Treating it like an unrelated half-moon |
| Double | Two separated arcs or tip lines | Graphic detail without full coverage | Lines merging into one thick band |
| Diagonal | Angled tip boundary | A sharper, directional look | Turning the design into a full diagonal color block |
| Chrome | French area defined by reflection | Metallic contrast with open base | Confusing shimmer or glitter with chrome |
| Negative-space | Tip outlined or partly filled | Airier structure and visible base | Too little boundary to read as French |
The point is not to find one “best” French manicure. It is to match the architecture to your nail space and the amount of contrast you want.
What Tip Width Actually Controls
Tip width is one of the most important French decisions because it determines how much of the nail plate stays visually open.
A micro French keeps the contrast close to the outer edge. It works especially well when the nail is genuinely short or when a dark color would feel heavy as a wide band. Black french tip nails, deep burgundy, cobalt, or bright red can all stay restrained when the line is very narrow.
A classic French uses a clearly visible band with a curved smile line. White french tip nails are the easiest reference for this structure because the contrast makes the boundary obvious, but the same width can be used with color.
A deep French increases the amount of tip color and usually uses a more pronounced smile line. On a longer oval or almond nail, that extra depth has room to read as intentional architecture. On a very short nail, the same depth can consume too much of the visible plate, so the design may look more like a half-painted nail than a French tip.
Essie’s French manicure tutorial shows the same principle from a DIY angle: the curve and depth of the smile line can be adjusted for a classic, micro, or asymmetrical result. That is a useful reference when you want to see how the boundary itself changes rather than only swapping colors.
Pair the Smile Line With Your Nail Shape
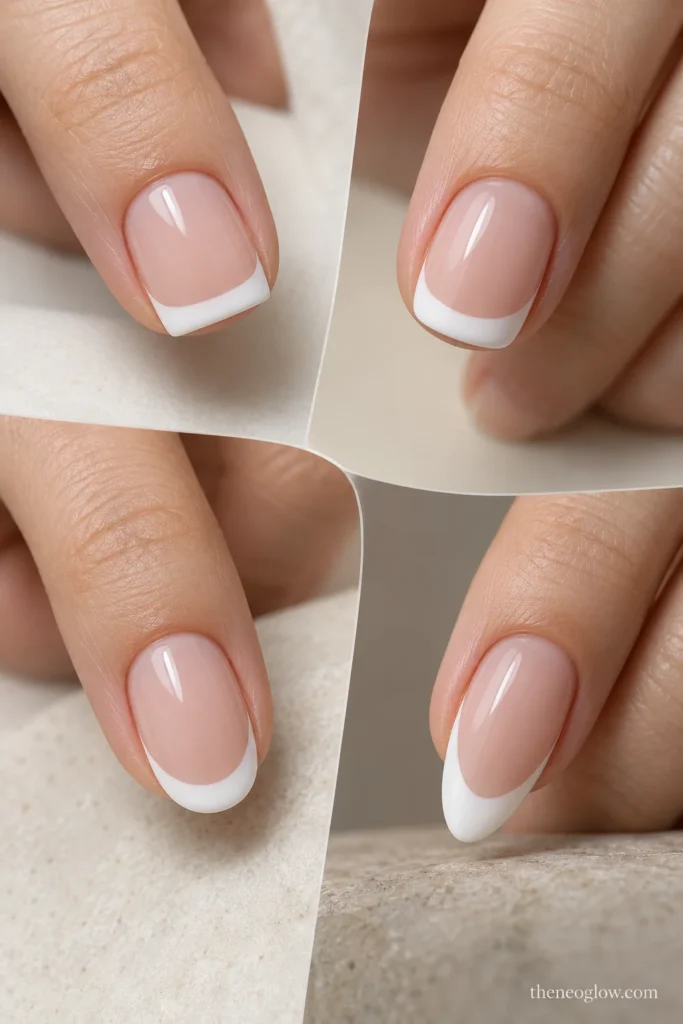
Shape and French structure should work together. If you are still deciding what outline your current free edge can support, use NeoGlow’s Best Nail Shape for Short Nails guide first. It goes deeper on square, squoval, oval, and realistic short-almond structure.
Square and soft square
Square nails give you a straighter free edge, so a shallow or nearly straight French can look clean. Micro tips, double lines, and diagonal tips also read clearly because the front edge is easy to map.
A very deep U-shaped smile line can fight the flat geometry if it drops too far down the sides. If you want a curved French on square nails, keep the curve controlled rather than forcing an exaggerated arch.
Squoval
Squoval is flexible because it keeps some straight structure while softening the corners. Classic, micro, side, and negative-space French tips all adapt well to it.
For short french tip nails, squoval is especially practical because the tip can follow the existing edge without inventing extra length. NeoGlow’s Short Nails guide goes deeper on scaling art to a small plate when your main constraint is true short length.
Oval
Oval nails naturally support a rounded smile line. A classic or slightly deeper French can echo the curved free edge, while a side French adds asymmetry without changing the underlying nail shape.
Keep the smile line centered. If one side dips lower than the other, the French boundary can make a small shape inconsistency more obvious.
Almond
Almond french tip nails have more room for a tapered, curved, or V-like edge because the sides narrow toward the center. They also suit double, diagonal, and chrome tips when you want the tip design to feel more directional.
Do not force an almond silhouette onto a nail that lacks enough free edge. OPI’s current shaping guide describes almond as better suited to medium-to-long nails, while square and squoval are suitable at shorter lengths. The cosmetic design should follow the structure you actually have.
Modern French Tip Structures to Know
These are not nine separate color ideas. They are nine construction families you can reuse with white, black, pink, red, brown, blue, metallic, or seasonal color.
Micro French
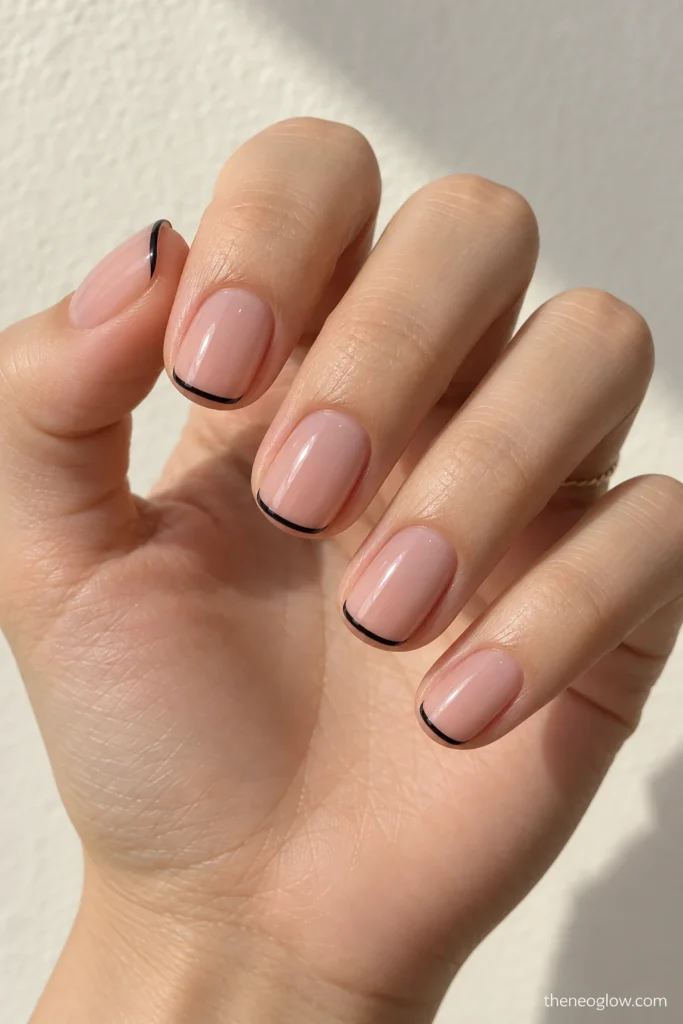
Keep the line as narrow as practical and close to the free edge. Use it when you want the base to stay dominant, when the nail is short, or when the tip color is strong.
Micro does not mean faint. A hairline black, red, or hot-pink edge can have high contrast while using very little space.
Classic French
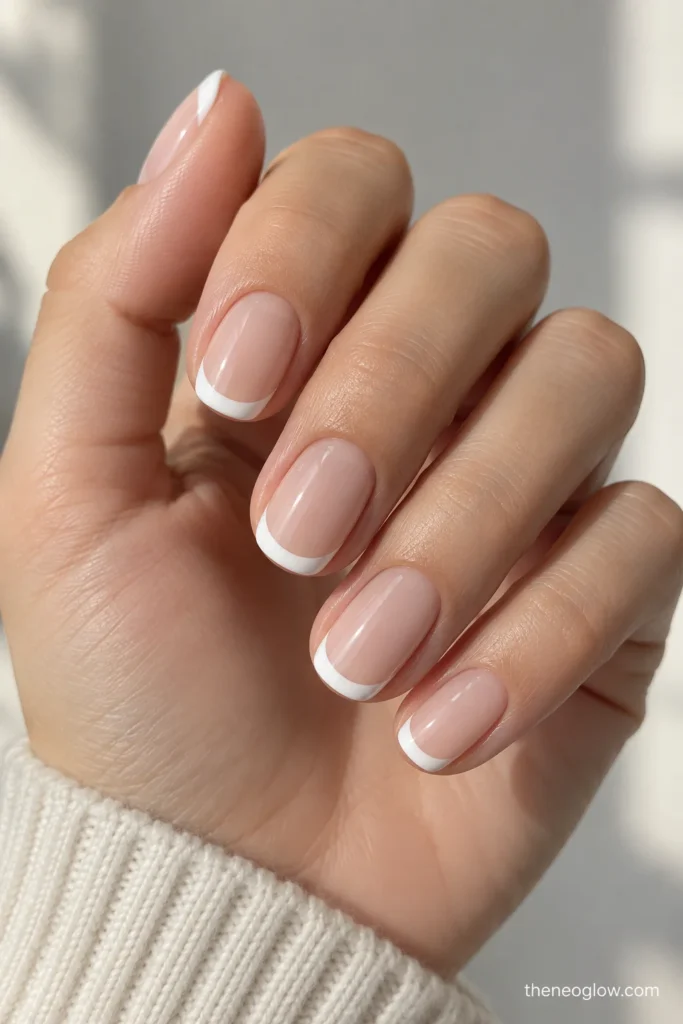
Use a continuous tip with a clean curved smile line and a sheer, milky, nude, or translucent base. The width should be visible without taking over the nail.
Classic structure is useful as your baseline. Once you know how wide and curved you like it, you can change color or finish without changing the architecture.
Deep French
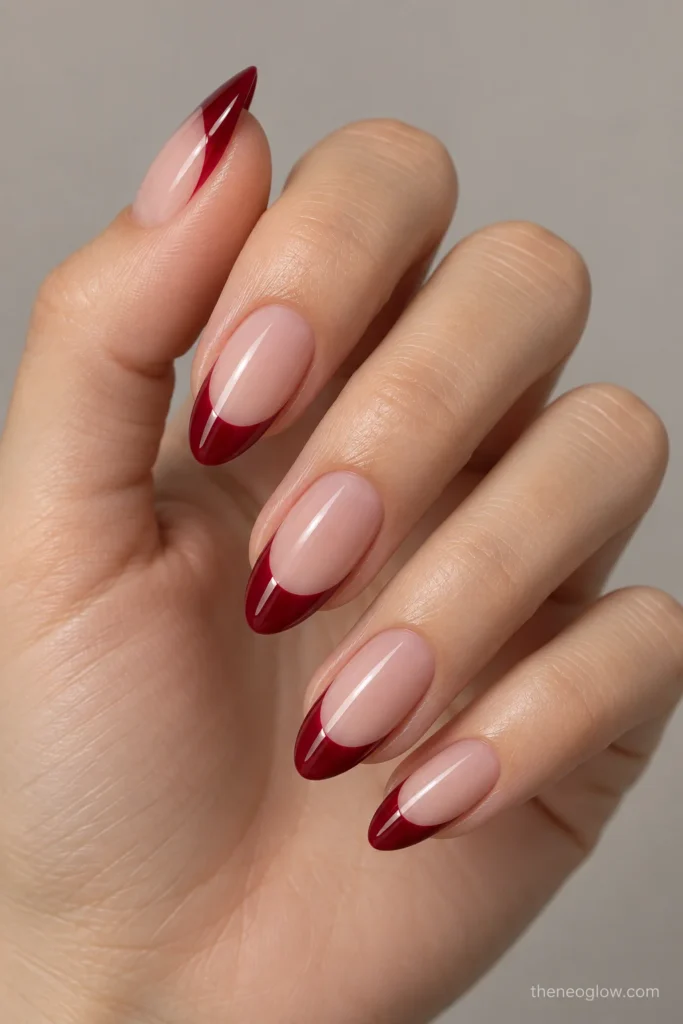
Let the smile line dip farther down the sides so the tip occupies more of the nail. This is better when you have enough length for the wider color zone to remain proportional.
A deep French is not automatically more dramatic because of color; its defining feature is how much of the nail the tip structure occupies.
Side French
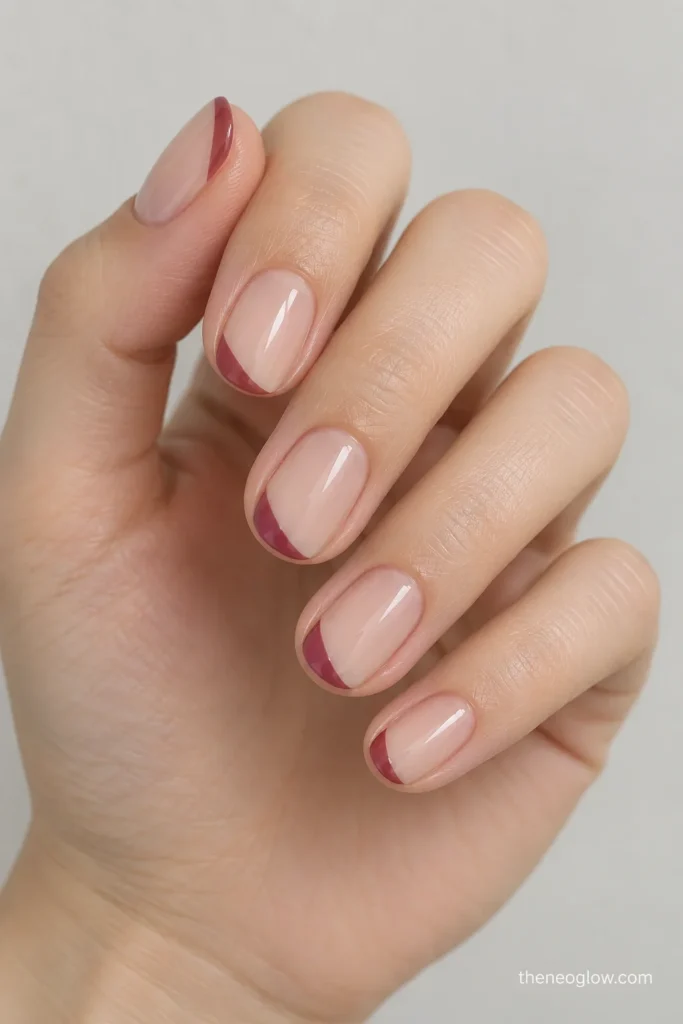
Place the contrast along one side of the free edge and taper it away before it reaches the opposite side. The remaining open base is part of the design.
This is a strong route when you like asymmetry or want color without a full-width tip.
Reverse French
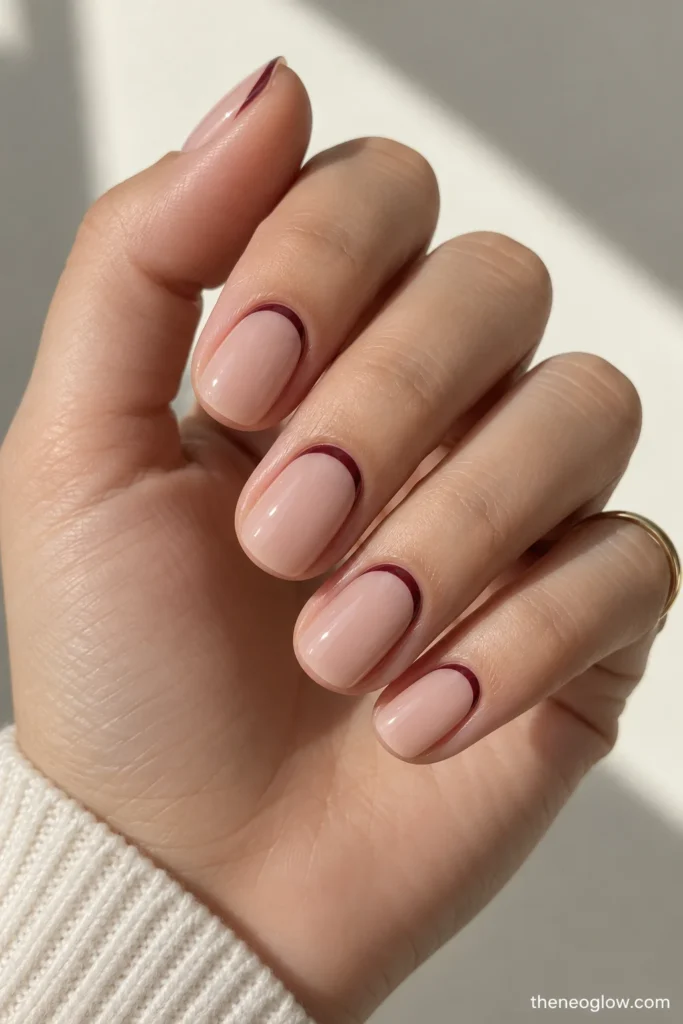
Move the French-style arc toward the cuticle area and leave the center and free edge mostly open or simply finished. The result is an inversion of the usual boundary.
Keep the line slim enough that it reads as a controlled arc rather than a large half-moon block.
Double French
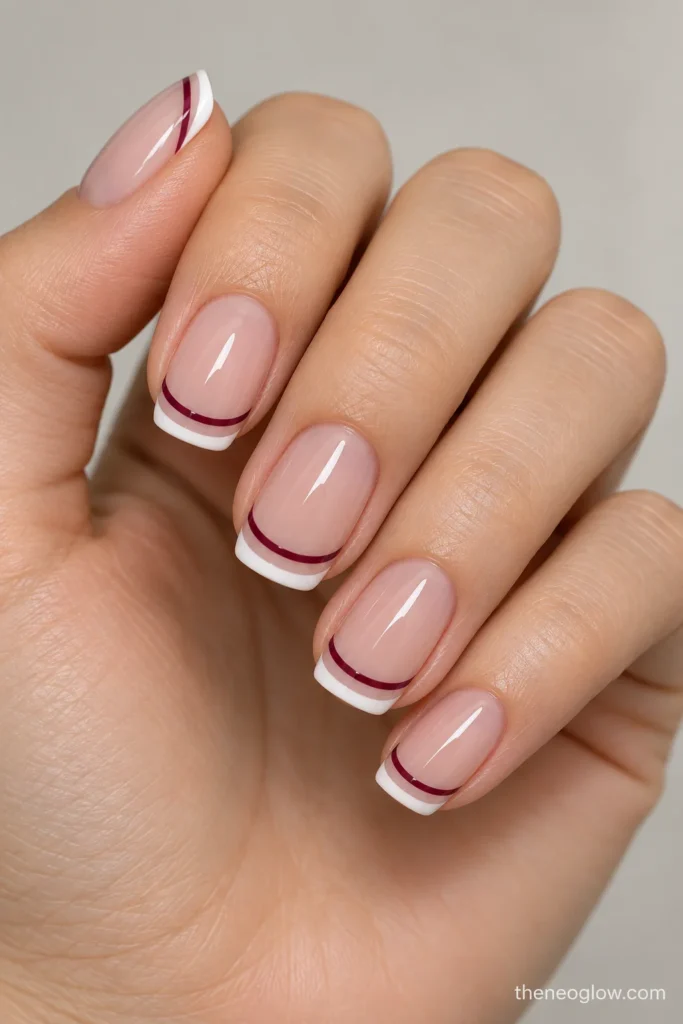
Use two distinct lines with visible base between them. They can be parallel curves, a classic tip plus a second hairline, or two related colors.
The separation matters. If the gap disappears, the design becomes one thicker tip instead of a double French.
Diagonal French
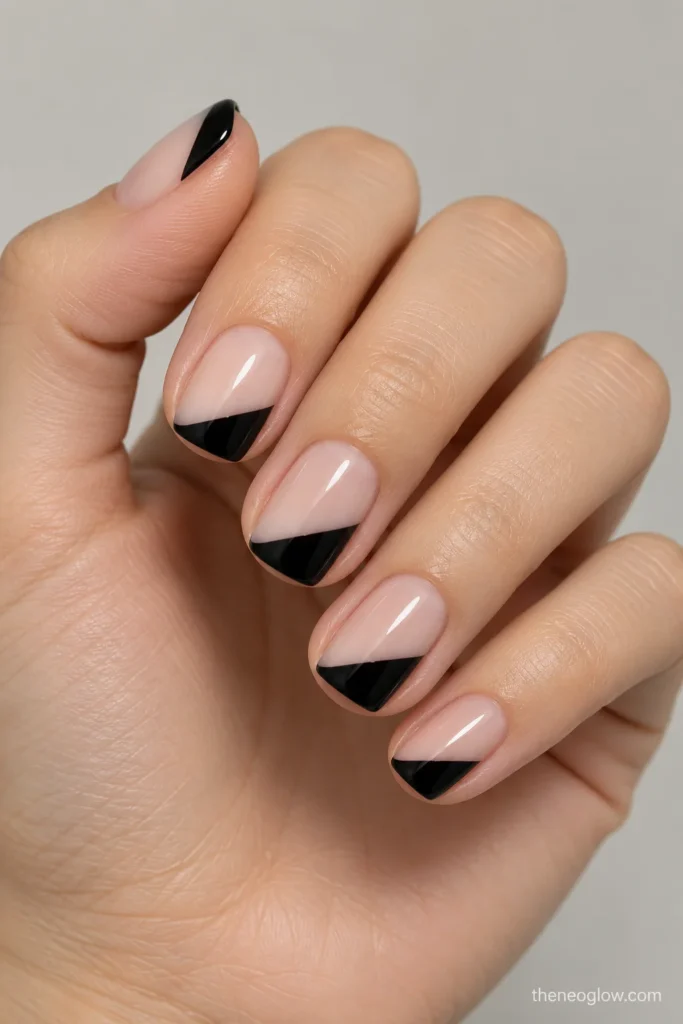
Replace the centered curve with an angled boundary across the tip. The color should still connect to the free edge so the design reads as French rather than a random diagonal panel.
A shallow diagonal works on shorter nails; a longer almond can carry a steeper angle.
Chrome French
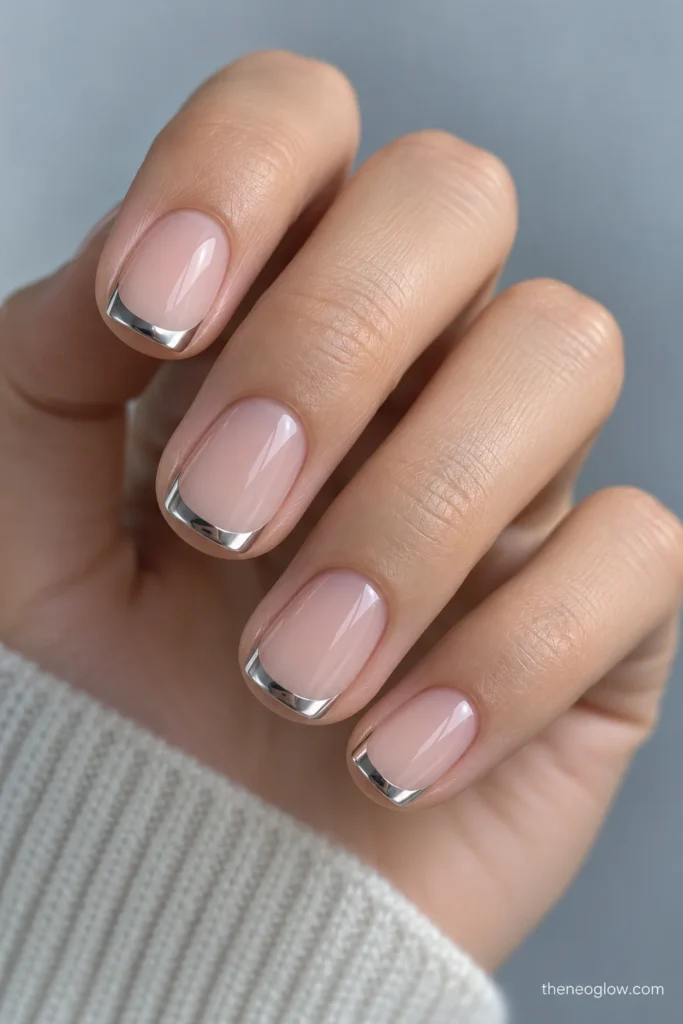
Keep the reflective finish inside the French zone. A silver mirror tip, pearl edge, champagne arc, or colored chrome tip can all work as long as the base remains visibly separate.
If you want to compare reflective intensity and chrome placement in more detail, NeoGlow’s Chrome Nails guide owns that finish family.
Negative-Space French
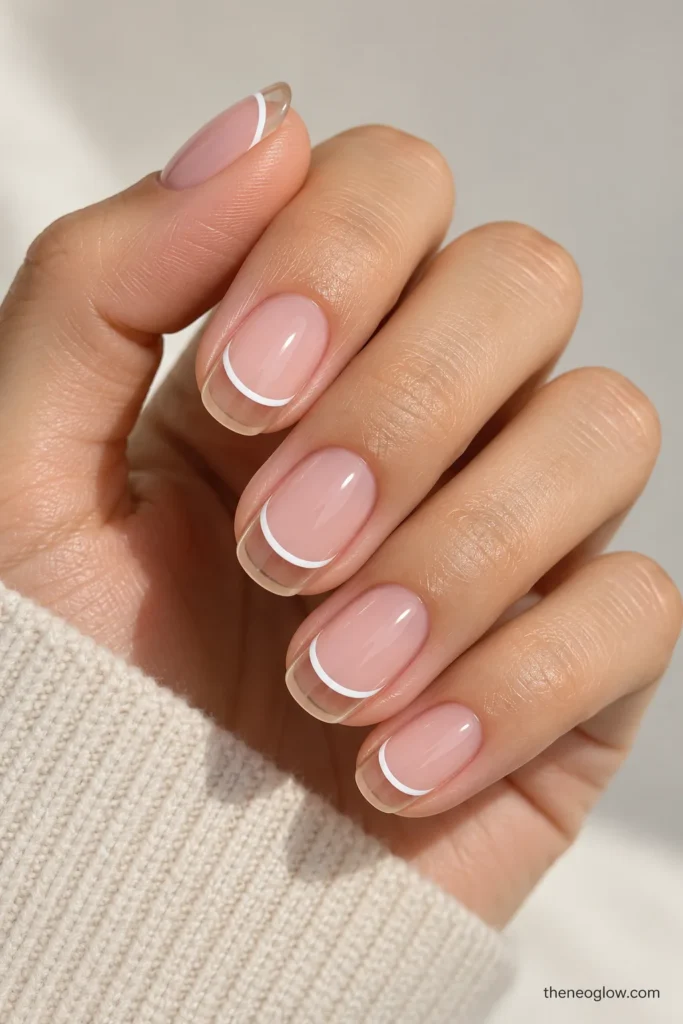
Leave part of the tip transparent or base-colored and define the French area with an outline, split fill, or open gap. This makes the boundary do the work instead of solid color.
It is useful when you want a graphic manicure that still feels light.
Color Is the Second Decision
Color matters, but it should come after the construction decision.
White french tip nails give you the clearest classic reference. A sheer pink or beige base with a crisp white edge makes width and symmetry easy to see.
Black french tip nails create stronger contrast, so micro, side, diagonal, or negative-space structures can keep the dark edge from feeling visually heavy.
Pink french tip nails can be tonal or high contrast. Pair a blush base with a slightly deeper pink for a soft effect, or use fuchsia on a neutral base when you want the tip to lead.
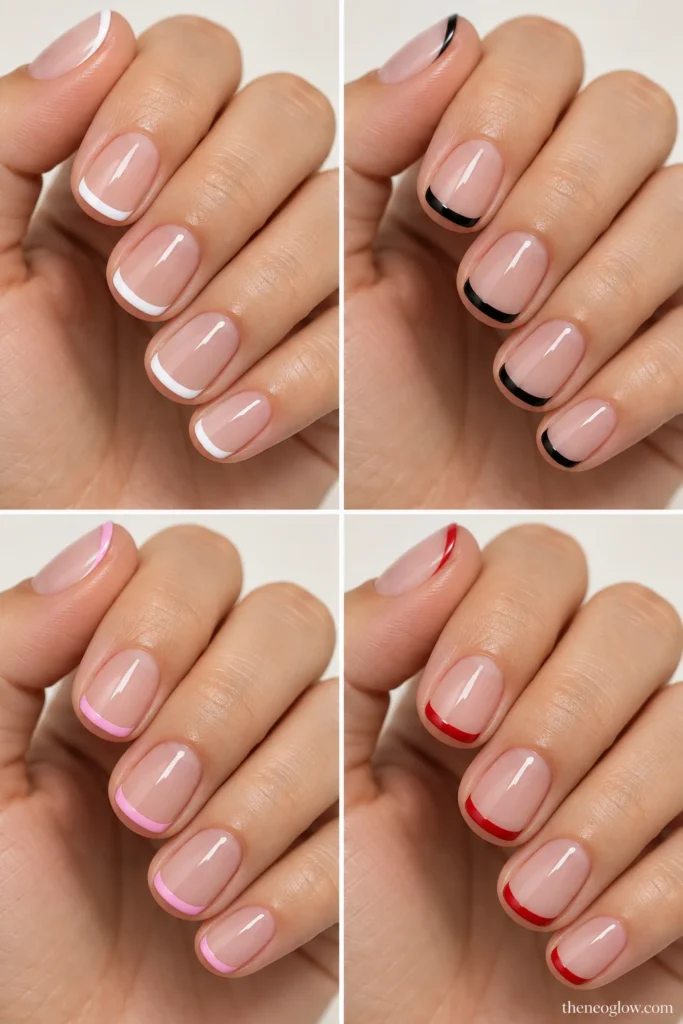
Red french tip nails can range from cherry to oxblood. A narrow red edge feels controlled; a deeper curved band makes the color more dominant.
For seasonal versions, keep this evergreen page focused on structure. NeoGlow’s Halloween French Tip Nails guide is the better next step when you want ghost edges, web outlines, blood drips, and other spooky variations instead of general French construction.
Building a Cleaner Smile Line at Home
For regular polish, choose the structure before you start painting. Apply your base, let it set enough for the next step, then map the smile line with a fine brush or the guide method you already use. Work on the boundary first and fill the tip second.
Do not correct an uneven line by repeatedly making the entire tip thicker. If one side is low, refine that side while keeping the planned width in view. Essie’s step-by-step French tutorial is a useful optional reference for tracing the smile line and customizing its depth.
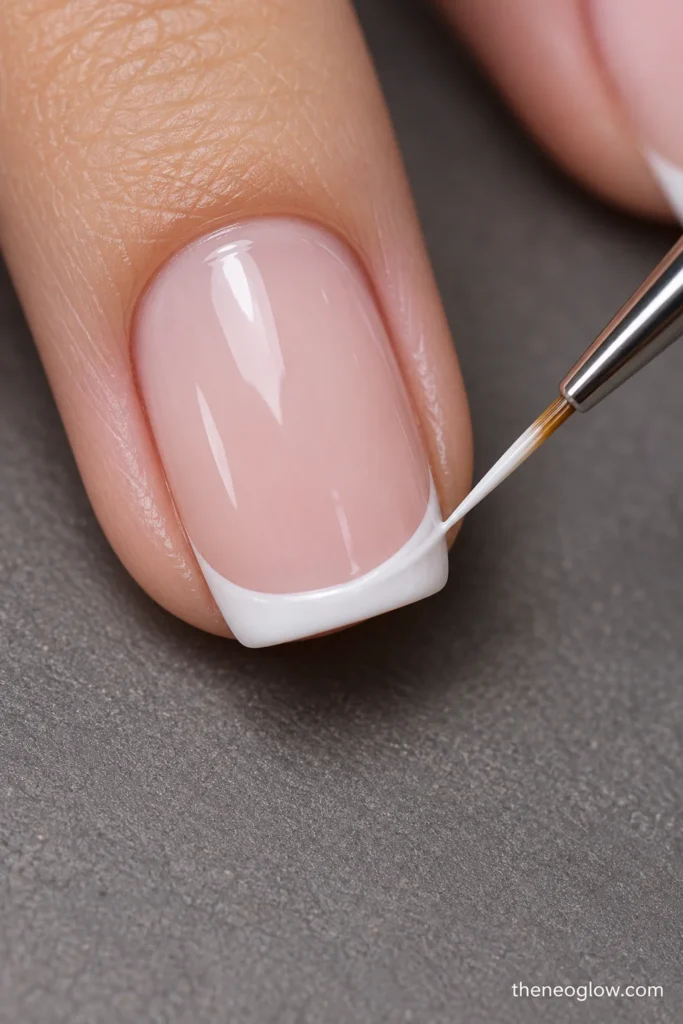
If you use gel or another product system, follow the directions for that exact base, color, lamp, and topcoat rather than borrowing cure times from a different brand. The French structure is transferable; product-specific processing is not.
Before shaping natural nails, keep the cosmetic goal secondary to the nail you actually have. If a saved reference only works after you remove substantial supported width or create a taper your current free edge cannot hold, change the French structure instead of forcing the nail into the photo’s silhouette. A shallower smile line, micro tip, or softer shape can preserve the same design idea with less reshaping.
Salon Wording: Describe the Geometry
A useful salon request describes five things: length, shape, base, French structure, and finish.
Instead of saying, “I want modern pink French tips,” try:
“Keep the nails short squoval with a sheer rosy base. Add a very thin curved pink micro French that follows the natural free edge. Keep the line equal in visual weight across all nails and finish glossy.”
For a stronger almond look:
“Medium almond, translucent neutral base, deep red French with a centered smile line that curves down the sides, glossy finish, no extra art.”
For a graphic version:
“Soft-square nails, sheer beige base, diagonal black French tips with the same angle on every nail and visible negative space.”
The wording gives the technician a structure to reproduce even if the saved photo uses a different color.
A Simple Order for Choosing the Final Look
Start with the nail you actually wear, not the inspiration photo.
Choose your length and shape first. Then choose tip width: micro, classic, or deep. Next choose placement: centered, side, reverse, double, diagonal, or negative-space. Add the finish—cream, glossy, chrome, matte, or another clearly defined effect—after the geometry is settled. Color comes last.
That order keeps a French manicure from becoming a random color swap. Save one reference that matches your real nail shape, note the tip width and smile-line depth, and use that wording at the salon or while recreating the design at home.