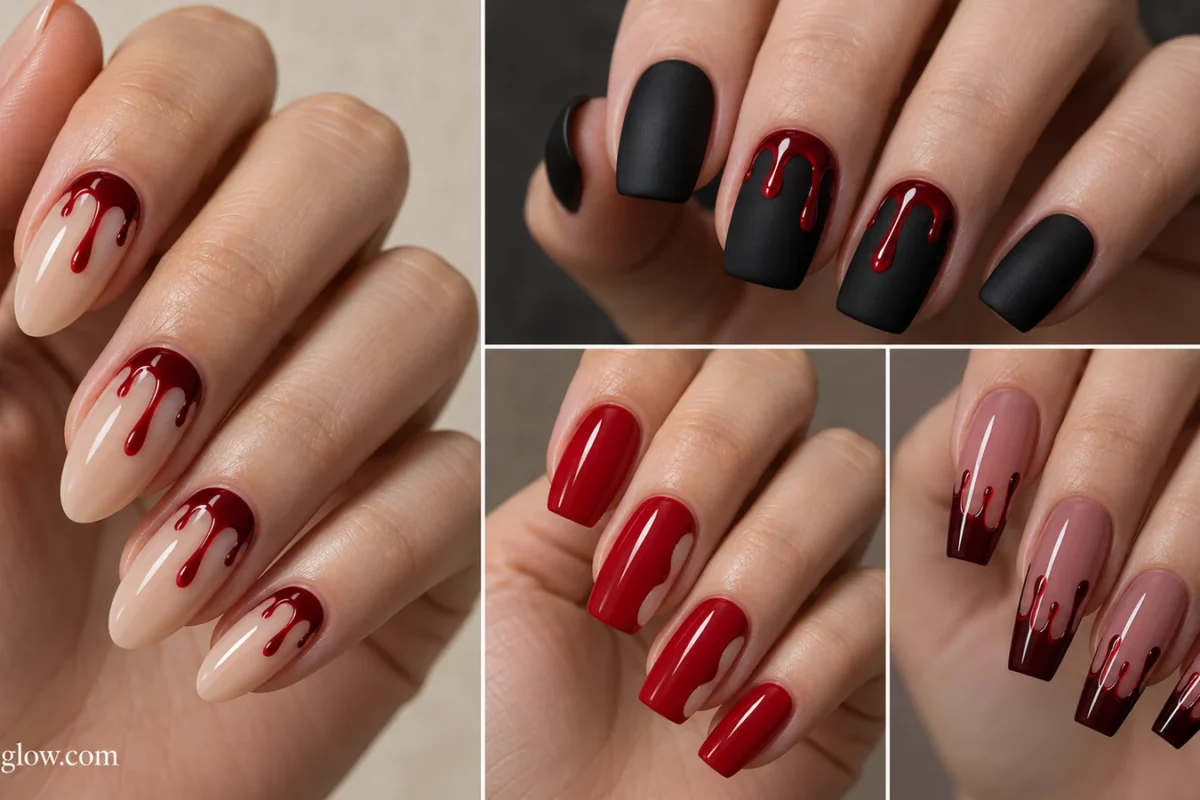
Blood drip nails depend on one small detail: a rounded bead of polish connected to a believable trail. Change where that trail starts, how far it travels, or how the color catches light, and the whole manicure changes. The 17 looks below range from single scarlet drops to layered garnet edges, with options for short natural nails and longer statement shapes. Every idea uses painted polish effects, not wounds or actual blood. You’ll also find a quick way to choose your layout, a practical drip-shaping method, and exact wording for a nail appointment. For other motifs and color families, explore NeoGlow’s Halloween nail ideas.
Choose Your Drip Layout First
The starting edge matters more than the shade. Drips falling from the cuticle look like falling lines; free-edge drips look as though color has spilled inward. A sidewall origin gives you an angled design without turning the nail into a French tip.
| Your priority | Try these ideas | What to specify |
|---|---|---|
| Small, wearable detail | 3, 8, 15 | One or two short drops on selected nails |
| Strong color contrast | 1, 4, 16 | Light or dark base with clearly separated red beads |
| Unusual drip direction | 2, 7, 9, 14 | Cuticle-down, sideways, or opposing directions |
| Reflective or translucent art | 5, 6, 10, 12 | Jelly, mixed shine, chrome, or negative space |
| Full statement edge | 11, 13, 17 | Broad color source with unequal rounded drips |
The Shape of a Convincing Polish Drip
A readable drip has three parts: an anchor where the red starts, a narrow stem, and a rounded endpoint. Two or three unequal lengths usually look more fluid than identical lines. Leave a little of the base visible between stems; filling every gap turns the design into a solid color block.
You can reverse the direction. For cuticle-down art, place the anchor close to—but not on—the skin and extend the stems toward the tip. For free-edge art, let the anchor touch the tip and draw the stems inward. On narrow nails, choose fewer drops instead of shrinking several into pinstripes.
Minimal Drips With Plenty of Open Base
1. Cherry Tip Drips on Milky Ovals
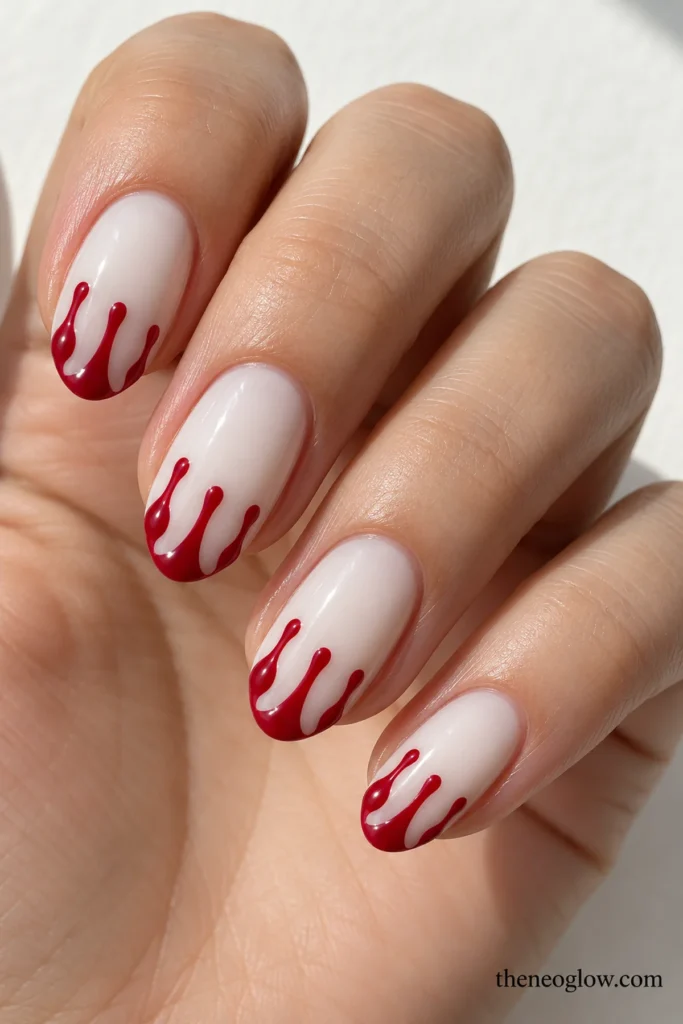
Soft milky-white medium ovals hold three separate glossy cherry-red trails that start at the free edge. One reaches the middle of the nail; two stop much sooner. Keep small milky gaps between the red anchors instead of painting a continuous smile line. The broken edge makes the liquid shapes—not a French band—the focal point.
2. Oxblood Cuticle-Down Cascades
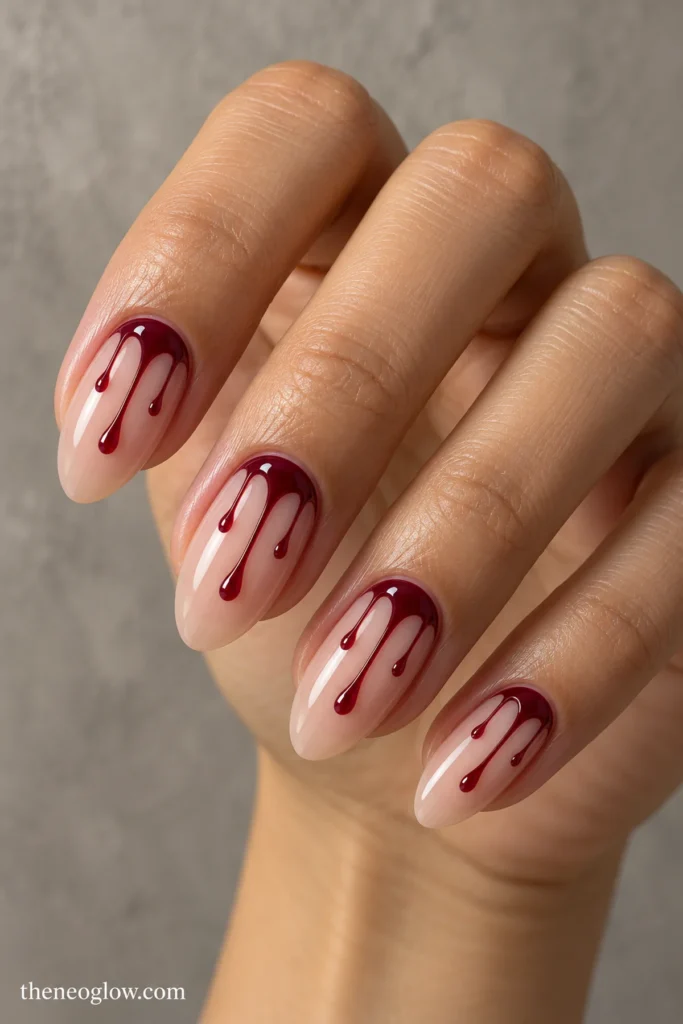
Against translucent peach-beige medium almonds, a narrow oxblood pool sits just inside the cuticle curve and releases three downward stems. Make the central one longest, the outer two staggered, and preserve a generous clear lower third. The origin at the nail base reverses the usual tip-born effect without resembling a neat inverted French cuff.
3. Two-Drip Nude Square Accent
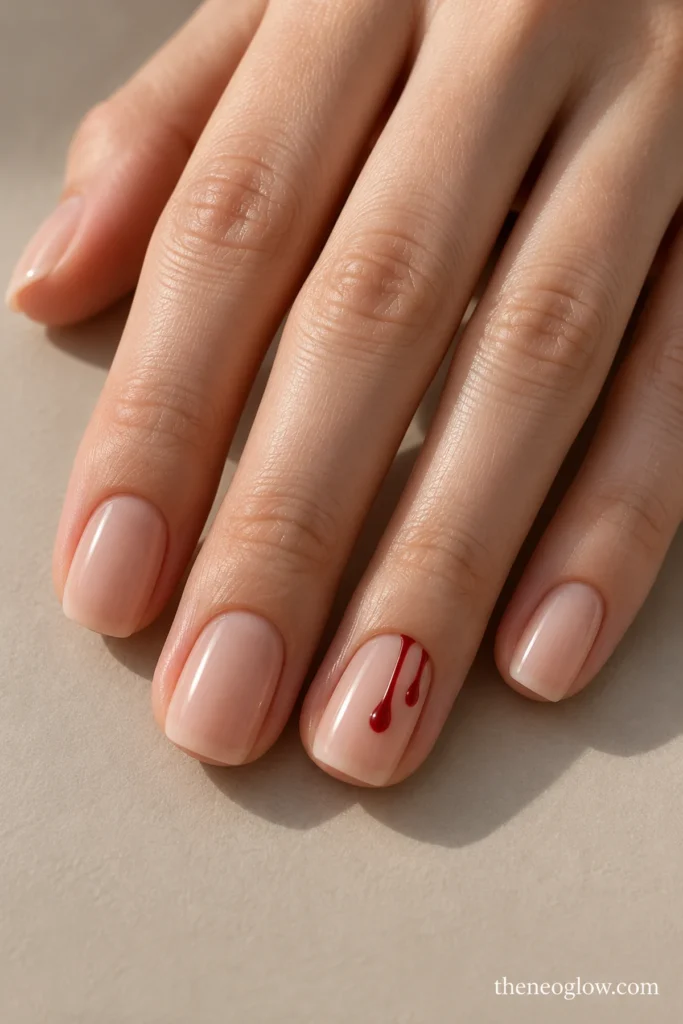
Paint short soft squares in a sheer neutral beige chosen to suit your preferred undertone. Only the ring nail receives two slim crimson trails from the free edge, ending at visibly different heights; the remaining nails stay plain. This option is for someone who wants the full drip silhouette without artwork on every finger.
4. Crimson Drips on Matte Black
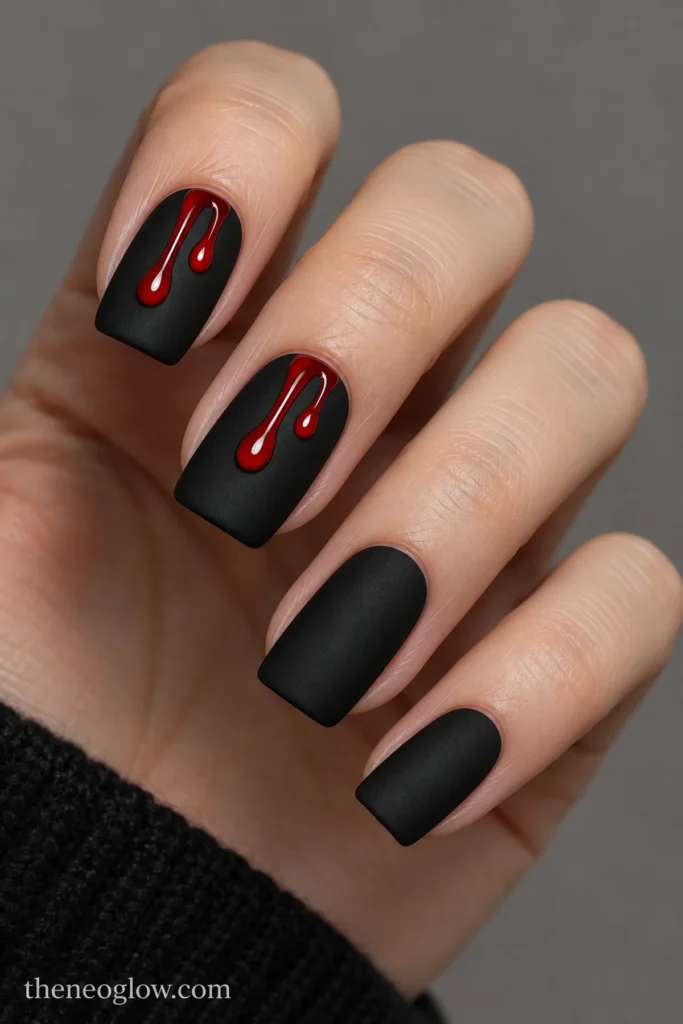
Opaque matte-black medium squovals make two bright crimson, high-gloss drops appear especially defined. Start their narrow stems at the cuticle-side upper border on the index and middle nails, with one bulb ending near mid-nail. Keep the other nails matte black. The red-versus-black contrast, rather than added Halloween symbols, carries the design.
5. Translucent Red Jelly Edge Melts
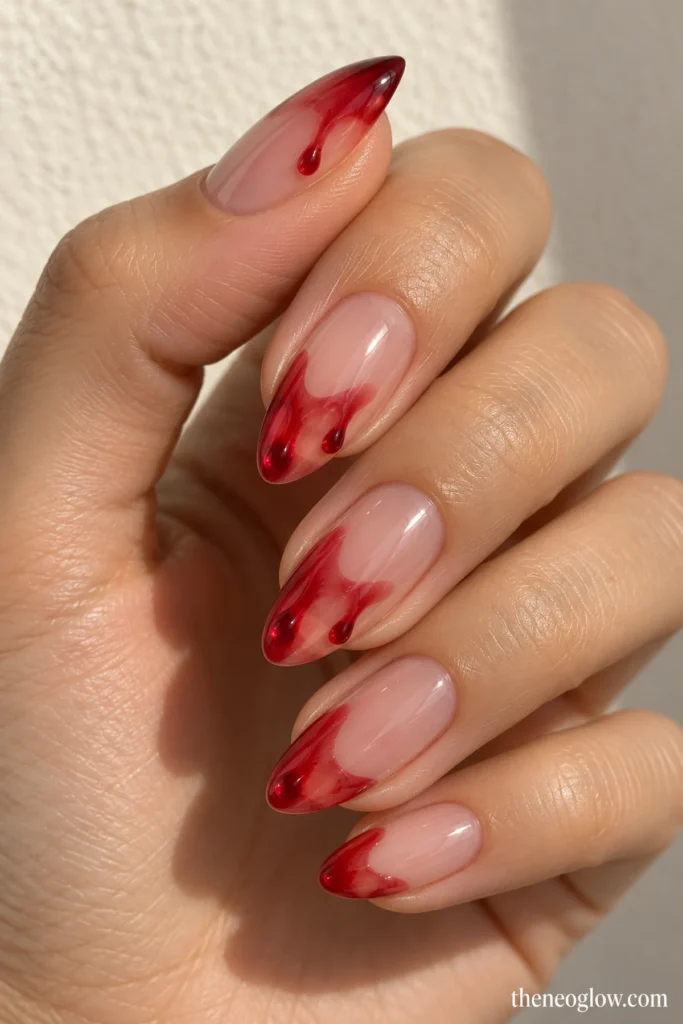
On clear-look medium almond nails, layer a transparent cranberry-red wash along the free edge and let two soft, uneven jelly drips extend inward. One stem should remain noticeably translucent while the rounded endpoint holds a little more color. Unlike an opaque cherry design, this one lets light pass through the painted red.
Shift the Direction, Scale, and Shine
6. Gloss-on-Satin Burgundy Drips
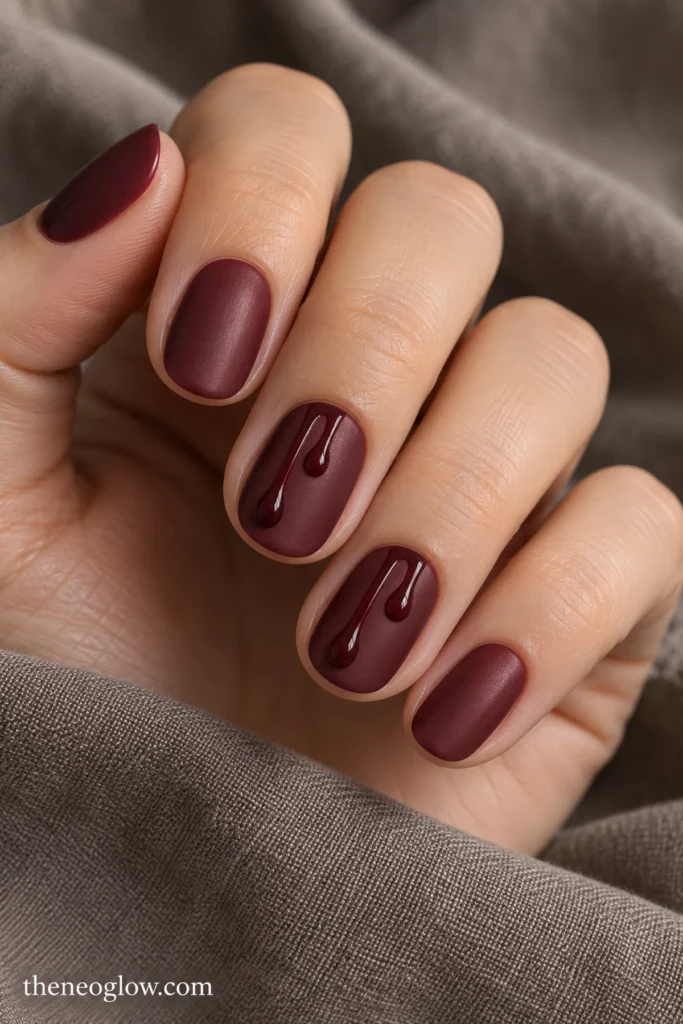
Try short oval nails painted in opaque satin burgundy, then add two slightly darker glossy burgundy drips descending from the outer sidewall of each accent nail. The pattern appears when light crosses the surface rather than from a dramatic color difference. Keep both finish zones smooth, with no raised liquid beads.
7. Sidewall Drip Ladder
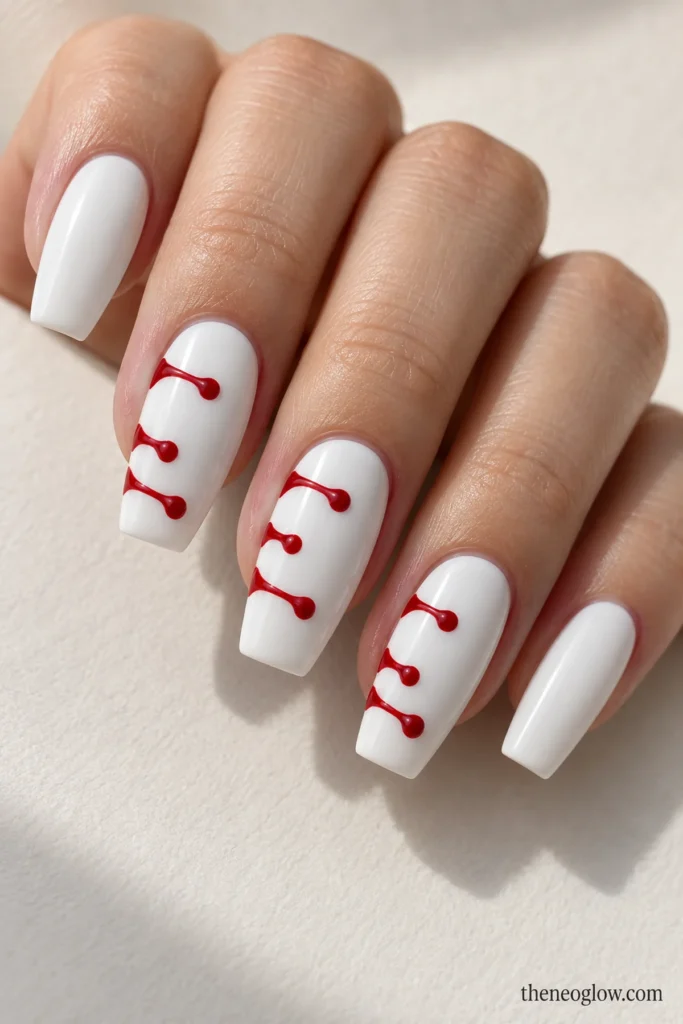
A porcelain-white medium coffin nail becomes a sideways composition: three narrow scarlet drops enter from the left sidewall at staggered heights, with each rounded bead reaching a different distance toward the center. Repeat the direction on two nails only. Avoid connecting them into a vertical stripe or drawing a literal ladder.
8. Scarlet Two-Drop Negative Space
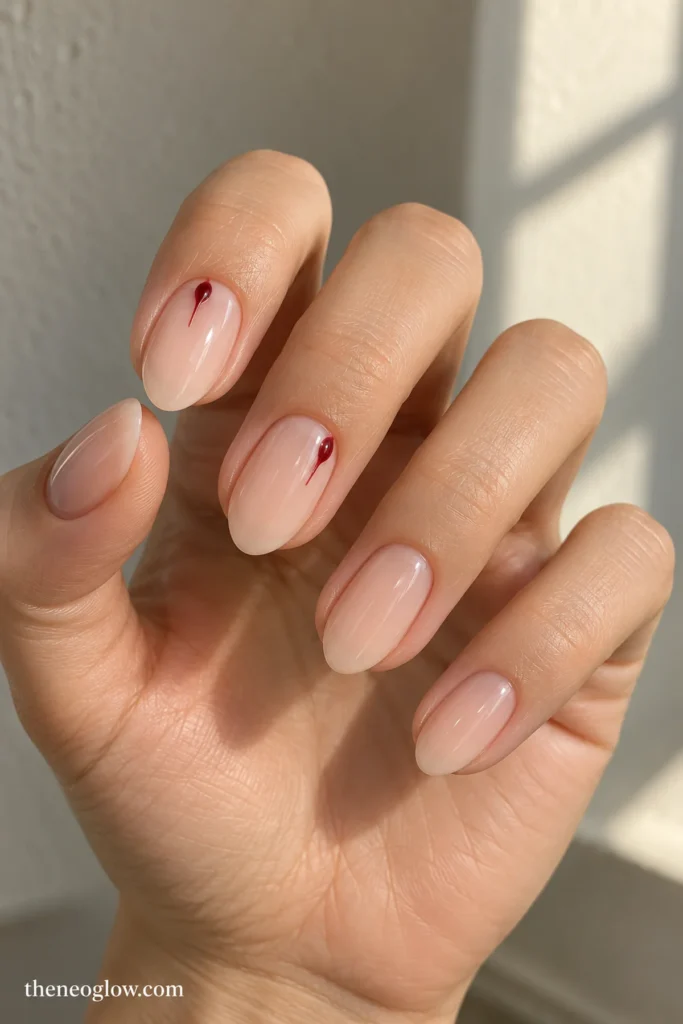
On sheer blush short almonds, give the index and middle nails one miniature scarlet drip each, anchored separately near the cuticle-side edge. Position one drop higher than the other when the fingers sit together. The pair should read as two tiny interruptions in mostly clear nails—not a large accent graphic or a full cuticle border.
9. Wine Drop at One Corner
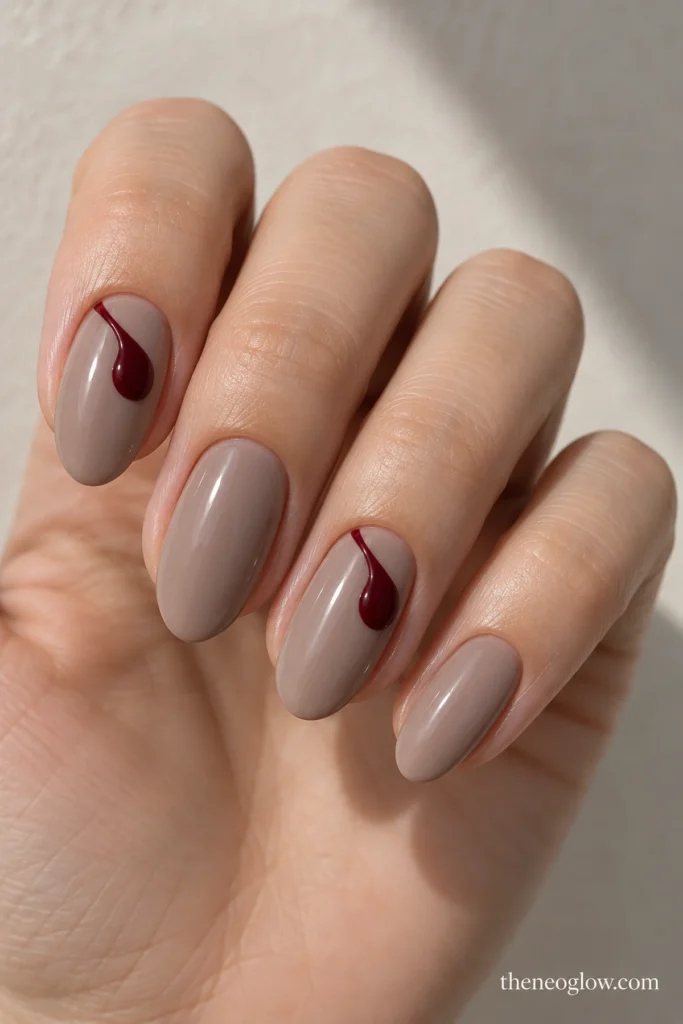
A single oversized wine-red drip curves diagonally inward from the upper outside corner of a translucent taupe medium oval. Its rounded endpoint sits off-center and its narrow tail follows a gentle diagonal. Repeat the same corner on every other finger, leaving the free edges completely clear. This is about one decisive asymmetrical gesture, not multiple thin droplets.
10. Mirror Red Chrome Drips
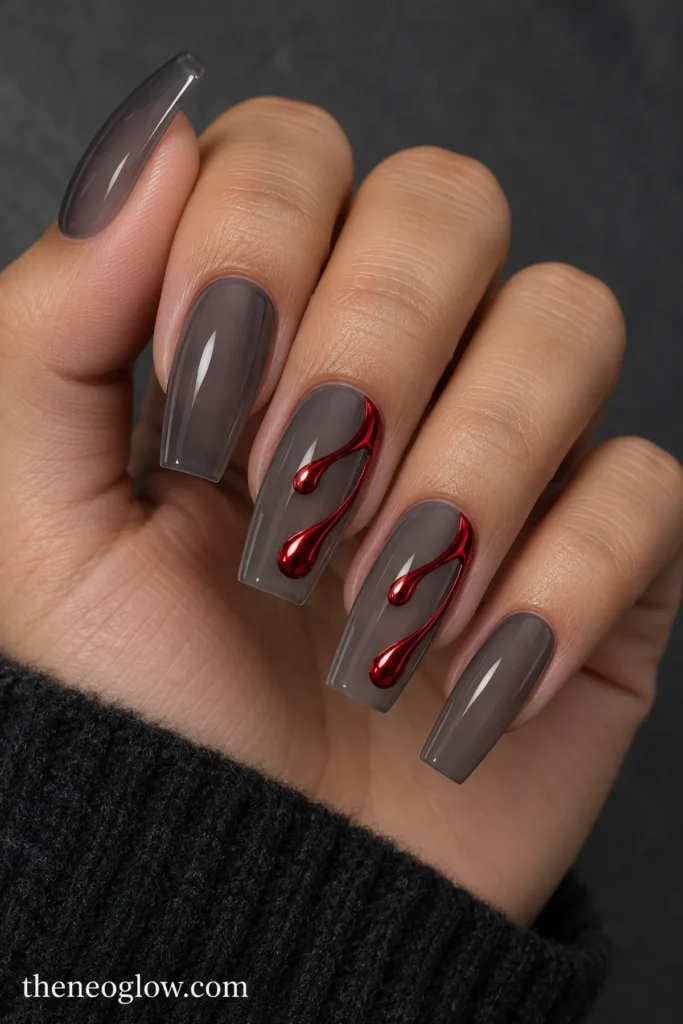
Choose long tapered-square nails with a transparent smoke-gray base. On the middle and ring nails, two painted red-chrome liquid shapes sweep inward from the right sidewall, with sharply reflective rounded ends and thin, connected tails. The metallic effect should follow the drip outlines only; avoid full-surface chrome or separate chrome stars. Ask your technician which compatible system can produce the finish.
11. Candy-Apple Gloss Drops
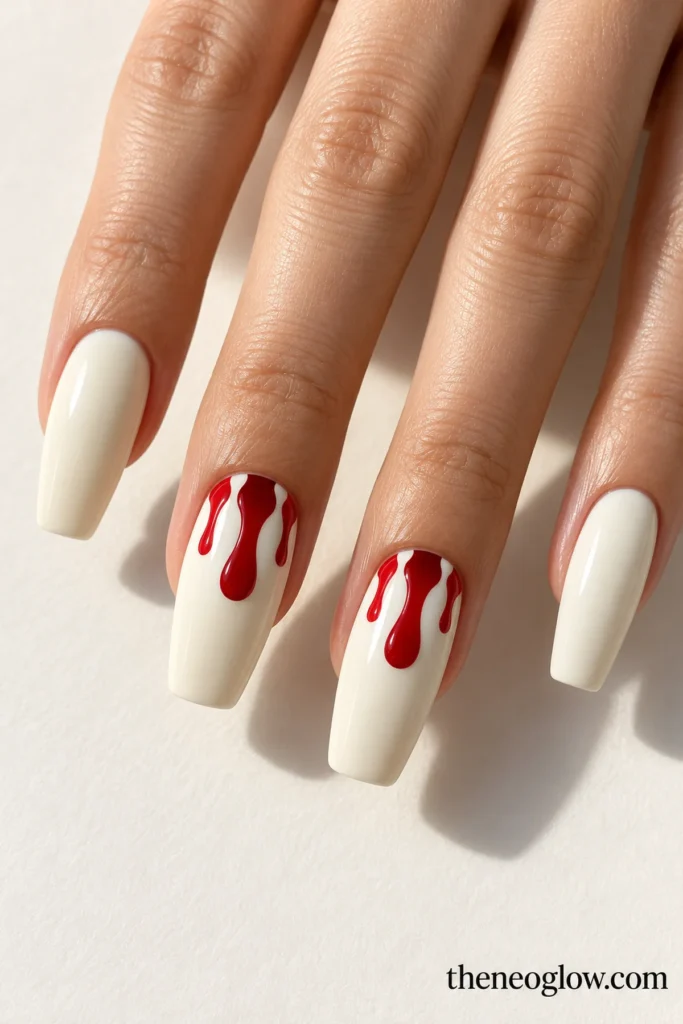
An ivory base on long rounded coffins makes room for three wide candy-apple-red drops spilling inward from a broken free-edge pool. Give the center bead a broad teardrop shape and keep the other two shorter and narrower. These are bold, thick-looking painted shapes, not actual blobs of built-up polish. The exaggerated scale separates this look from the finer cherry trails in Idea 1.
Negative Space and Layered Liquid Edges
12. Clear-Look Drip Windows
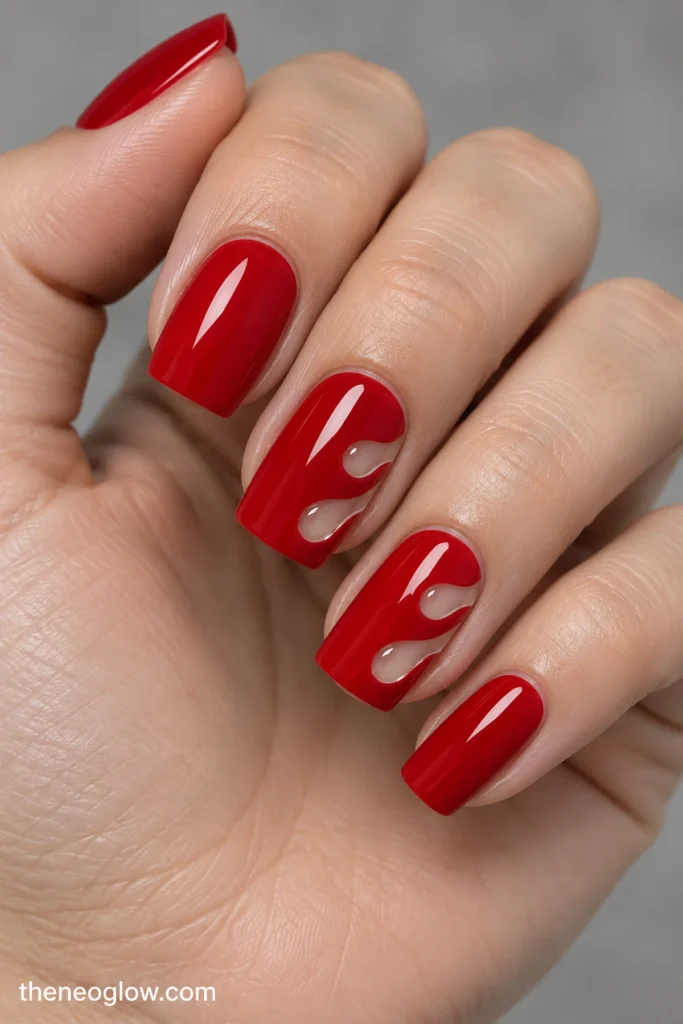
Instead of adding red onto a light base, paint medium soft-square nails in opaque lacquer red while preserving two transparent, rounded drip-shaped windows that open from the right sidewall. Outline each window cleanly so its bulb and stem are recognizable. The unpainted spaces form the dripping motif; neither a red tip band nor a simple cutout stripe is enough.
13. Half-Nail Liquid Edge
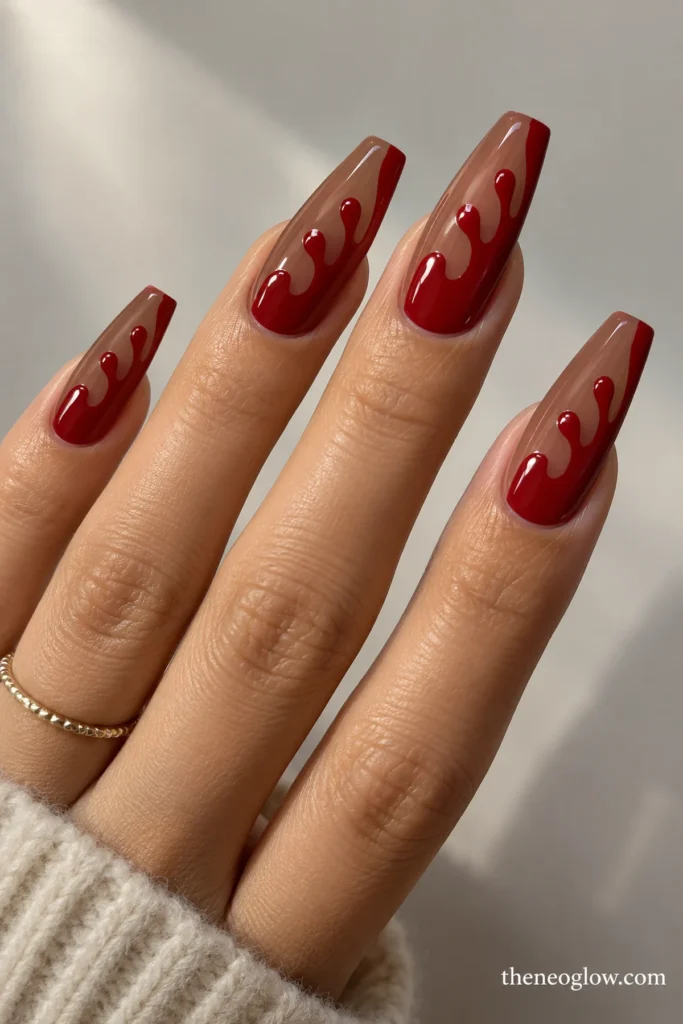
Divide long coffin nails diagonally: keep the upper-left portion sheer cocoa and fill the lower-right half with dense crimson. Where the sections meet, replace the straight diagonal with three rounded droplet lobes of unequal length. The liquid boundary travels through the center of the nail rather than along the free edge, making this a color-block drip, not a French manicure.
14. Asymmetrical Red Double Drops
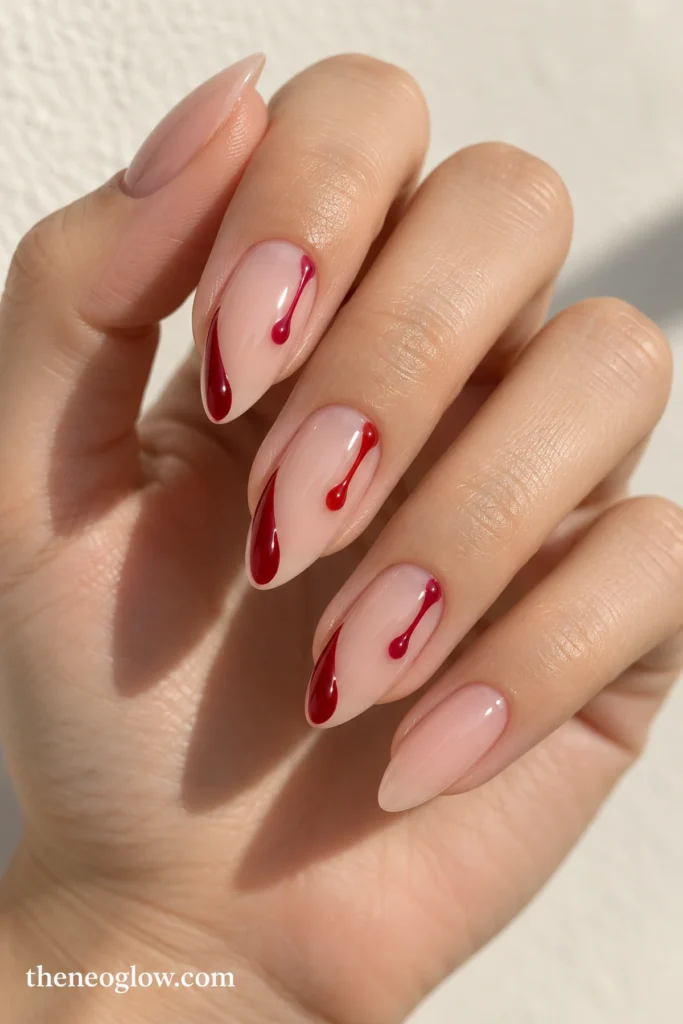
Over neutral translucent medium almonds, position one long ruby drip rising inward from the free edge along the left side and a much shorter crimson drip falling from the cuticle-side right. Stop both before they touch. That strip of bare-looking nail between opposing stems is essential: without it, the art becomes a zigzag instead of two separate flows.
15. Short Squoval One-Drip Accent
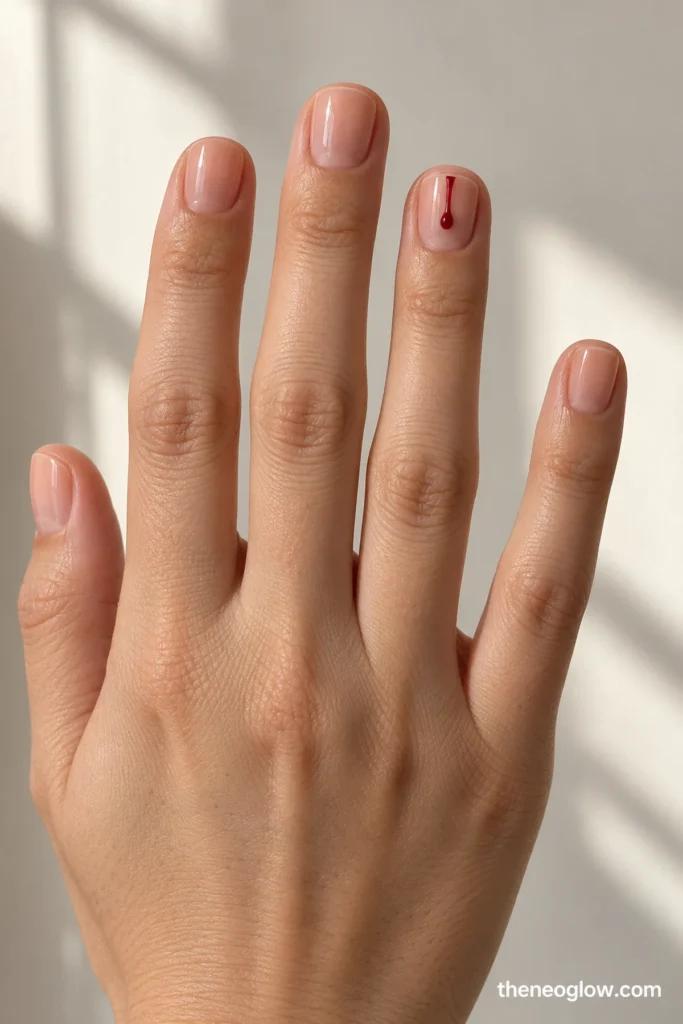
Keep short squovals in a glossy peach-nude sheer, apart from one tiny scarlet drop descending from the center of the ring-finger cuticle-side edge. Its bulb ends before the nail midpoint, leaving plenty of open base. If your nails have limited visible length, this single centered motif is easier to read than three crowded stems.
16. Icy Silver With a Ruby Drop
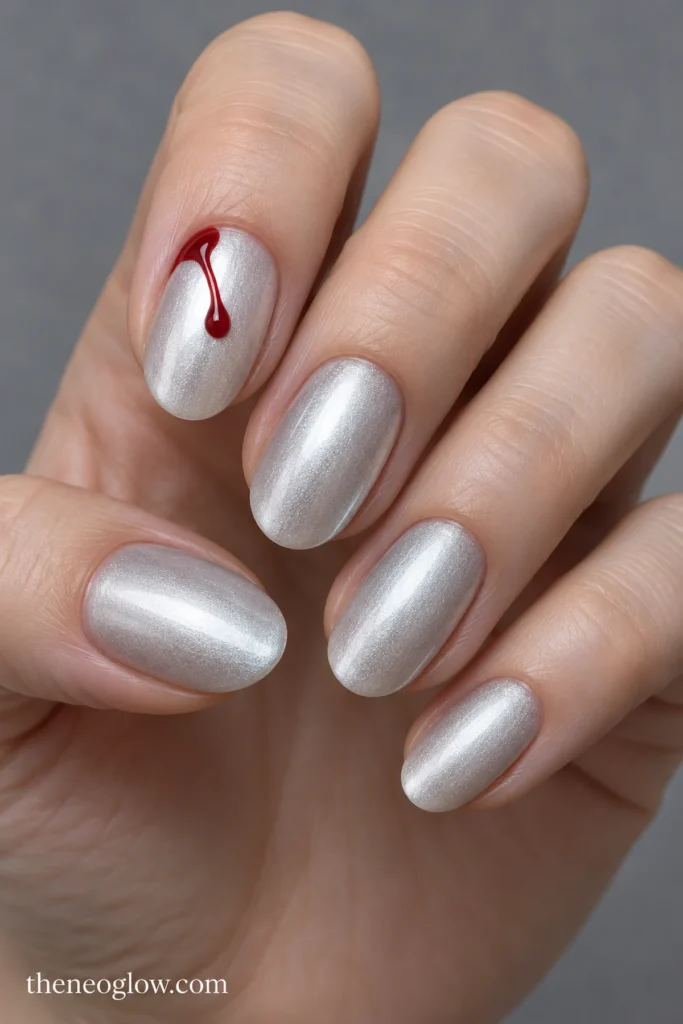
A pearl-silver satin finish on medium ovals makes one glossy ruby-red drip stand out. Place it near the upper-left cuticle-side corner of the index nail, angled slightly toward the middle, and leave the remaining silver nails unmarked. The contrast is cold, luminous metal against one warm red bead—not glitter sprinkled over blood art.
17. Deep Garnet Layered Drip Edge
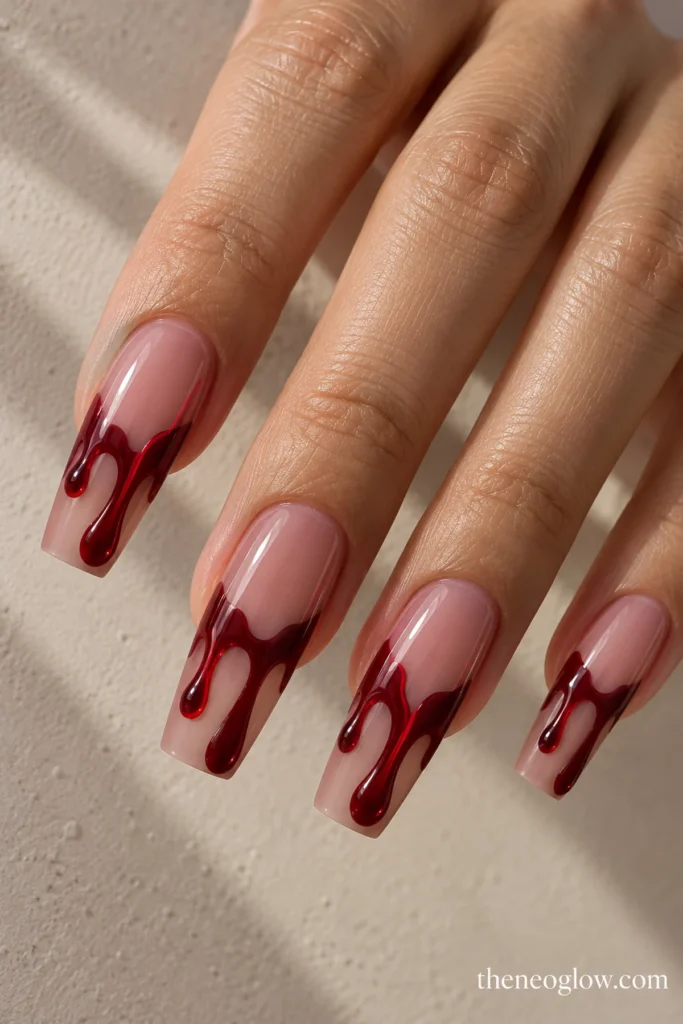
For long tapered squares, begin with a sheer smoked-rose base and paint a dark garnet irregular pool along the free edge, pulling three uneven drips inward. Add a second, narrower translucent crimson outline just inside two dark stems, offset enough to show both layers. The nested liquid contours create depth; avoid a black ombré, splatter, or sculpted wounds.
Match the Drops to Your Nail Length
Very short rounds and squovals: start with Ideas 8 or 15, using one small bead and a short tail. A substantial patch of clear-looking base is important when there is little vertical space.
Short-to-medium squares and ovals: Ideas 3, 4, 6, and 12 have enough width for distinct stems, finish contrast, or negative-space windows. Keep the endpoints inside the nail outline rather than extending art onto the skin.
Medium almonds: Ideas 2, 5, 9, and 14 can follow the taper with downward or diagonal trails. Check the composition on the widest part of the nail before placing the rounded bead.
Long coffins and tapered squares: Ideas 7, 10, 11, 13, and 17 benefit from their extra drawing space. Use that room for visibly different stem lengths rather than simply adding more drops.
For a darker palette without literal liquid shapes, NeoGlow’s vampire nails guide covers magnetic red, smoky gradients, and romantic finishes. If the most important feature is a crisp French smile line, browse Halloween French tip designs instead.
Paint Cleaner Drips and Fix Common Mistakes
With regular lacquer, start on a dry base. Mark the rounded endpoint using a dotting tool, connect it toward your chosen origin with a fine brush, and then widen the anchor only as much as the drawing requires. OPI’s step-by-step drip nail-art tutorial demonstrates the dot-first, curved-connection approach for one of its lacquer systems; use the prep and drying directions on your own products.
If a drip looks like a stripe, round its endpoint and vary its length. If it looks like a blob, remove excess polish from the tool and narrow the stem. If three drips merge on a short nail, repaint fewer rather than squeezing in more. Try the placement on a spare practice tip first when precise spacing matters.
For a wider selection of low-tool beginner motifs, see NeoGlow’s easy Halloween nail guide. This article focuses specifically on controlling the liquid silhouette.
Exact Wording to Take to Your Nail Appointment
“I’d like medium oval nails with a sheer milky base and glossy cherry-red polish drips. Please start two or three uneven stems at the free edge, make every endpoint rounded, leave visible base between them, and keep the design flat. No standard French smile line, splatter, fangs, or raised effects.”
To adapt it, change five variables: shape, base opacity, drip origin, number and length of drops, and finish. Show one reference with the same direction you want. For tone-on-tone art, request a satin background and glossy droplets; for negative-space windows, describe which color should remain transparent.
Keep the Finish Smooth and Plan Removal
Avoid thick raised beads of polish; the design should be visual, not something that catches on clothing. Follow the directions for your chosen lacquer, gel, or other nail system, including its curing or drying process. If a gel manicure begins lifting, do not pick or scrape it off. The American Academy of Dermatology’s professional guidance for removing gel polish explains why forced removal can damage nails and outlines a removal method for appropriate gel products; check your exact system’s instructions too.
Choose One Drip That Reads Clearly
For the easiest starting point, choose a single cuticle-side bead on short nails. For maximum graphic contrast, try crimson on matte black. If you want an elaborate salon reference, save the garnet layered edge and specify the two visible contours. Pick the idea that fits your nail space, then save its placement description alongside the image so the finished manicure keeps the drip shape you actually wanted.