A bat doesn’t need a haunted-house backdrop to look unmistakably Halloween. The best bat nails make the pointed ears, small body, and scalloped wings clear at a glance, whether the design takes up one tiny corner or stretches over a long nail. If the wings blur into a wavy stripe, the whole idea gets lost.
These 16 looks concentrate on the bat itself: filled silhouettes, open outlines, cropped wings, bat-shaped French edges, and a few dark-sky settings where the creature stays in charge. Start with the comparison below, then choose a design that fits the actual width and length of your nails.
Choose Your Bat Design First
| Your starting point | Choose | Why it works |
|---|---|---|
| Very short natural nails | 1, 2, or 14 | One bold shape or squared-off pixels remain legible |
| Subtle everyday art | 1, 3, or 13 | Small focal details with plenty of clear background |
| French-tip structure | 6 | The bat interrupts the tip without hiding the whole nail |
| High-impact wing shapes | 4, 7, or 16 | Extra width or two adjacent nails give the wings room |
| Dark Halloween party look | 9, 11, or 12 | Smoke, velvet light, or reflective contrast supports the bat |
A quick silhouette test: At arm’s length, can you distinguish the head and two wings? If not, use fewer bats, increase the contrast, or simplify the scallops along each wing. A tiny bat with two clean wing notches reads better than a detailed shape whose edges have merged.
Small Bat Silhouettes With Plenty of Space
1. Single Onyx Bat on Milky Nude
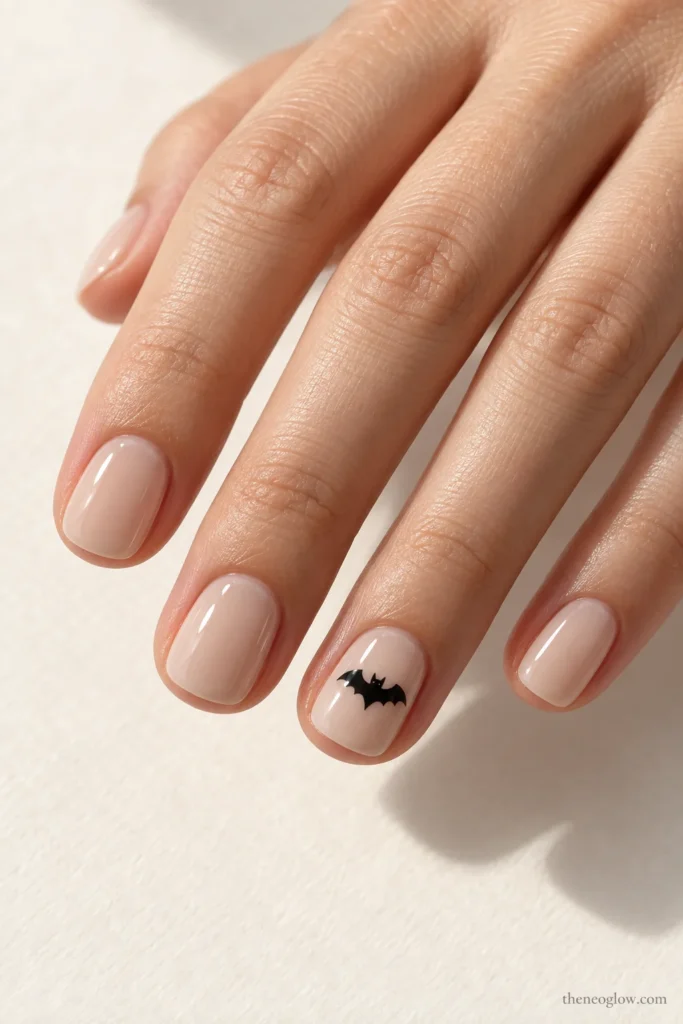
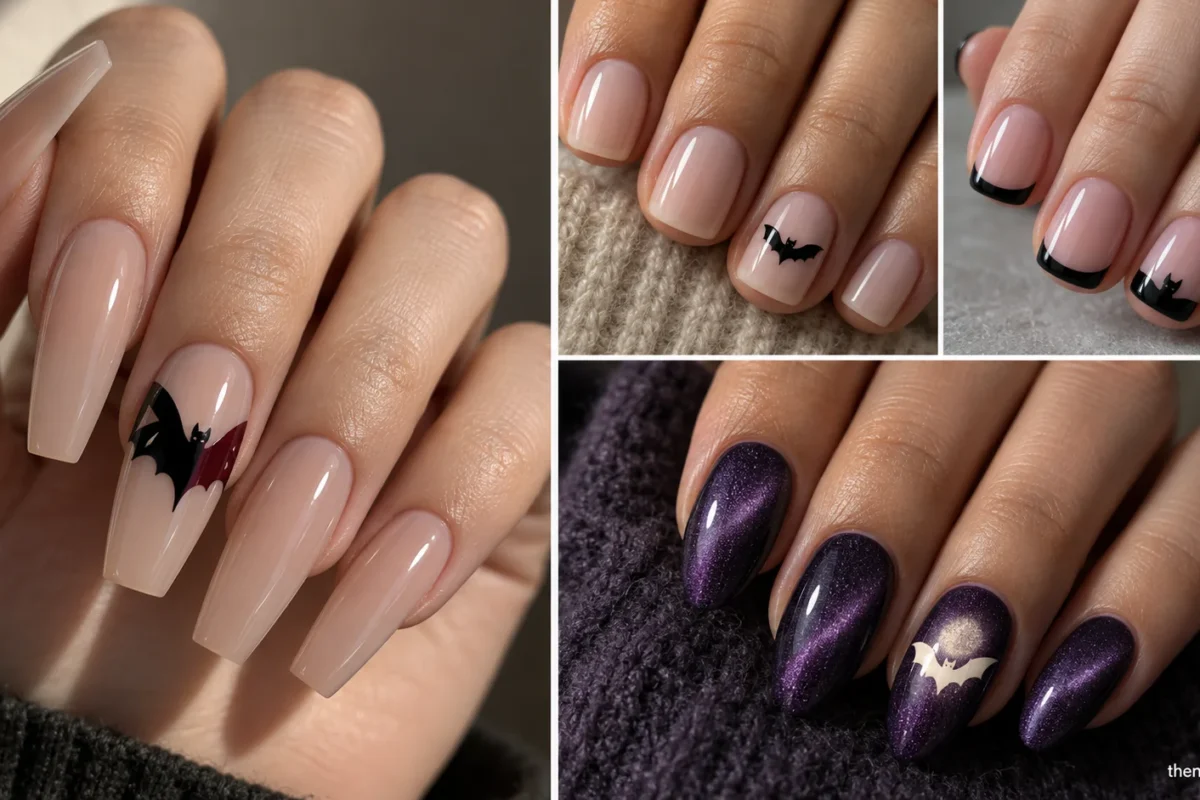
On short rounded-square nails, paint a translucent milky beige base and add one small, solid black bat at the center of each ring finger. Give it two clear ear points and three shallow curves along each wing; leave the other fingers plain and glossy. This is the most restrained option, and one accent nail is enough to identify the motif.
2. Upside-Down Bat at the Cuticle
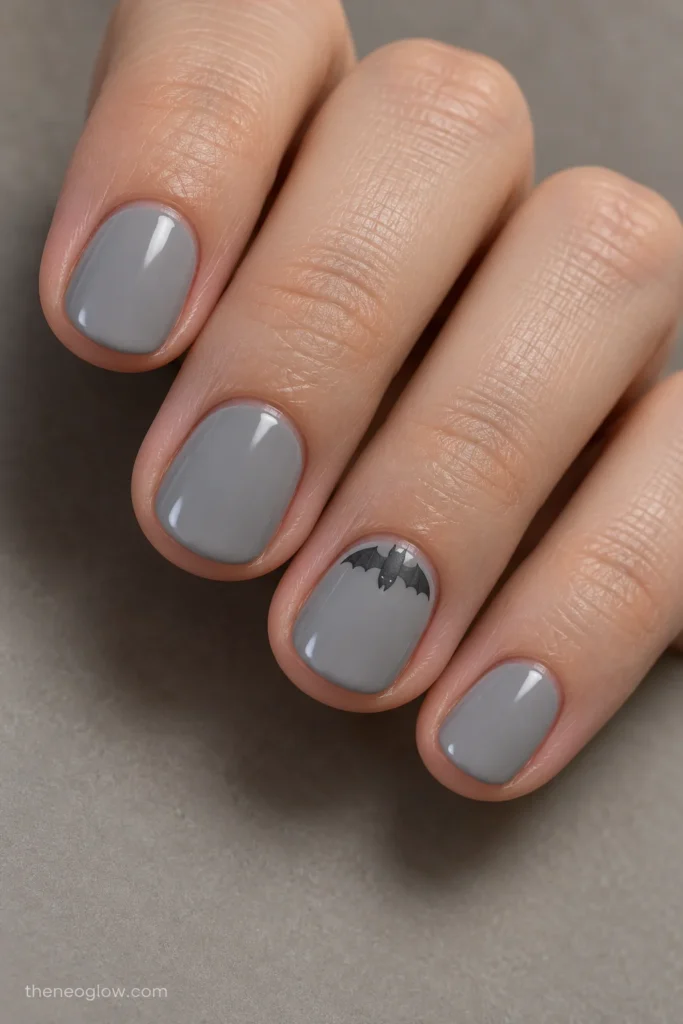
Place a small charcoal bat near the cuticle of a very short, cool-gray round nail, with its head pointing toward the free edge and its wings folded slightly inward. Keep the tips empty. The inverted orientation makes this more than a second centered-bat design, and the narrow wing span fits a compact plate.
3. Wine-Red Bat Outline on Ivory
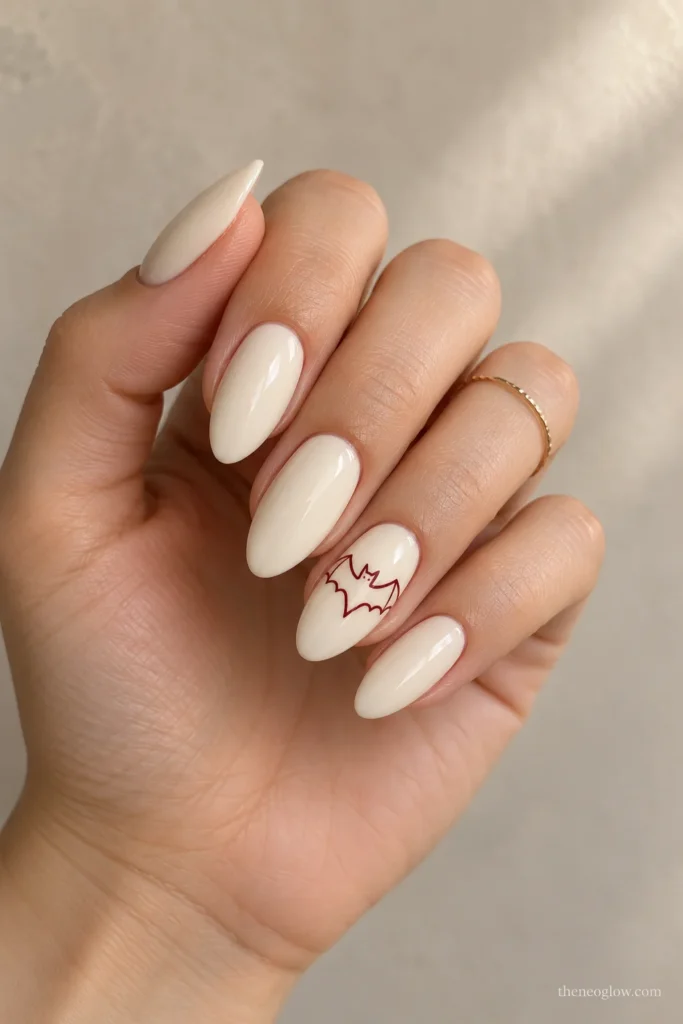
A single open burgundy outline sits across the middle of a medium almond nail coated in opaque ivory. Its interior stays ivory, so the fine red contour—not a filled sticker shape—defines the pointed ears and wing dips. Leave the other nails ivory with no companion bats. Ask for a slightly broader line if the drawing disappears from a normal viewing distance.
Cropped Wings, Cutouts, and Bat-Shaped Tips
4. One-Wing Corner Crop
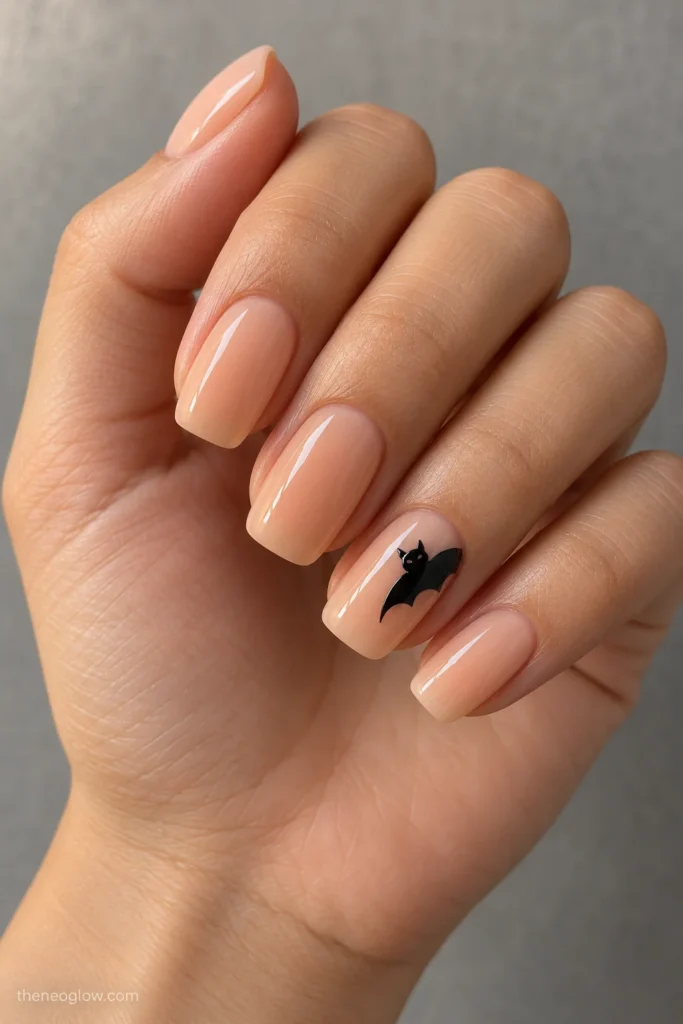
On glossy peach-beige squovals, place a large ink-black bat at the top outer corner of each accent. Keep the head and inner wing fully visible, but let the far wing extend beyond the side edge. The ear points and scalloped lower wing edge must remain clear; otherwise the crop may resemble an abstract black swoosh.
5. Lilac Bat-Shaped Negative Space
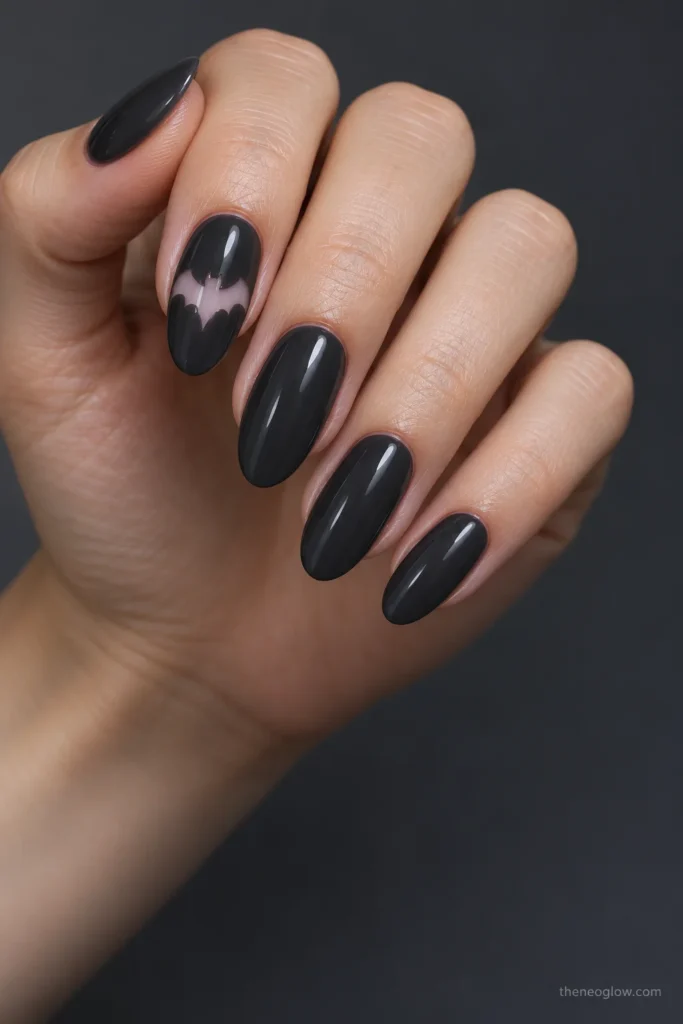
Cover medium-long oval nails in deep charcoal, reserving one translucent lilac bat-shaped window across the middle of each index finger. Dark polish surrounds the silhouette; the bat itself is the unpainted-looking opening. The two wings should be wide and connected to one central head. This reverses the usual black-on-light composition.
6. Bat French Edge Break
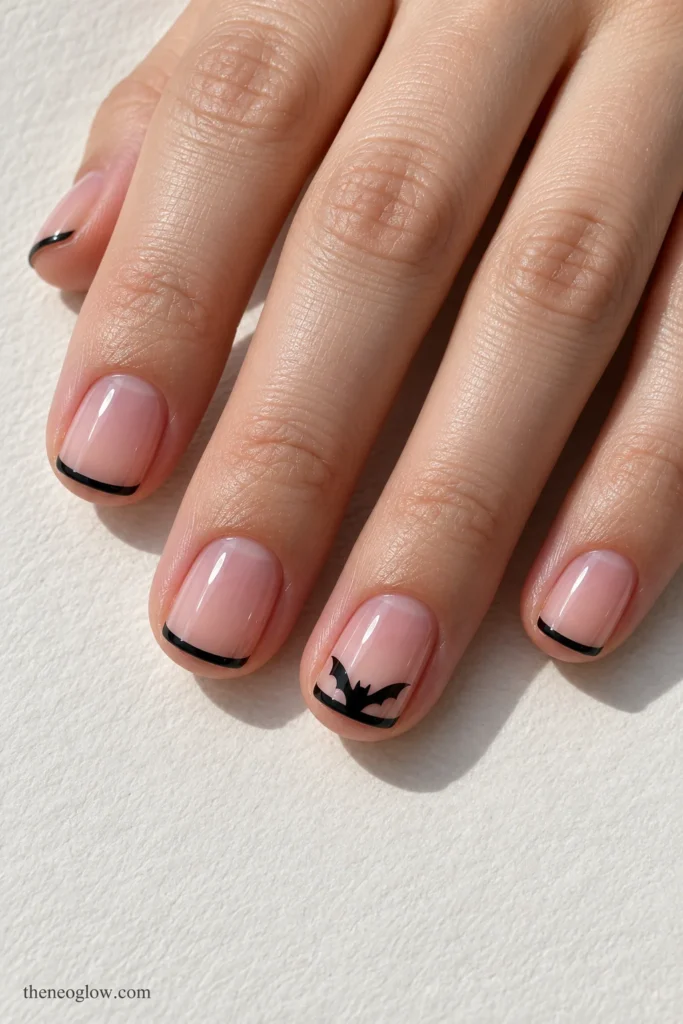
Trace a slim black French band on short soft-square nails, then let one tiny bat rise from the center of the free edge on the ring fingers. Its body overlaps the band, while two upward-swept wings interrupt the straight tip line. Keep the nail bed sheer pink; do not add separate bats above the smile line. The tip and creature should read as one joined graphic.
7. Wing Diptych Across Two Nails
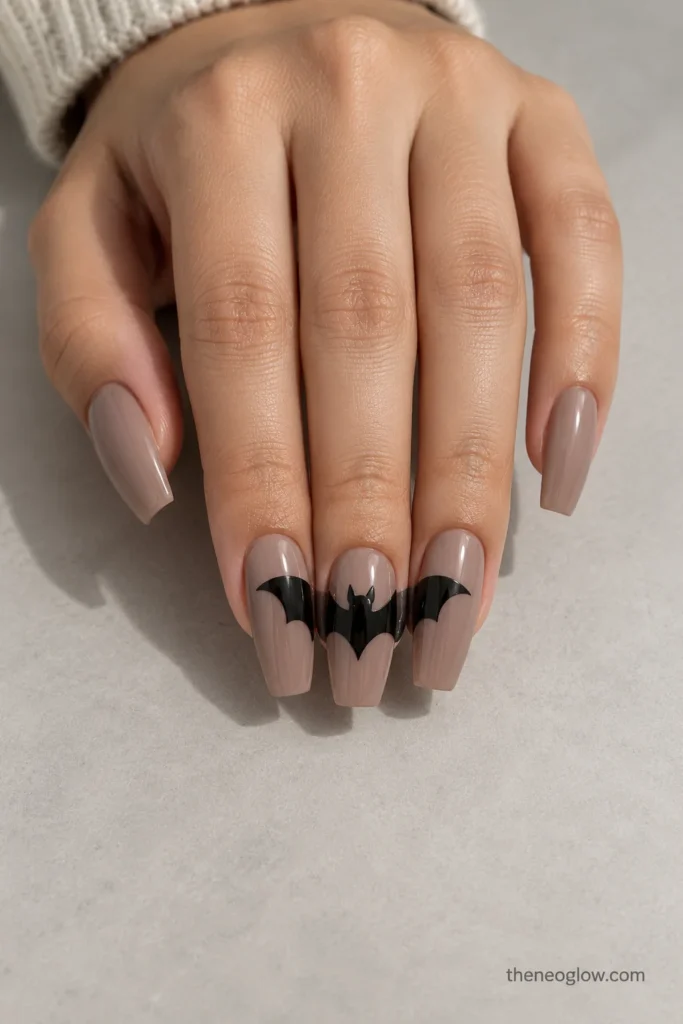
A medium coffin manicure turns the middle and ring fingers into one picture when placed together. Paint the left half of a broad black bat on one sheer taupe nail and the right half on its neighbor; the head sits at the meeting line and the wings extend toward the outer edges. Separately, each accent reads as an intentional partial wing. Together, they reveal a single full creature.
For bats that need to remain convincing on genuinely short nails, NeoGlow’s short Halloween nails guide compares limited-space layouts. This page keeps the emphasis on bat anatomy rather than a mixed-motif gallery.
Moonlight and Movement With the Bat in Focus
8. Bat Beneath a Thin Silver Crescent
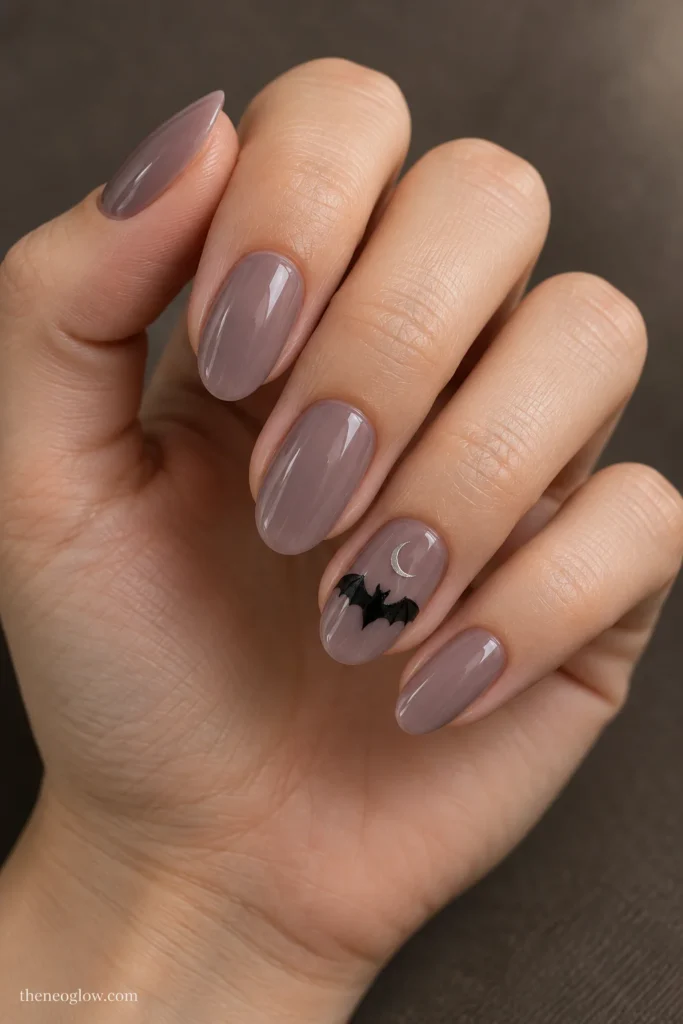
Use translucent mauve-gray on medium oval nails, with one broad black bat across the lower center of a single accent. Set a narrow silver crescent well above it, no wider than the bat’s head-to-wing midpoint. The crescent establishes a night scene, but the spread wings occupy more space and remain the first thing you notice.
9. Three Bats Through Sheer Smoke
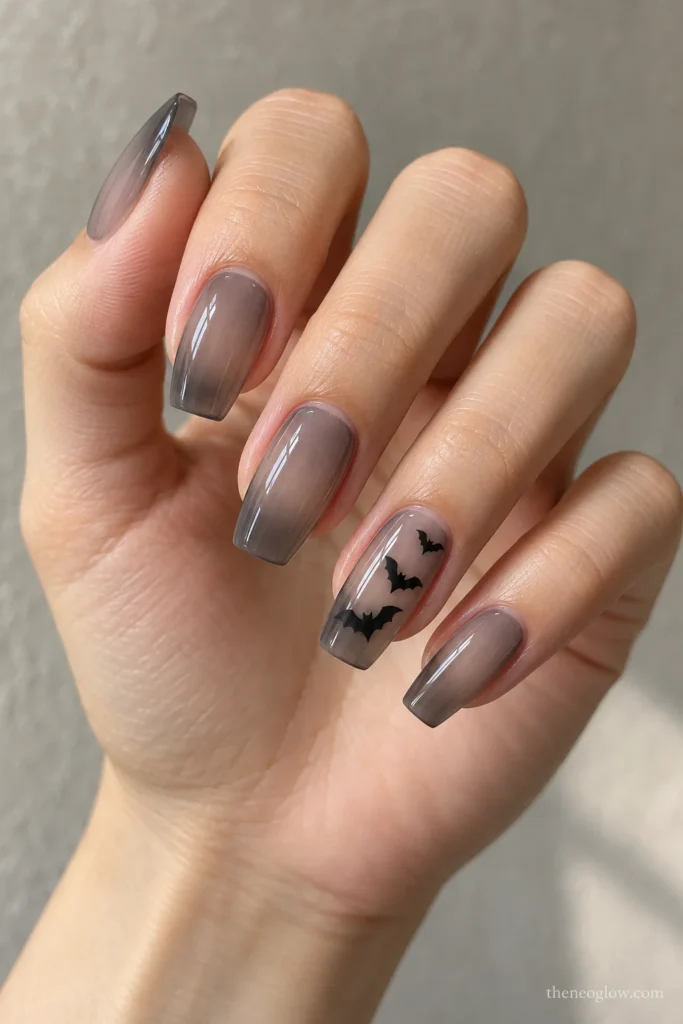
Build a translucent smoke-gray wash on medium coffin nails, darkest near one sidewall. Place three black bats of decreasing sizes on one accent, rising from the lower center toward the opposite upper edge. Give each its own pocket of clear space so their wings never merge. This is a three-stage flight composition, not a pair of burgundy micro bats on nude.
10. Ivory Bat With a Navy Flight Arc
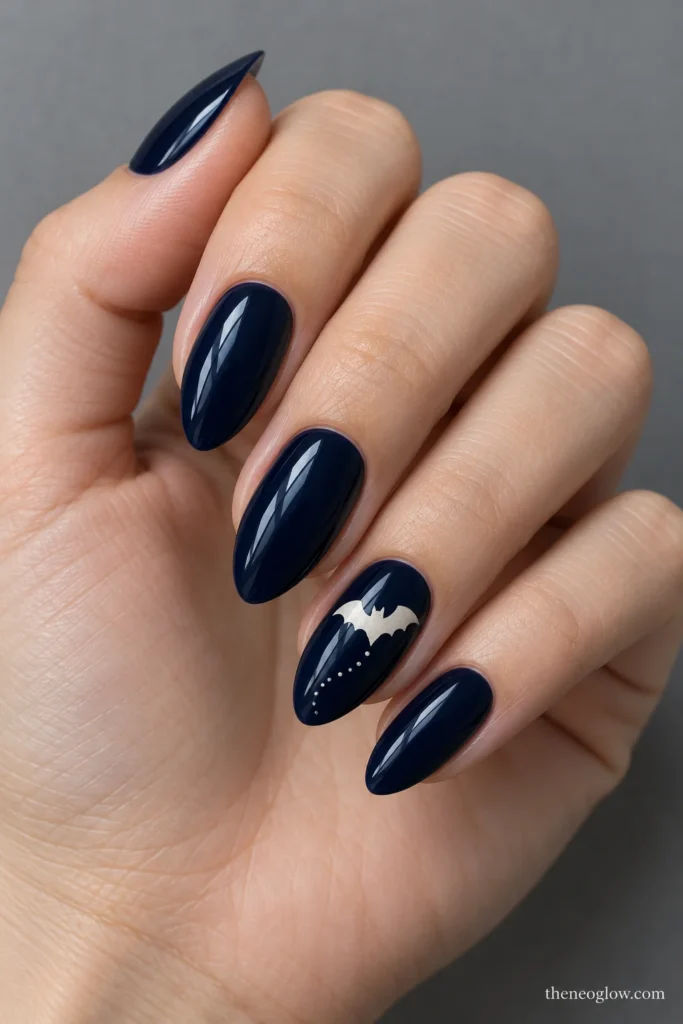
On glossy midnight-navy almonds, paint one medium opaque-ivory bat toward the upper third of each ring finger. Beneath it, curve a short trail of widely spaced silver pinpoints toward one sidewall. Stop the trail before it circles the bat: the pale wing silhouette should remain the only illustrated animal or icon.
11. Moonlit Velvet With a Pale Bat Accent
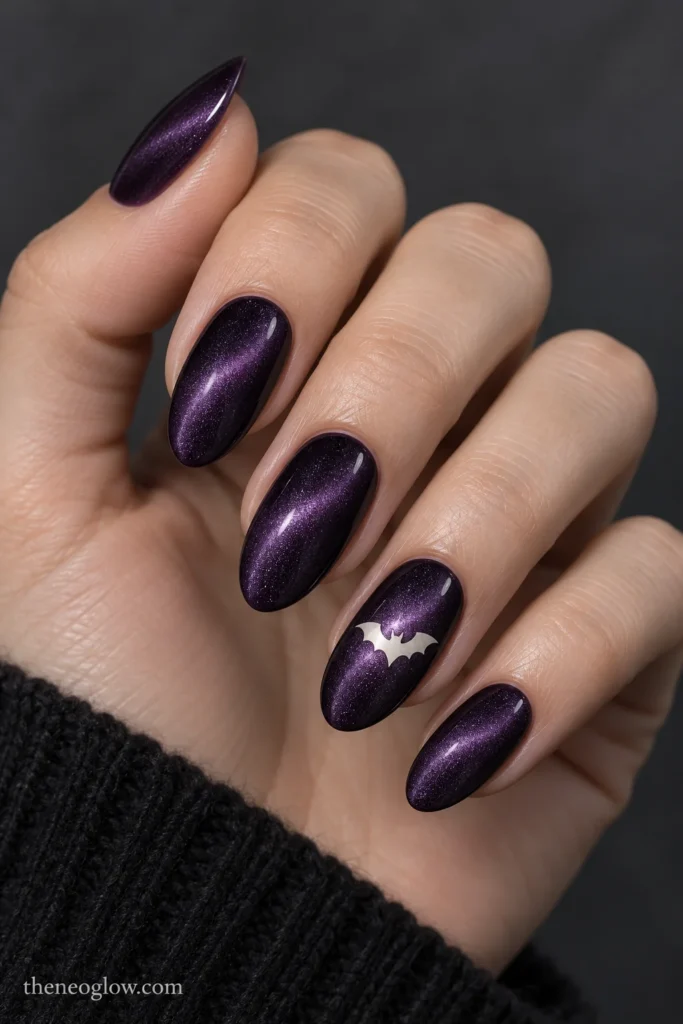
Make medium almond nails deep violet magnetic velvet, concentrating the luminous band behind one pale ivory bat on each ring finger. A small, softly glowing circular area can suggest moonlight without drawing another crescent. Keep the bat solid and crisp against the shifting purple light; the shimmer belongs to the background, not the creature.
If you prefer a whole manicure built around moons, smoke, or other witch-inspired symbols without a visible bat, explore the separate witch nails collection. Here, the atmospheric details stay secondary.
Bat Shapes That Change With the Finish
12. Matte Graphite With Glossy Bat Shadows
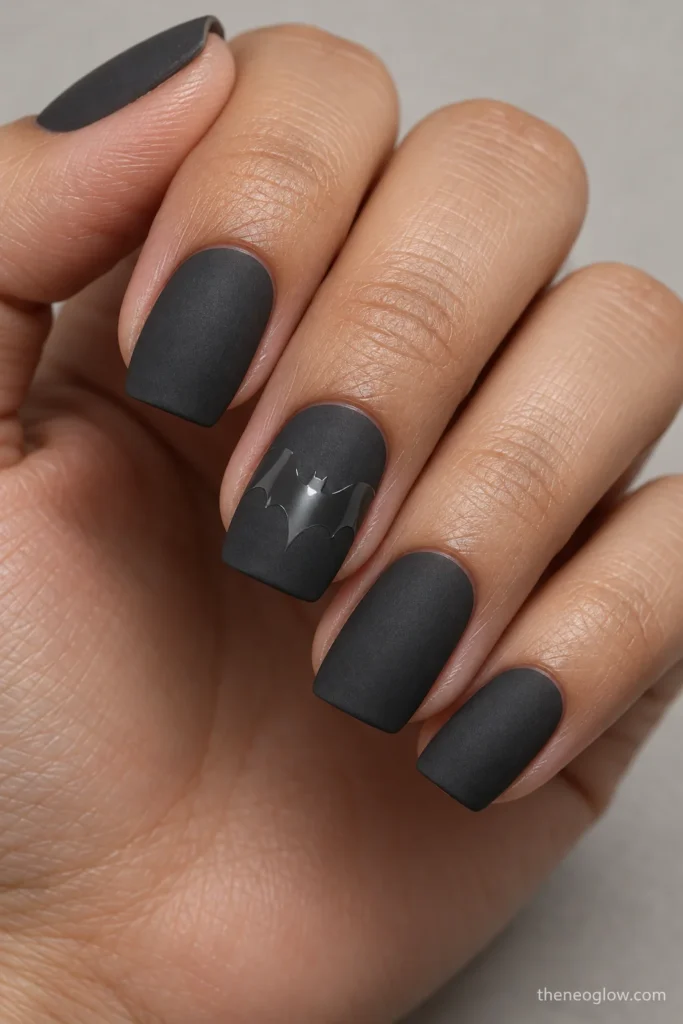
Paint medium soft-square nails opaque graphite and seal them matte. Put one larger clear-gloss bat across each middle finger, with the two scalloped wings reaching nearly to the sidewalls. The shape appears when light crosses the surface. For a photo reference or salon preview, check the angle under a lamp; otherwise the dark-on-dark bat can vanish.
13. Silver Micro-Outline on Deep Plum
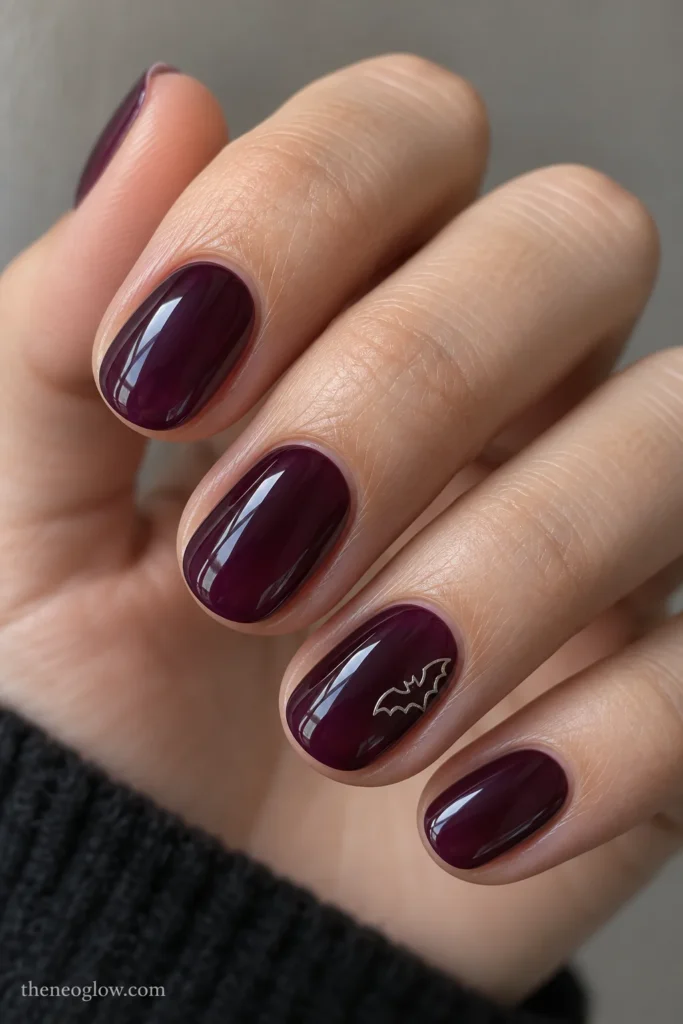
Short ovals get a translucent deep-plum jelly coat and one fine silver bat outline placed just above the outer sidewall of each ring finger. Make the outline compact but complete, including both wing dips. Unlike the broad red-on-ivory outline in Idea 3, this is a small metallic off-center emblem against a dark transparent base.
14. Pixel Bat on Golden Ochre Squares
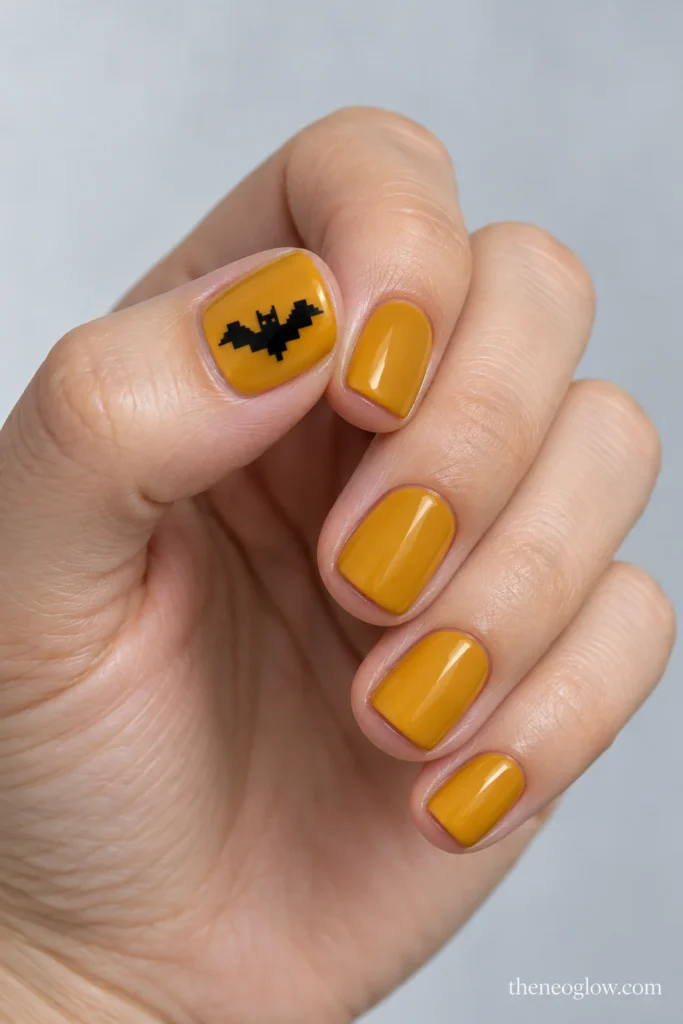
Very short square nails make a deliberate eight-bit bat easier to read than a realistic one. Use opaque golden-ochre cream polish and construct one black, stair-stepped bat from small square blocks on each thumb. Two jagged horizontal wings and a squared central body create the recognizable retro shape. No web lines, eyes, or added Halloween icons are needed.
Larger Wings for a Salon Statement
15. Rust Bat With an Offset Cocoa Shadow
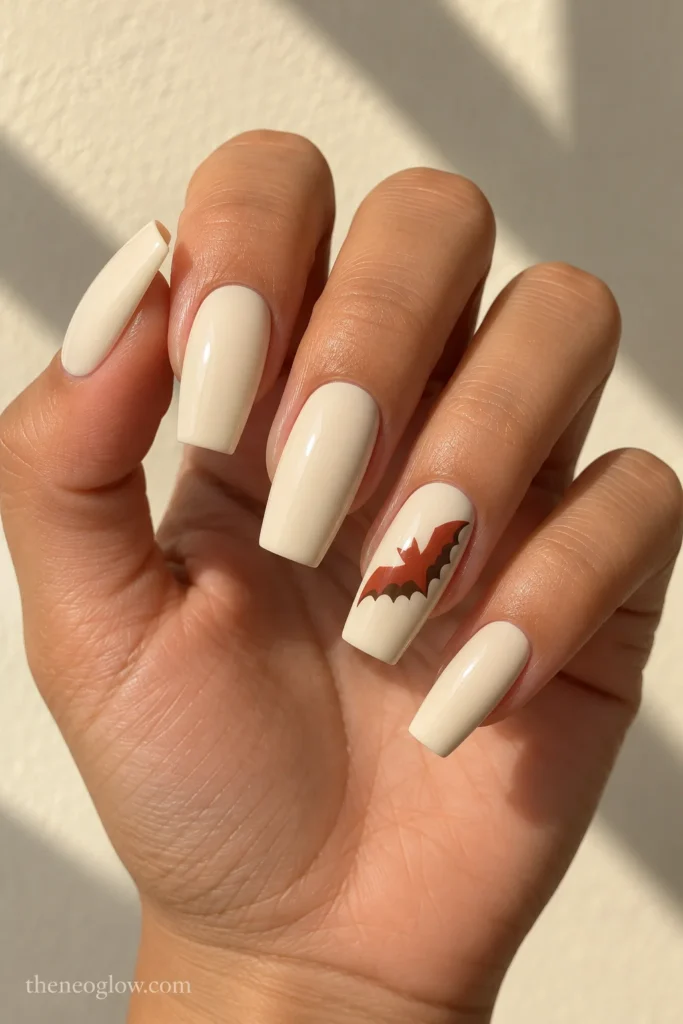
On medium-long cream coffin nails, position one terracotta-rust bat diagonally across the center of each accent. Add a thin cocoa silhouette offset just below and to the right, like a printed drop shadow, while keeping the rust head and scalloped wings completely visible. The double layer adds dimension without turning into a pair of separate bats.
16. Two-Tone Wing Cutouts on Long Coffins
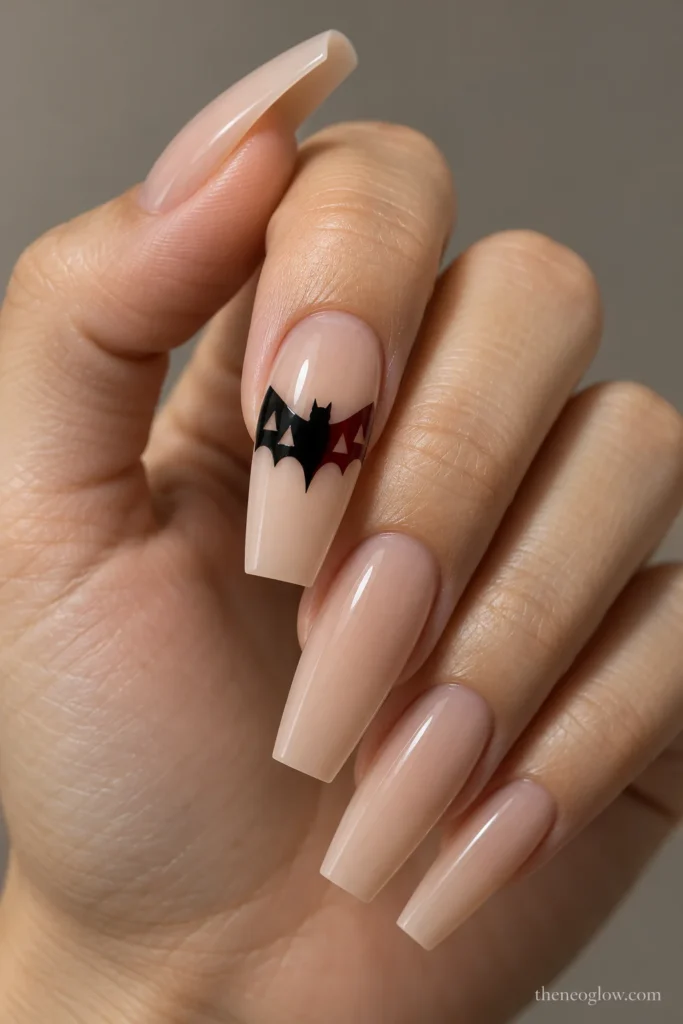
Use long sheer-beige coffin nails for one dramatic bat stretching almost the full width of each index finger. Fill its left wing in black and its right wing in black cherry, joining both to a small central dark body. Carve two tiny transparent triangular openings into each wing, away from the edges. The negative spaces make the wings architectural; the ears, body, and broad scalloped outline keep the image unmistakably a bat.
Match the Bat Scale to Your Nail Shape
Very short round or square: Choose one compact bat, a cuticle-hanging figure, or a pixel silhouette. Leave a border of base color around the art so the wings don’t visually touch both sidewalls.
Short squoval: A single accent and a bat rising from a shallow French edge are practical choices. A giant full-width wing is harder to read on this amount of space.
Medium oval or almond: You have room for outlined wings, a small flight arc, or one crescent above a substantial bat. Keep the longest part of the wing span across the nail rather than squeezing the design vertically.
Medium to long coffin: A paired-nail wing picture, three-step flight, or divided-color wings can use the flatter, broader canvas. If you choose extensions, settle the final length and profile before planning the illustration.
For finish, opaque cream gives the sharpest colored silhouette, jelly allows a layered smoky effect, matte plus gloss needs directional light to show the bat, and magnetic velvet works best when the bat is high contrast and its outline remains uninterrupted.
What to Tell Your Nail Artist
Use a request that fixes both the bat shape and the negative space:
“I’d like short squoval nails with a translucent neutral-beige base and a glossy finish. Put one solid black bat on each ring finger, about one-third the nail width, with pointed ears and three visible dips along each wing. Leave the other nails plain, and please show me the silhouette before sealing it.”
For Idea 7, replace the single-accent instruction with: “I want one bat split across my middle and ring nails so the wings connect when my fingers touch.” For Idea 12, specify matte graphite underneath and a clear-gloss bat on top; ask to check it under direct light.
For a DIY version, a flat bat decal or a practice nail tip can help you judge the wing width before painting. Whatever product system you use, follow its own preparation, application, curing, and removal instructions. If you choose gel, avoid picking at it when it’s time for a change: the American Academy of Dermatology’s gel-polish removal guide explains a dermatologist-recommended removal approach and why scraping or peeling can injure nails.
Pick the Bat You’ll Actually Recognize
For a quiet October manicure, start with Idea 1 or 3. For a stronger graphic effect, choose the joined French bat in Idea 6 or the paired wings in Idea 7. If the finish is the main attraction, Ideas 11 and 12 put moonlight or gloss behind an unmistakable bat.
Save one design with its shape, wing size, and placement—not just its color. For Halloween styles that feature other motifs instead, return to NeoGlow’s Halloween nails 2026 guide and keep this page as your bat-specific reference.