A pumpkin manicure can look like a tiny illustration, a carved Halloween face, or the curved surface of an actual gourd. The difference matters: pumpkin nails need recognizable lobes, stems, ridges, or jack-o’-lantern details, not just orange polish. These 17 ideas move from translucent everyday accents to reflective orange and dimensional designs, then into Halloween faces and softer harvest colors. Use the comparison below to pick the motif scale first, then match it to your nail length and how long you want to keep the set after October 31.
Choose Your Pumpkin Motif Before the Color
| Your priority | Start with | What makes the pumpkin visible | Nail-space fit |
|---|---|---|---|
| Quiet, close-up detail | Ideas 1–5 | Outlines, cutouts, fine ribs | Short oval or medium almond |
| Texture rather than cartoon art | Ideas 6–10 | Raised grooves, metallic contours, magnetic light | Medium almond or square |
| Unmistakable Halloween | Ideas 11–13 | Carved faces or a pumpkin patch | Medium square or longer |
| Wear it into November | Ideas 14–17 | Cinnamon linework, gourds, soft neutral color | Short squoval to medium oval |
A cropped motif occupies a corner or edge; an outlined motif draws the entire gourd with fine lines; a sculpted motif uses actual surface relief. On small nail plates, one clear stem and two or three curved ribs often communicate the subject more effectively than a fully detailed miniature scene. Choose colors for the contrast you like against your skin, whether that means milky peach, caramel, pink-beige, deeper cocoa, or a cooler celadon base.
Sheer and Neutral Pumpkins With Clear Shapes
1. Sheer Nude Pumpkin-Shape Cutouts
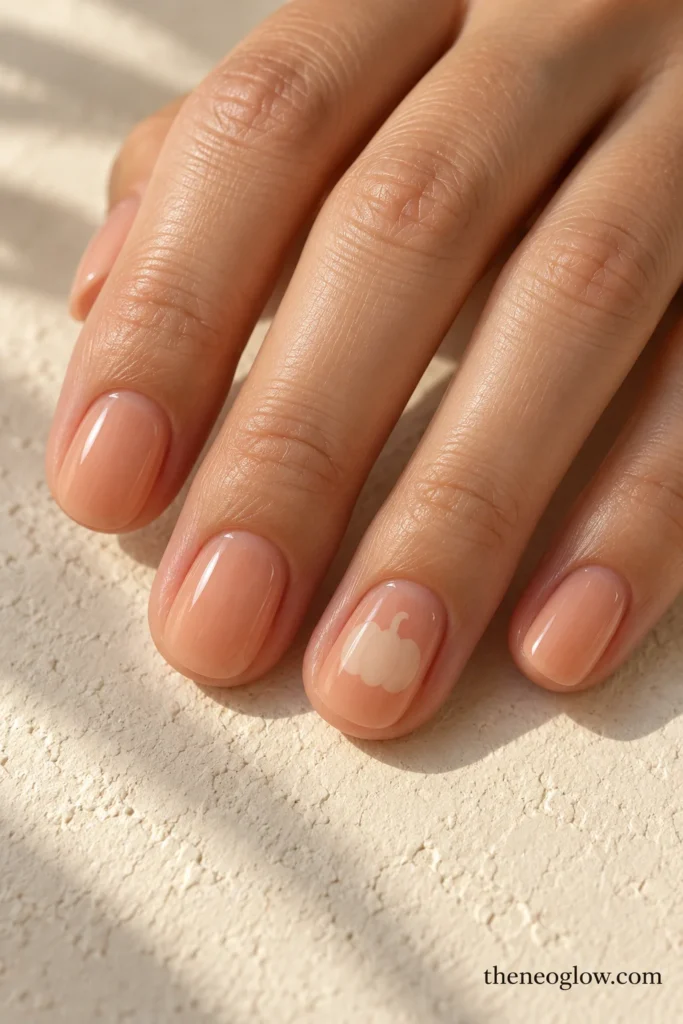
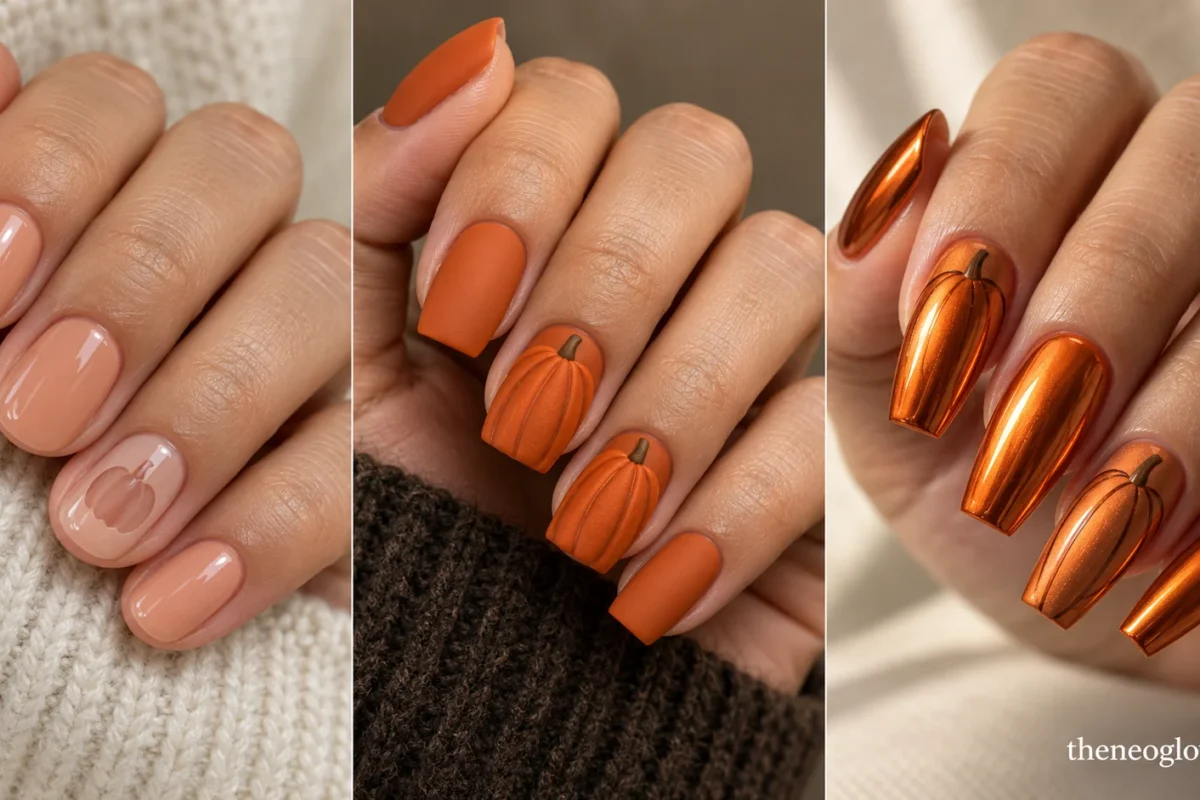
On short oval nails, paint translucent peach-beige around a pumpkin-shaped clear window on the ring finger. Give the exposed window three softly rounded lobes and a tiny curved stem at the top; keep the other nails evenly sheer. This is negative-space art, not a painted orange pumpkin or the usual cropped corner outline. Its silhouette should remain identifiable before any extra color is added.
2. Apricot Wire-Frame Ovals
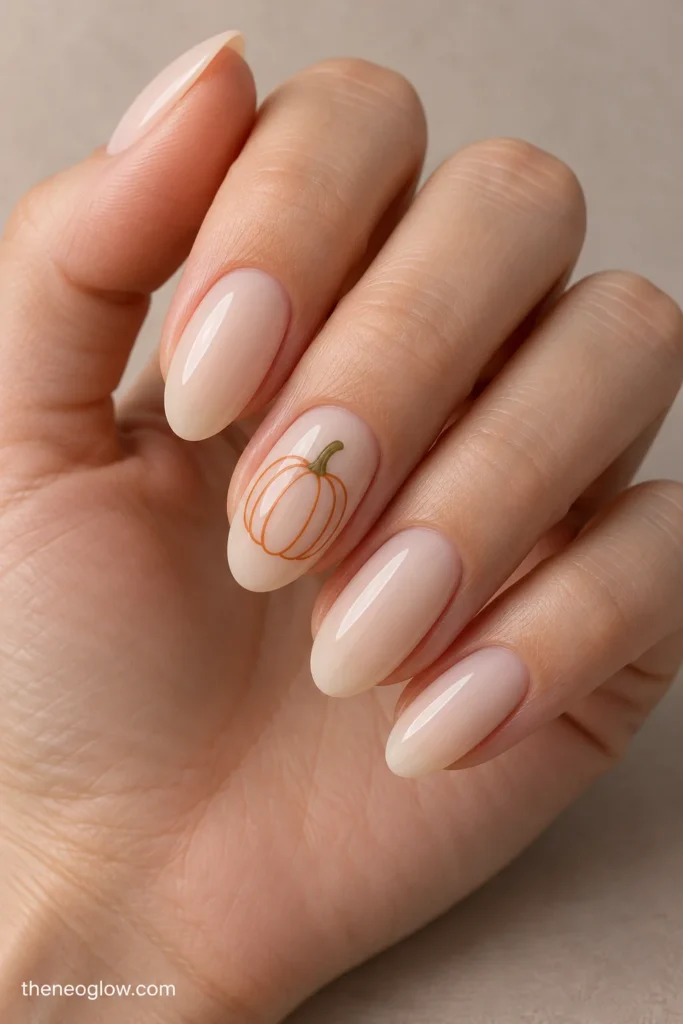
Trace a complete, hollow apricot pumpkin on each middle oval nail over a milky neutral base. One outer contour, three curved interior ribs, and a slender olive stem make it look like delicate wirework. Leave the center unfilled so the underlying nail shade shows through. The repeated line thickness is more important than adding vines or leaves.
3. Terracotta Ribbed Half-Pumpkin Fans
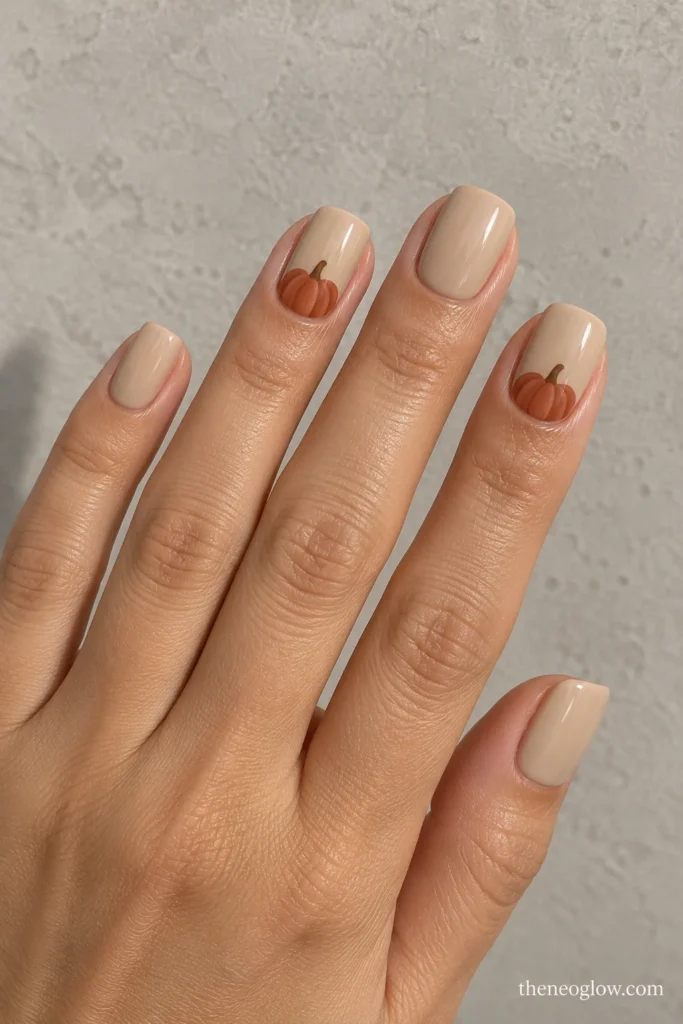
Place a terracotta half-pumpkin across the lower third of two medium squoval nails, but give it three distinct rounded ridges rising toward a little brown stem at the center. The remaining surface stays opaque sand beige. Unlike a plain cuticle half-moon, the segmented lobes and stem make this clearly a pumpkin viewed from above the patch.
4. Ivory-on-Milk Gourd Relief
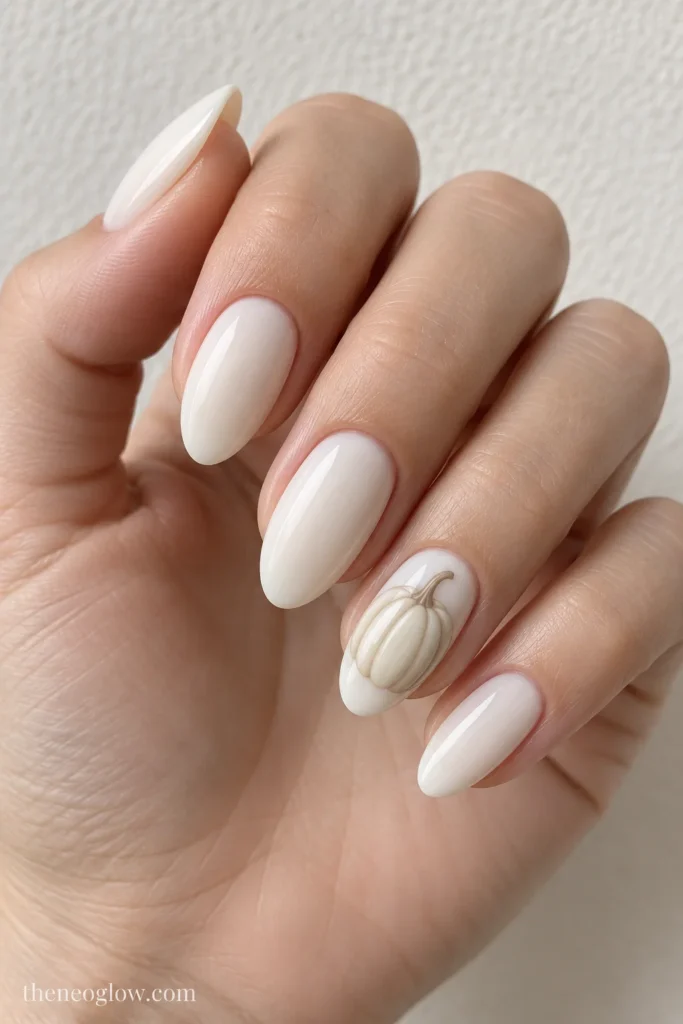
Use milky-white medium almond nails with one large off-white pumpkin cameo on the ring finger. Build its body from flat, overlapping ivory lobes and separate them with narrow warm-gray shadows; finish with a short taupe stem. The nearly monochrome color makes the carved shape, rather than orange pigment, the focal point. Keep the other nails plain milk.
5. Celadon Pumpkin Windows
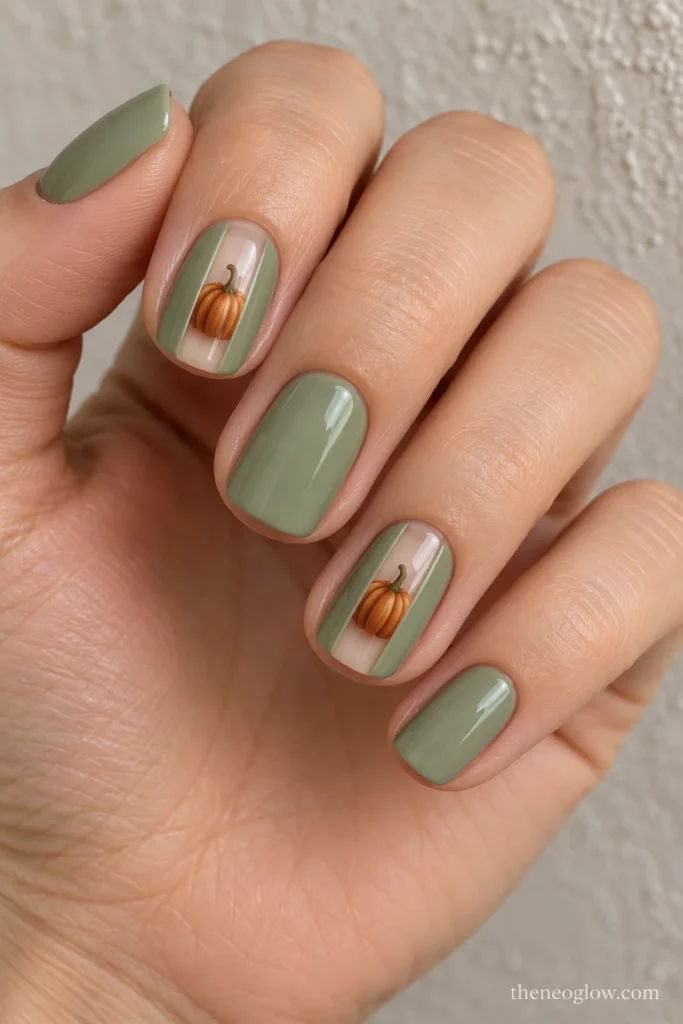
On short rounded-square nails, create a celadon-green opaque base and reserve a tall, narrow translucent window on each index and ring finger. Inside each window, center one tiny burnt-sienna pumpkin with clearly visible vertical ribs and a dark sage stem. The green frame is the distinguishing feature; avoid turning it into scattered autumn leaves.
Orange Finish Changes That Still Look Like Pumpkins
6. Burnt-Orange Raised Ridges
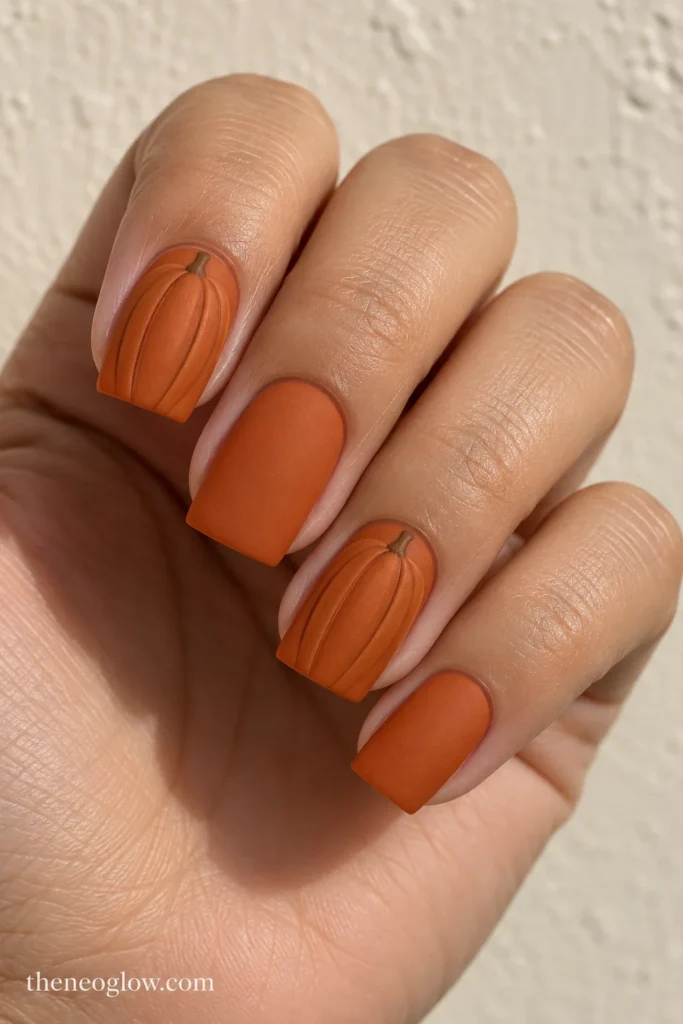
Cover medium square nails in matte burnt orange. On two accent nails, add four low, vertical curved ridges in slightly deeper orange, converging toward a short stem at the cuticle end. The raised lines imitate pumpkin skin without using a painted face. Ask for a smooth, low-profile version if you regularly type or wear snug gloves.
7. Pumpkin Chrome With Ribbed Accents
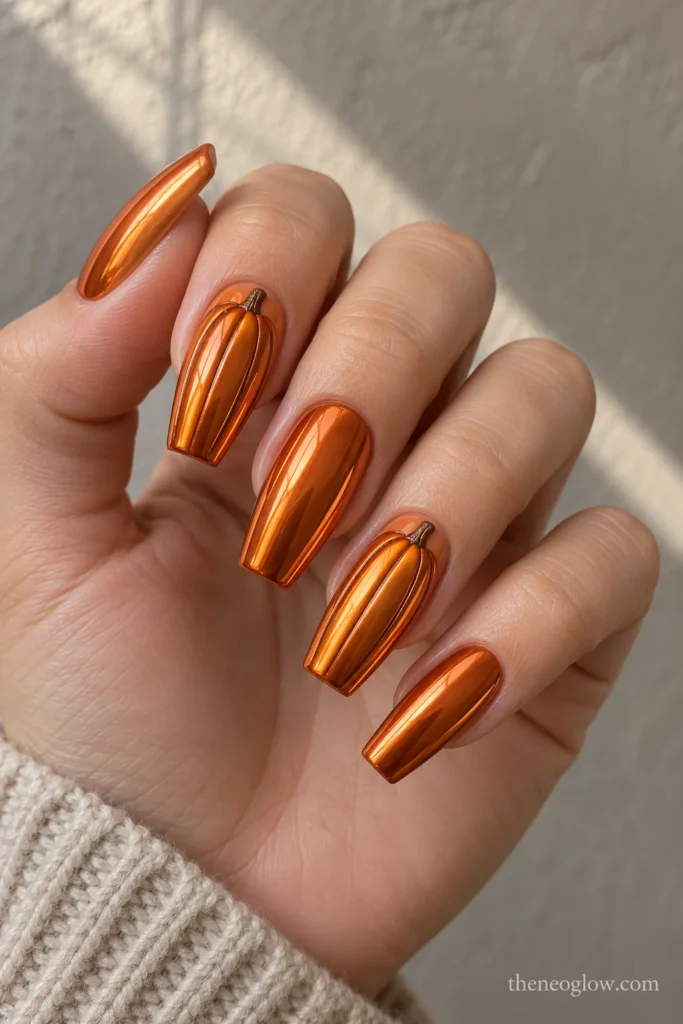
Let rich metallic pumpkin-orange mirror finish cover medium coffin nails, then reserve the index and ring fingers for fine, darker copper arcs that divide each nail into rounded pumpkin lobes. Add one miniature brown stem at the base of each accent. Without those arcs, this would only be an orange chrome manicure; with them, the gourd structure survives the reflection.
8. Velvet Pumpkin Almond Glow
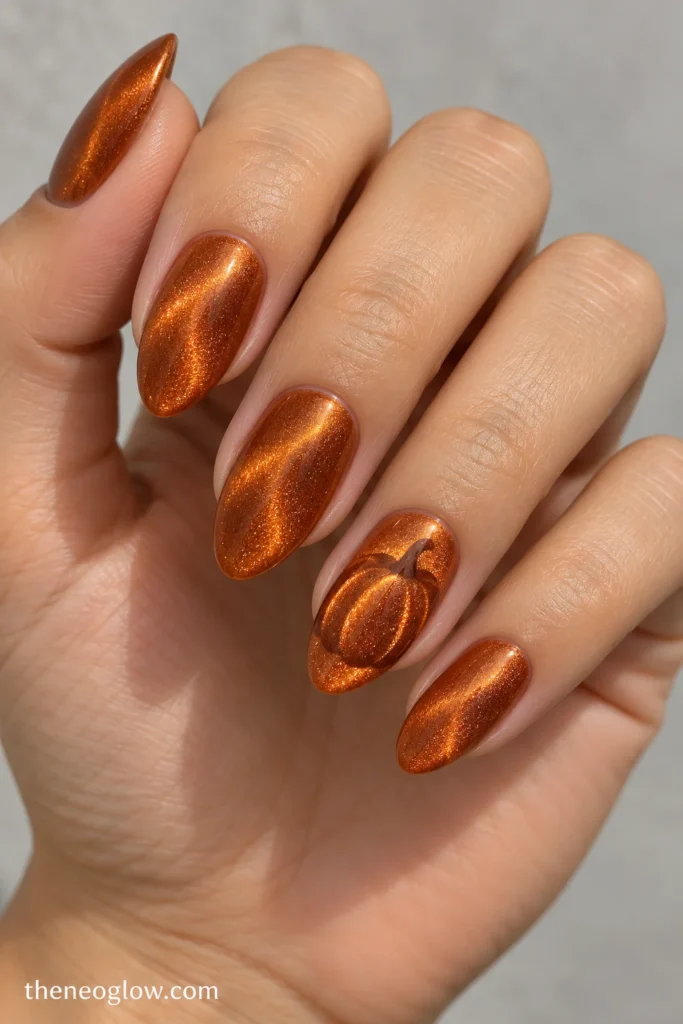
On medium almond nails, use a burnt-apricot magnetic finish with a soft directional glow. The ring finger carries a broad, darker pumpkin silhouette, with three gently curved lighter magnetic-looking bands inside its body and a fine stem. The glow should emphasize the pumpkin’s roundness, not become a generic diagonal cat-eye stripe. Keep the other nails a coordinated velvet orange.
9. Amber Jelly Gourd Center
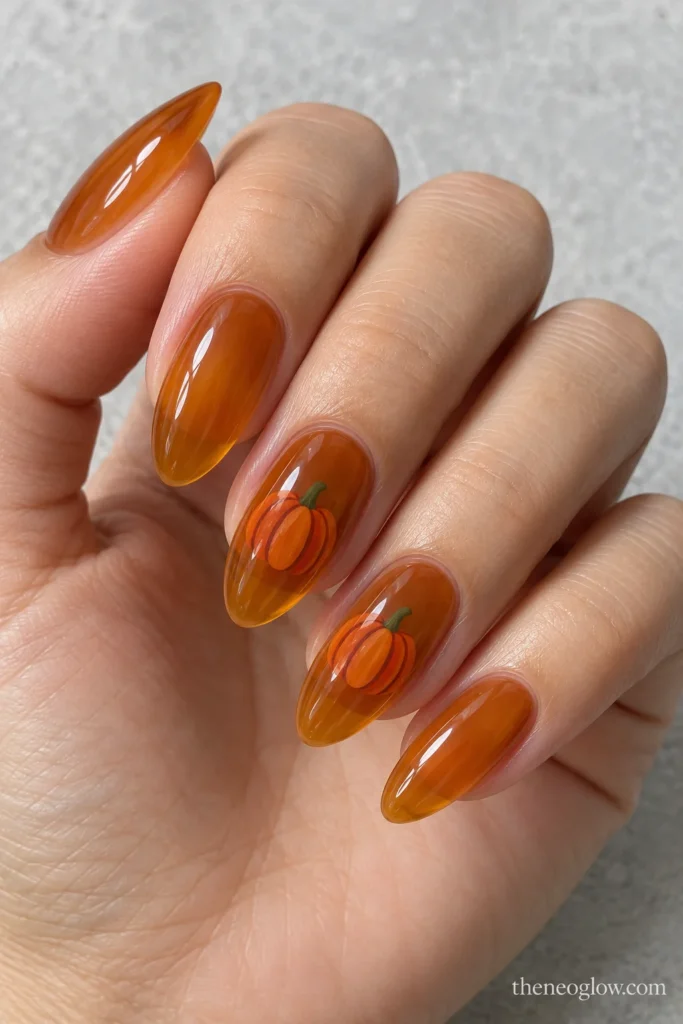
Start with translucent amber jelly on long rounded almonds. Set one opaque cinnamon pumpkin in the middle of each accent nail, leaving a generous glossy amber border all around it. A sage stem and two deeper rust ribs keep the small centered figure readable through the glassy color story. Avoid loose glitter or confetti that could blur its outline.
10. Copper-Rimmed Harvest Pumpkins
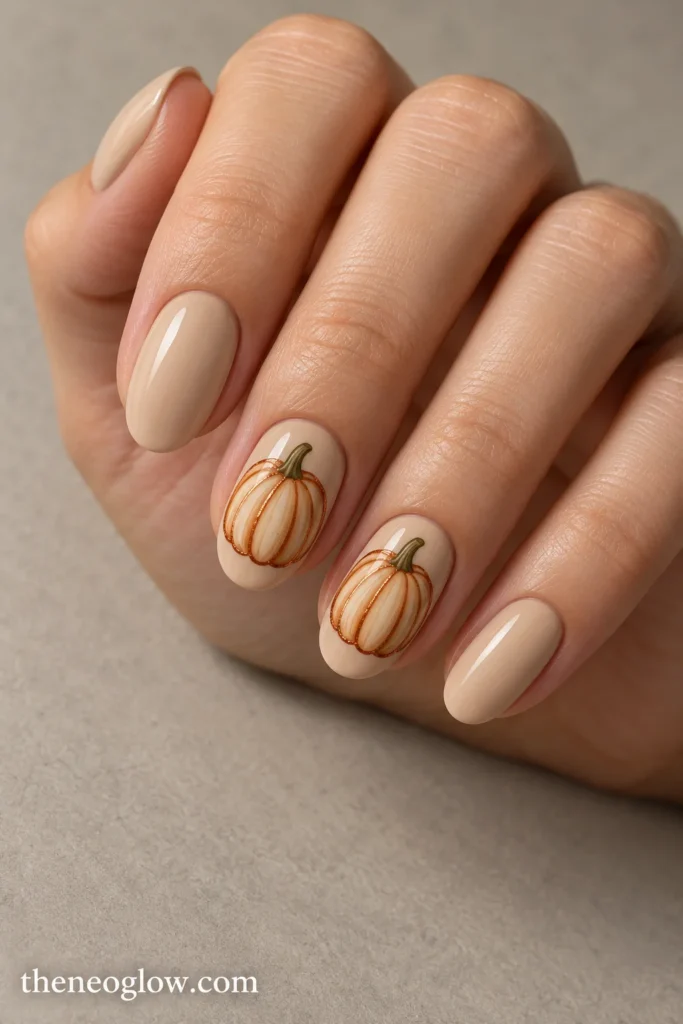
On warm beige medium ovals, paint one broad pale-clay pumpkin on each middle and ring accent, then edge the gourd only with a thin copper metallic contour. Add dark russet ribs and a short olive stem; the other fingers stay smooth beige. The copper line follows the pumpkin’s shape rather than covering the whole nail in metallic powder.
Jack-o’-Lanterns and a Real Pumpkin-Patch Look
11. Jack-o’-Lantern Thumb Portrait
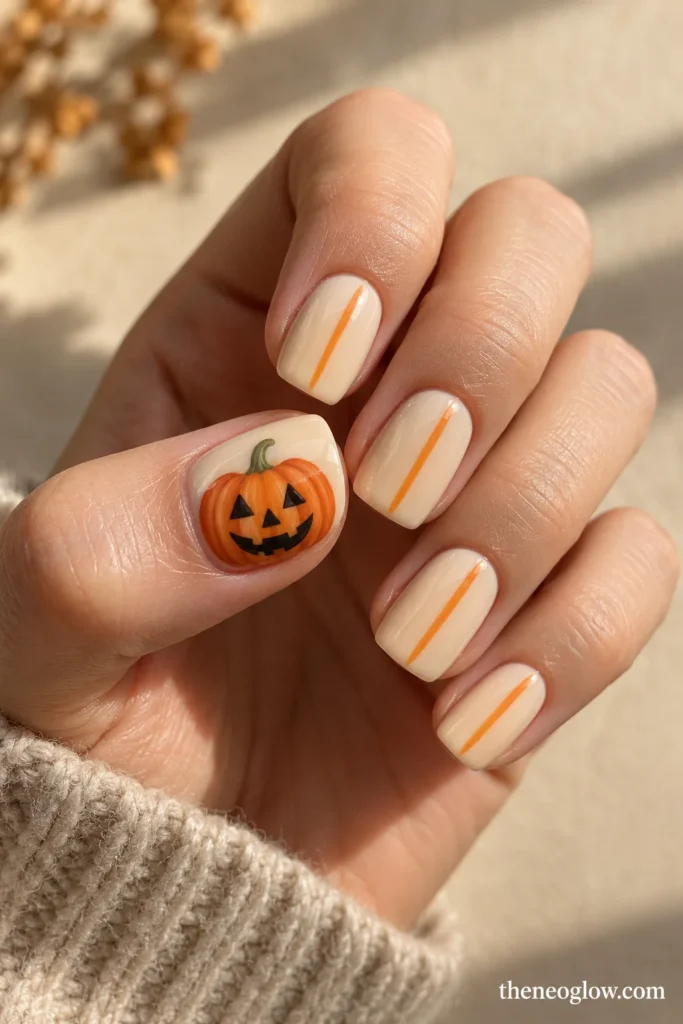
Use medium squoval nails in a glossy buttercream shade and make the thumb the single Halloween portrait. Center a full bright-orange pumpkin with a green stem, two dark triangular eyes, a small triangular nose, and a wide notched smile. On the other fingers, repeat only a narrow pumpkin-rib line in soft orange, so the thumb is clearly the featured face rather than part of a crowded character set.
12. Carved-Face Negative Space
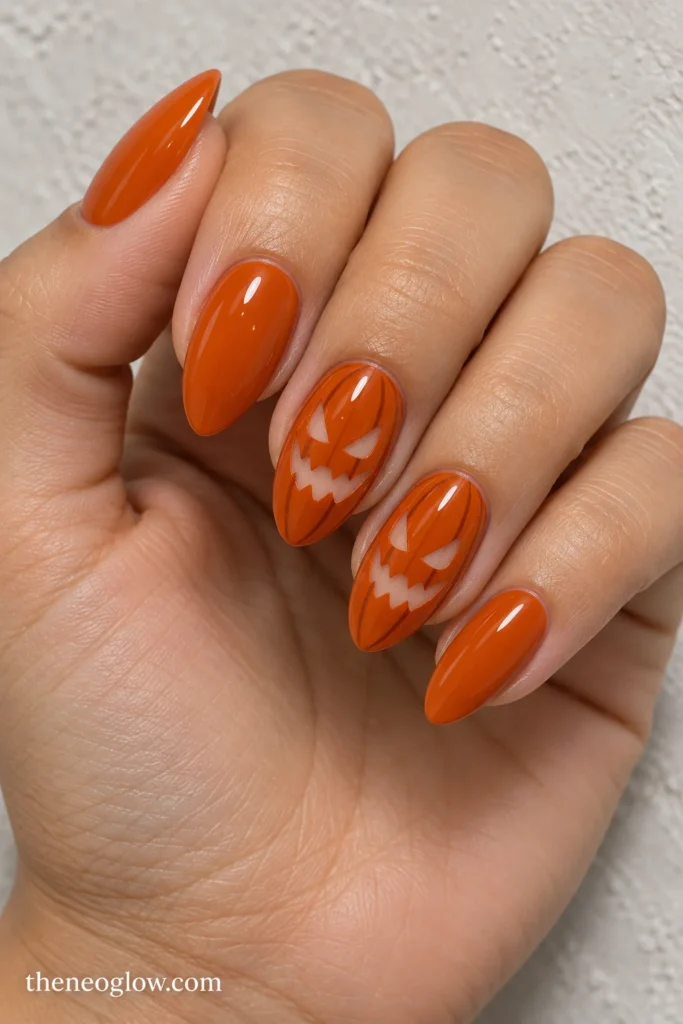
Paint medium almond nails opaque deep persimmon. On the middle and ring fingers, leave sheer nail-colored openings shaped like two slanted eyes and a jagged mouth, then curve two slightly darker orange ridges around the face. The expression appears cut out of a pumpkin-colored surface, instead of being drawn on with black paint. This is the stronger, graphic option for Halloween night.
13. Pumpkin-Patch French Windows
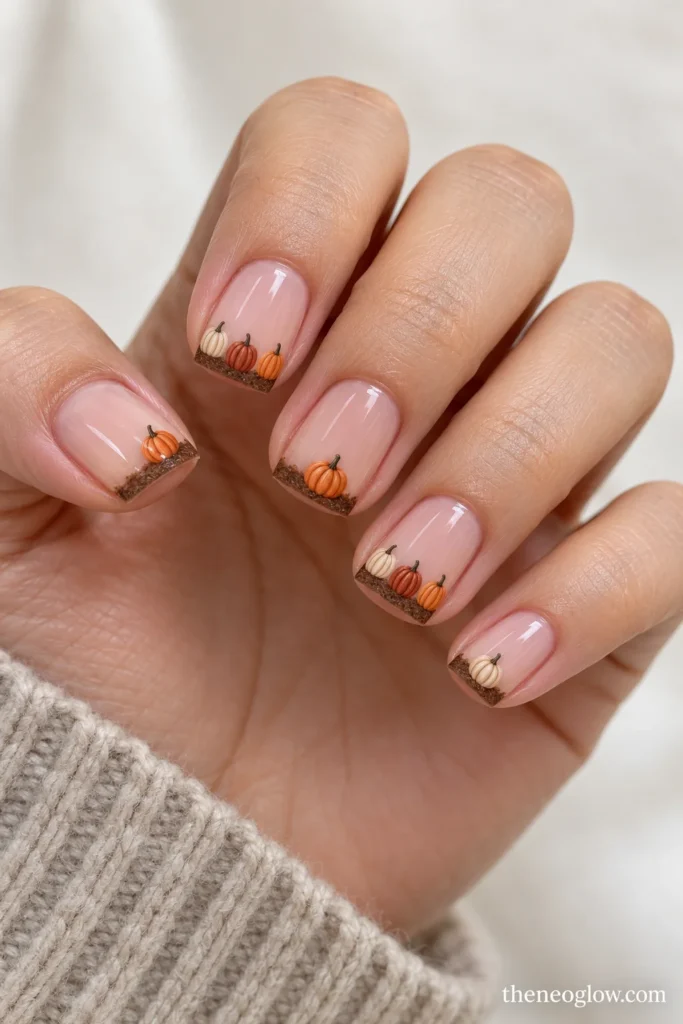
Keep short-to-medium square nails sheer blush and build a narrow curved strip of earthy brown along the free edge. Across the strip on two nails, arrange three tiny pumpkins of different heights in cream, rust, and muted orange, each with a distinct stem and rib lines. The remaining fingers get one small pumpkin at the edge. This is a miniature garden along the tip, not a plain orange French manicure.
If you want bats, black polish, or stronger two-color contrast around the same season, NeoGlow’s black-and-orange Halloween nails guide owns those palette-first looks. Keep this set focused on the actual pumpkins.
Soft Harvest Gourds for October and November
14. Matte Cinnamon Pumpkin Engraving
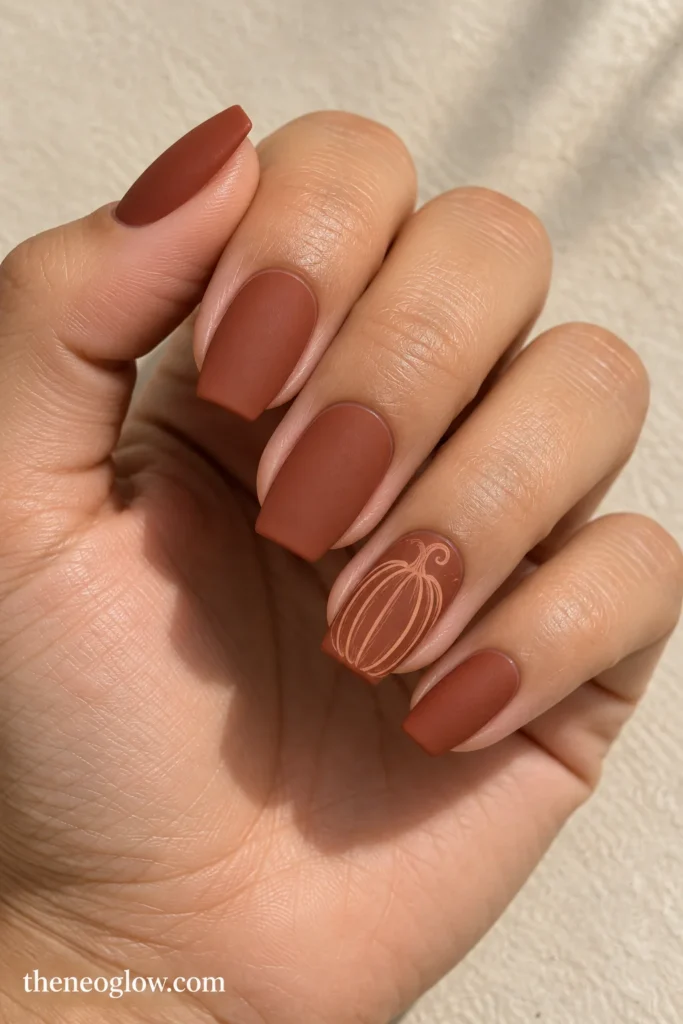
Choose short coffin nails in opaque matte cinnamon. On the ring finger, use slightly lighter dusty-clay lines to engrave one oversized pumpkin outline with a curled brown stem, stretching the body vertically instead of making it round. The fine tonal lines contrast with the dry-looking base; skip gloss, glitter, and faces so the design stays understated.
15. Blush Pink Mini Gourd Garland
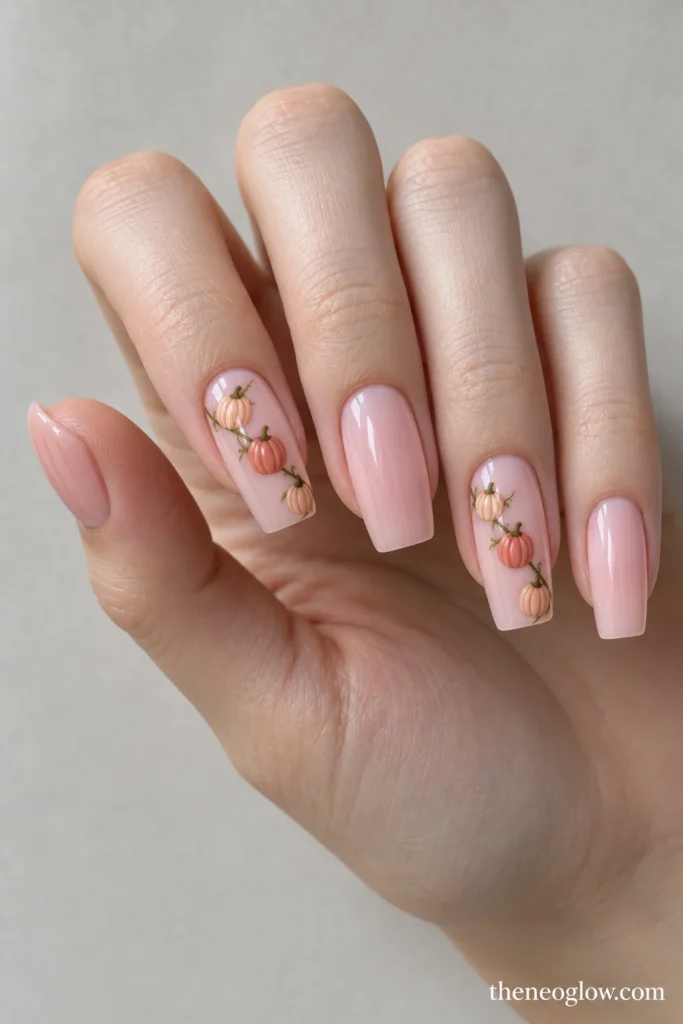
On long soft-square nails, paint a sheer cool blush base. Run a thin olive vine diagonally across just the index and ring fingers, attaching three miniature gourds in dusty coral and pale peach. Give every gourd its own little stem and vertical grooves, with some elongated and some round. The vine connects the shapes; it should not become a floral manicure.
16. Squoval Pumpkin With Seed-Dot Halo
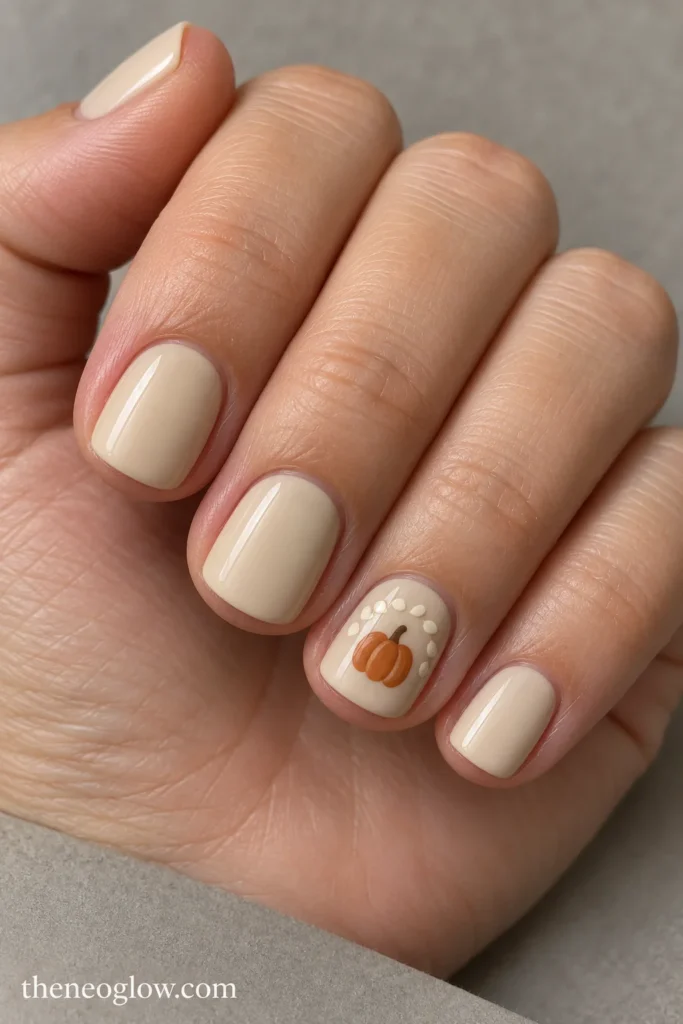
Keep very short squovals opaque oatmeal and place a single compact russet pumpkin in the center of each ring finger, complete with three rounded lobes and a brown stem. Surround it with an airy half-circle of tiny cream seed-shaped dots. The dots frame an unmistakable pumpkin; they are not the pumpkin motif by themselves. Leave the other nails plain oatmeal for breathing room.
17. Cream-and-Russet Mixed Gourd Silhouettes
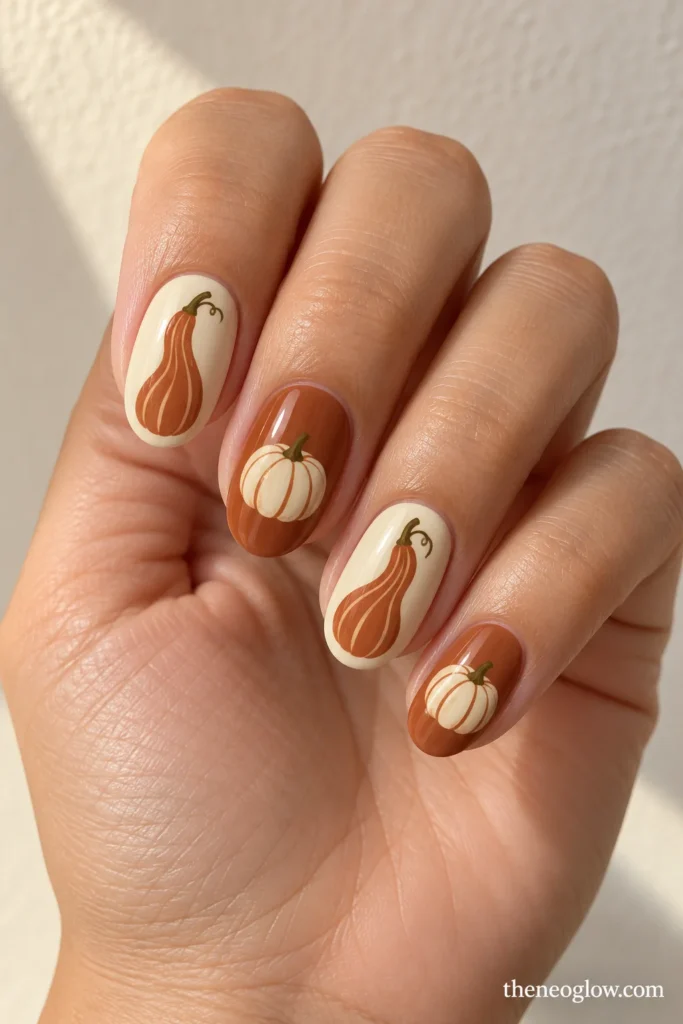
Use medium oval nails with alternating cream and muted russet backgrounds. Paint one elongated, curved-neck gourd on each cream nail and one squat ribbed pumpkin on each russet nail, reversing their colors for contrast. Give both forms small stems but no faces. The deliberately different vegetable silhouettes make this feel like a harvest still life rather than Halloween character art.
Match the Art to Your Nail Shape and Salon Appointment
Very short or short nails: Try ideas 1, 2, 5, or 16. Keep the pumpkin to one focal nail or a simplified silhouette, and make the stem large enough to read. Medium squares and squovals: Ideas 3, 6, 11, and 13 leave space for ribs, faces, and patch scenes. Almond or longer nails: Ideas 4, 8, 9, 12, and 15 can hold an elongated gourd or more layered finish without shrinking the art into a smudge.
Bring a screenshot and make the request measurable. For a small motif, say: “Short ovals, sheer peach-beige base, one pumpkin-shaped clear cutout on each ring finger, three visible lobes, one small stem, high-gloss finish, no faces or extra fall icons.” For texture, try: “Medium square, matte burnt orange, four low curved pumpkin ribs on two nails, one short stem per accent, no glitter or large 3D charms.” For Halloween, specify whether the jack-o’-lantern face should be painted on the pumpkin or cut out as negative space; ideas 11 and 12 are not interchangeable.
Regular lacquer suits flat outlines and simpler accent art, while sculpted relief and some reflective effects may call for a compatible professional nail system. Follow the directions for the exact products and curing equipment used. If choosing gel, the American Academy of Dermatology’s gel manicure and removal advice covers salon hygiene, UV precautions, and why you should not pick the coating off.
Keep the Pumpkin, Change the Season
To wear a set after October 31, choose a stemmed gourd without a carved face, or replace a bright orange backdrop with oatmeal, celadon, blush, or russet. Flat details are easier to keep visually tidy than bulky charms; if the coating lifts, avoid pulling it away from your nail and follow the appropriate removal instructions. For basic at-home accents, NeoGlow’s easy Halloween nail designs guide has tool-based options, while the broader Halloween Nails 2026 collection helps when you decide you want another motif entirely.
Choose one defining detail before you save a reference: cutout, drawn rib, dimensional ridge, magnetic glow, or carved face. That one choice will make the final pumpkin manicure much easier to recognize—and explain at the salon.