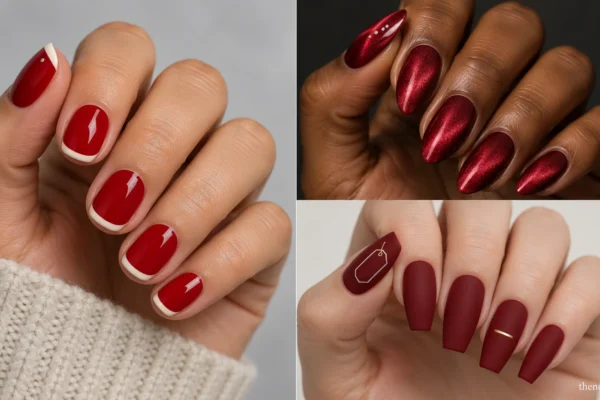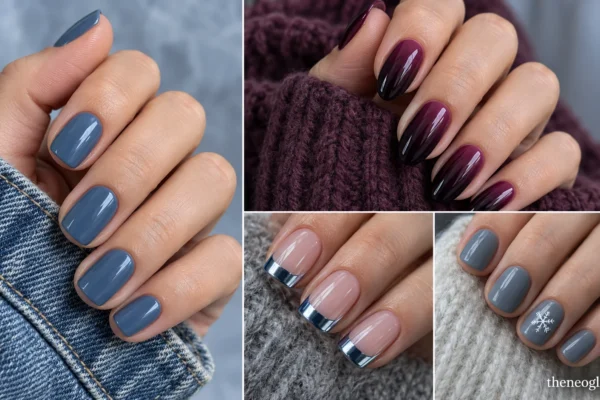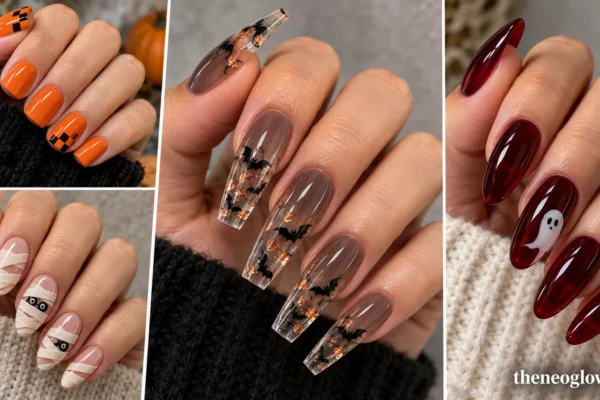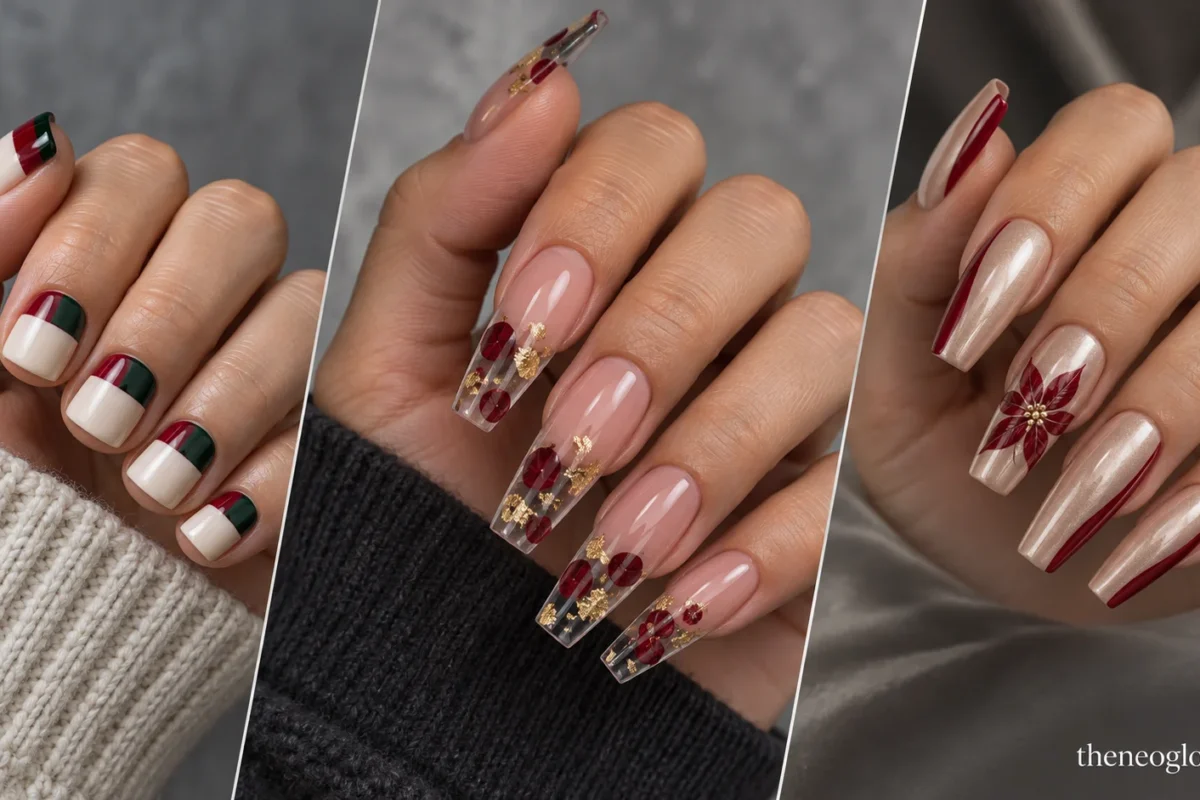
Christmas acrylic nails can look stunning in photos while hiding how long the extensions really are. That missing detail matters at a salon: the same artwork looks different on a short square, a medium almond, and a long coffin tip. These 22 Christmas acrylic nail ideas give every look an actual extension silhouette, finish, color layout, and design placement. You’ll also find an appointment script, a realistic upkeep plan, and ways to avoid paying for extra length you do not want. Think of the acrylic as the structure; the Christmas design is the finish built around it.
What to Settle Before Booking an Acrylic Set
An acrylic enhancement is a product system, not a nail shape or a synonym for every long manicure. Traditional liquid-and-powder acrylic forms a hardened enhancement; your technician can then shape it and finish it with compatible color and artwork. The FDA’s nail-care product guidance explains acrylic ingredients, label warnings, potential reactions, and why ventilation matters.
| If your December involves… | Discuss this structure | Keep the design… | Consider first |
|---|---|---|---|
| Typing, cooking, wrapping gifts | Short square or softened squoval | Flat, with compact geometry | 1–5 |
| Dinners and ordinary workdays | Medium almond or oval | Curved, smooth, not overly raised | 6–11 |
| A crisp salon-art reference | Medium tapered square or coffin | Defined across a wider tip | 12–17 |
| One or two dressy events | Longer ballerina, coffin, or stiletto | More dramatic, with planned removal or fills | 18–22 |
A length check that helps: show your technician how far the free edge should extend past your fingertip, not just a top-view photo. Ask to see the proposed side profile and thickness, and test the length against normal tasks before the design starts. Shapes such as almond and stiletto also need enough extension to support a genuine taper; avoid forcing that outline onto almost no usable length.
For a color-first gallery that is not restricted to acrylic services, explore NeoGlow’s 27 Christmas nail ideas.
Short Acrylics With Clear, Compact Christmas Details
1. Cranberry Split-Cap Squares
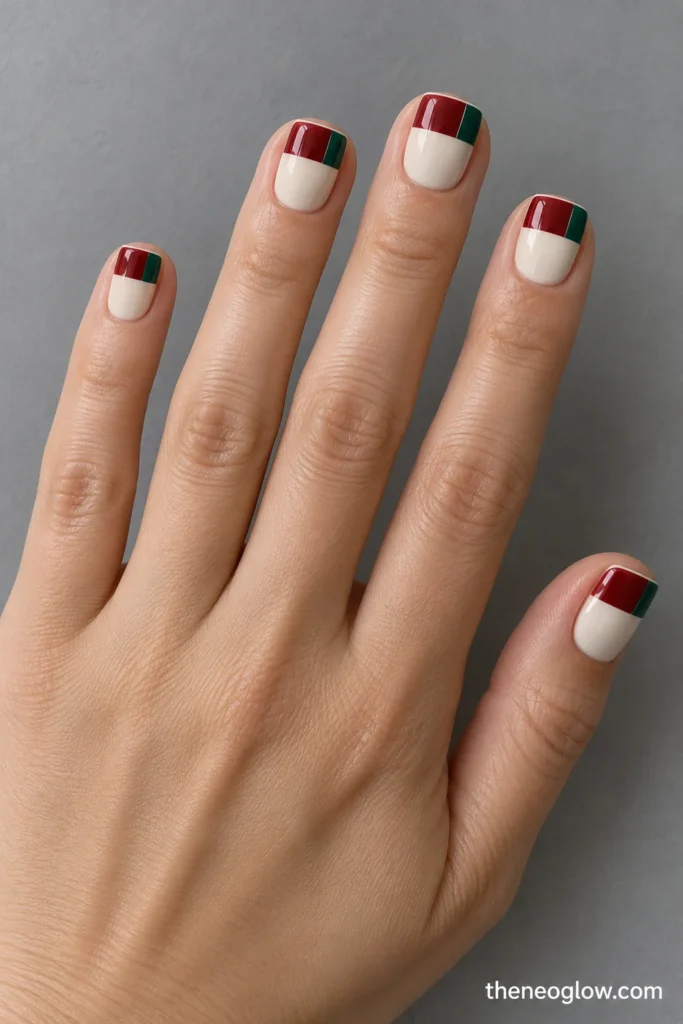
On short, straight-edged square acrylics, use opaque winter-cream gloss and divide the upper third into two blocks: a broad cranberry rectangle and a narrow forest-green rectangle. The split runs vertically, while both colors finish flush with the flat edge. This is a color-block cap, not a striped French tip; it looks intentional even when the free edge is modest.
2. Satin Fir Rails on Squovals
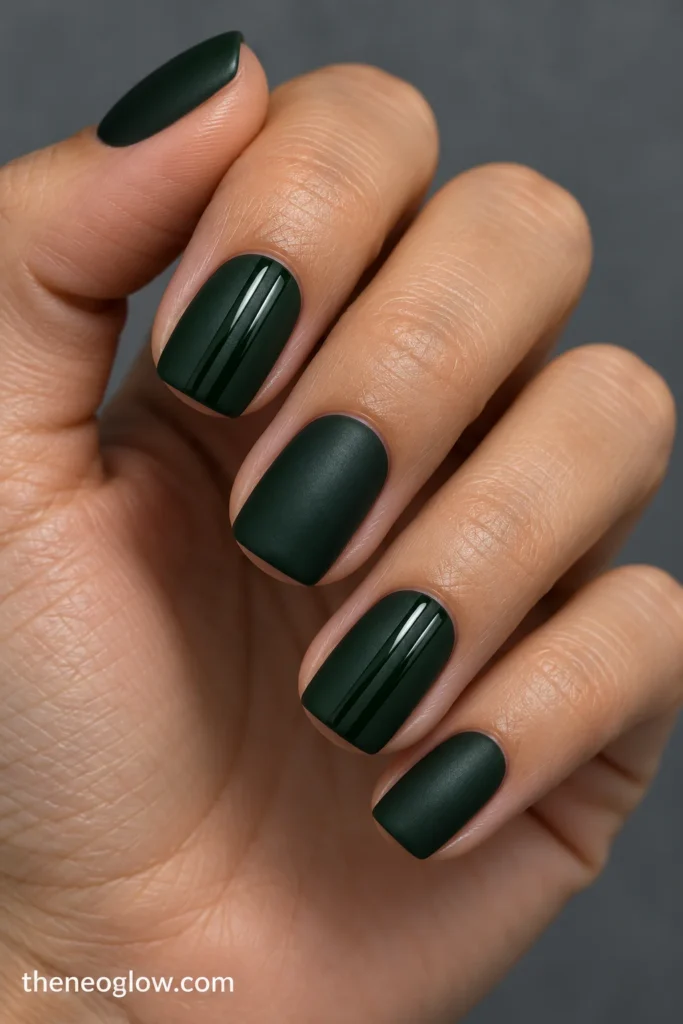
Keep short squoval enhancements an opaque blackened-fir green with a satin top finish. On the index and ring nails, run two parallel glossy-green rails from mid-nail to just before the rounded tip. Because the rails are the same color as the base, reflected light—not a second holiday motif—makes the pattern. The softly rounded corners suit a smaller extension.
3. Copper Gift Tabs on Cream Rounds
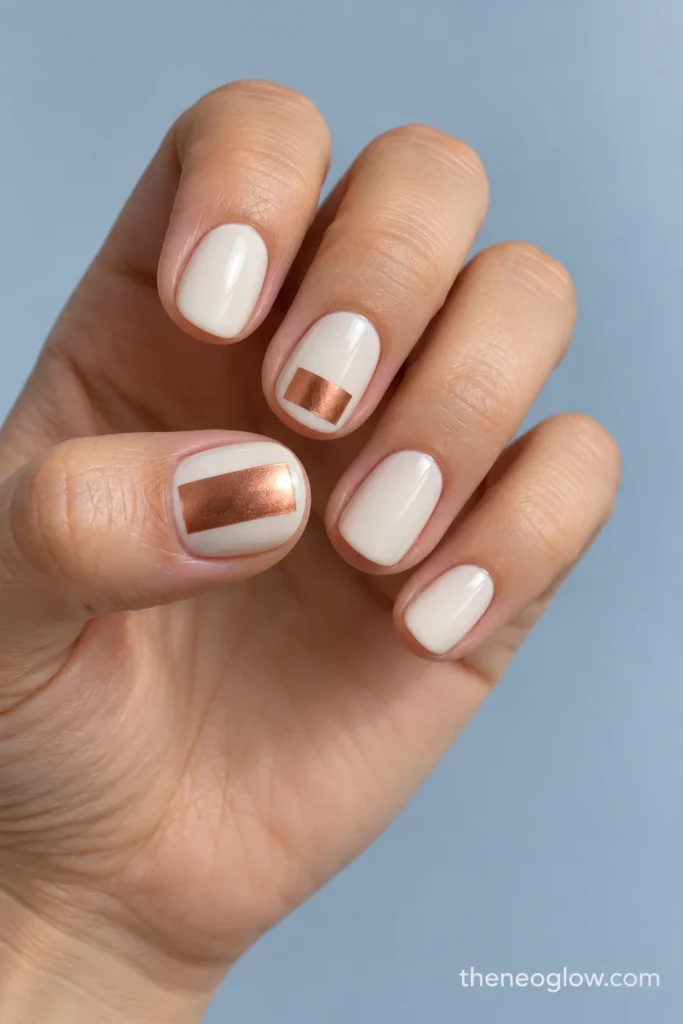
Build short round acrylics with a glossy porcelain-cream surface. A broad, flat copper-metallic rectangle sits horizontally across the middle of each thumbnail, with one smaller copper block near the middle-finger tip. These look like pieces of metallic gift wrap without bows or lettering. Rounded ends keep the contrast softer than a full graphic square manicure.
4. Oxblood Ribbon Windows on Short Ovals
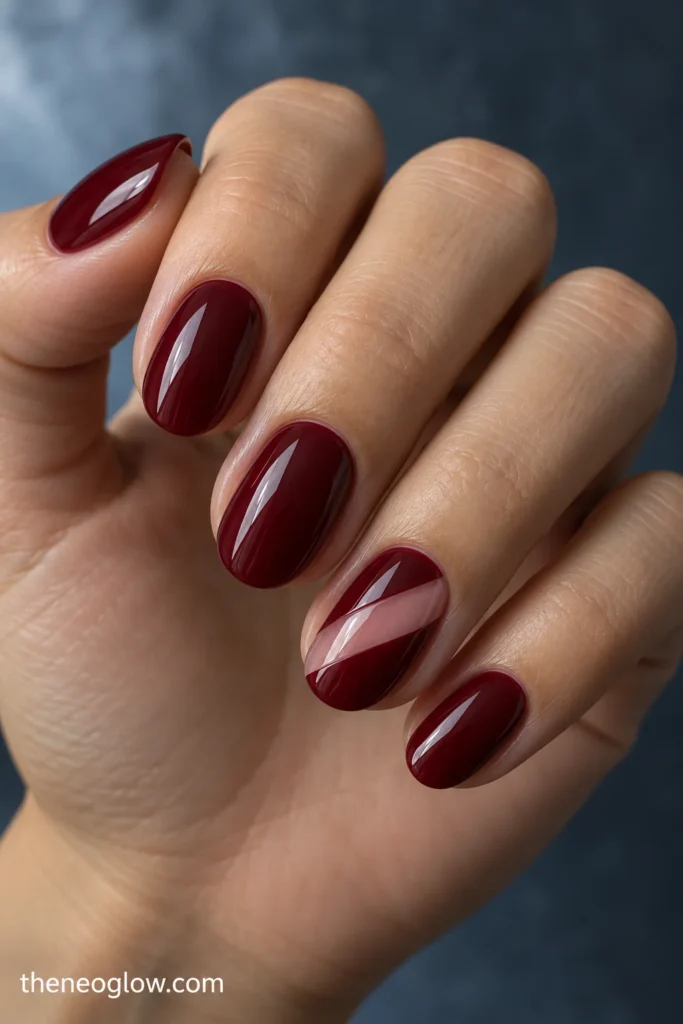
Give short oval acrylics an opaque oxblood-red gloss, interrupted by one wide, diagonal translucent rosy window running from the lower left to the upper right on each ring finger. Keep the window clean and flat beneath the finish. The exposed-looking band is a deliberately finished sheer color section—not an uncoated gap in the enhancement.
5. Staggered Snow Bricks on Blue Squares
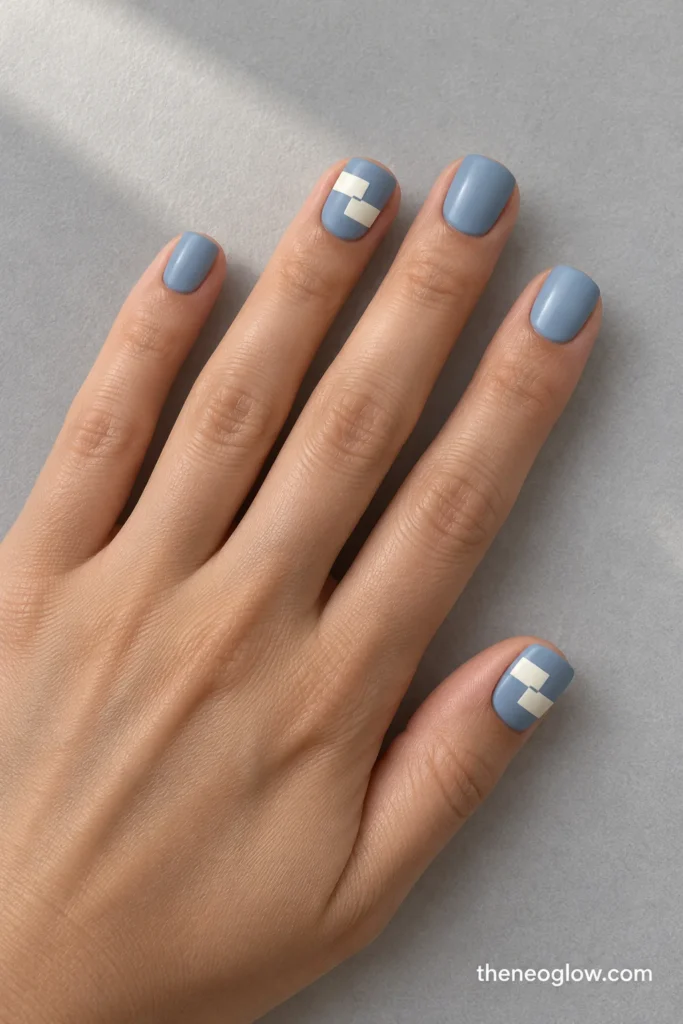
Choose short square acrylics in muted glacier-blue satin. On the thumbs and ring fingers, add two chunky ivory rectangles staggered like stepped snow blocks across the top half, leaving a blue gap between them. Other nails remain blue. Squared extension tips give the geometry a clean ending; tiny hand-painted snowflakes are unnecessary.
Short acrylics are still enhancements, not automatically the best choice for every natural nail. If you want designs on nails that barely pass the fingertip without added structure, NeoGlow’s short Christmas nails collection covers that different brief.
Medium Almonds and Ovals for Sweeping Holiday Art
6. Black-Cherry Contour Almonds
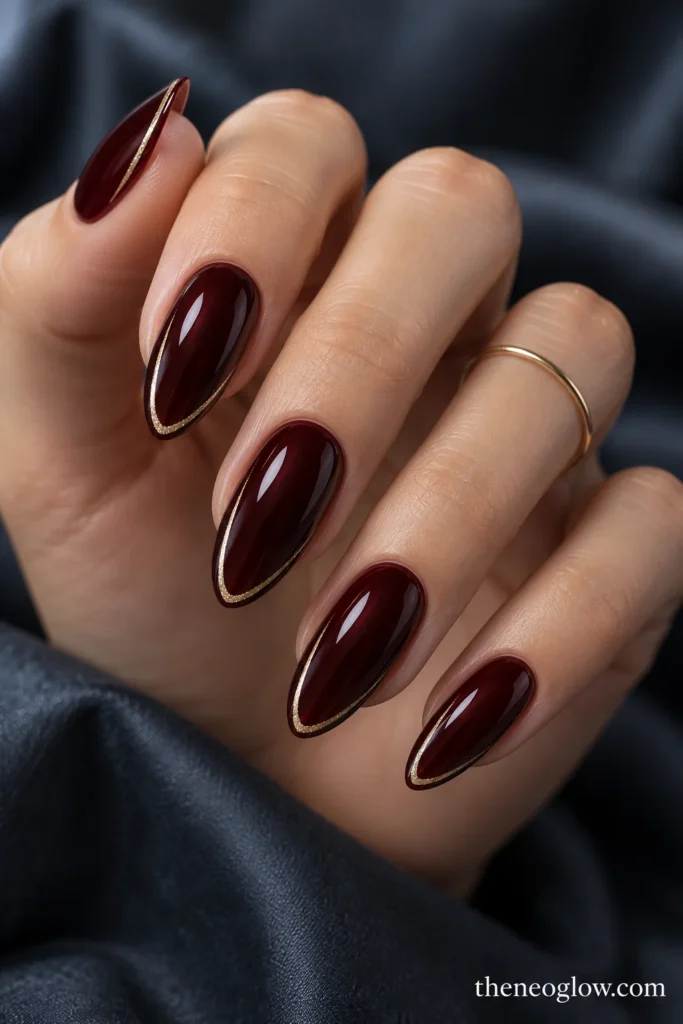
Medium almond extensions wear glossy, almost-black cherry. A fine champagne-gold line traces the inner side edge, curves around the pointed-but-rounded tip, and stops halfway down the opposite side. The partial frame emphasizes the acrylic taper rather than creating another ornament. Keep the gold flat so the silhouette remains the strongest feature.
7. Silver Aurora Veil Ovals
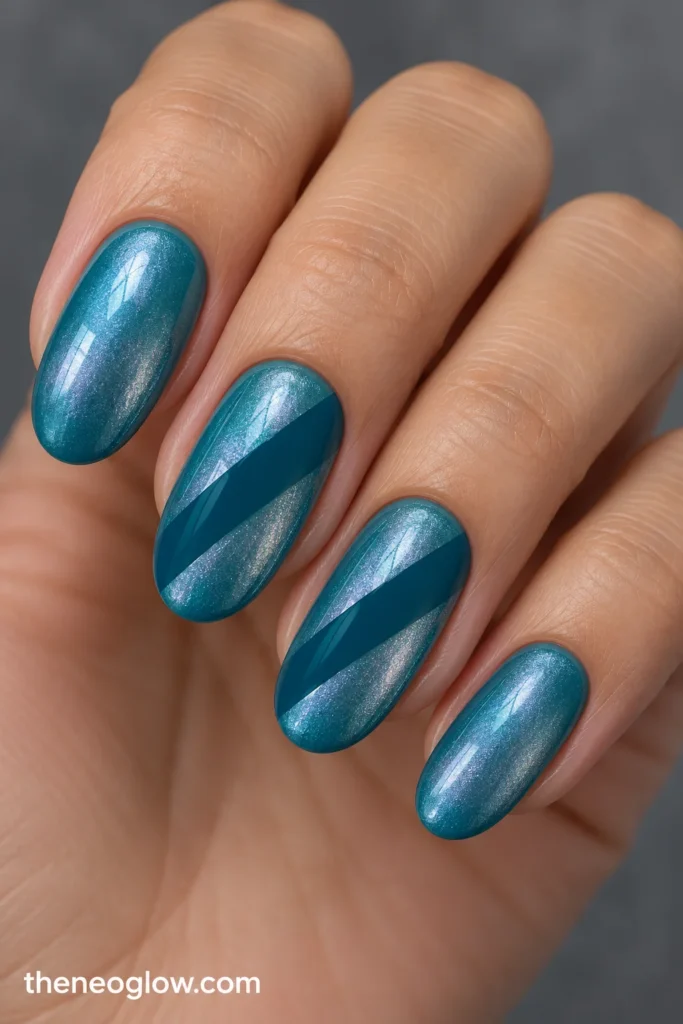
Start with medium oval acrylics in opaque blue-teal. Cover most of the surface with a translucent icy-silver pearl effect, but leave one broad diagonal stripe of clean blue-teal uncovered on the middle and ring nails. The color break should be unmistakable in natural light. This gives a frosted holiday finish without painting a winter scene.
8. Cardinal Brushstroke Almonds
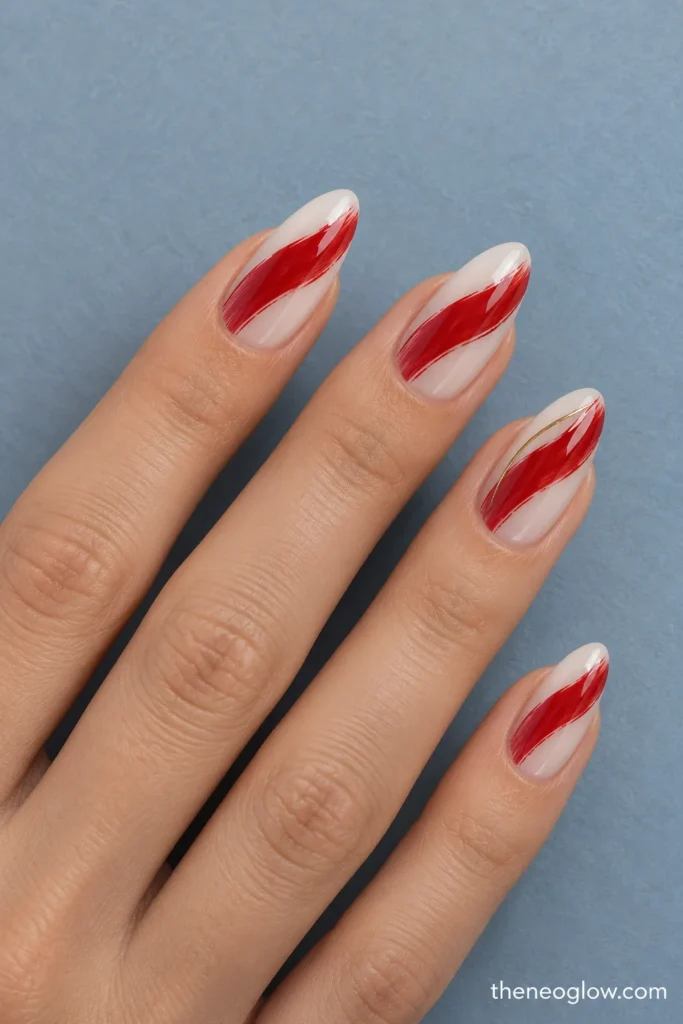
Over a semi-sheer ivory base, sweep a broad cardinal-red stroke from the lower right edge across the center of each medium almond, ending before the upper left tip. Add one thin gold line beside the red only on the ring fingers. Unlike a side French, the red crosses the central nail plate; the length gives the brushstroke room to breathe.
9. Evergreen Ornament Orbits
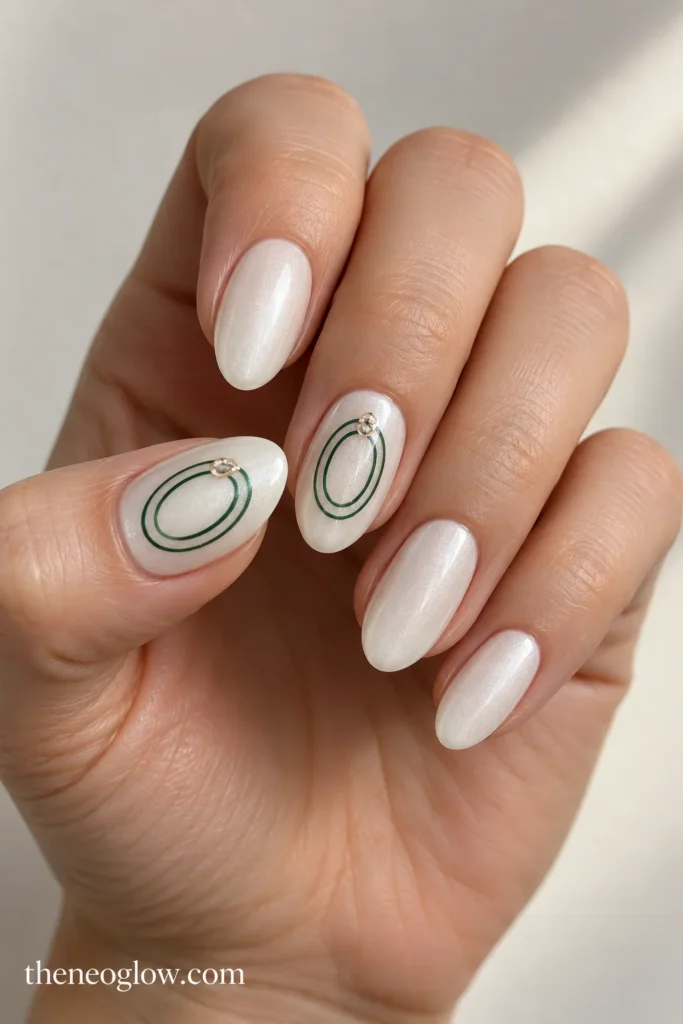
Medium almond acrylics have opaque pearly-white gloss with two fine concentric evergreen oval rings around the center of the thumb and middle nails. Finish each pair of rings with a single champagne glint at the top, suggesting hanging ornament wire without drawing a full bauble. Leave the smaller fingers white to prevent an all-over pattern from getting crowded.
10. Mulberry Snowfall Fade
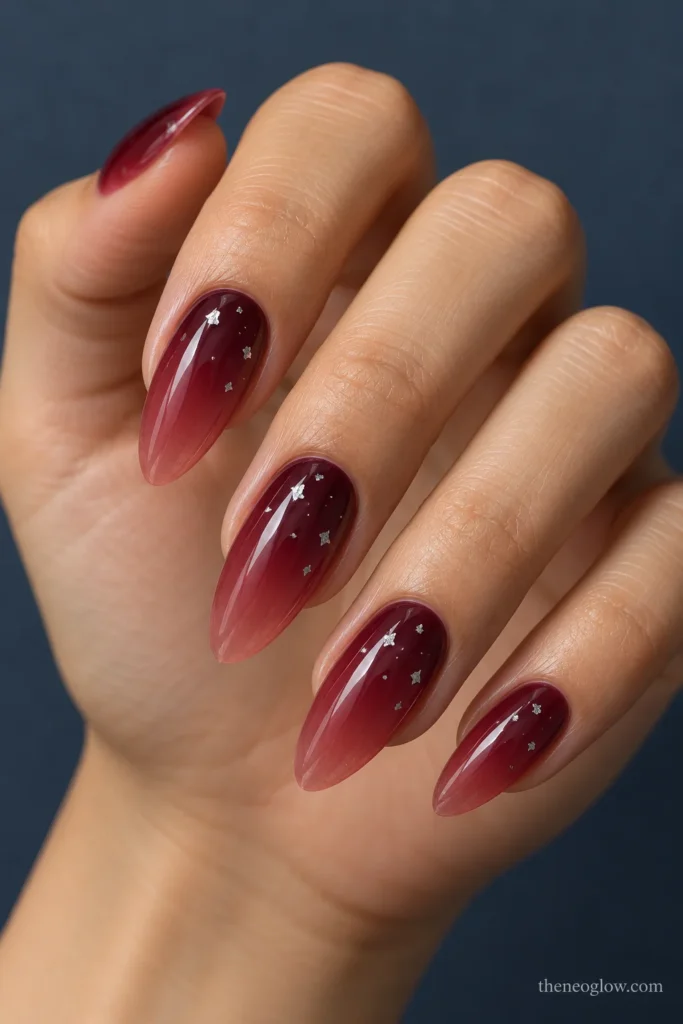
Use medium almond extensions with a deep mulberry base that gradually softens toward translucent berry at the tips. Concentrate a few separate, tiny silver flecks within the upper third only, like sparse snow against a dark sky. This is not a glitter French: the visible transition runs through the whole nail, while the flecks stay scattered and flat.
11. Midnight Icicle Inlay Ovals
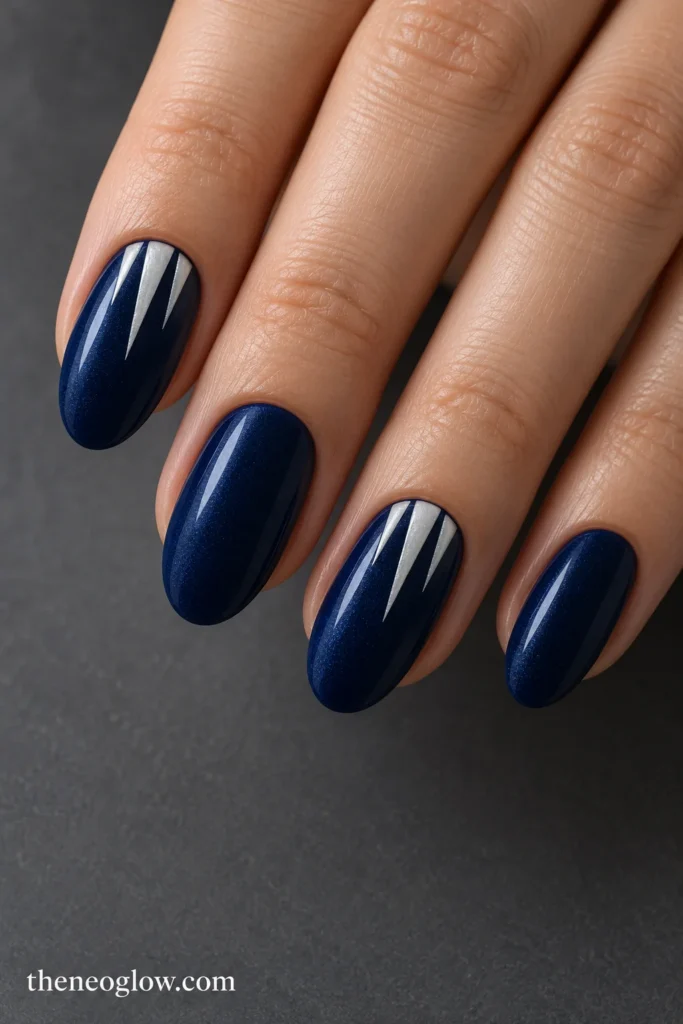
Finish medium oval acrylics in opaque midnight blue with a subtle velvet sheen. On the index and ring fingers, three slender pearl-white triangles descend from the cuticle toward the center at alternating lengths. The pointed inlays reverse the usual snow-drip French orientation, leaving the navy tips untouched. Request painted, flush detailing rather than dangling pieces.
Tapered Squares and Coffins Built for Graphic Art
12. Gilded Ruby Box-French Squares
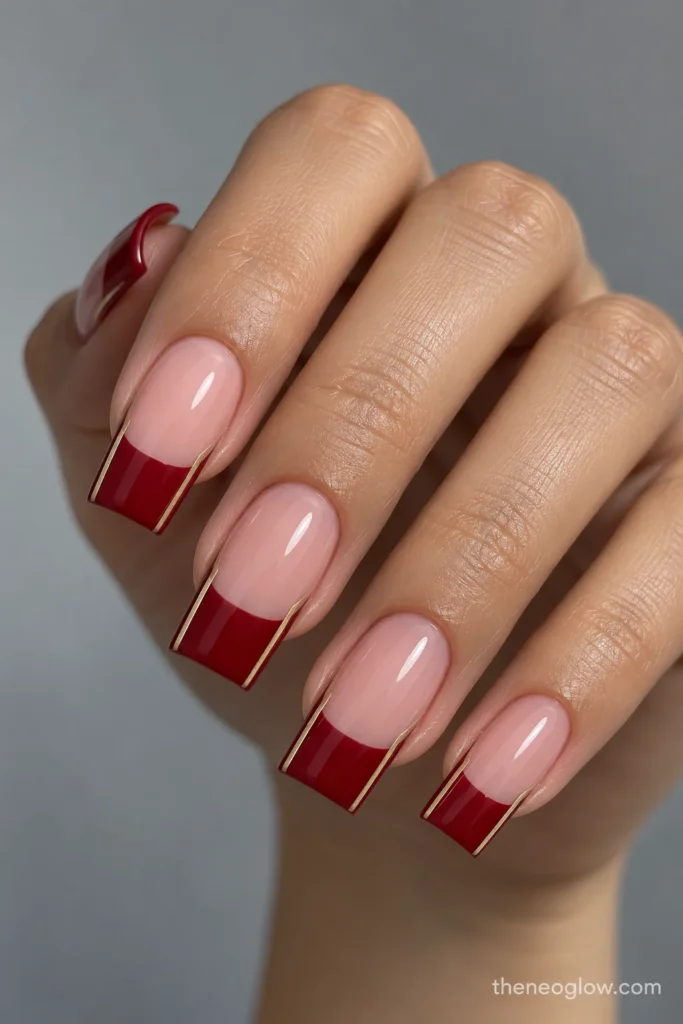
On medium tapered-square acrylics, keep the nail beds softly pink and make a broad, straight-edged ruby-red French cap. Thin gold lines mark the cap’s two vertical shoulders but do not cross its top edge. The sharp corner geometry, wider color band, and squared ends distinguish this from a conventional curved French manicure.
13. Gold Herringbone Forest Coffins
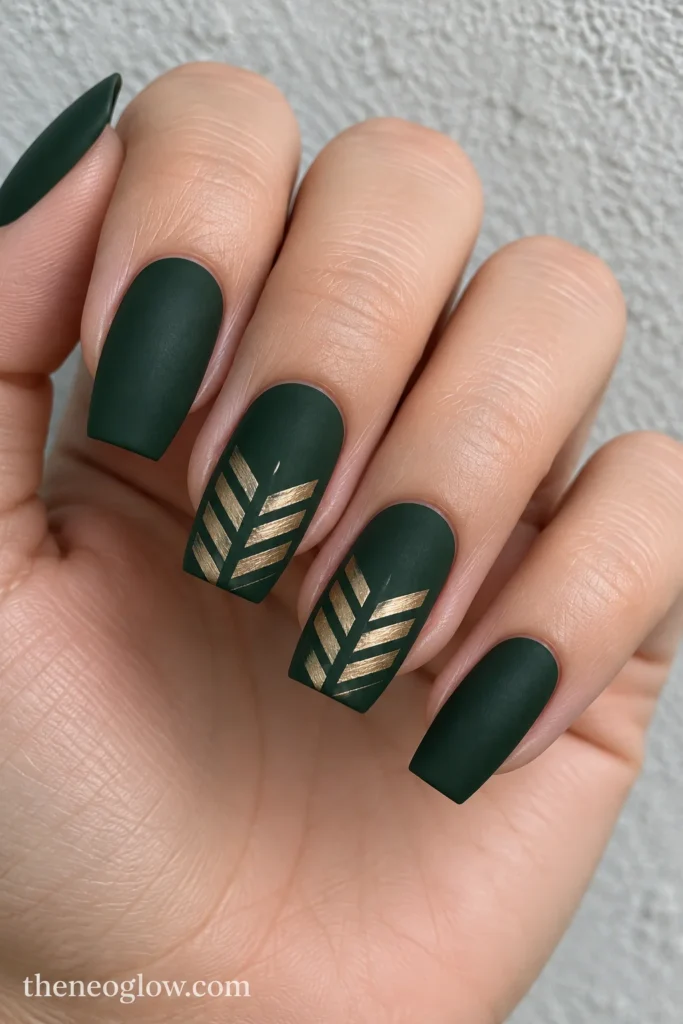
Choose medium coffin enhancements in matte, very dark forest green. Across the distal half of the middle and ring nails, alternate four short champagne-gold diagonal strokes on either side of an imaginary centerline, producing a herringbone pattern. The lines are flat and evenly spaced. Leave other nails matte green so the coffin’s tapered sidewalls stay visible.
14. Suspended Cranberry-Glass Coffins
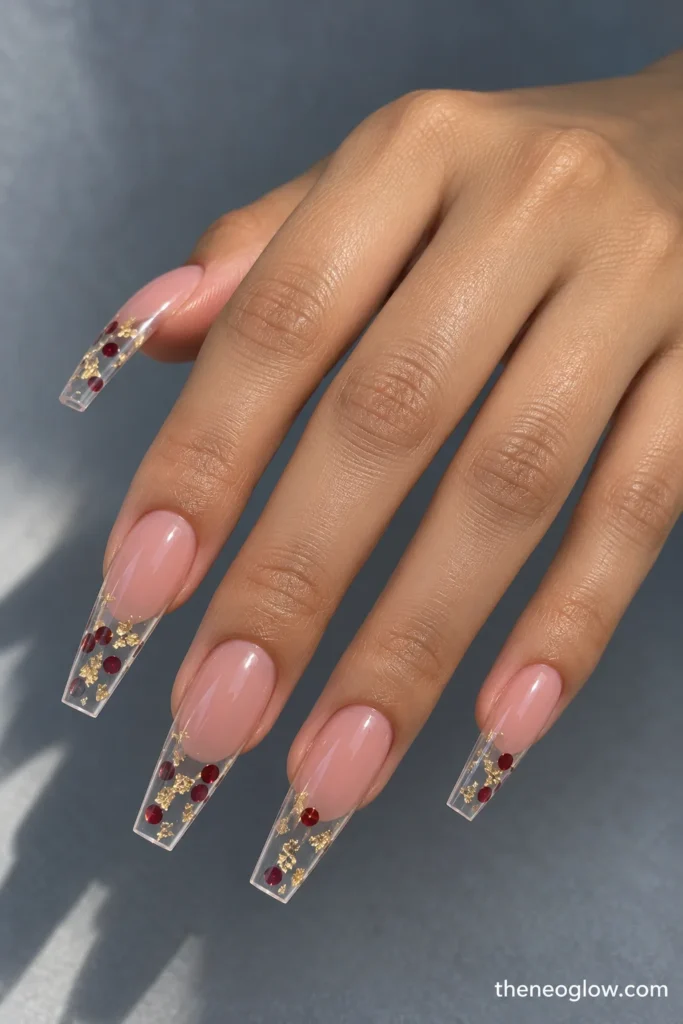
Let medium-long coffin acrylics have a soft pink nail-bed zone and visibly transparent free edges. Within the clear distal sections, space a few tiny flat cranberry-red disks and irregular gold flecks as though suspended in glass, only if your technician’s acrylic system supports this kind of encapsulation. Keep the tips mostly clear so the negative space—not a solid red topcoat—defines the look.
15. Polar-Blue Mirror-V Squares
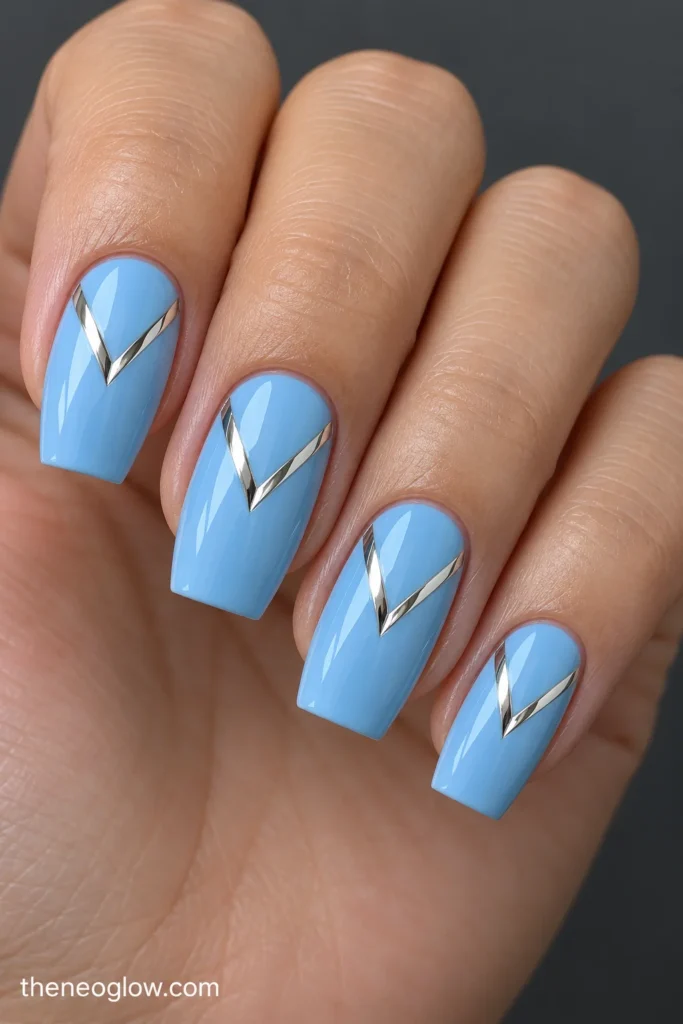
Medium tapered-square acrylics carry opaque powder-blue gloss. On each nail, two slender mirror-silver diagonal bars rise from the lower outer sides and meet in a broad V near the upper center, leaving a blue triangle visible above. The V is placed on the nail surface rather than forming a French-tip boundary. Keep every bar smooth and symmetrical.
16. Mulled-Wine Arch Coffins
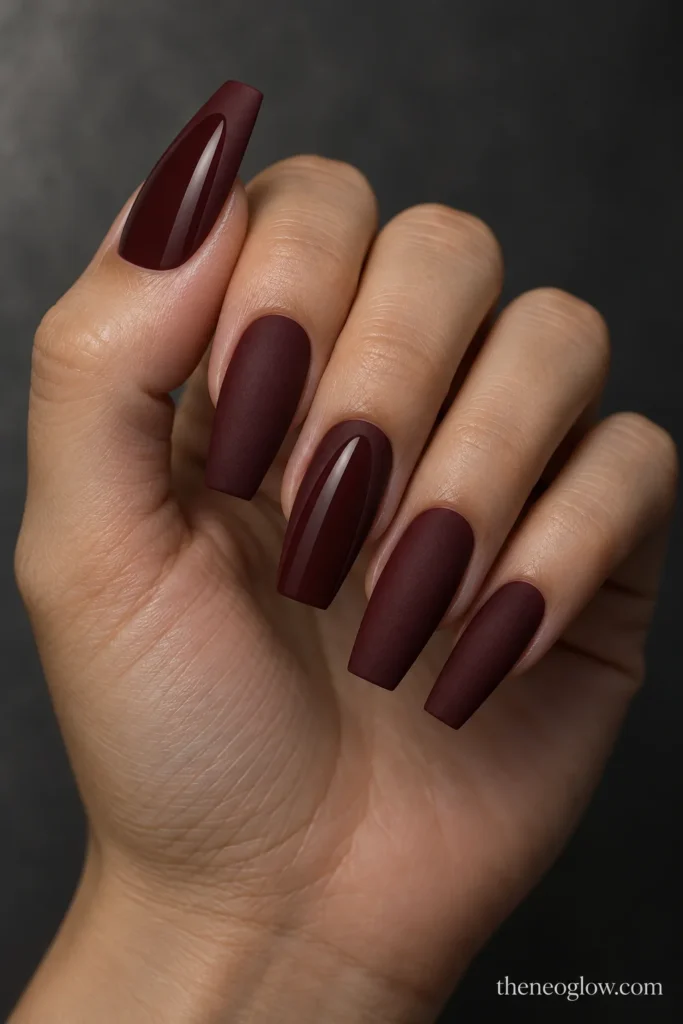
Use medium coffin acrylics with a deep mulled-wine matte base. On the thumbs and middle fingers, create one tall glossy-wine arch that starts near the base, narrows through the center, and stops short of the flat tip. The low-contrast matte-versus-gloss arch is the complete decoration. It reads as a deliberate architectural panel rather than another burgundy solid.
17. Christmas Tile Tips on Ivory Coffins
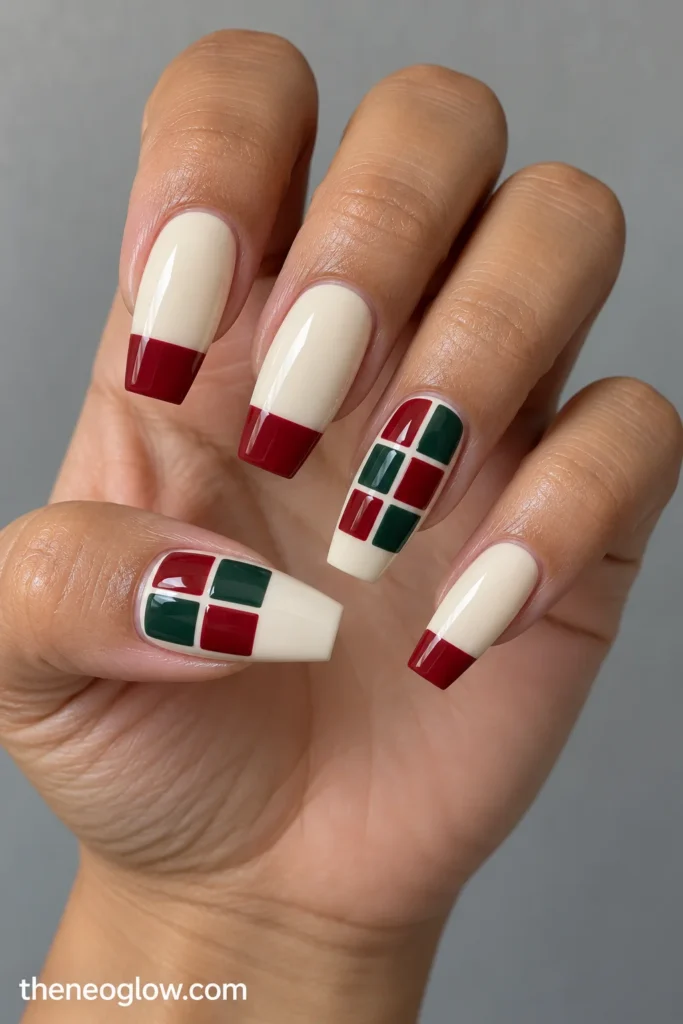
Medium coffins take an opaque warm-ivory glossy base. Cover just the upper half of the thumb and ring nails with six large alternating cranberry and pine-green rectangles in a two-by-three tile arrangement; finish the other nails with one broad cranberry end block. The larger coffin surface keeps individual tiles readable instead of shrinking the motif into confetti.
If peppermint striping matters more than the extension itself, NeoGlow’s candy cane nails guide explains stripe width and tip placement in greater depth. Here, the wider coffin or tapered-square construction is the reason to select the look.
Long Acrylic Statements for Parties and Photos
18. Clear Silver-Star Stilettos
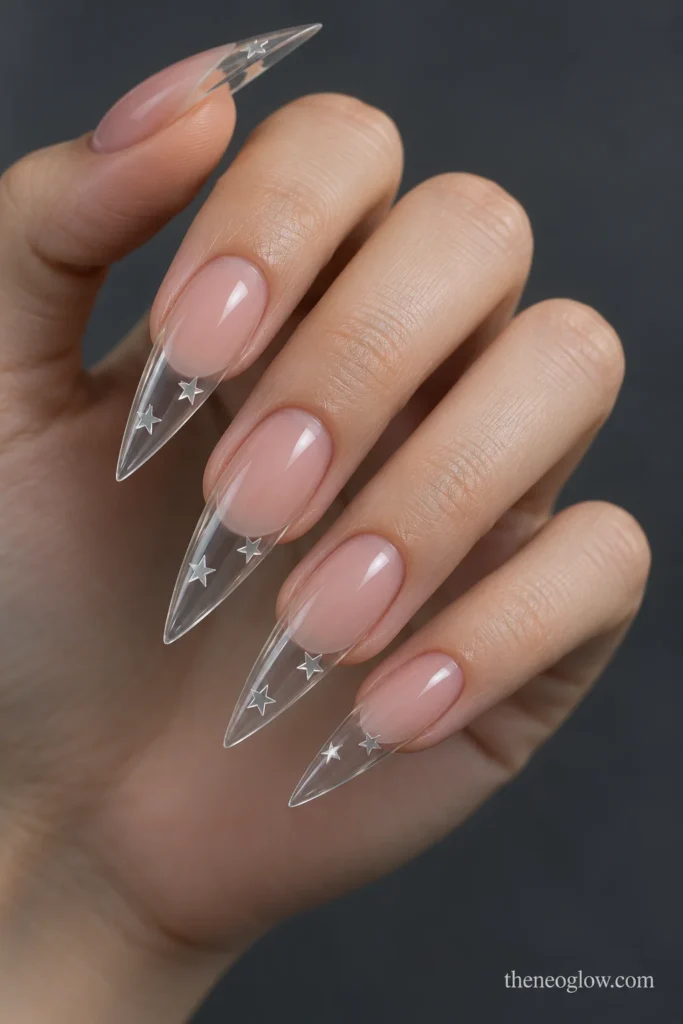
Long stiletto acrylics show soft neutral-pink nail beds and fully transparent pointed extensions. Scatter a limited number of tiny flat silver stars through the clear distal area, leaving visible space between them. If the chosen system permits encapsulation, the stars can appear suspended. Check the pointed length carefully against clothes, hair, and daily hand movements before committing.
19. Poinsettia Petal Ballerinas
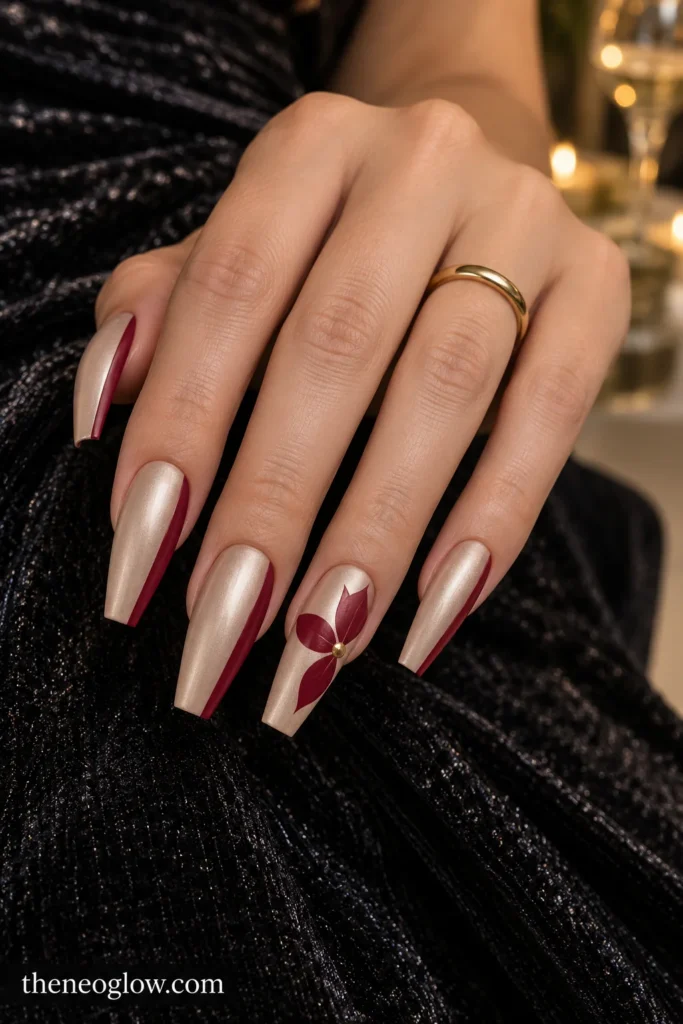
Make long ballerina acrylics a muted champagne satin. On each ring nail, paint four large asymmetrical cranberry poinsettia petals occupying the outer half of the nail, joined by a tiny gold center. The other fingers wear champagne with a narrow berry-colored side block. The broad, flat ballerina tip gives the flower enough width without relying on a raised charm.
20. Gold-Leaf Corners on Garnet Coffins
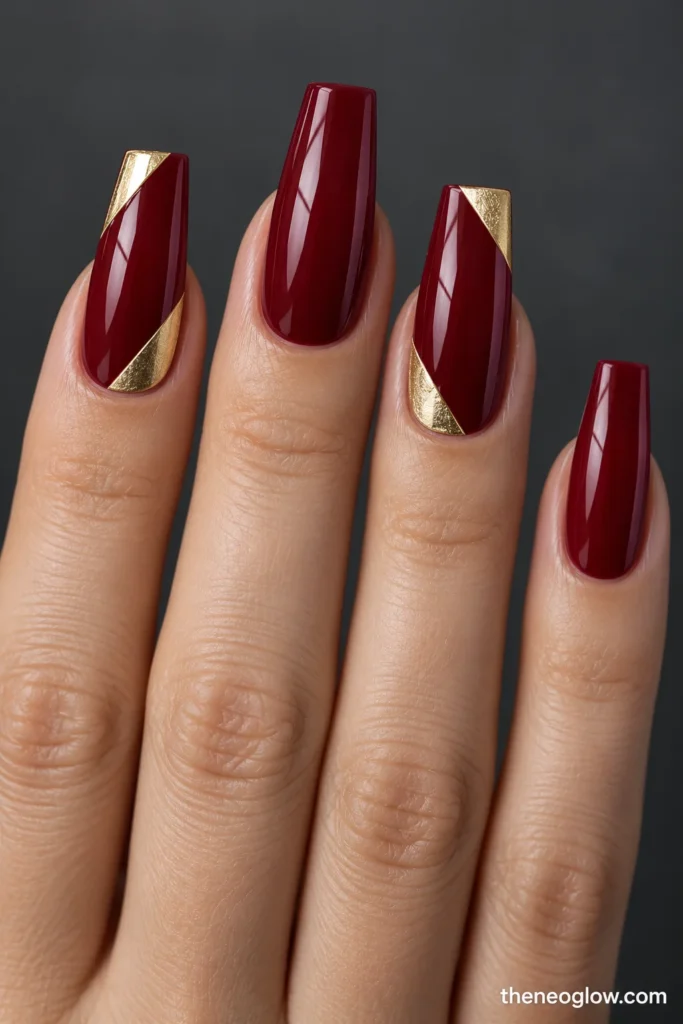
Choose long coffin enhancements coated in opaque glossy garnet. On the index and ring fingers, place two angular champagne-gold foil-style panels at opposite free-edge corners, leaving a wide garnet channel between them. The mirrored corner layout is the feature; it should resemble flat metallic inlay, not loose foil projecting above the finish.
21. Evergreen Frost-Point Stilettos
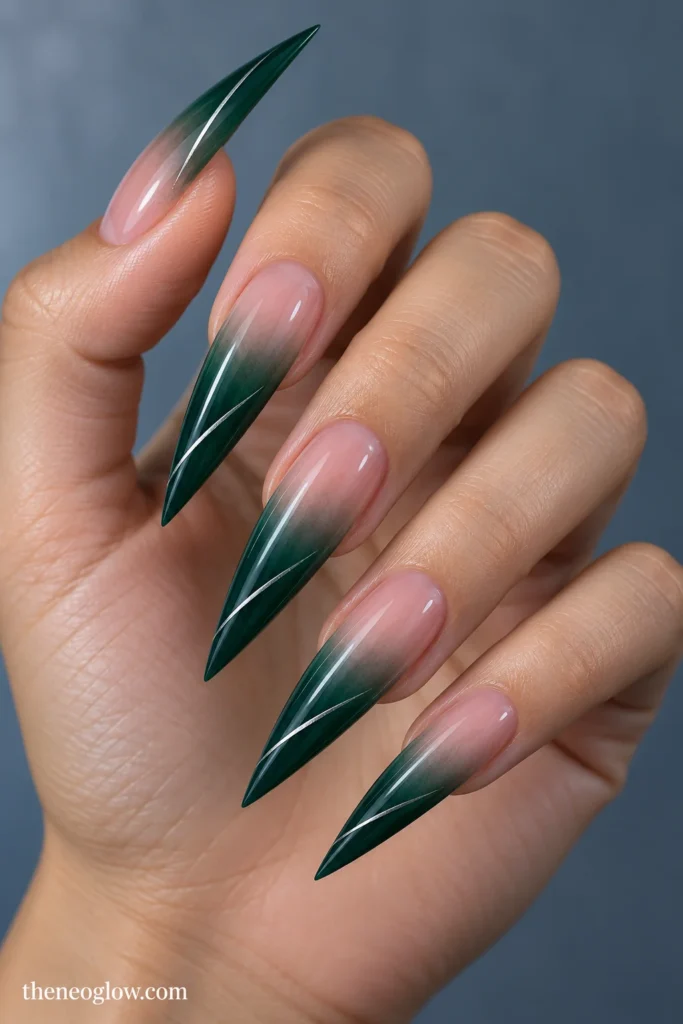
Long, sharply tapered stiletto acrylics have translucent smoky-pink bases that transition into deep evergreen across the outer half. A single hairline platinum slash runs diagonally through each green zone. The green color strengthens toward the pointed tip, so the fade follows the extension itself rather than the usual horizontal glitter ombré.
22. Midnight Deco Fan Tapered Squares
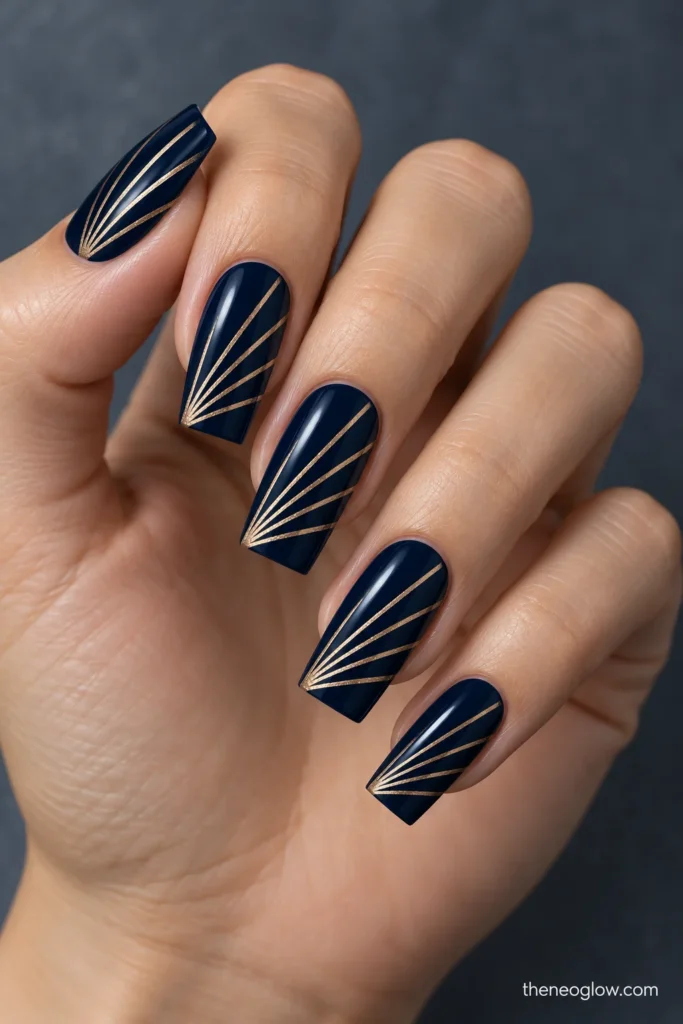
For a Christmas-to-New-Year set, use medium-long tapered-square acrylics in glossy midnight navy. From one lower corner of each nail, fan out five fine champagne-metallic rays toward the opposite upper side, with generous navy gaps. The asymmetry creates an Art Deco party design that does not depend on a Santa, snowflake, or other motif you’ll stop wanting after December 25.
The Salon Request That Prevents Shape Surprises
Bring one top-view picture and, if possible, a side-view reference. State whether you want a new full acrylic set or a consultation about an existing enhancement, then specify these details together:
“I’d like a short [or medium/long] liquid-and-powder acrylic set in [shape], extending roughly [your preferred distance] beyond my fingertips. Please keep the profile comfortable for my daily tasks. I want idea [number]: [base color and opacity], [exact artwork location], and [matte, satin, gloss, or reflective finish]. Can we confirm the length, compatible finishing products, upkeep, and removal plan before starting?”
A reference photo does not guarantee that every salon offers encapsulated accents, magnetic finishes, chrome, or elaborate painted lines. Ask what the technician can reproduce with the products they use and whether the design changes the appointment service or maintenance. If you’re undecided, request a single sample nail or confirm the layout before all ten are completed.
Acrylic Upkeep and Removal Through the Holidays
Plan for growth as well as the party date. The American Academy of Dermatology’s artificial-nail guidance says acrylic enhancements often require fill appointments every two to three weeks when worn longer, and that preparation, frequent touch-ups, and removal can affect natural nails. That’s a planning reference, not a promised wear time for your set.
Ask your technician how lifting, a snagged edge, or a lost decoration should be handled. Never pull off, pry, or forcibly peel an acrylic. Professional removal may involve acetone or filing depending on the product and technique; follow the actual system’s instructions rather than copying a random at-home hack. Don’t cover painful, irritated, or visibly unhealthy nails with a new set. If you develop persistent pain, swelling, redness, or another worrying change, seek appropriate medical advice.
For smoother day-to-day wear, keep oversized charms off the nails you use most, avoid using extensions as tools, and consider a design that still looks intentional as the cuticle gap grows. Glossy panels and flat painted art are easier to inspect than a crowded mix of embellishments.
Choose a Design You Can Live With After Christmas
If extensions are new to you, begin with the compact squares or squovals in ideas 1–5. Medium almonds and ovals suit wider curved artwork, while tapered squares and coffins provide strong edges for graphics. Save one numbered reference plus its preferred length and side profile, then ask your technician to check the structure before copying the decoration. A great holiday photo is useful; a manicure that fits your hands and maintenance plans is better.