Black and gold nails can look sharply minimal, richly textured, or unapologetically festive without changing the two-color palette. The difference is where the metal sits: a tiny mark over opaque black, a divided French tip, a scattered foil detail, or an entire mirror-finish nail. That choice affects what you notice first and how practical the manicure feels.
These 20 designs cover genuinely short natural nails, medium salon shapes, and longer extensions. Every look has a specific black base, gold finish, and placement, so you can save one workable reference rather than several almost-identical pictures. Use the quick comparison to find a starting point, then explore the details.
Find the Right Black-and-Gold Combination
| Your priority | Best starting route | Length and shape | What to watch |
|---|---|---|---|
| Subtle for work | Fine metallic marks, Ideas 1–2 | Short round or square | Lines must stay clean |
| Visible design on short nails | Corner tip or glitter side fade, Ideas 7 and 10 | Short square or squoval | Avoid crowding the free edge |
| A dressy French | Black-and-gold tip construction, Ideas 6 and 8 | Medium almond or oval | Keep both colors readable |
| Rich texture | Jelly, foil, or tweed, Ideas 9, 11, and 18 | Short to medium | Distinguish particles from painted marks |
| Reflective party look | Mirror, cat-eye, or liquid gold, Ideas 12, 14, and 20 | Short to long, depending on art | Surface and finish matter |
Warm yellow gold produces a different contrast from pale champagne gold or muted antique gold. Try each beside a black swatch and your usual jewelry rather than assuming one metal shade suits everyone. On smaller nails, concentrate detail on one or two fingers instead of shrinking every feature until it disappears.
Quiet Gold Details Over Black
1. Micro Brass Corner Marks
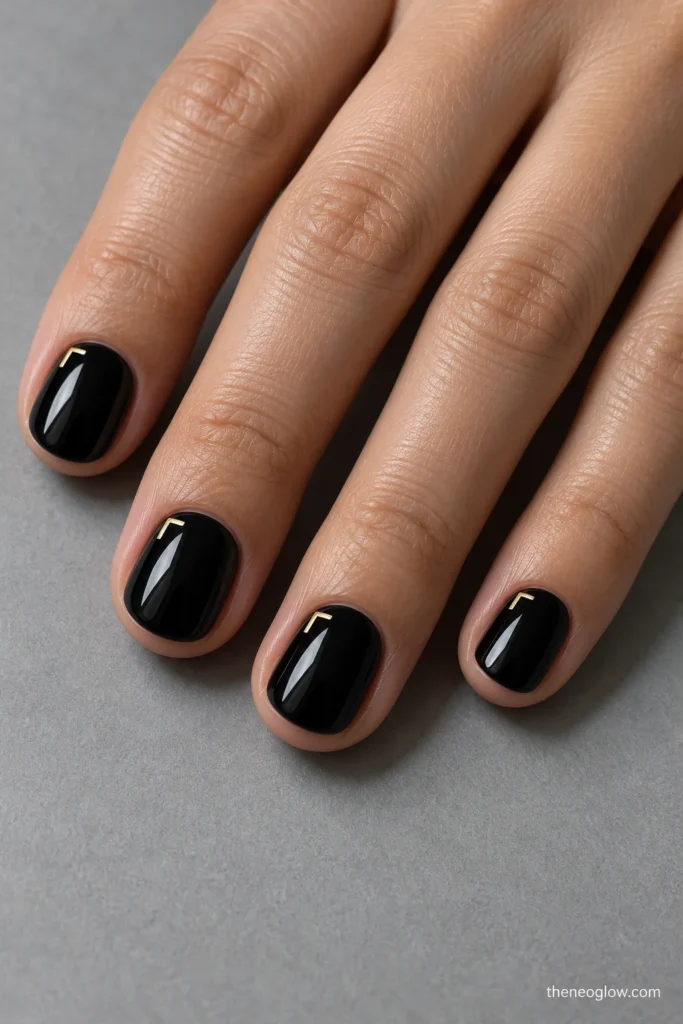
Very short rounded nails wear glossy, opaque jet black. Place a tiny angular brass-gold L at the outer cuticle corner of each nail, leaving the rest completely black. The marks sit at the base rather than on the tips, so they remain legible even without a visible free edge. Keep each L thin and flat; this is a graphic detail, not a charm.
2. Matte Onyx With Twin Gold Rails
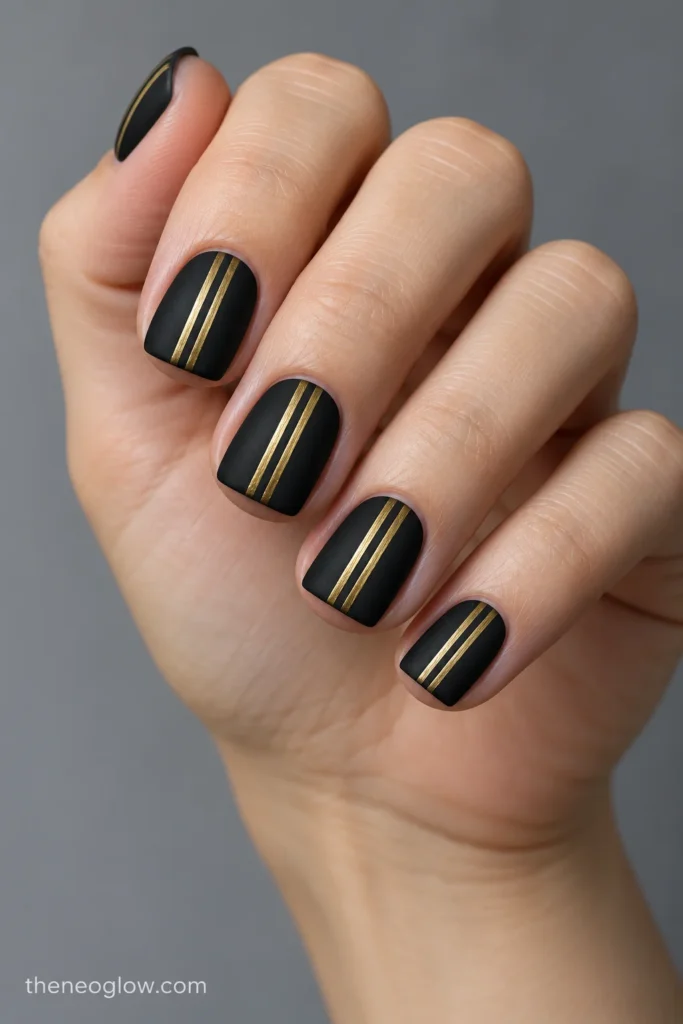
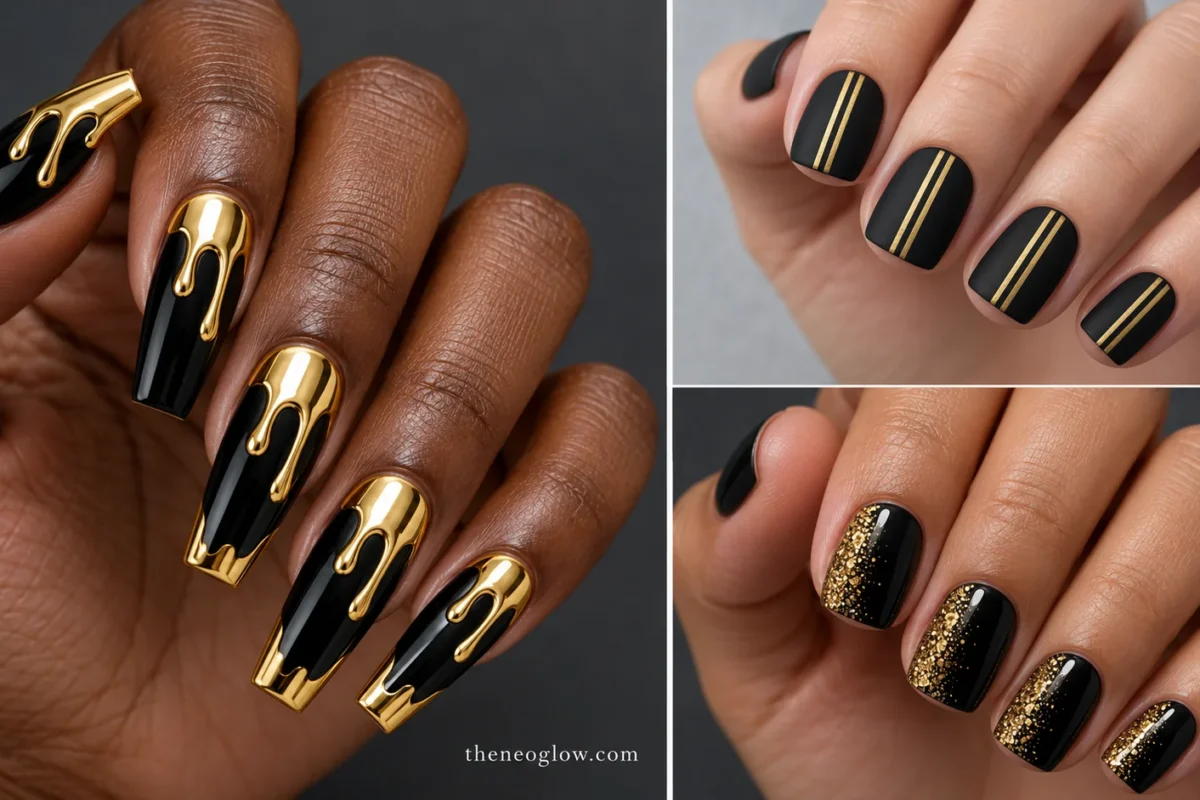
On short square nails, use flat matte black and two fine, parallel brushed-gold lines running vertically through the center of each nail. Stop both lines just before the cuticle and free edge. This looks tailored from a distance and differs from Idea 1 in finish, direction, and repetition. It needs steadier linework than a single corner mark.
3. Gold Confetti Against Patent Black
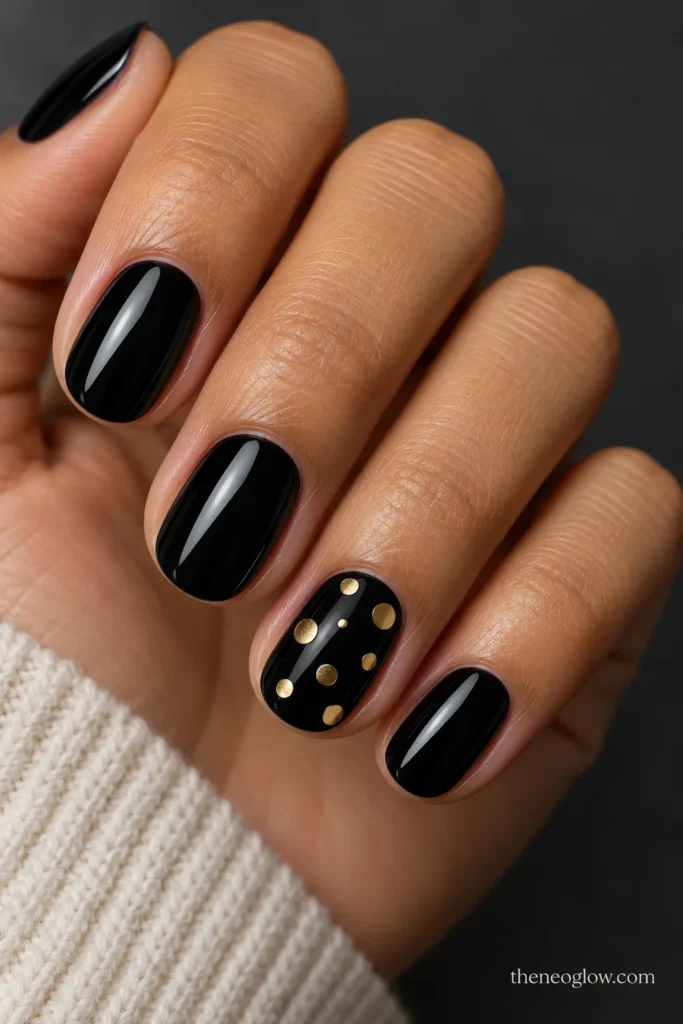
Short ovals get solid, high-gloss black with five or six widely spaced, flat metallic-gold dots on each ring nail. Keep the other fingers plain black, and vary dot sizes slightly without turning them into a full glitter layer. The open spaces are essential: distinct reflective circles should be visible against the dark polish.
4. Antique-Gold Cuticle Fans
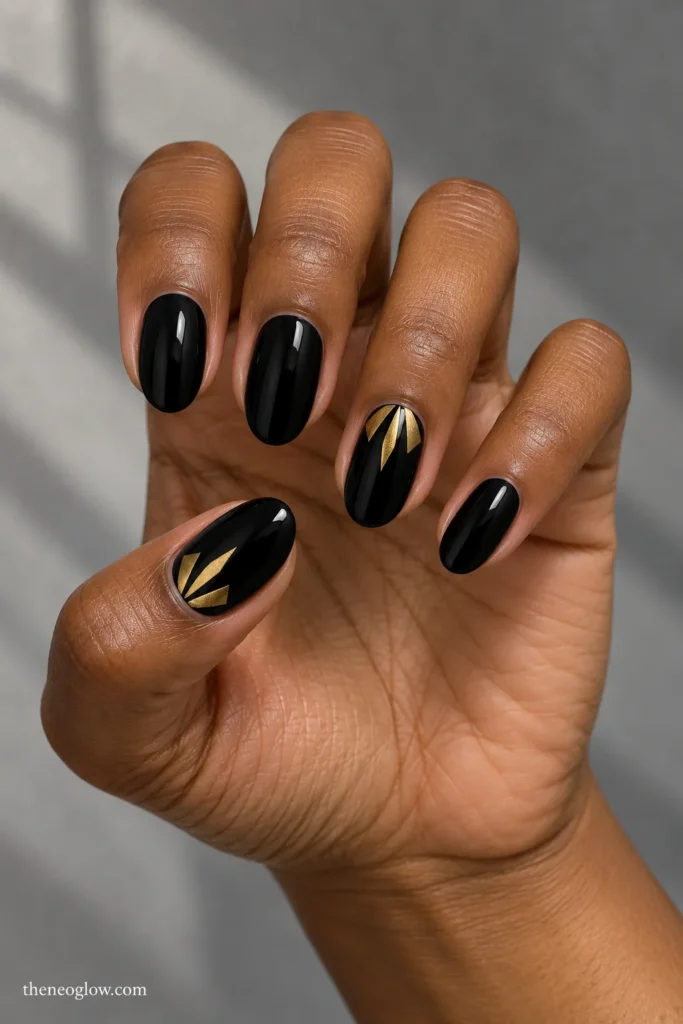
A medium oval manicure begins with glossy true black. On the thumb and ring fingernails, arrange three narrow antique-gold triangular blades fanning outward from the cuticle center. Each blade stays separate, and the remaining nails are pure black. The placement feels jewelry-inspired without a raised ornament, although medium nail beds show the fan more clearly.
5. Floating Gold Hourglass Shapes
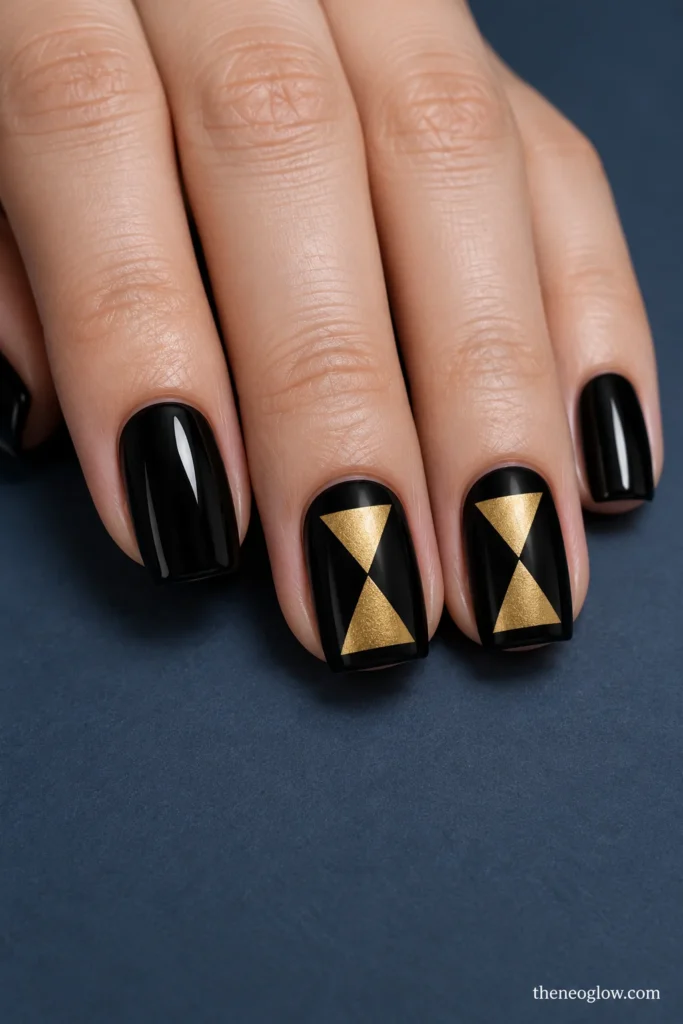
On medium squovals with an opaque black gloss, place two opposing muted-gold triangles in the center of the middle and ring nails. Their narrow points almost meet but leave a distinct black gap, creating a floating hourglass silhouette. The index and little fingers stay plain black. Broad flat shapes make this more graphic than the small marks above without introducing extra colors.
French and Free-Edge Designs With Two Clear Colors
6. Black French With a Warm Gold Seam
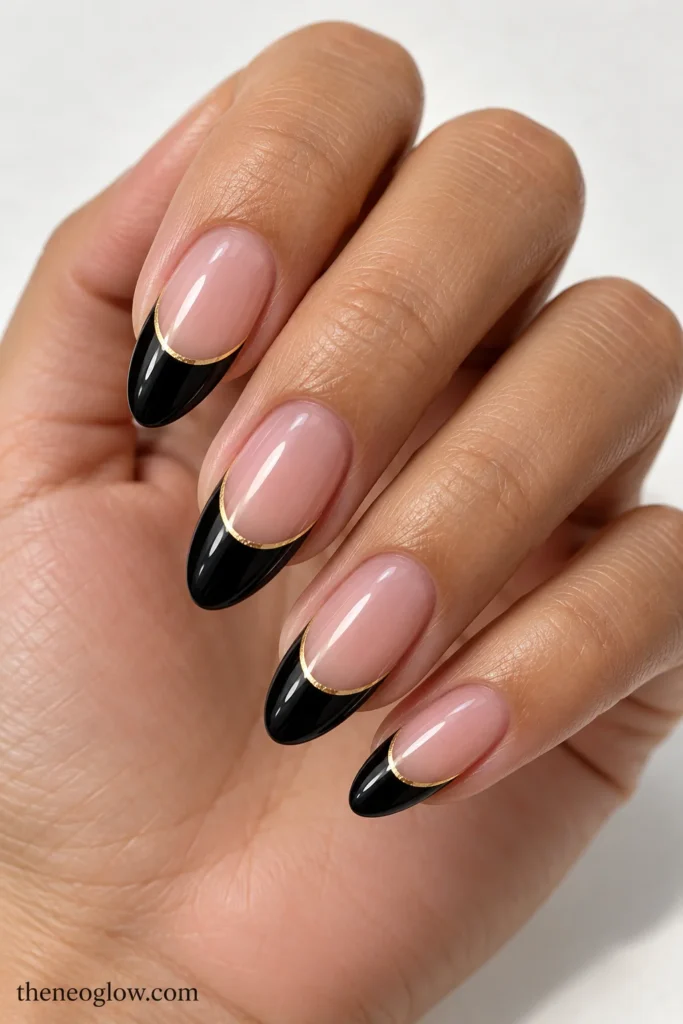
On medium almond nails, leave the nail bed translucent rose and paint a broad, curved, opaque-black French tip. Follow the lower edge of the black with one very fine warm-gold line; do not outline the full nail. The gold acts as a crisp boundary while black remains the main tip color. Give the smile line enough depth for both layers to show.
7. Gold Corner French on Black
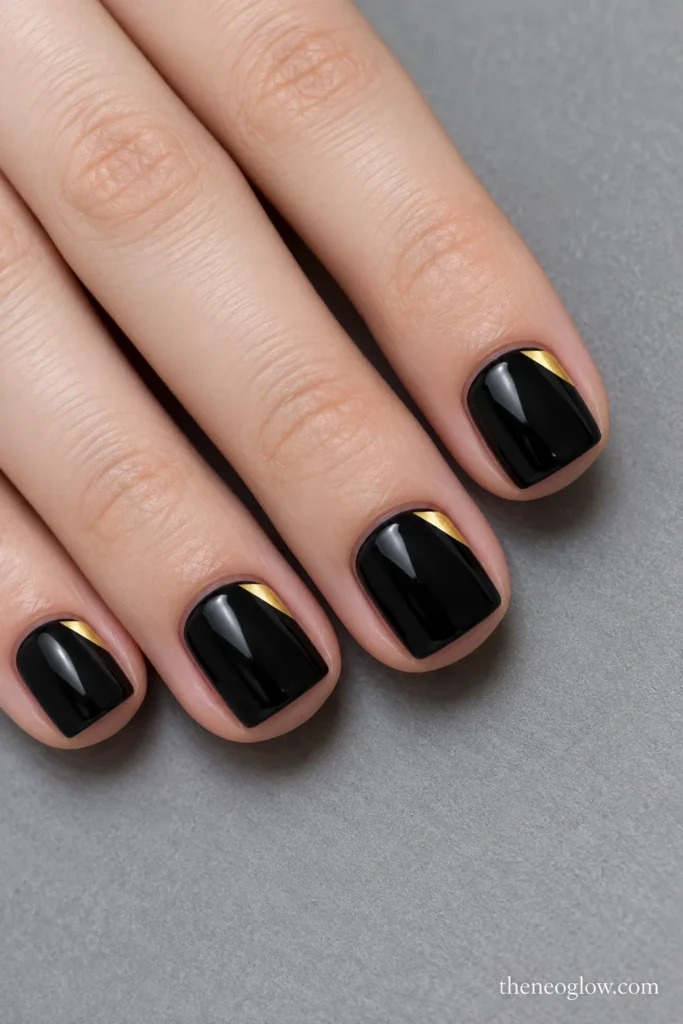
Cover genuinely short square nails in glossy black, then add a tiny triangular metallic-gold patch at the upper-right free-edge corner of every nail. Leave the opposite side fully black. This is not a conventional gold French band: only one clipped corner flashes. The simple geometry also scales well to regular polish with a small detail brush.
8. Half-Black, Half-Gold French Tips
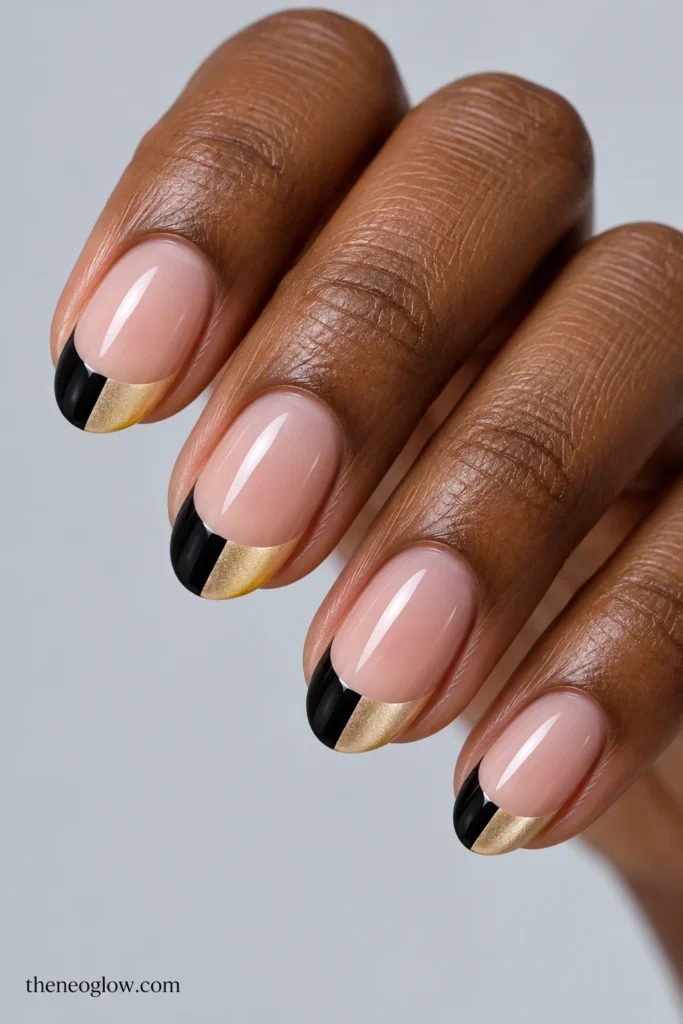
Medium ovals have a translucent neutral-pink base and a moderately deep French band divided vertically down the middle. Fill one tip half with opaque black and the other with pale metallic gold, meeting at a straight center seam. Keep the division inside the tip area and repeat the same orientation across the hand. The two-colored free edge is the entire design.
If the structure of the black tip matters more than its gold partner, NeoGlow’s black French tip nails guide covers detailed tip geometries without turning this palette page into another French-only collection.
Glitter, Jelly, Foil, and High-Reflection Finishes
9. Smoky-Black Jelly With Floating Gold Specks
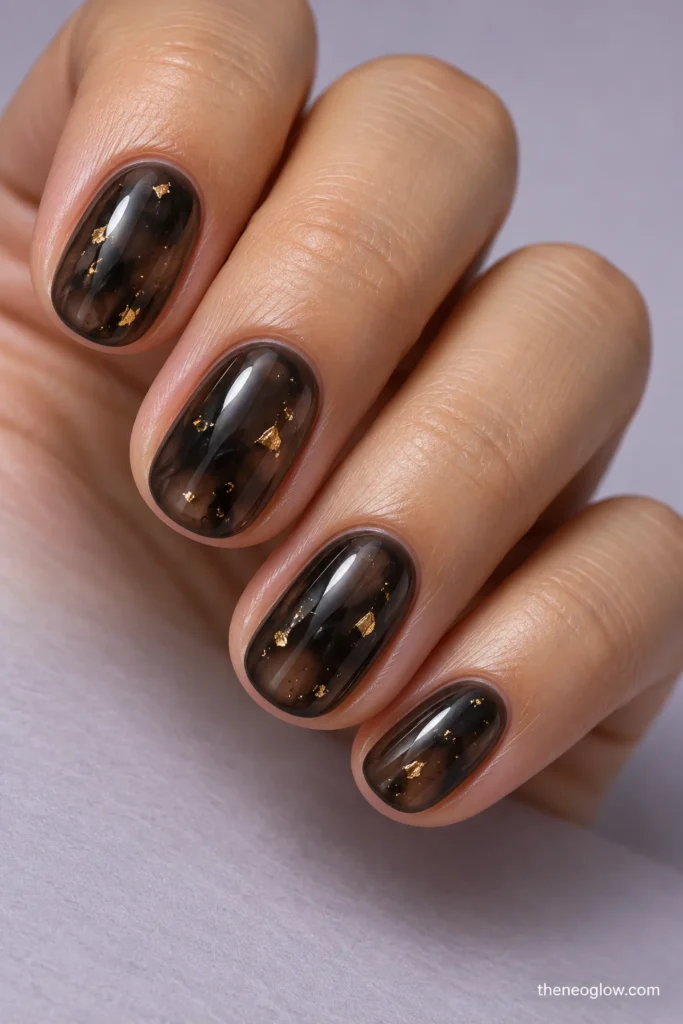
Short ovals carry translucent smoky-black jelly that still reveals a little natural nail depth. Suspend a few tiny irregular gold fragments within the clear-dark layers, not as a dense topping. The gold should appear to float at different depths while the black remains visibly sheer. This is a stained-glass effect, not opaque black with dots.
10. Gold Glitter Side Fade
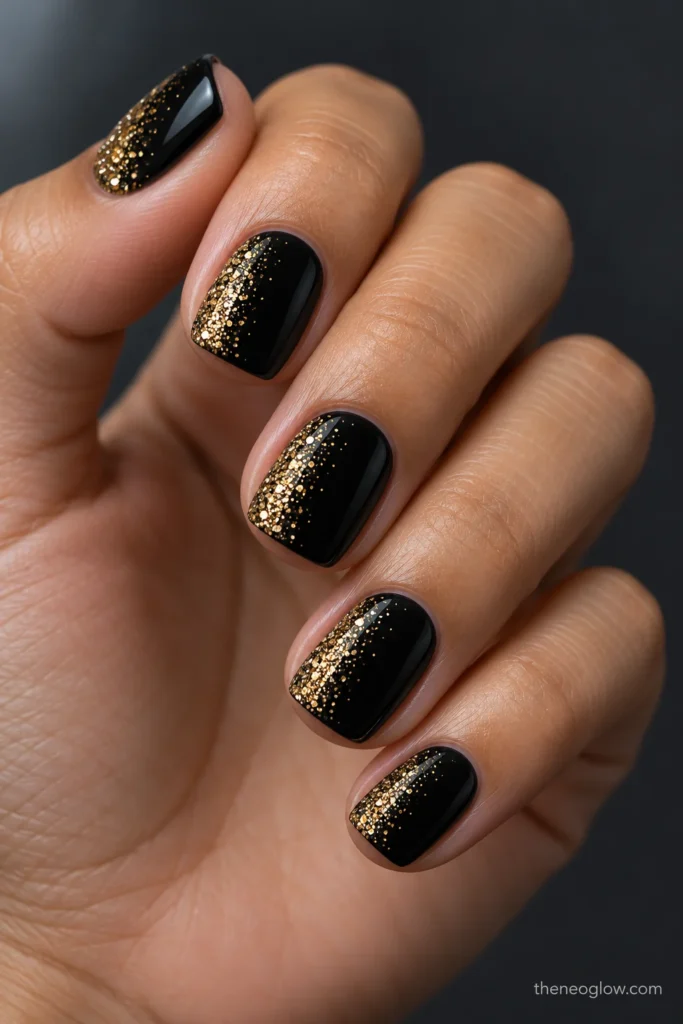
Use opaque black cream on short squovals and concentrate fine warm-gold glitter along the left sidewall of every nail. Let the sparkle taper toward the center without crossing the whole plate. The diagonal density change makes this distinct from isolated foil pieces or full glitter nails. It is a party-friendly option that does not require extra length.
11. Torn-Gold Leaf on Matte Black
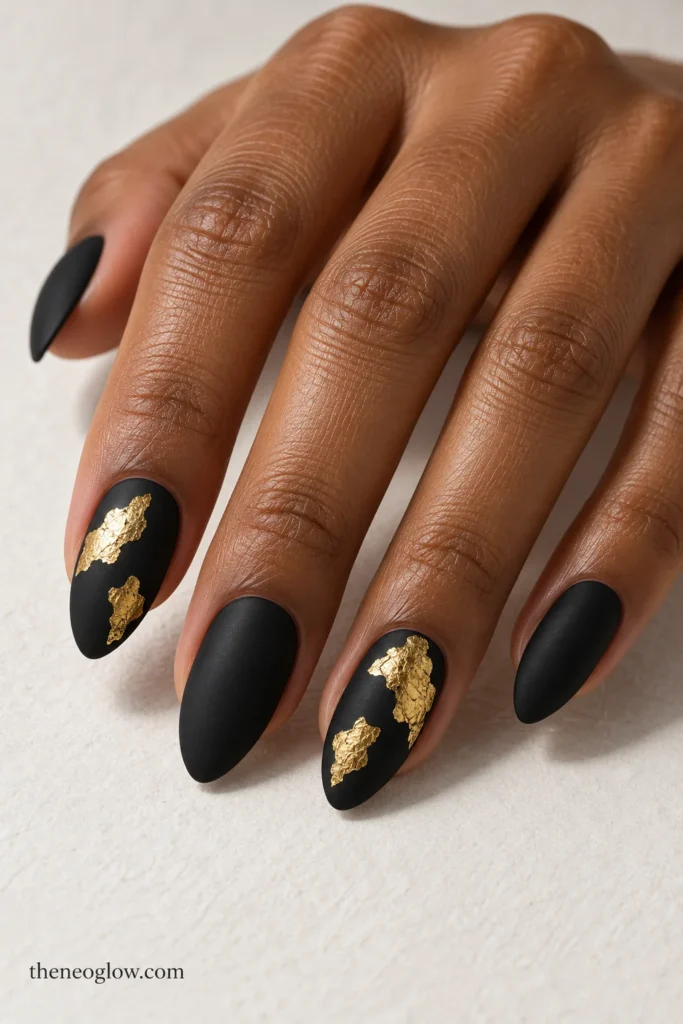
Medium almond nails have a smooth matte-black field. Press two or three irregular flat antique-gold foil islands onto the index and ring nails, separated by wide black gaps; leave the other nails matte. Uneven leaf edges are intentional, but the pieces should not form one solid gold sheet. This reads more organic than the crisp lines above.
12. Gold Mirror Accent Pair
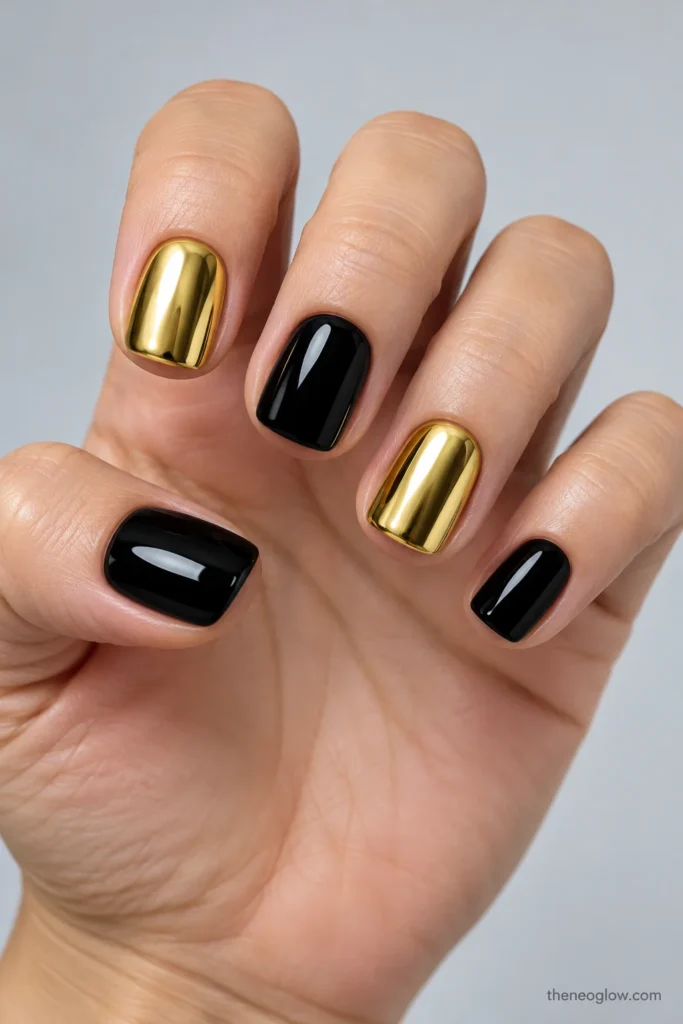
Make three short squoval nails opaque glossy black and reserve the index and ring for uninterrupted reflective yellow-gold chrome. No glitter, additional art, or split panels: the mirror nails carry the contrast. Their smooth reflections make this different from the opaque gold geometry in Idea 5. Check the gold in regular room lighting as well as under bright light.
13. Champagne-Chrome Diagonal Sash
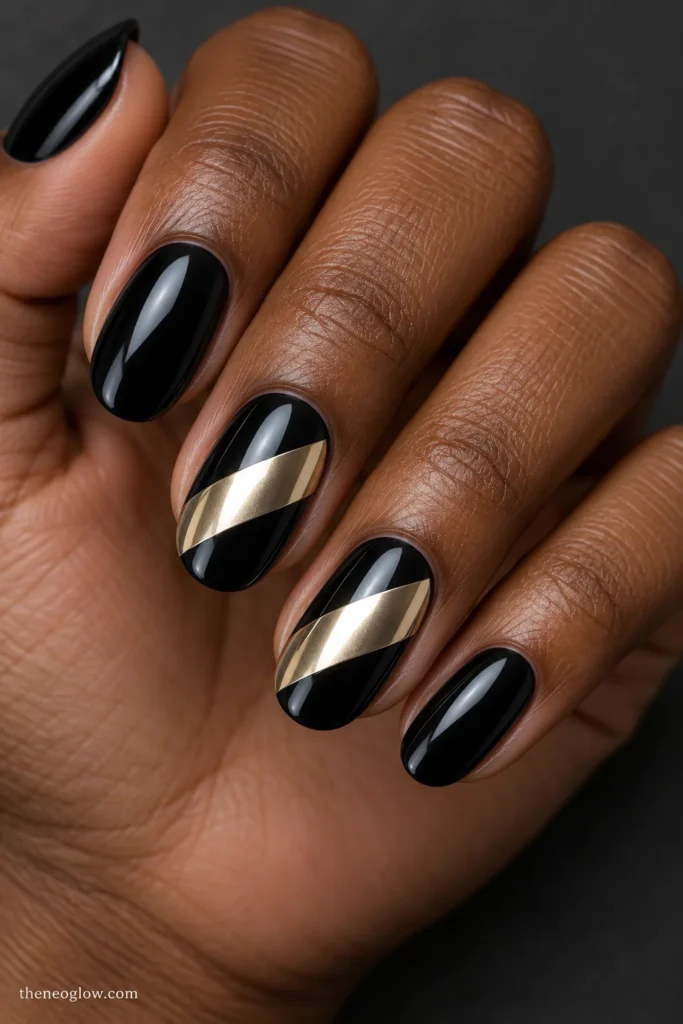
Medium ovals stay high-gloss black except for a broad diagonal champagne-gold chrome band across the center of the middle and ring nails. Black must remain visible above and below each sash. The reflective gold is a fixed surface, not a moving magnetic stripe. The exact base and chrome product influence how pale or warm the result appears.
OPI’s explanation of chrome powders and glaze toppers shows why a chrome effect changes with its underlying shade and system. For a larger comparison of mirror, pearl, and partial metallic finishes, see NeoGlow’s chrome nails guide.
14. Golden Magnetic Beam Through Black
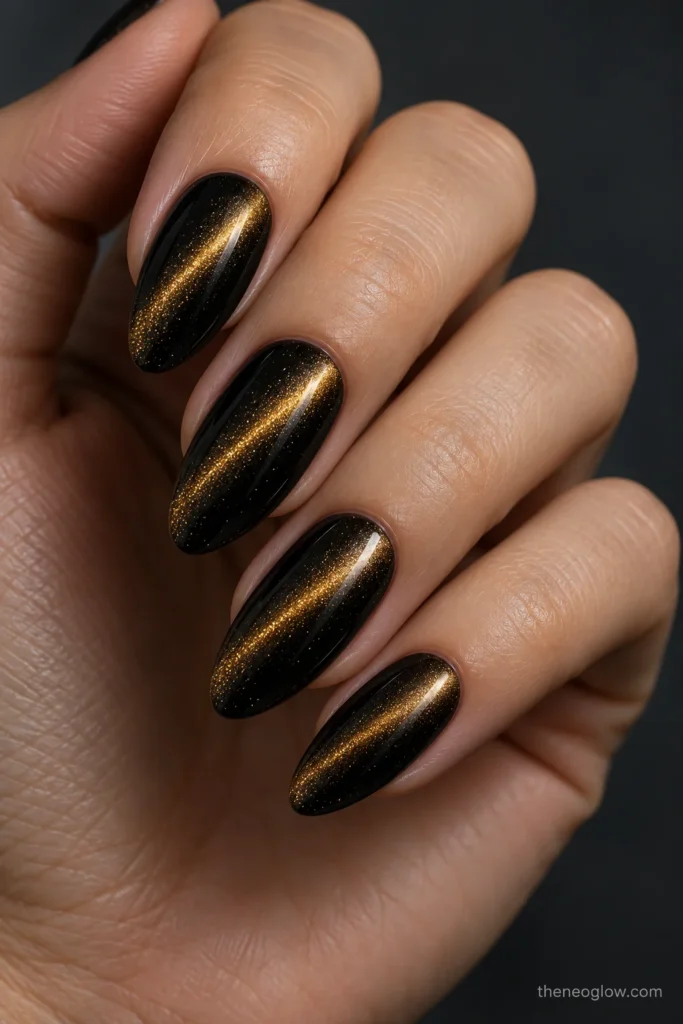
For medium almond nails, begin with deep black magnetic polish containing warm-gold reflective particles. Shape one narrow diagonal golden beam across each nail while keeping clearly black areas on both sides. The highlight changes with the viewing angle; it should not resemble a painted metallic stripe. This is the only fully magnetic look here, so the color pairing stays central.
For beam, halo, and velvet differences, NeoGlow’s cat-eye nails guide explains the effects and their product-specific application requirements.
Graphic Gold and Statement Party Nails
15. Satin Gold With Floating Black Frames
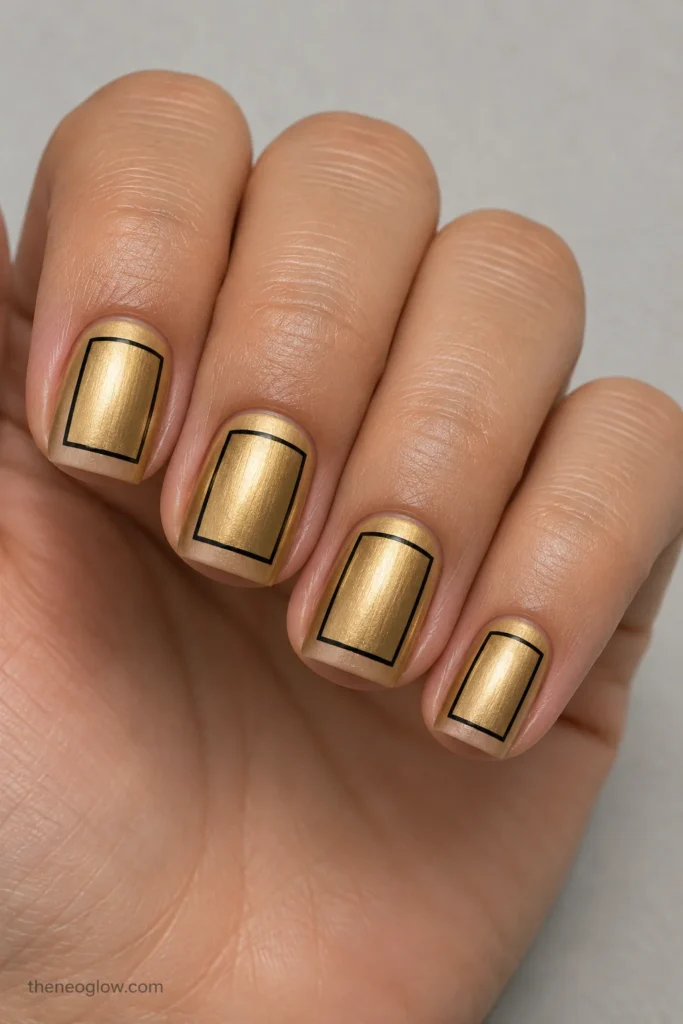
Short square nails reverse the balance: each has an opaque softly reflective gold background with a slim black rectangular outline set well inside the nail edges. The open middle remains gold. Keep all four corners square and the border flat. This is graphic gold-first color blocking, not a black manicure with an accent.
16. Fine Gold Chain-Link Columns
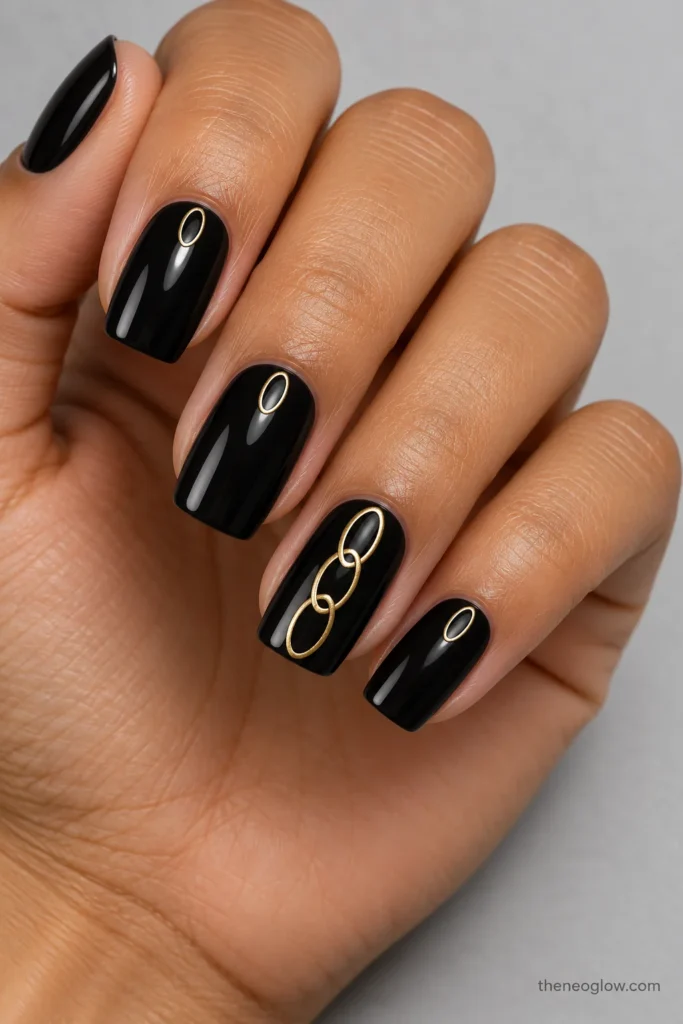
A medium soft-square set stays lacquer-black and glossy. Down the center of the ring nail, draw three overlapping elongated gold ovals that suggest a delicate chain; the other nails carry one small gold oval near the base. The connected-link shape gives the accent a recognizable pattern without requiring real chains or bulky hardware.
17. Black-and-Gold Leopard Side Panels
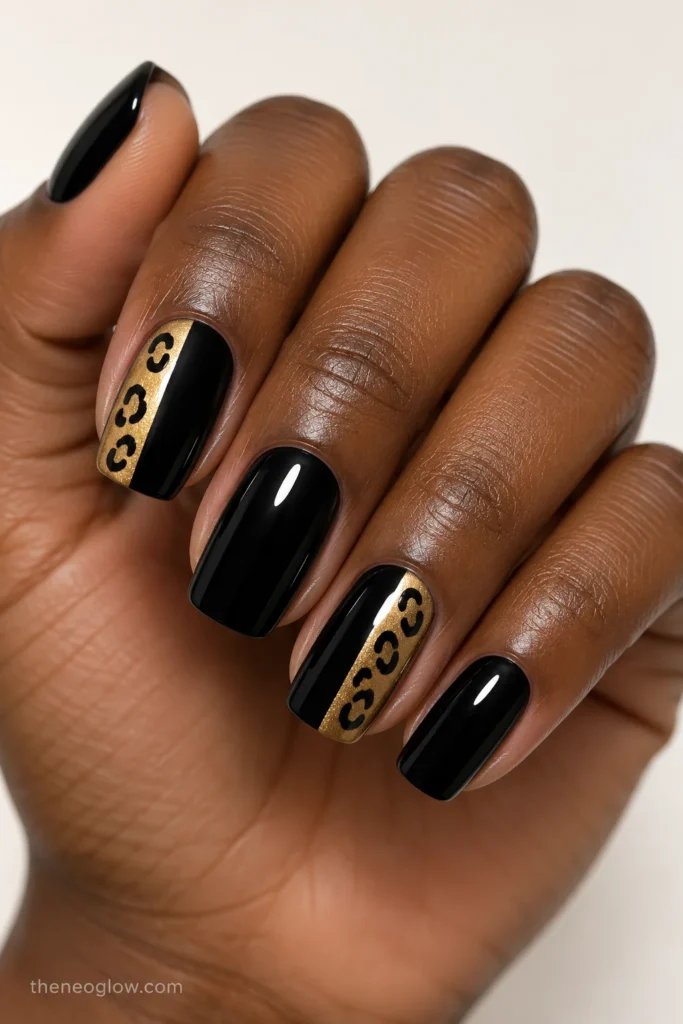
Medium rounded-square nails receive a glossy black base. Add one wide, opaque muted-gold side panel on the index and ring nails, then paint three or four open black leopard rosettes within each gold panel. Keep other fingers black. The confined animal print reads as a designed inset rather than all-over spotted art.
18. Fine Gold Tweed Crosshatch
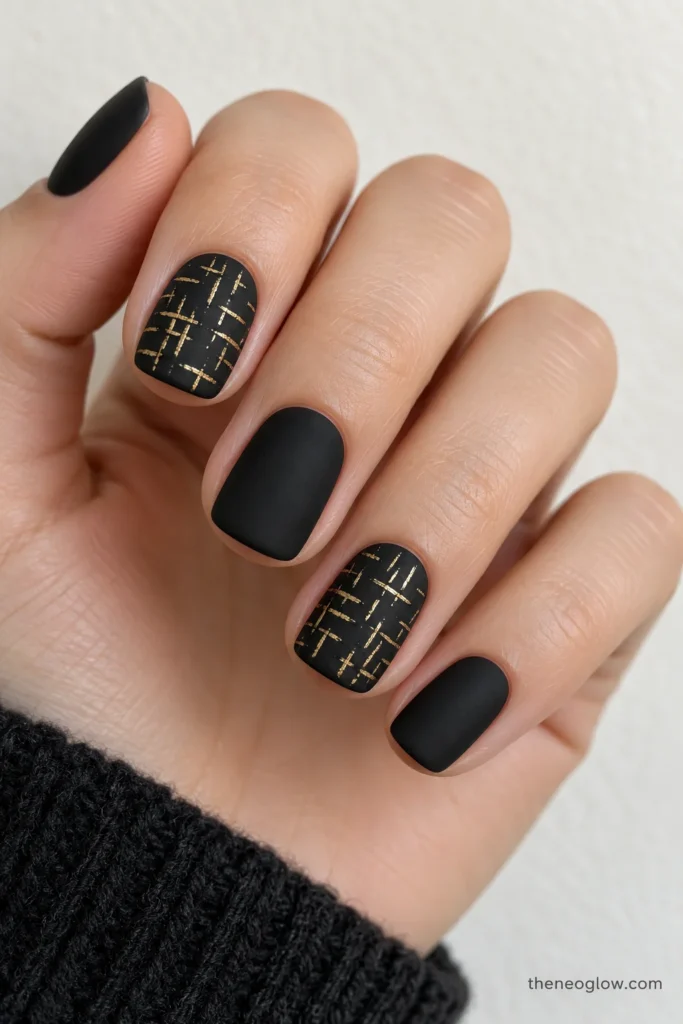
Short soft-square nails wear matte black. On the index and ring, cross several short, imperfectly staggered hairline gold strokes, some vertical and some horizontal, to suggest woven tweed. Leave black gaps between intersections, and keep the other nails plain. Compared with the orderly parallel rails of Idea 2, this texture looks deliberately irregular.
19. Off-Center Gold Starburst Pair
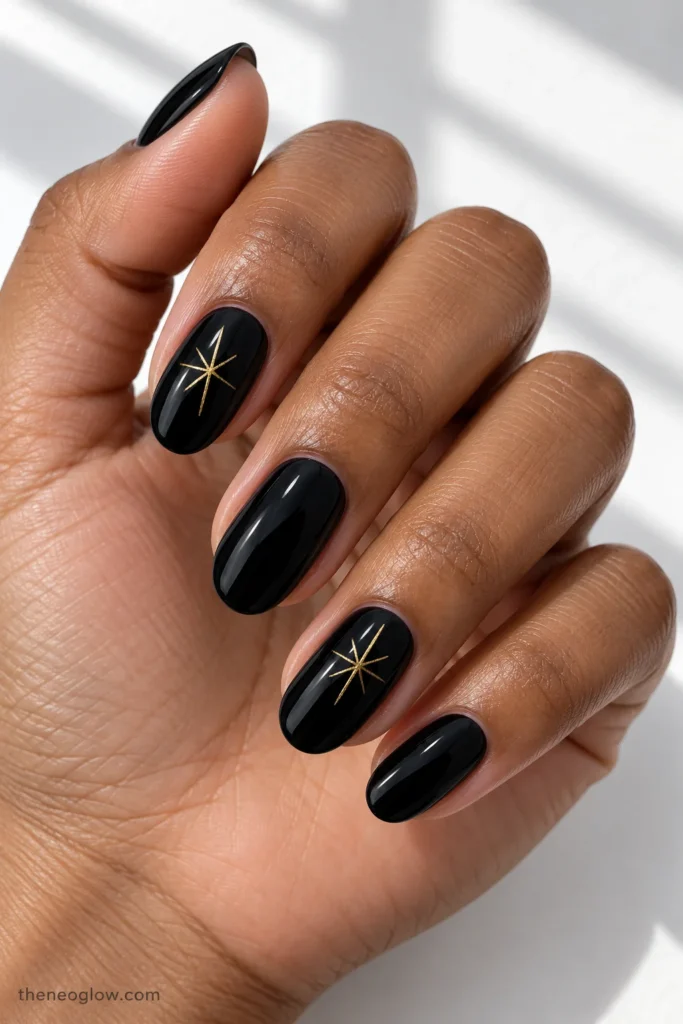
Medium oval nails are opaque, glossy black. Paint a small, asymmetrical fine-line gold starburst slightly above center on the index and ring nails, using six slender rays and no gemstones. Let the remaining nails stay solid black. The motif feels festive enough for a dinner or New Year’s outfit without spelling out a holiday.
20. Liquid-Gold Drips on Black Coffins
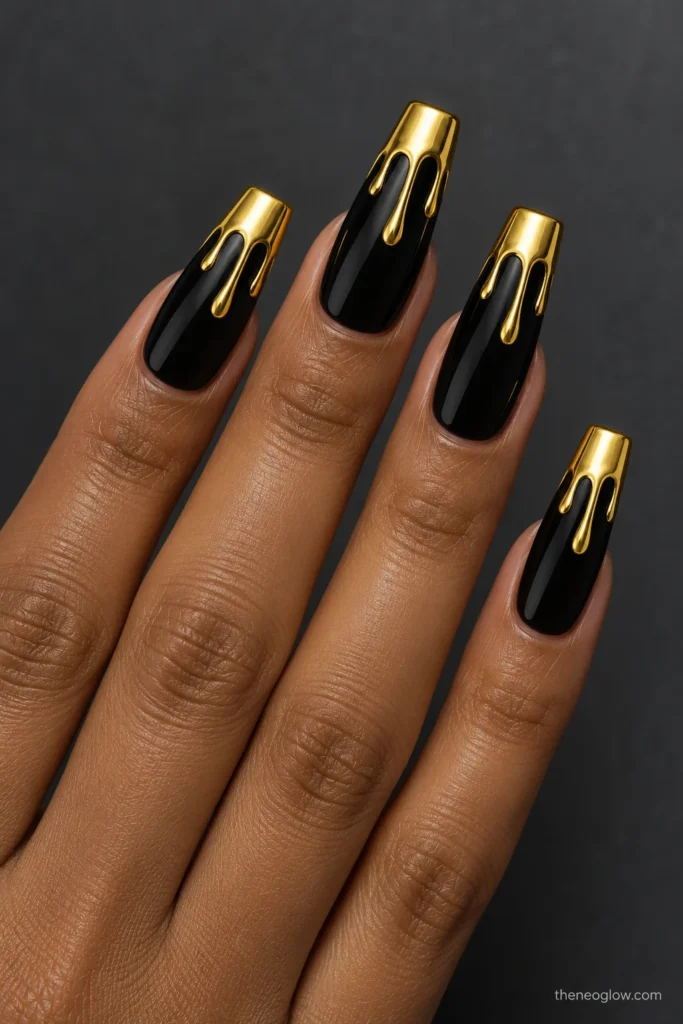
Long tapered-square coffin nails make room for a bold finish: solid glossy black below, with an opaque mirror-gold cap at the tip and two uneven, rounded gold drips extending toward the middle. Keep the gold flat and smooth rather than building tall 3D drops. This is a statement look; shorter nails need fewer, wider drips to avoid muddy details.
For a manicure designed around a whole event rather than this two-color pairing, NeoGlow’s holiday nails collection compares Thanksgiving, Christmas, and New Year choices across additional palettes.
How to Match the Design to Your Week
For typing and daily errands: Short round, square, and squoval versions of Ideas 1, 2, 3, and 7 keep the decoration flat and away from long projections. Dark polish can make free-edge chips more obvious, so check the edge before choosing full black on every finger.
For a wedding guest look or dinner: Ideas 4, 6, 11, and 13 offer metallic detail without filling every nail with glitter. If your jewelry is yellow gold, you might like warm brass; for a subtler contrast, consider champagne or antiqued gold. These are styling options, not skin-tone rules.
For a holiday party or New Year’s Eve: Ideas 10, 12, 19, and 20 have more visible sparkle, reflection, or motif. For a longer extension, check the finished profile from the side and how it works with your regular activities, not only how it photographs.
Acrylic extensions are optional for most of these designs. The American Academy of Dermatology’s guidance on artificial nails explains filing, irritation, fills, and removal tradeoffs if you are considering gold nails on acrylic rather than your natural length.
Keep the Finish Looking Intentional
Ask for a clear hierarchy: is the black supposed to dominate, are black and gold balanced, or is gold the main surface? Specify whether the metal should look brushed, dotted, glittery, foil-like, magnetic, or like a continuous mirror. Those effects are not interchangeable.
For a useful salon reference, record your nail length and shape, black opacity, gold tone, placement, and final shine. One example: “Short square, opaque glossy black, one small yellow-gold triangle at the outer tip corner of each nail, no other decoration.” If you are using a gel or chrome system, follow its exact application and curing instructions.
Never peel or pry off a lifting gel manicure. The AAD’s dermatologist-led guide to gel-polish removal provides detailed instructions for suitable soak-off gel polish; hard gel, acrylic, and other systems may require a different professional removal process.
The strongest reference is not necessarily the most elaborate one. Choose one of these 20 black-and-gold designs that suits your actual nail length, decide how prominent the metal should be, and save the image with those two details so the finished manicure matches what you meant.