Spiderweb nails can be delicate, architectural, or unapologetically dramatic. The difference is not just black versus white polish. It is where the web begins, how far its spokes travel, whether the curves stay inside a French tip, and what happens when the surface turns matte, glossy, or metallic.
These 18 Halloween-ready designs move from compact webs on genuinely short nails to graphic French constructions and more involved acrylic finishes. Every idea has a specific shape, color, placement, and scale so you can save a reference that translates into an actual manicure. For ghosts, pumpkins, and other motifs instead, explore the broader Halloween nails 2026 collection.
Find Your Web Placement
A recognizable spiderweb usually has spokes radiating from a point or edge and curved connecting strands between them. On a short nail, a few spokes and one or two arcs can be enough. A longer nail can hold a more open framework without turning the design into a crowded grid.
| If you want… | Look at… | Detail to protect |
|---|---|---|
| A compact design for short nails | Ideas 1, 2, or 7 | Keep the web distinct from the cuticle and sidewalls |
| Clearly visible graphic art | Ideas 4, 5, or 6 | Reserve an open area around the web |
| French tips that still read as French | Ideas 7–12 | Confine the dominant structure to the free-edge area |
| Dark nails without bright linework | Idea 13 | Use a matte-versus-gloss contrast under directional light |
| Reflective or dimensional party details | Ideas 15–18 | Decide whether the shine belongs to the web, base, or raised detail |
An intricate reference may need simplifying if your nail plate is small. What matters is preserving the web’s geometry, not squeezing every strand into the design.
Compact Web Placements and Negative Space
These first six ideas change where the web sits on the nail. They are not six color versions of a corner accent.
1. Fog-Gray Mid-Side Fan Webs
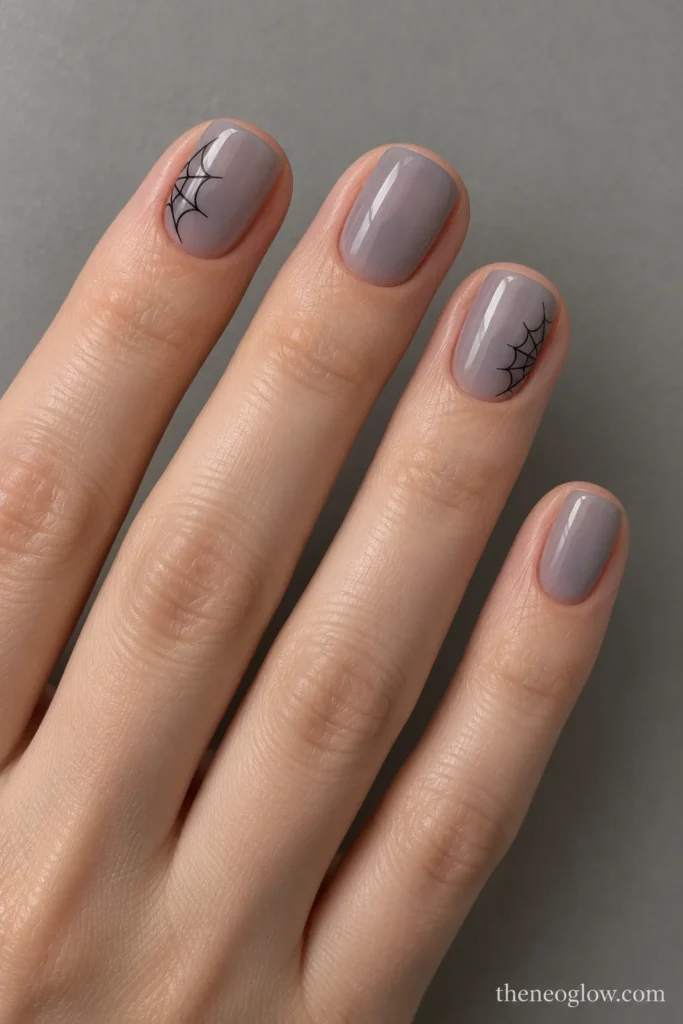
On short squoval nails, begin with a translucent fog-gray wash and a smooth glossy finish. Place one black web on each index and ring finger, with its hub at the middle of the outer sidewall, not at a cuticle or tip corner. Four short spokes fan toward the middle of the nail; two shallow connecting arcs finish the web before it crosses the centerline. Leave the other nails fog-gray and unillustrated.
This is a side-entry design that keeps most of a short nail open. The small fan is still recognizable without requiring added length.
2. Midnight-Blue Centered Web Rosettes
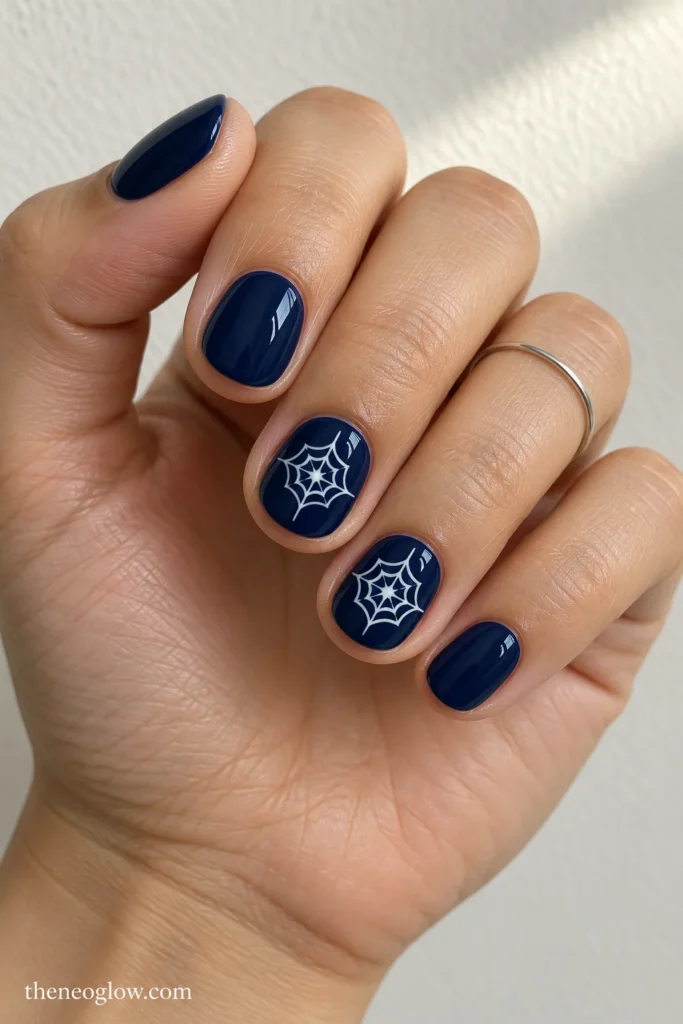
Give very short round nails an opaque midnight-blue cream finish. On the middle and ring fingers, center a small white four-spoke web like a circular rosette, with two concentric scalloped rings connecting the spokes. Leave a border of blue around the motif instead of letting its ends touch the nail edges. The remaining nails stay solid and glossy.
Unlike a corner web, this pattern needs balance in every direction. It works especially well if you want one readable motif at the center rather than an all-over Halloween print.
3. Two-Corner Web Fragments With an Open Diagonal
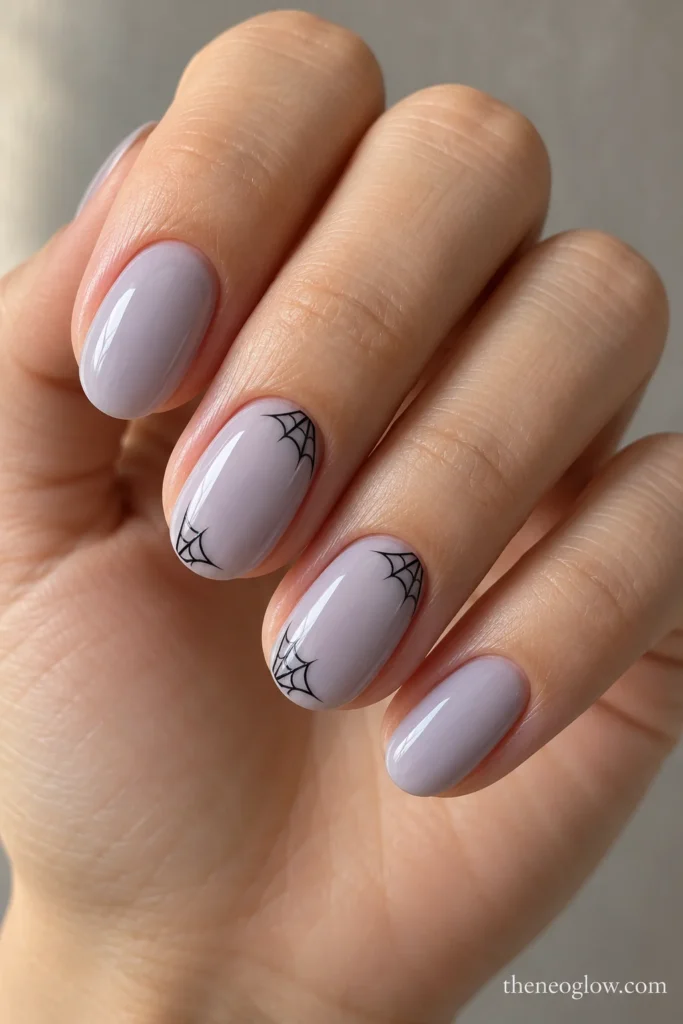
Choose medium-short oval nails with a milky lavender-gray base. On two accent nails, draw one tiny black web fragment entering the upper outer tip corner and a second entering the opposite lower inner corner. Each fragment has only three spokes and a single curved connector. Keep a generous clean diagonal path between them; do not join the two webs.
The deliberate break is the design. It gives you the visual tension of two separate corner webs without repeating a single burgundy or taupe corner accent from a general Halloween gallery.
4. Charcoal Diagonal Web Sashes
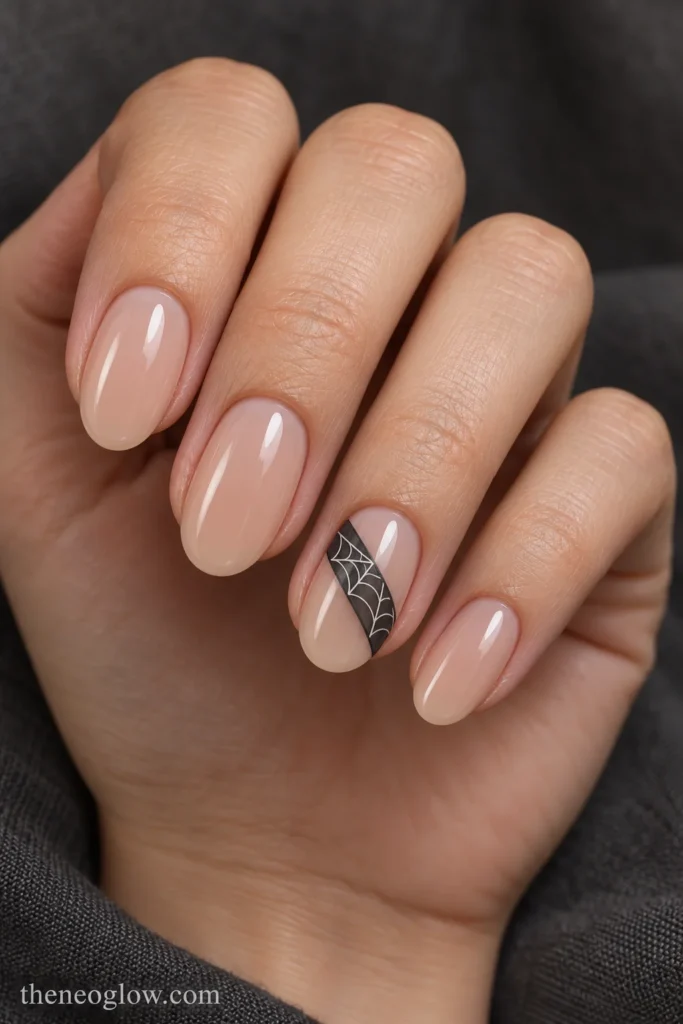
Start with glossy, sheer beige on medium ovals. Across each ring-finger nail, paint a narrow diagonal charcoal band traveling from the lower right side toward the upper left edge. Inside that band, add a few thin ivory spokes and scalloped connectors, as if the web were woven into a sash. Keep its edges straight enough to read as a deliberate strip, and leave plenty of exposed base on both sides.
This is for someone who likes graphic nail art but does not want a full-nail web. The diagonal band—not a web placed randomly on top—is the main structure.
5. Clear Web Portals in Matte Graphite
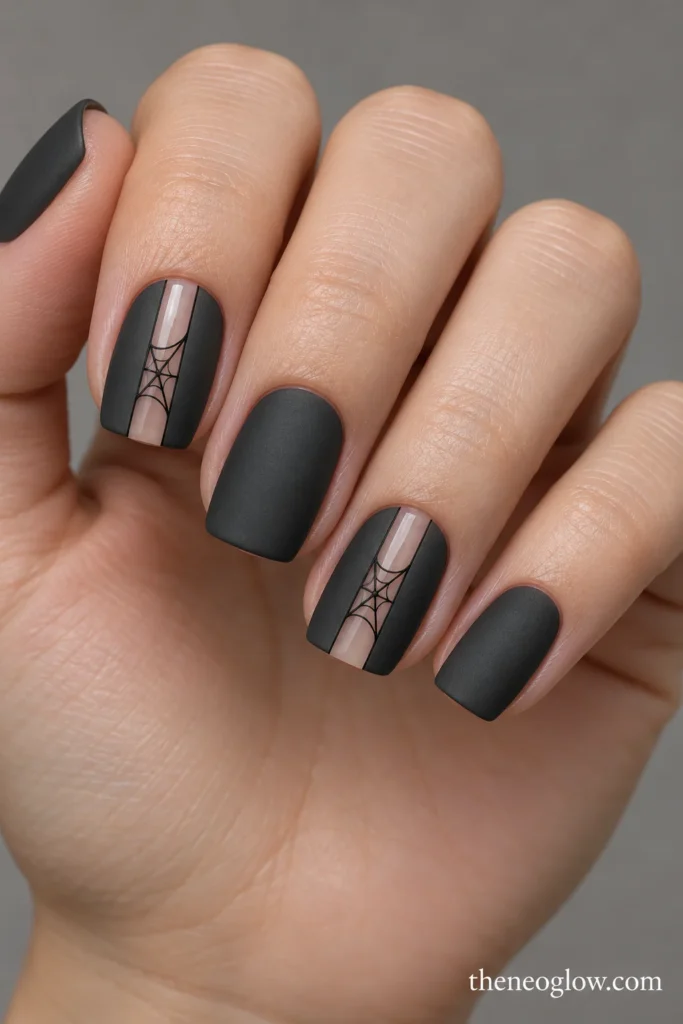
Paint medium-short square nails in opaque matte graphite. On the index and ring fingers, preserve a slim, central translucent window running vertically down the nail plate; it should look like a clean opening in the dark polish, not a separate black stripe. Inside the clear window, draw one small black web with three radiating spokes and two arcs. Give only the inset a subtle gloss so its transparency is legible against the matte frame.
The surrounding dark surface makes this negative-space construction more graphic than a standard web accent. Avoid placing the window so close to the sidewall that it disappears in photos.
6. Oversized Off-Axis Web Over Ivory
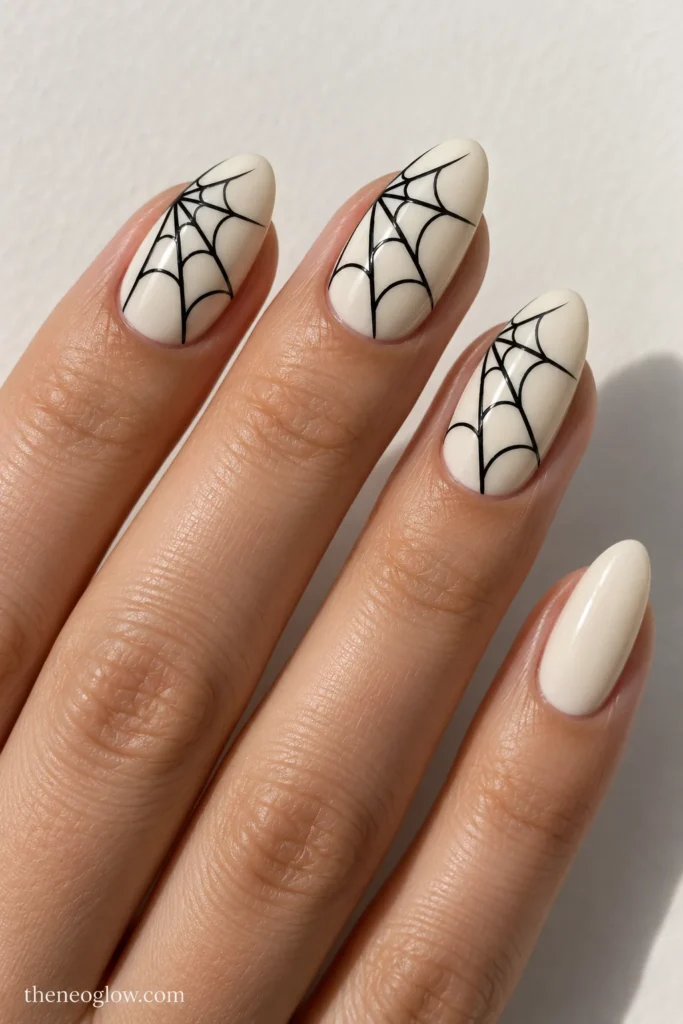
Medium almond nails provide room for an almost full-plate black spiderweb over opaque soft ivory. Position the imaginary center of the web just outside the upper-left edge of each illustrated nail. Five or six long spokes sweep diagonally across the surface, connected by three unevenly spaced curved tiers. Let selected lines run off the free edge while keeping the ivory base visible between them.
Use this larger design on two or three nails and keep the others ivory. Its scale and off-center geometry make it the strongest high-contrast option in the placement group.
Spiderweb French Tip Nails With Different Structures
For these six, the free edge is doing the work. Some webs replace the tip, others hang from or sit within a defined French shape. For a larger gallery of non-web French constructions, visit Halloween French tip nails.
7. Bare-Net Micro French on Short Squares
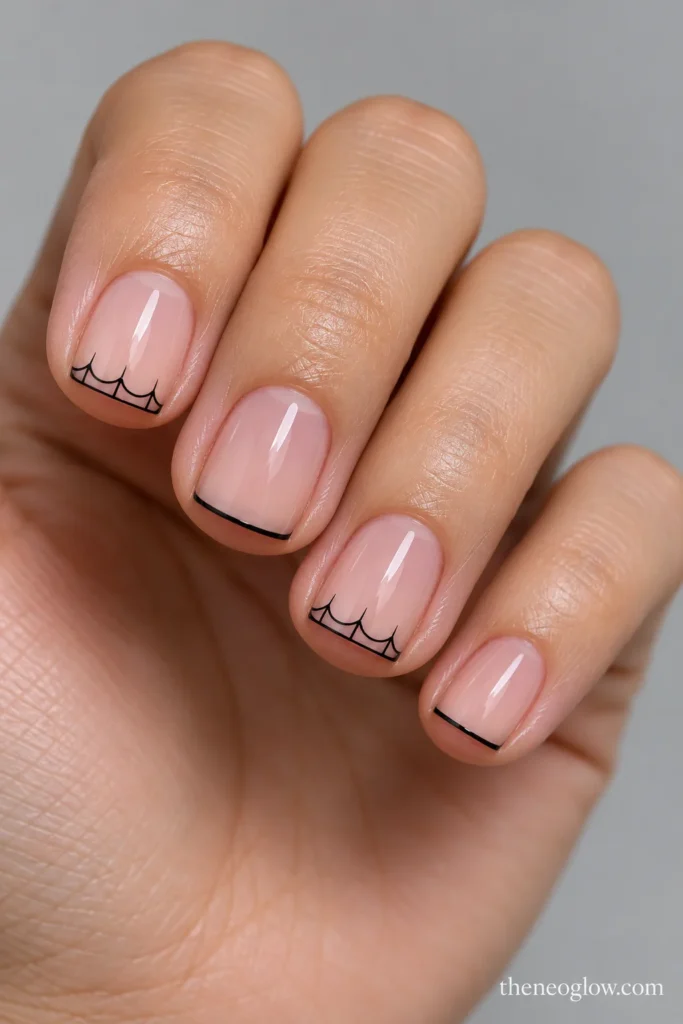
Use genuinely short square nails with a translucent rosy base and glossy topcoat. At the free edge of the index and ring nails, build a very shallow black mesh from three miniature spokes joined by one tiny scalloped strand. Do not paint a solid black French band or a separate full smile line: the web itself becomes the micro tip. Trace only a hairline black edge on the remaining nails to keep the set coordinated.
This design suits limited nail space because it uses the width of the straight tip rather than asking for a long web. If the lines touch, simplify the mesh instead of thickening it.
8. Deep-Chevron Web French
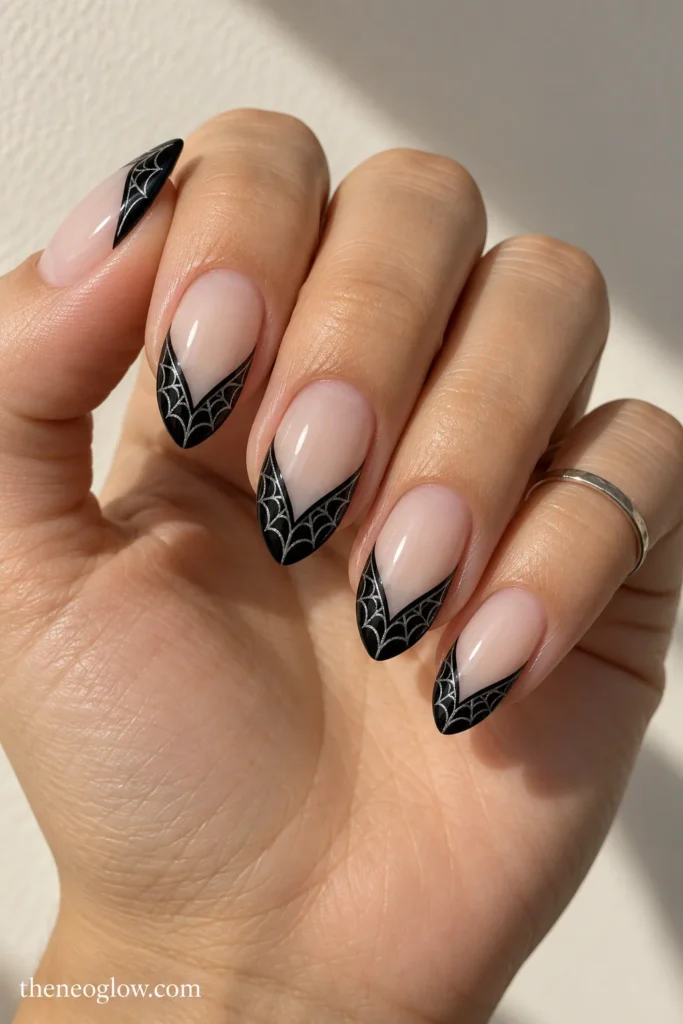
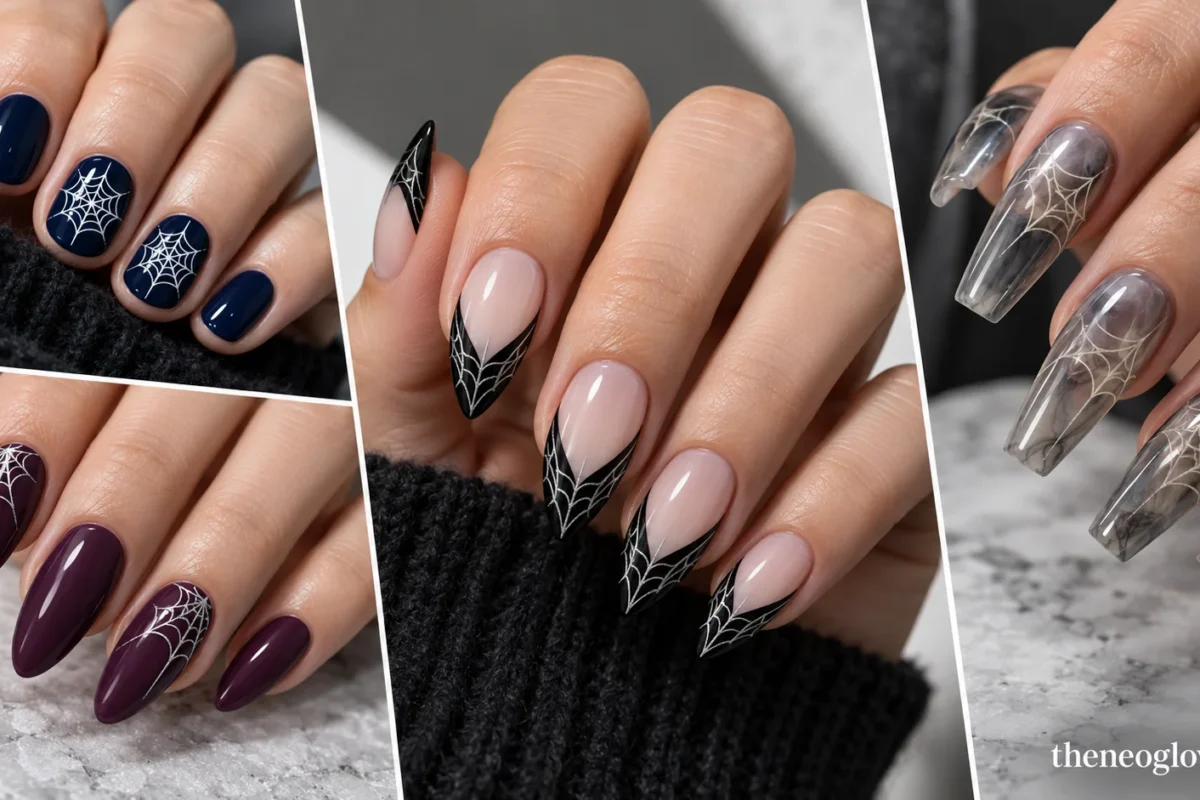
On medium almond nails with a milky neutral base, paint a symmetrical inky-black V-shaped French tip. Keep the point of the V noticeably lower in the nail’s center than its two outer edges. Inside both arms of the black V, use fine silver-gray lines to create web spokes connected by shallow arcs. The silver detail must remain within the dark tip rather than spreading over the neutral nail bed.
This is a sharp, structured alternative to a one-corner web French. The V supplies the silhouette; the internal web makes the shape unmistakably Halloween.
9. Scalloped Web-Fringe French
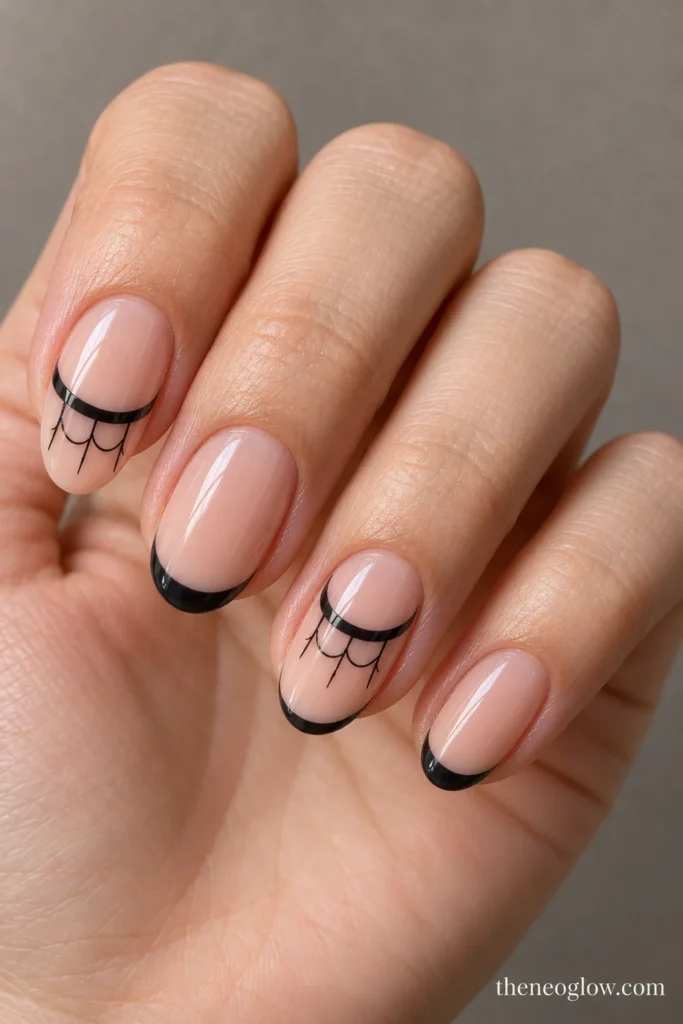
Paint medium oval nails with a sheer peach-pink base and a slim opaque charcoal French band. From the lower boundary of that band, drop three very short black spokes toward the center of each accent nail. Connect them with two hanging, downward-curving scallops, leaving the rest of the nail untouched. The web should resemble a delicate fringe suspended from the tip rather than a full fan with a visible corner hub.
Choose this when you want movement below a traditional French edge. The hanging arcs need enough separation to look like a web instead of ordinary decorative scallops.
10. Double-Smile Thread French
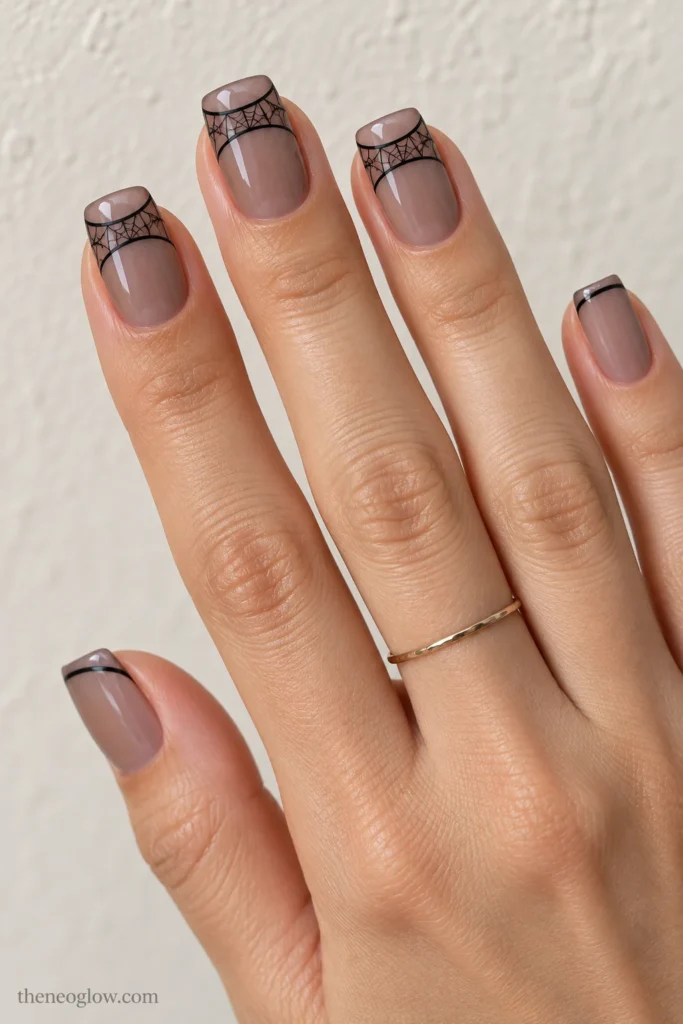
Medium squoval nails carry two fine black smile lines over a translucent smoky-taupe base. Space the curves a few millimeters apart so they create a transparent band. Inside this band, add five tiny crossing spokes and one row of shallow web arcs; everything outside the band stays clean. Repeat the treatment on the index, middle, and ring nails, with the other fingers using one simple black smile line.
This French construction is defined by two boundaries with webbing between them, not a web drawn from a tip corner. It is more technical than a basic outline tip but still relatively flat and wearable.
11. Ink-Blue Nails With Clear Web-Glass Coffin Tips
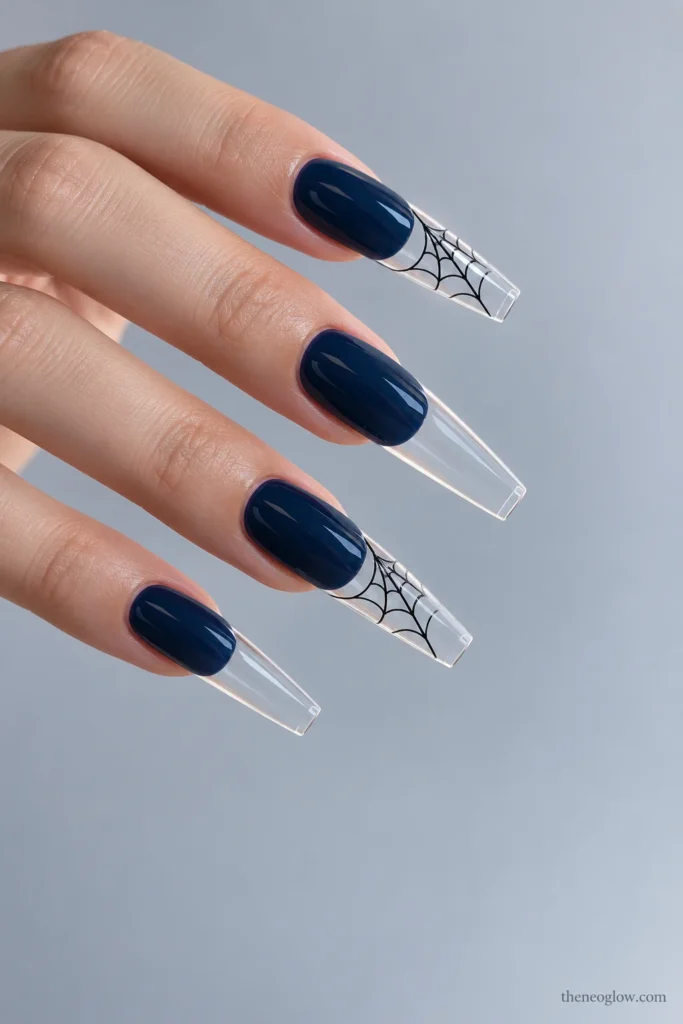
For a long coffin acrylic set, cover the nail-bed portion in opaque ink blue and keep the extended free-edge portion genuinely transparent. Build a fine black spiderweb only inside the clear tip zone of the index and ring nails, with spokes running from one transparent corner toward the flat end. Use a glossy finish and a neat transition between blue and clear. The remaining clear tips may stay plain.
The attraction here is seeing the web apparently suspended in the extension, not increasing the number of Halloween icons. Added length and the clear acrylic construction make this a planned salon option, not a shortcut for short natural nails.
12. Center-Notch Web French
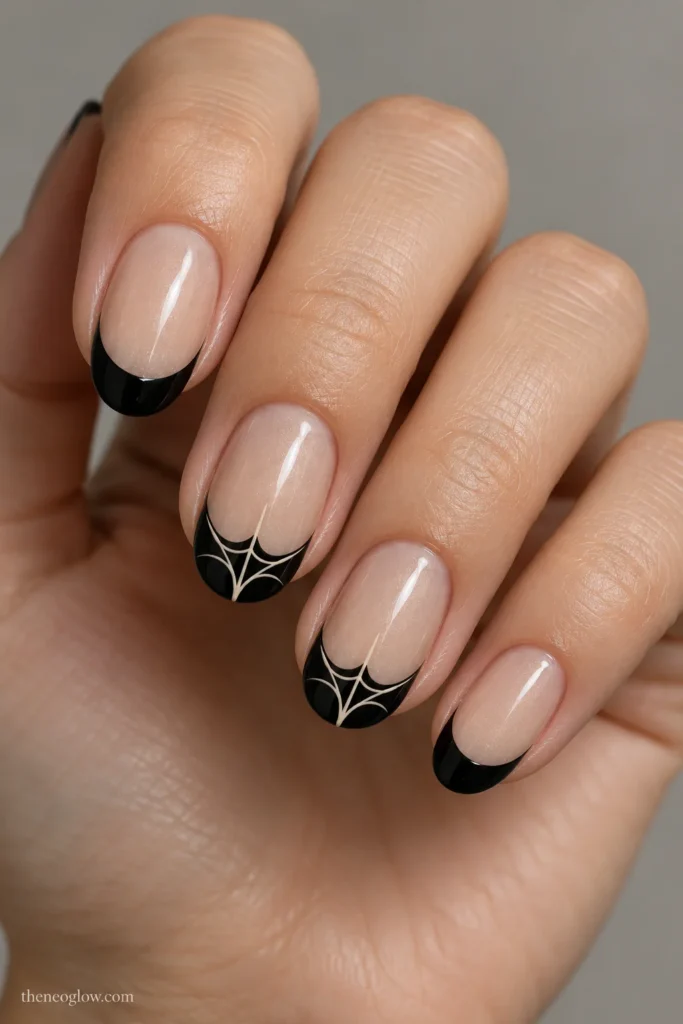
Try medium oval nails with a translucent champagne-beige base and a black French tip whose lower border dips into a single shallow center notch. From that notch, draw three fine ivory web spokes upward into the black tip and connect them with two small curved strands. Keep the rest of the tip opaque black so the notch remains the clear focal point. Repeat on the middle and ring nails and use regular black French edges elsewhere.
The web appears to grow out of the center of the French boundary. That is different from a side wedge, a double-smile mesh, or a web hanging below the band.
Black, Chrome, and Dimensional Spiderweb Finishes
The last six shift attention to how the web catches light. The placement still matters, but the surface treatment changes the result much more than a polish color swap would.
13. Matte Black With Glossy Shadow Webs
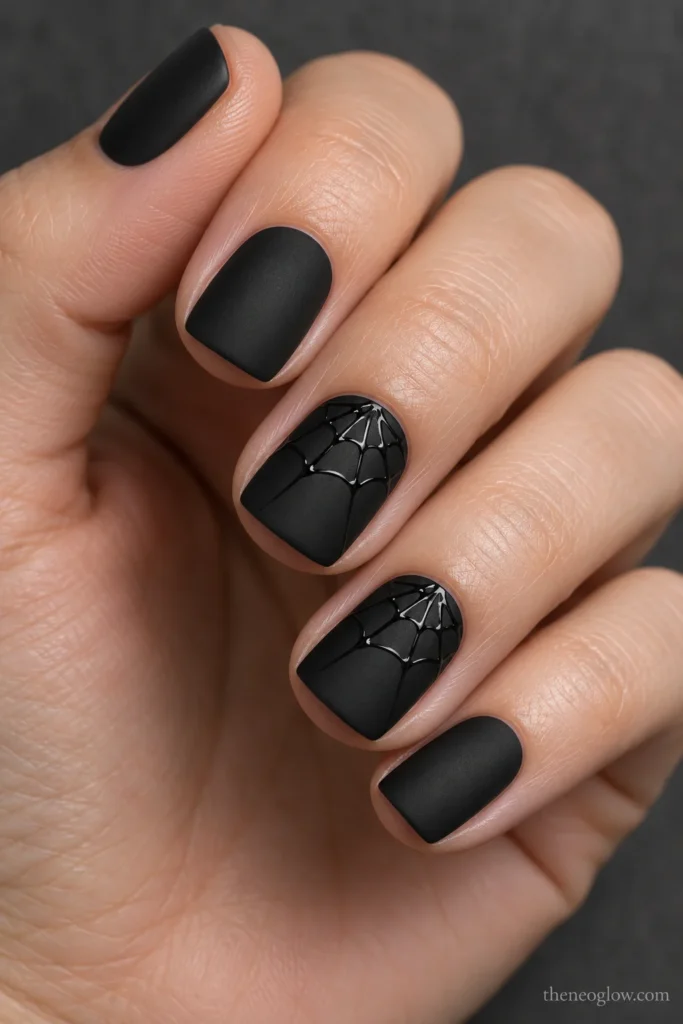
Apply opaque black to short soft-square nails and finish the surface matte. Over the ring and middle nails, trace a broad web across the upper half using clear glossy detailing product: four dark-on-dark spokes and two curved cross-strands. Nothing should be painted white, silver, or glittery. In indirect light it looks restrained; under a window or lamp the clear gloss reveals the web.
The contrast here is reflective rather than colorful. Ask to see the design under actual lighting before accepting a very subtle result; matte and gloss can look nearly identical in a flat photograph.
14. White Threads Across Smoky-Glass Gradients
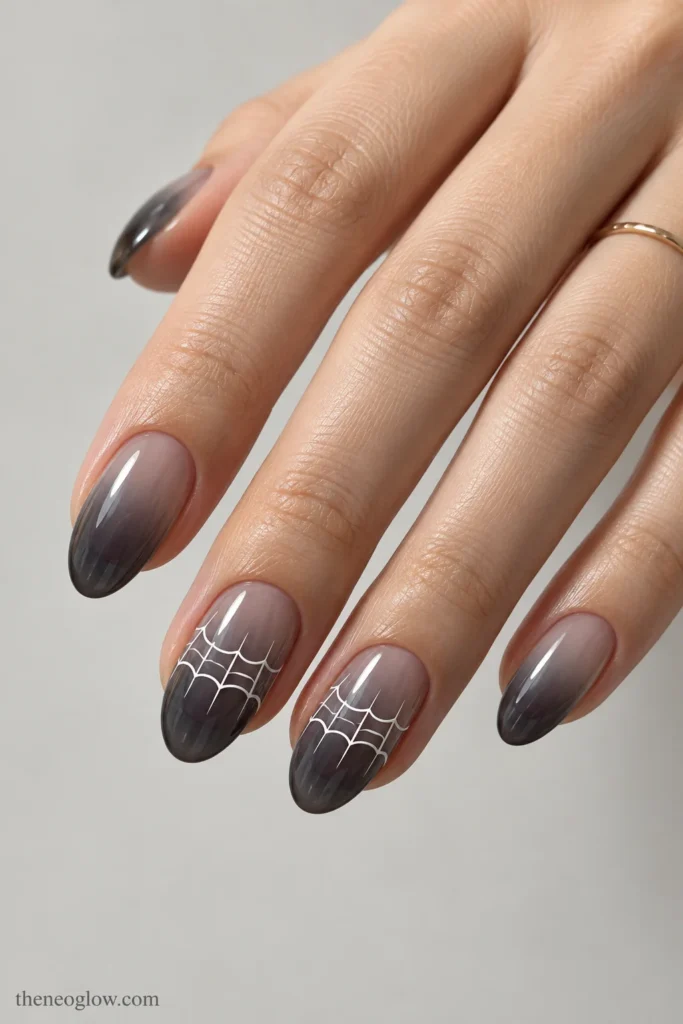
Use medium oval nails with a smooth translucent gradient: pale smoky gray near the cuticle, deepening to transparent charcoal toward the free edge. On two accent nails, stretch a thin white web horizontally from one sidewall toward the other, with five spokes and two gently bowed rows. Keep the white lines crisp and the gradient visibly sheer beneath them. Finish with clear gloss and leave the other nails gradient-only.
This finish gives white web art depth without placing it on solid black. The gradient is the atmosphere; the side-to-side web remains the illustration.
15. Mirror-Silver Filament Webs on Plum Satin
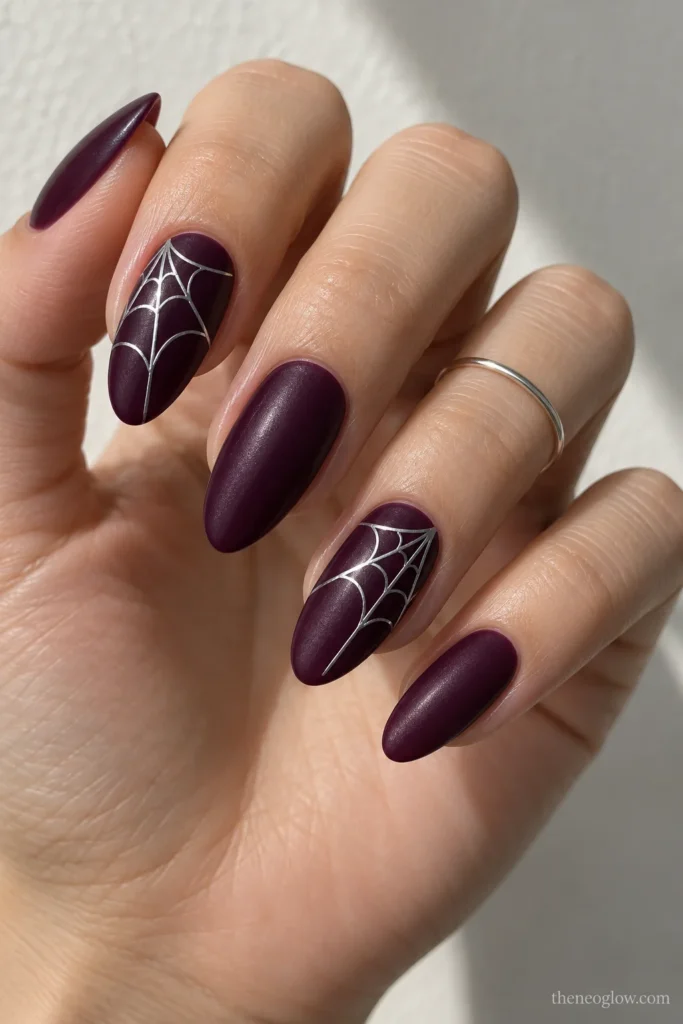
Coat medium almond nails in opaque deep plum with a restrained satin finish. On the index and ring fingers, use narrow mirror-silver filaments to form one large web anchored near the upper outer sidewall. Give it four long spokes and widely spaced curves, then stop before the cuticle. Do not chrome the full nail or scatter metallic fragments around it.
The shiny metal belongs exclusively to the web lines, so even one illustrated nail can be striking. Flat, thin detailing will generally feel less bulky in everyday wear than raised metal-like accents.
16. Pearl-Chrome Nails With Black Orb Webs
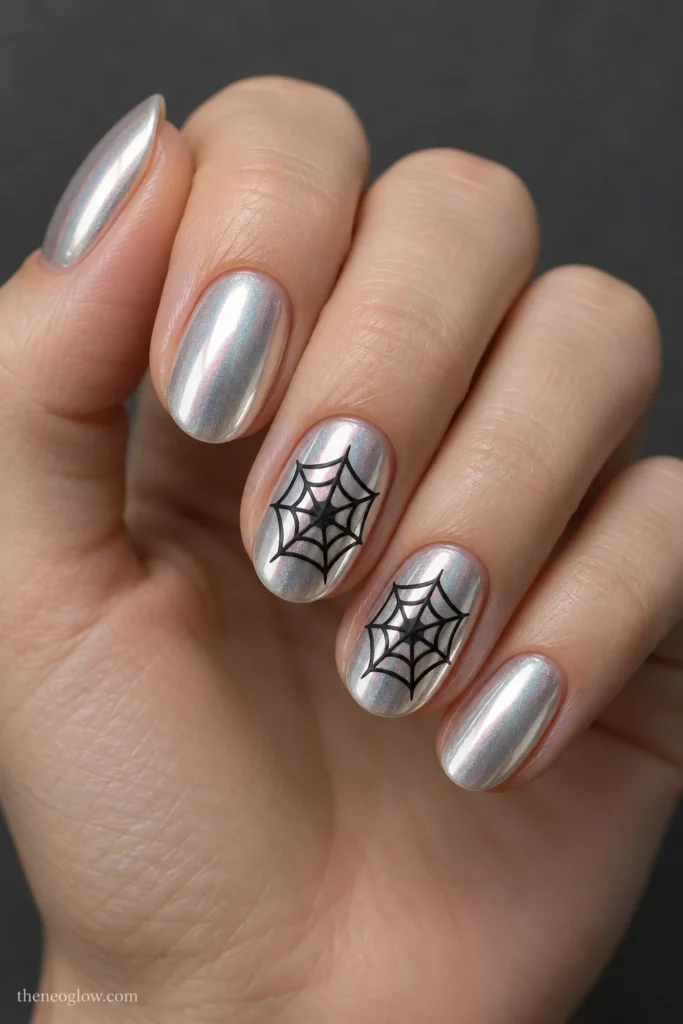
Choose medium-short oval nails coated in luminous, cool-toned pearl chrome, with an even reflective finish from cuticle to tip. Center a bold, circular black orbital web on the middle and ring nails: five fine radial spokes with two clearly separated scalloped rings. Keep the web compact enough that the surrounding pearl surface is visible on every side. The other nails stay unmarked pearl chrome.
Here the whole base reflects light while the web stays flat and dark—the reverse of the mirror-silver web in Idea 15. It is an option for a party manicure that still has a controlled, repeating motif.
17. Encapsulated Smoke-Web Acrylics
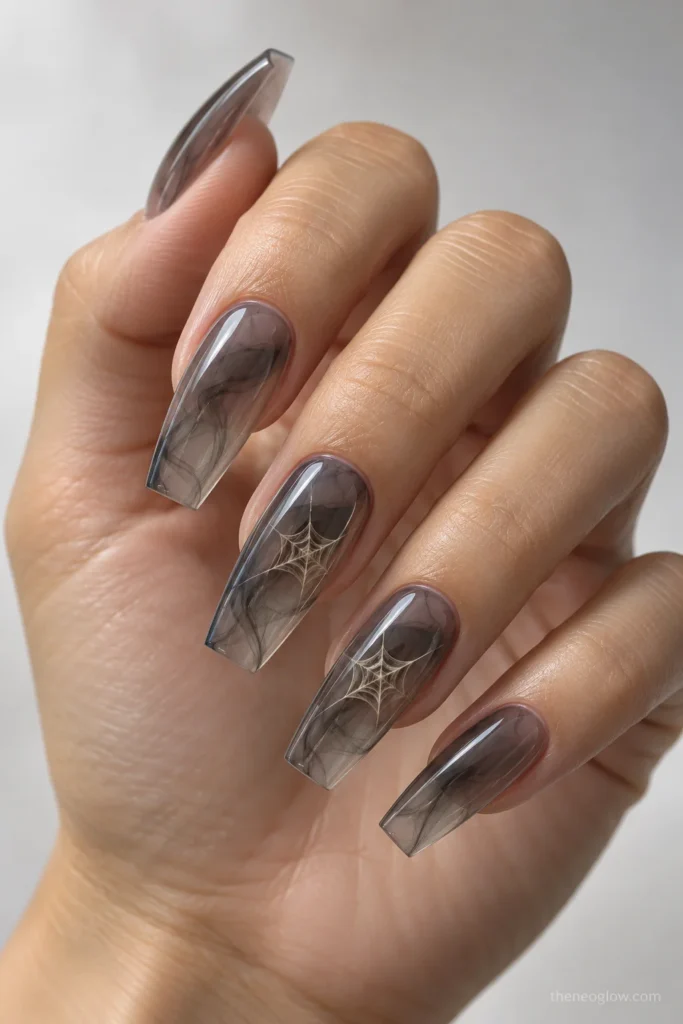
Build medium coffin acrylic nails in a translucent smoke-gray finish with a clear, glossy exterior. On two accents, place a fine ivory web within the smoky interior layers, concentrated across the central third of the nail rather than at the free edge. Four to five slender spokes and two arcs should remain visibly separated under the smooth top surface. Keep the other nails translucent smoke-gray with no added symbols.
The web’s suspended appearance—not extra crystals or a longer coffin tip—is the feature. This calls for a technician who can explain the enhancement, sealing, upkeep, and safe removal method.
18. Low-Relief Graphite Webs on Slate Blue
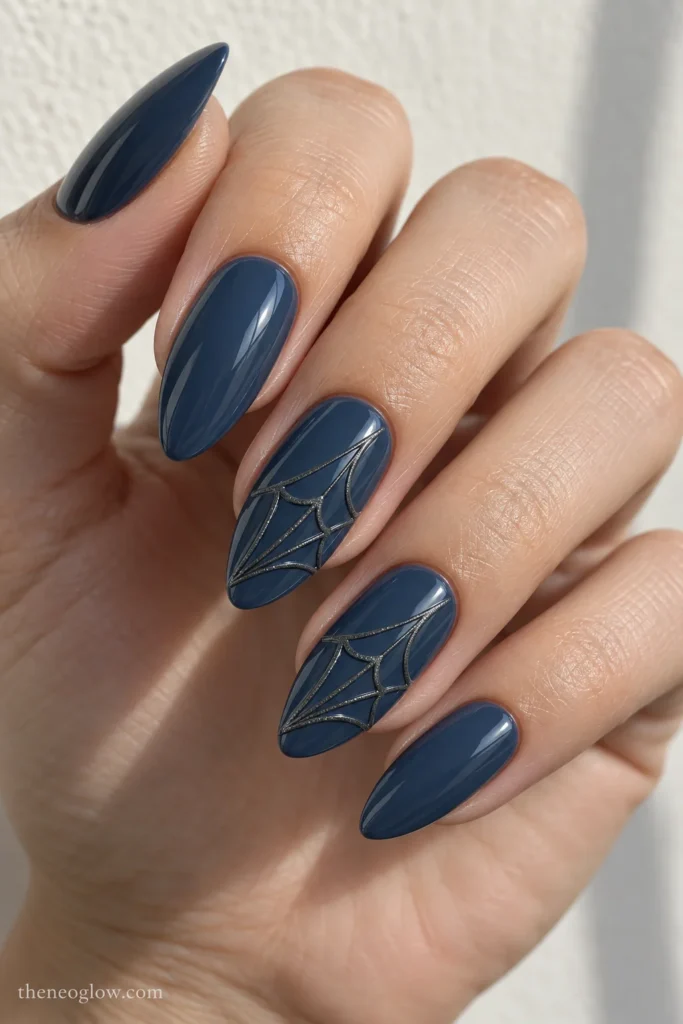
Finish long almond nails in opaque, glossy slate blue. On the middle and ring fingers, trace a diagonal graphite web from the lower left side toward the upper right tip, using four taut spokes and two generous connecting arcs. Build the graphite strokes in a subtle low-relief texture that is visible from a slight side angle but not heavily sculpted. Leave the remaining nails uninterrupted blue.
This is the most tactile design in the collection. Request a smooth, sealed surface and consider whether any raised detail will catch on hair, fabric, or gloves during your normal routine.
Spiderweb Nails Tutorial: A Small Design Before a Full Set
The cleanest way to practice is on a single nail or spare practice tip. This short method describes the web geometry; it does not replace the application directions for your specific polish, gel, or adhesive system.
- Choose one hub. Put it at the side, center, or within a French-tip zone. A web without a clear starting point often looks like random crosshatching.
- Lay down the spokes. Use a fine liner and make three to five separated strokes. On short nails, start with fewer rather than filling the entire surface.
- Connect with shallow curves. Add one arc between each neighboring pair of spokes, then a second tier only if there is room. Keep the connectors curved rather than drawing a square grid.
- Check the scale and seal correctly. Allow regular lacquer layers to dry as directed, or follow the exact professional product system’s instructions. Do not touch wet detail or apply incompatible layers just to speed up the design.
If line painting feels frustrating, a flat web decal can preserve the motif more accurately than a rushed freehand attempt. For a more extensive home-method guide, NeoGlow has easy Halloween nails with tool and shortcut comparisons.
Make the Design Practical for Your Nail Length
Short natural nails: Keep the web’s hub and arcs legible before adding a second motif. Ideas 1, 2, 7, and 13 are designed for compact nails. For more choices that prioritize real fingertip length, see short Halloween nails.
Medium ovals, squares, and almonds: There is usually more room to spread the spokes or shape a French boundary. Ideas 4, 6, 8, 10, 14, and 15 use that space in visibly different ways. Pick the structure that suits your actual nail silhouette rather than stretching a tiny corner-web image onto every shape.
Acrylic extensions: Ideas 11 and 17 are intentionally different: one confines artwork to a transparent coffin tip; the other suspends a web within smoky-looking nail layers. For an extension-specific length and upkeep comparison, use the Halloween acrylic nails guide.
For any home product, follow its label and warnings, work with adequate ventilation, and avoid skin contact when product directions require it. The FDA nail-care product guidance explains that some nail ingredients may cause irritation or allergic reactions and why safe-use directions matter. Do not peel off enhancements or improvise a removal method when the product requires a specific process.
Frequently Asked Questions
Can you wear spiderweb nails on very short nails?
Yes. A centered four-spoke rosette, a shallow web micro French, or one mid-side fan needs less area than a full-plate web. Keep the free edge genuinely short and reduce the number of connecting curves rather than drawing the same large web at a smaller but unreadable scale.
What is the difference between spiderweb French tips and corner webs?
A corner web begins from a nail corner or side and can extend into the nail plate. A spiderweb French uses the free-edge area as part of the design’s structure—for example, a net replacing a micro tip, a web inside a V-tip, or threads suspended from a French band.
Can spiderweb art work without black polish?
Absolutely. White lines over smoky gray, silver filaments over plum, and glossy clear lines over matte black all create recognizable webs. Keep enough visual separation between the spokes and connecting arcs to preserve the pattern.
Are spiderweb nails easier with regular polish or acrylic?
The web pattern itself can be painted on a natural nail with compatible nail products. Acrylic changes the underlying nail’s length and structure, which is useful for designs like transparent coffin tips or encapsulated web layers. Difficulty depends on the pattern, the product system, and your experience—not on the word “acrylic” alone.
Save the Structure, Not Just the Color
A useful spiderweb reference makes four things obvious: where the hub begins, how many spokes are visible, how far the curves travel, and which finish catches the light. Save the idea with its nail shape and length in view. If you want other spooky motifs, the full Halloween nails guide is the next stop; if you want the web itself, one of these 18 placements is a much clearer starting point.