Simple winter nails can feel seasonal without a snowflake on every finger or a complicated chrome service. The trick is limiting each manicure to one clear feature: an icy color, a quieter finish, a two-shade arrangement, or a mark small enough to leave room around it. These 21 looks include blue winter nails, cooler neutrals, and darker options you can wear to work or through January. Most suit natural short nails, and each idea names its shape, coverage, and exact detail so you can save a useful reference. Some look simple but still demand a steady hand; the guide flags those differences.
The Low-Detail Winter Nail Decision Table
| Your priority | Best design structure | Start with | DIY expectation |
|---|---|---|---|
| No artwork | One color and one finish | 1–6 | Lowest detail |
| Two colors, no tiny motifs | Alternating nails or a single accent | 7 or 9 | Beginner-friendly |
| Graphic winter color | Flat blocks, a split, or clear windows | 8, 10, 11 | Some precision |
| A nearly invisible detail | One edge, dash, or pair of dots | 12–14 | Basic tools help |
| Dressier but still restrained | One finish change or metallic accent | 16, 18–21 | Depends on placement |
Simple-looking is not always easy to paint. A plain cream manicure needs little artwork; a perfectly straight split or identical glossy-on-matte curves can take more control. If you want truly easy execution, favor a solid color, an alternating set, a rounded dot, or a flat premade decal. For a broader menu of winter textures, chrome, magnetic effects, and snowy designs, explore NeoGlow’s 27 winter nail ideas. This page keeps the detail level deliberately lower.
Six Winter Colors That Need No Nail Art
1. Periwinkle Cream Soft Squares
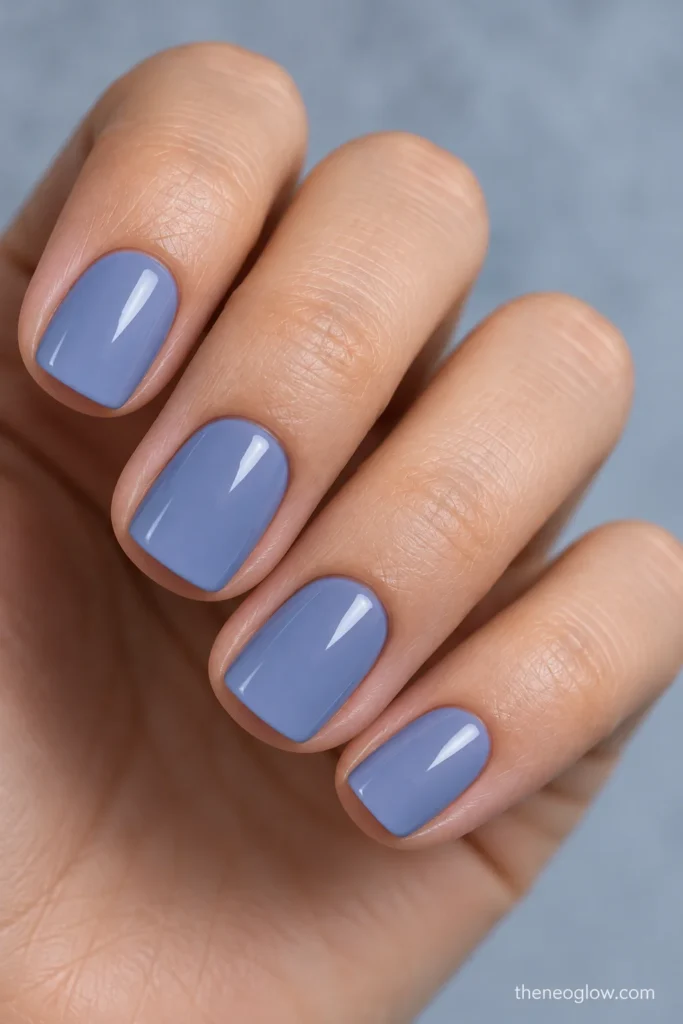
Very short soft-square nails take an opaque, muted periwinkle cream with a cool blue-violet cast and clean gloss. Paint every nail the same color, with no shimmer or added line. The lavender note separates this from standard baby blue, and the straight, softened edge gives the pale shade structure. Effort: low; the clean polish outline is the entire design.
2. Cool Rosewater Jelly Ovals
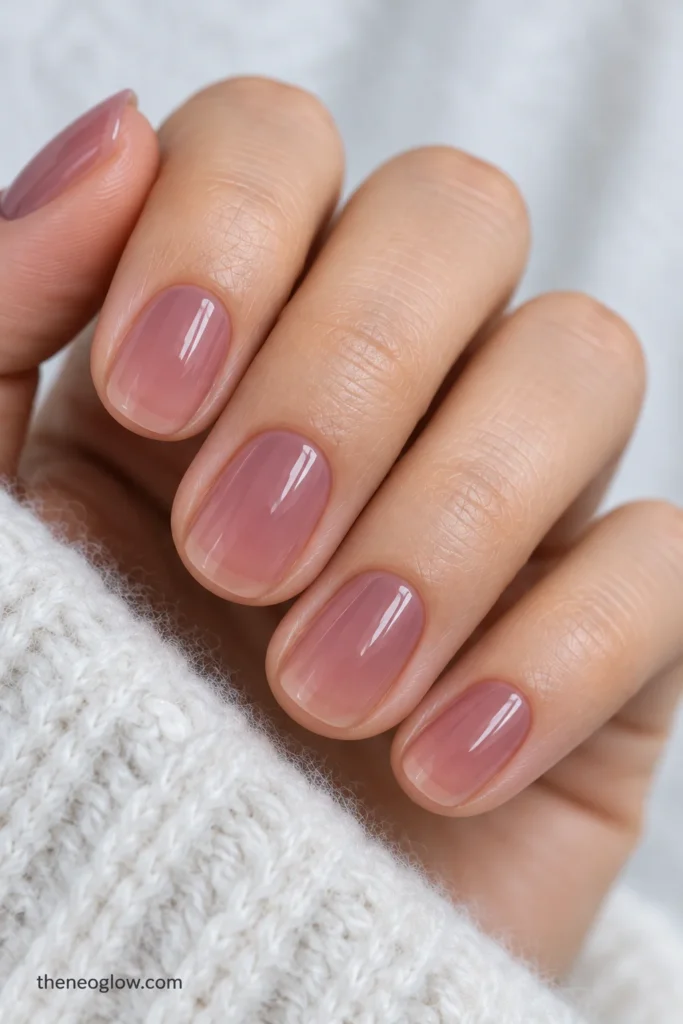
Choose short natural ovals and a translucent, cool rose-pink jelly that lets the nail beneath remain visible. Keep the tone pink rather than beige or white, with a glassy finish and no accents. It is a quiet winter neutral for people who prefer a gentle tint over a completely opaque coat. Effort: low; build the coverage according to your polish directions.
3. Midnight-Ink Short Rounds
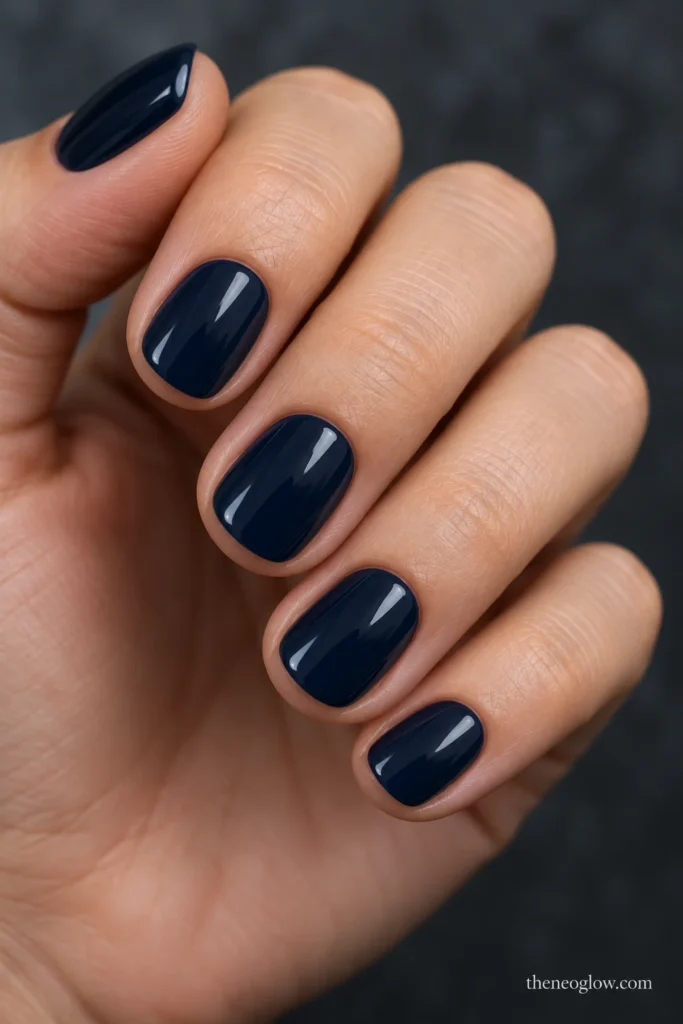
A blue-black cream on genuinely short rounded nails creates a more dramatic look without any artwork. Keep the finish glossy and the blue undertone visible in daylight; plain jet black would change the effect. Dark polish makes the nail edge more noticeable, so leave enough time for a tidy outline and any cleanup. Effort: low art, more visible mistakes.
4. Mushroom-Mist Matte Squovals
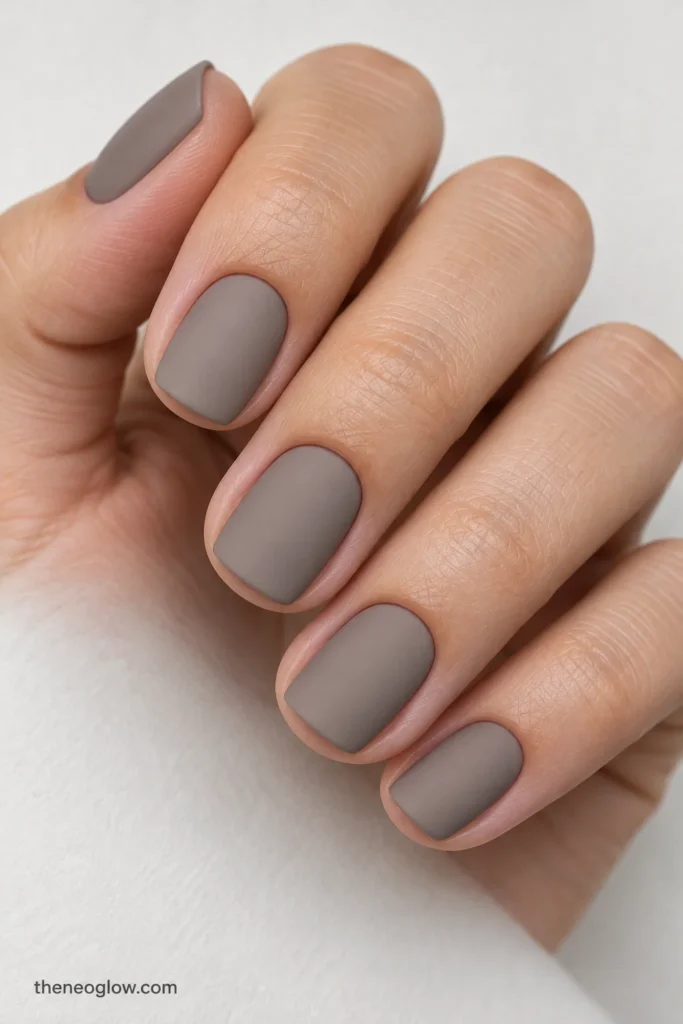
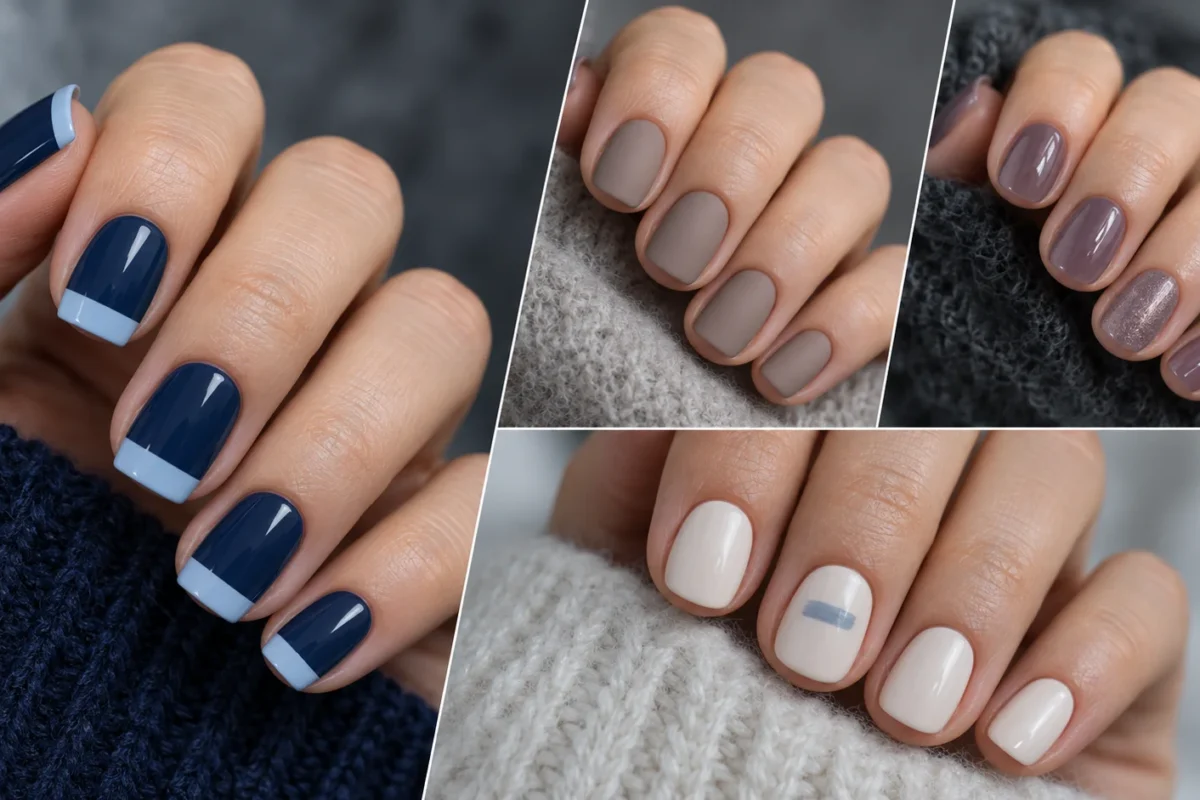
Paint short squovals in opaque cool mushroom taupe, halfway between brown-gray and soft stone. Finish all nails in smooth matte, without raised texture or decorative marks. This is a practical neutral option for workwear when an icy blue feels too colorful. Effort: low, provided your color and matte topcoat are compatible.
5. Silver-Sand Microshimmer Almonds
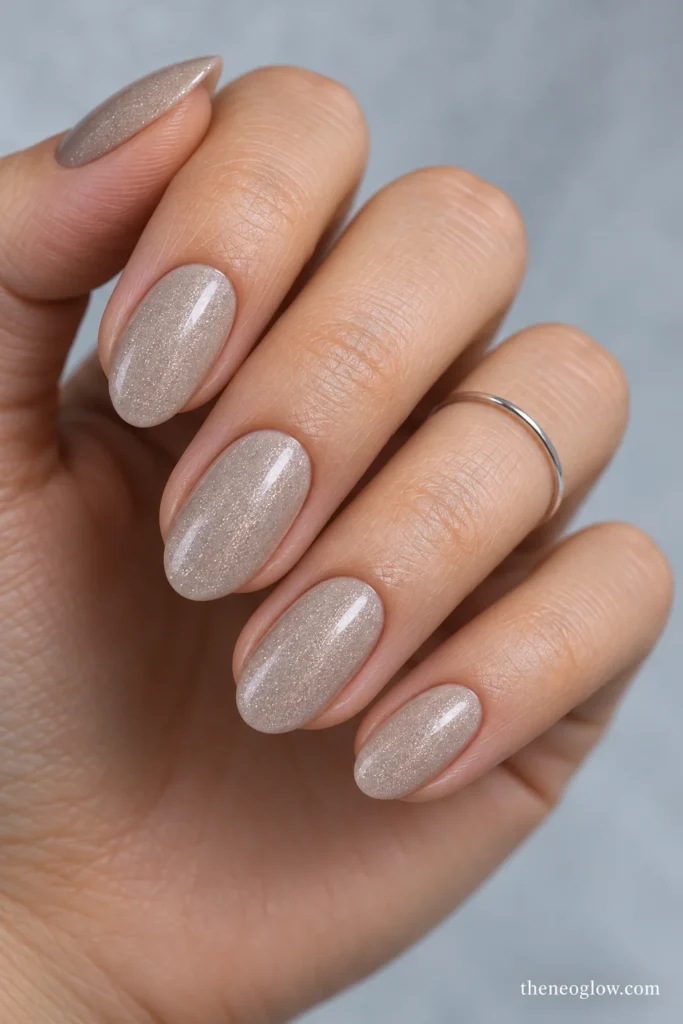
Use a restrained short-to-medium almond shape with an opaque pale sand base containing very fine, cool silver shimmer. The shimmer should be dispersed evenly, not concentrated into a chrome edge or glitter chunk. This is a one-polish light-catching option; the rounded tapered shape needs a real free edge rather than aggressive side filing. Effort: low art, shape-dependent.
6. Blue-Green Glass Rounds
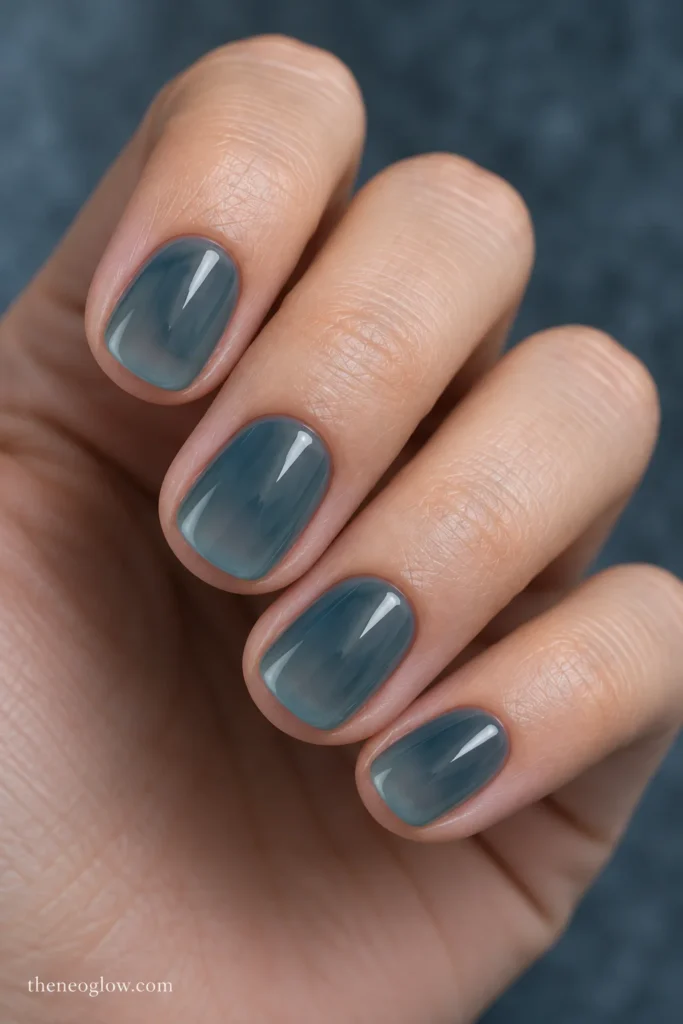
Tint extra-short rounds with a translucent, smoky blue-green jelly. Its green note is muted enough to avoid looking like a Christmas evergreen, while the visible natural nail softens the color. The result differs from an opaque petrol manicure: transparency, not shine alone, creates the depth. Effort: low; avoid adding white swirls or metallic borders.
Five Two-Color Looks With Very Little Drawing
7. Ivory and Ice Alternating Squares
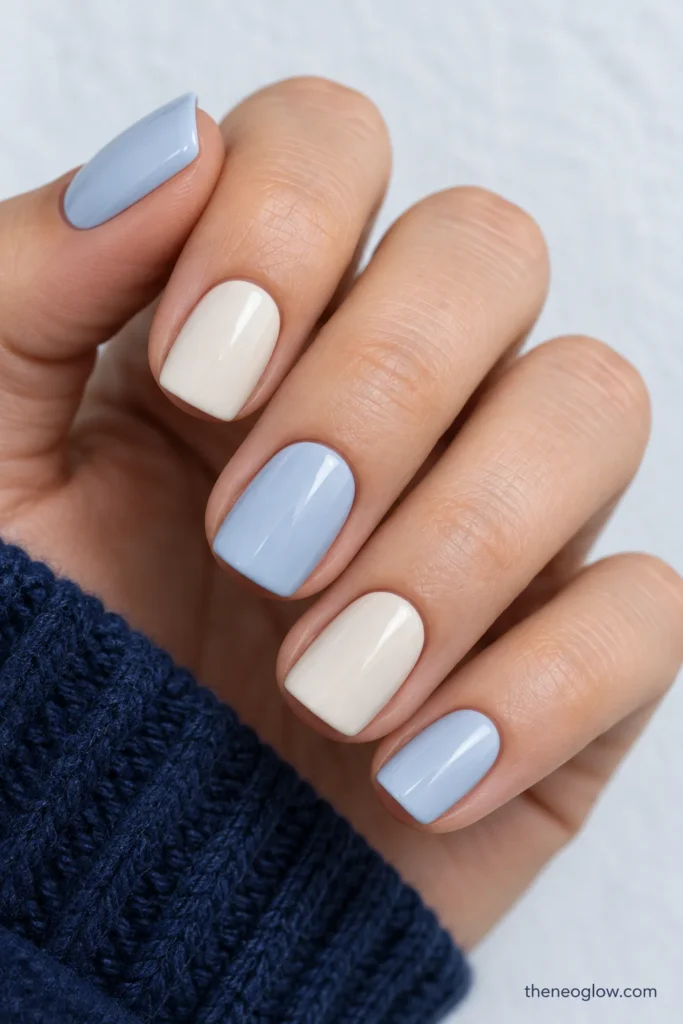
On short squares, alternate opaque cool ivory and pale icy-blue cream, using the same glossy finish on every nail. Repeat the order across both hands. The color contrast is the complete design, so no snowflakes, dots, or gradients are needed. Effort: very low if you can paint a solid color cleanly.
8. Flat Frost-Blue Tip Blocks
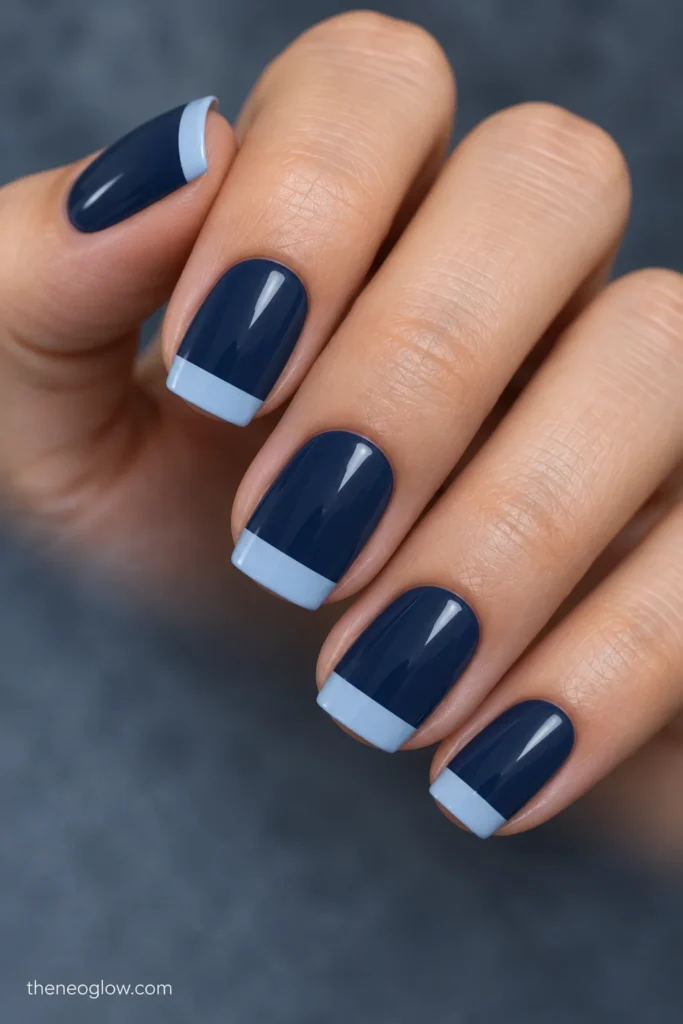
Start with medium-short soft-square nails painted opaque dusty navy. Add one straight-edged, pale frost-blue rectangular band across the outer fifth of every nail; the band should be flat across, not a curved French smile. Tape or a suitable flat guide can help with the boundary. Effort: moderate precision, even though the finished design looks minimal.
9. One Blue Accent on Pink Milk
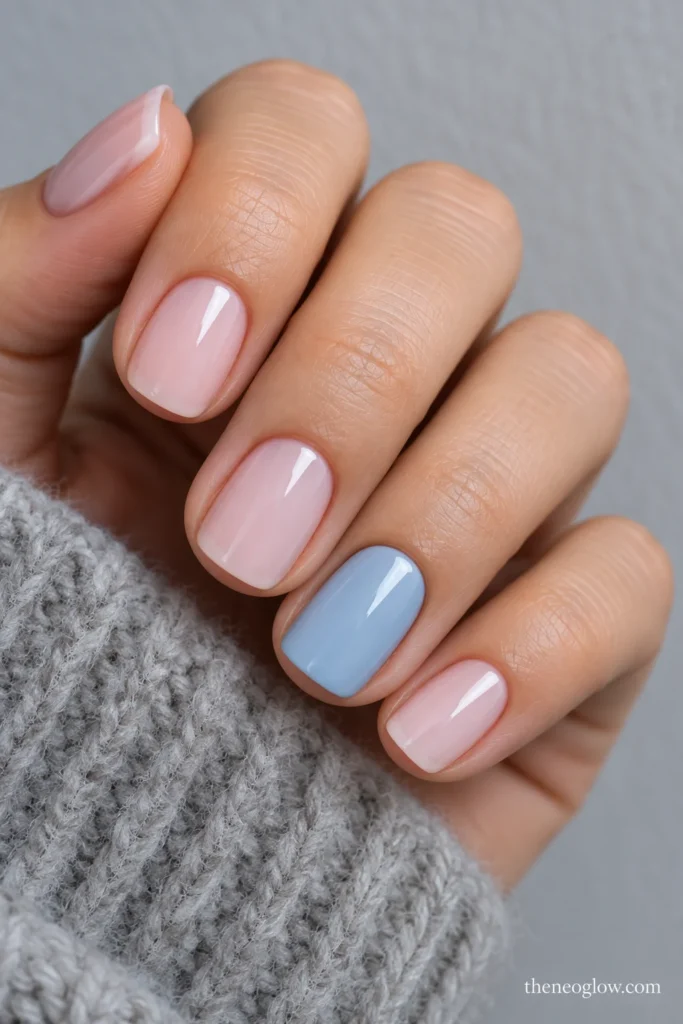
Keep short squovals in semi-sheer cool pink-milk polish, then paint the ring finger only in opaque chalky blue. The blue nail is fully colored, not outlined, and the remaining nails stay plain pink. This works when you want a winter cue that does not draw attention to every fingertip. Effort: very low; two solid polish shades.
10. Lilac and Chalk Vertical Split
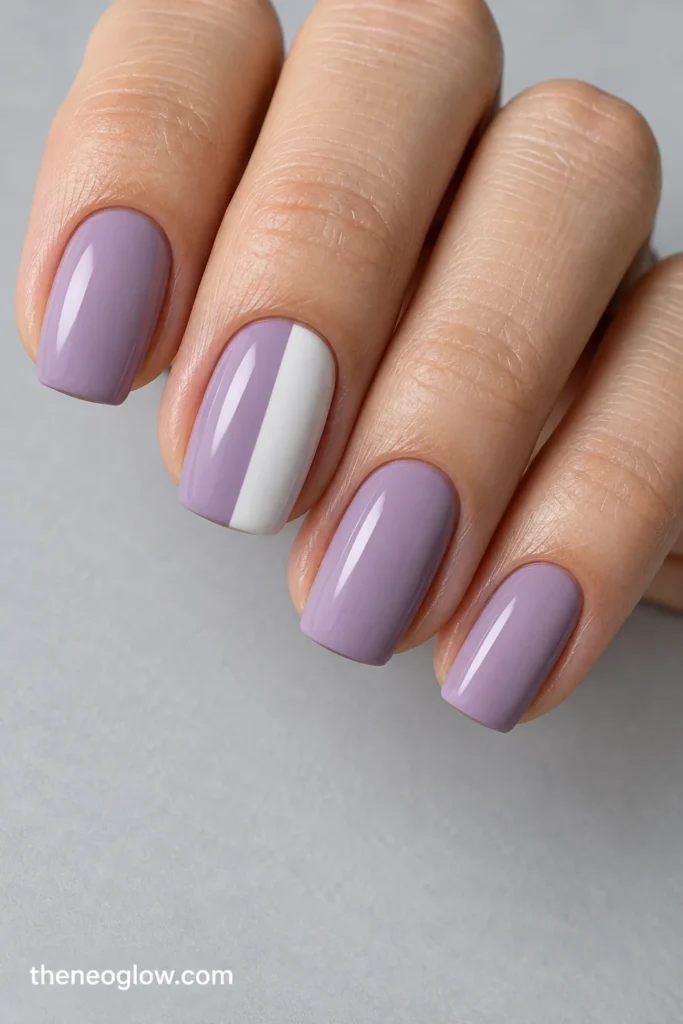
Medium squovals get opaque dusty lilac on most nails. On each middle finger alone, divide the nail vertically into equal dusty-lilac and cool-white halves, from cuticle to free edge. A straight tape guide can establish the border, but the layers must be ready before tape is applied. Effort: moderate; visually simple, not necessarily beginner-easy.
11. Slate With Clear Cuticle Windows
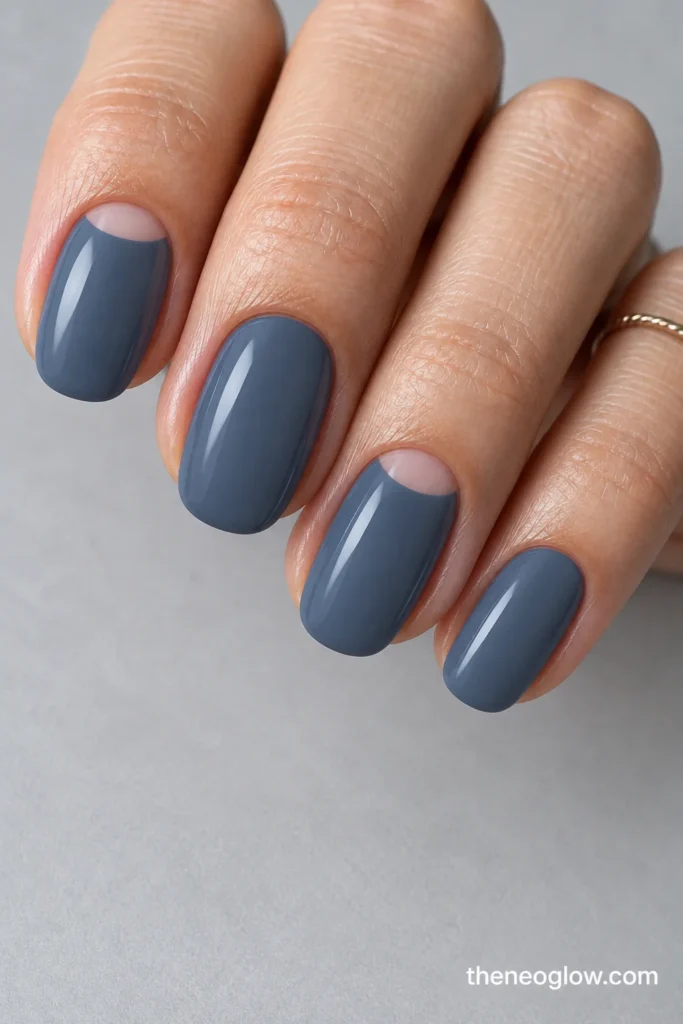
Cover medium rounded ovals in opaque blue-slate cream, leaving a small, bare-looking semicircle near the cuticle of the index and ring fingers. Keep those windows symmetrical and the remaining nails completely slate. A curved guide can help if your polish system supports it. The clear opening is the accent; do not add a metallic crescent. Effort: moderate for the clean negative-space edge.
Six Flat Details That Stay Small
12. Winter-White Offset Micro Edges
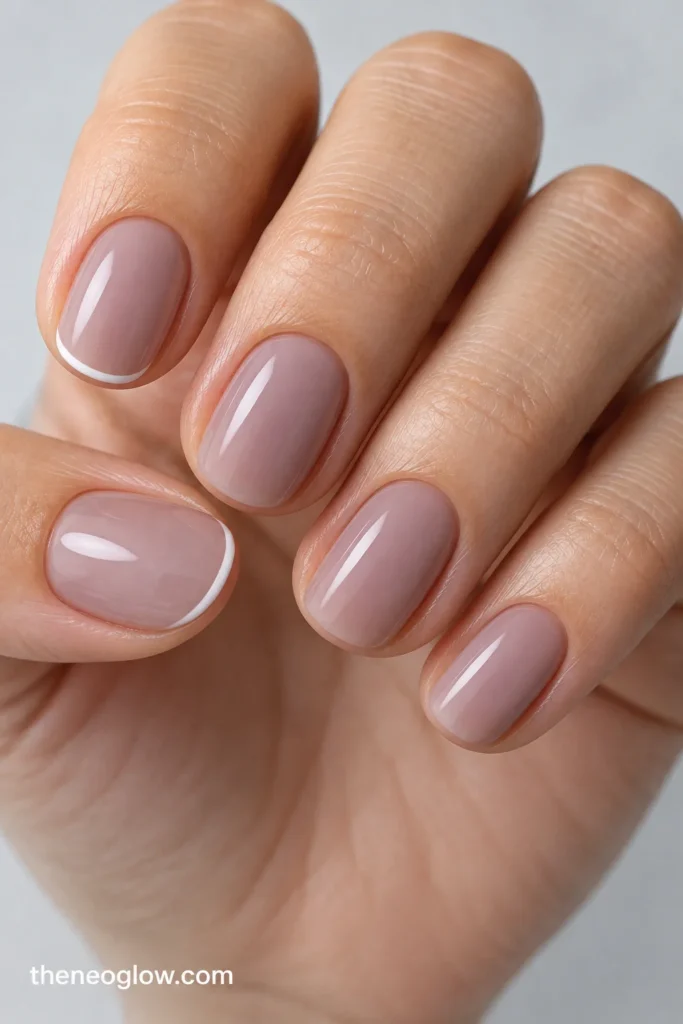
Short natural ovals wear a sheer rosy-gray base. Draw an ultra-narrow, opaque winter-white line across the free edge of the thumb and index only; leave the other nails un-tipped. The intentionally partial French layout is more relaxed than tracing all ten tips. Effort: moderate if the free-edge line must look precise.
13. One Fog-Blue Crossbar
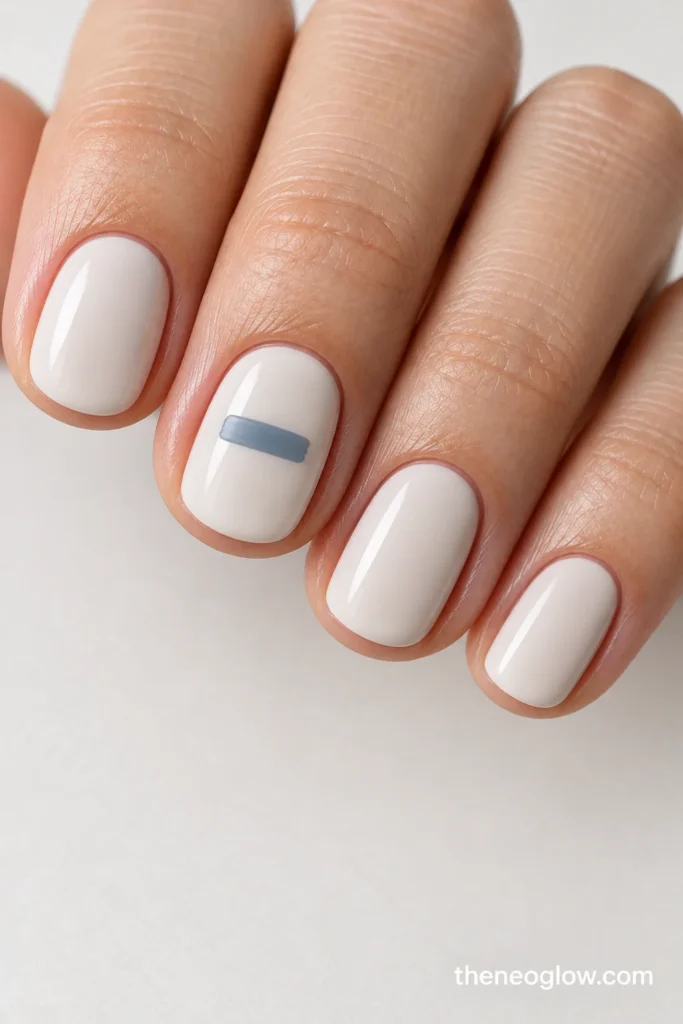
Paint very short round nails in opaque cool cream. On the middle finger, place a single short, horizontal fog-blue dash just above the center, with generous cream showing around it. The mark should look like one brushstroke, not a snowflake arm or a stripe across the entire nail. Effort: low with a small flat brush.
14. Glacier Twin Dots
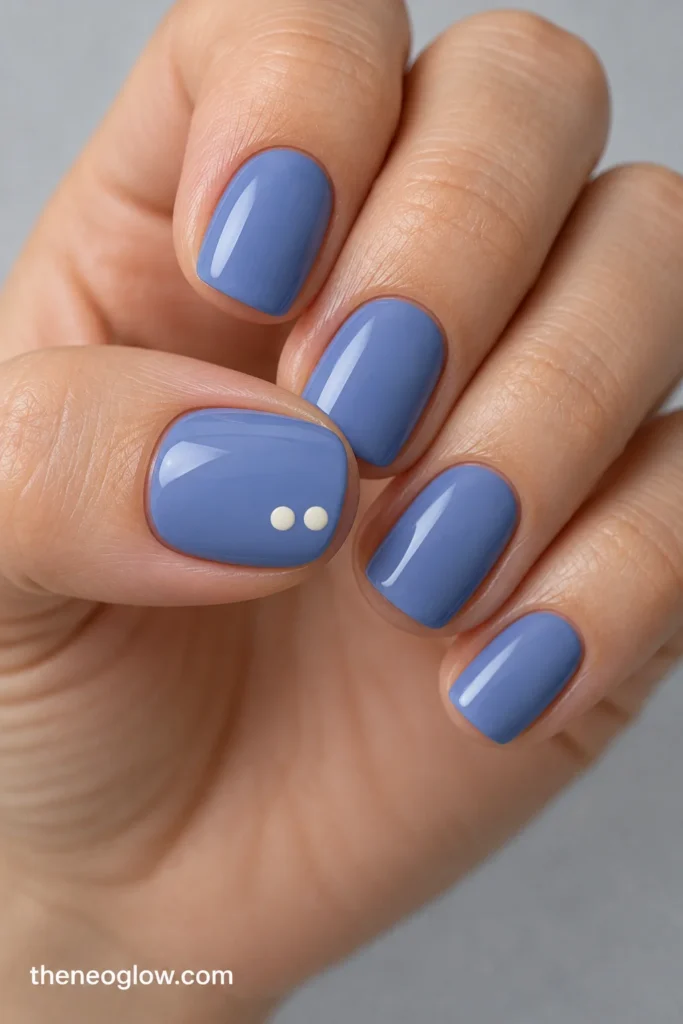
Give short squovals an opaque dusty cornflower-blue base. Add exactly two separated ivory dots near the outer half of the thumbnail, horizontally aligned; every other nail remains solid blue. A dotting tool or rounded pin end makes the two marks more manageable than fine linework. Effort: low; stop after the pair.
15. Navy Corner Brackets
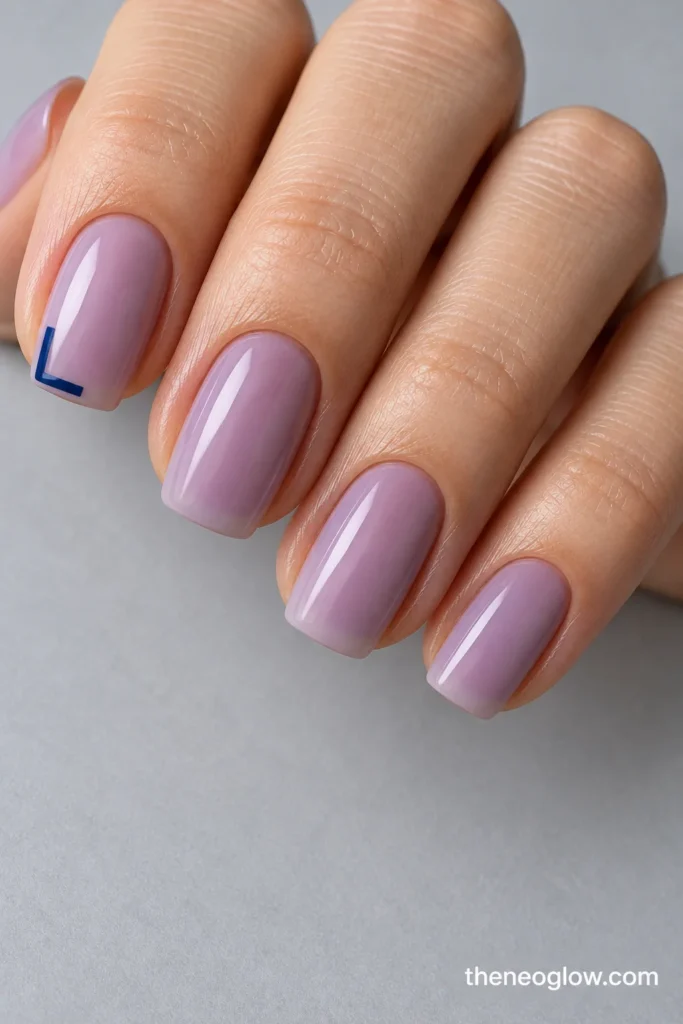
Over translucent cool-lilac polish on medium squovals, put one small, dark-navy L-shaped bracket at the outer tip corner of each index finger. The two straight strokes meet cleanly but do not outline the whole nail. Keep the thumb, middle, ring, and little fingers plain. Effort: moderate; short striping tape may be simpler than freehand corners.
16. Silver Side Swipe on Oat Milk
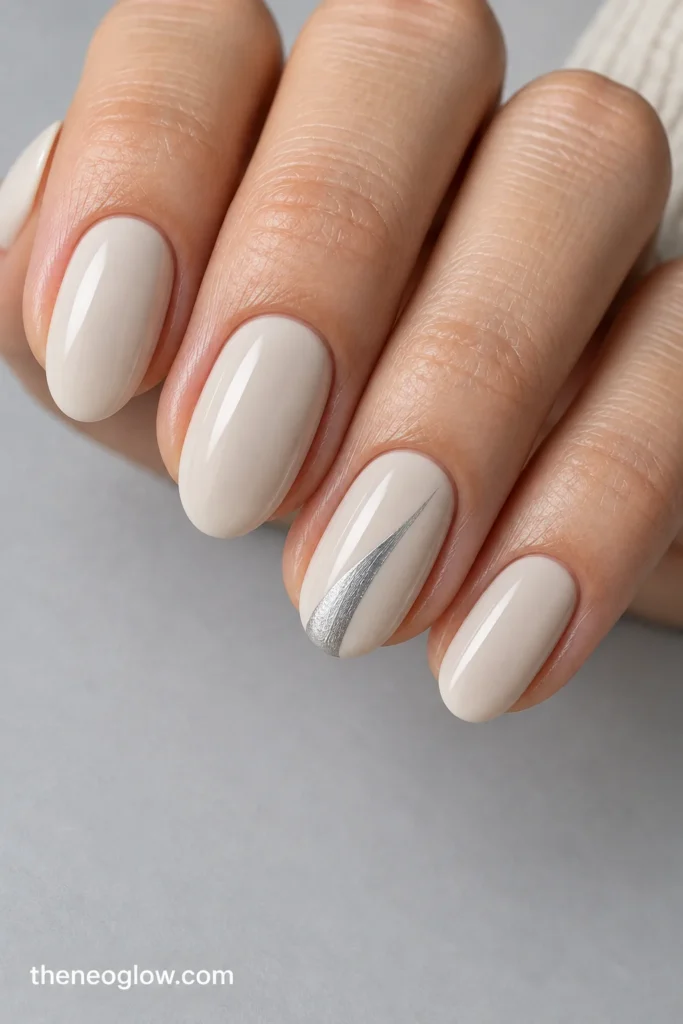
Short-to-medium soft almond nails have an opaque cool oat-milk base. On the ring finger, sweep one flat, narrow silver lacquer stroke from the lower sidewall toward the nail’s center, ending well before the tip. It should be a single tapered accent, not a mirror-chrome panel or branching pattern. Effort: easy to moderate, depending on brush control.
17. One Frost-Blue Dry-Brush Patch
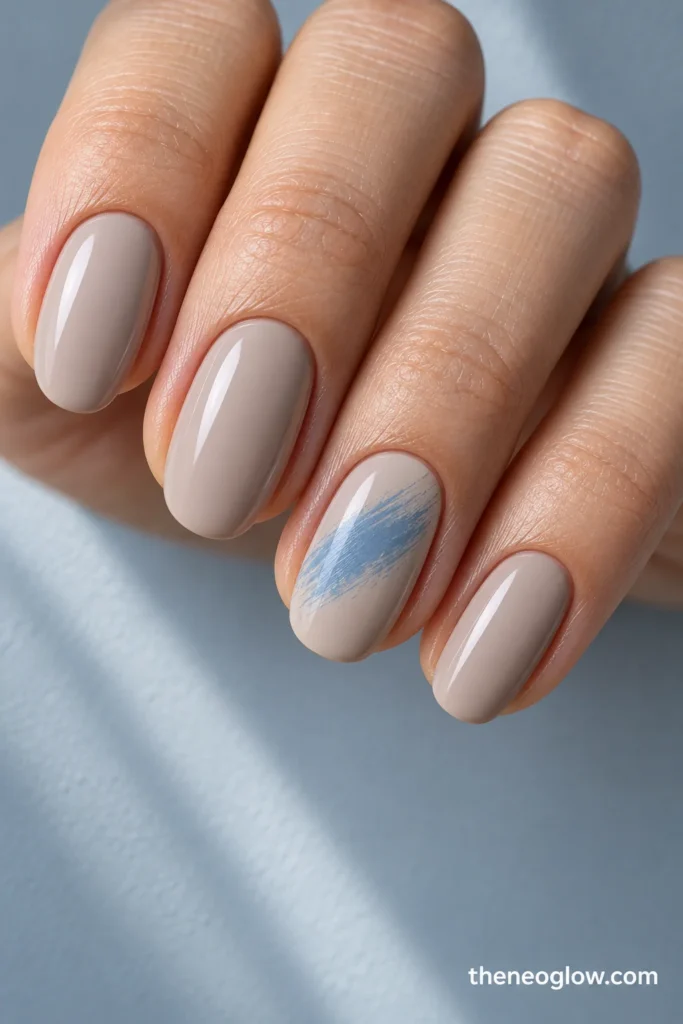
Paint medium oval nails in opaque cool beige. Across the ring nail only, drag one short, irregular frost-blue dry-brush patch diagonally through the upper middle, keeping both the cuticle and tip mostly beige. Its deliberately feathered outline is forgiving compared with a taped geometric block. Effort: approachable with a nearly unloaded brush; practice the amount of polish first.
Four Quiet Finish and Accent Switches
18. Satin Blue With a Glossy Center Tile
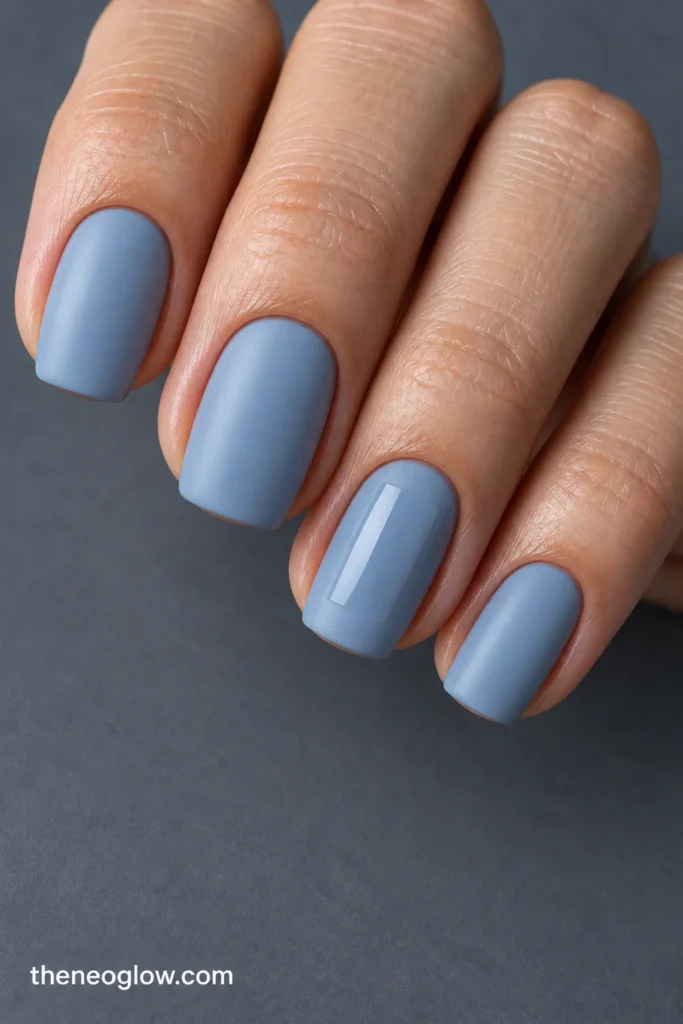
Use opaque muted ice blue on short rounded squares, finished satin-matte. On the ring finger only, paint one small clear-gloss rectangle in the center of the matte blue surface, leaving matte space on all four sides. It is a flat finish-only detail, not a raised gem or metallic frame. Effort: moderate because the rectangular topcoat boundary needs control.
19. Plum Glass With a Silvered Ring
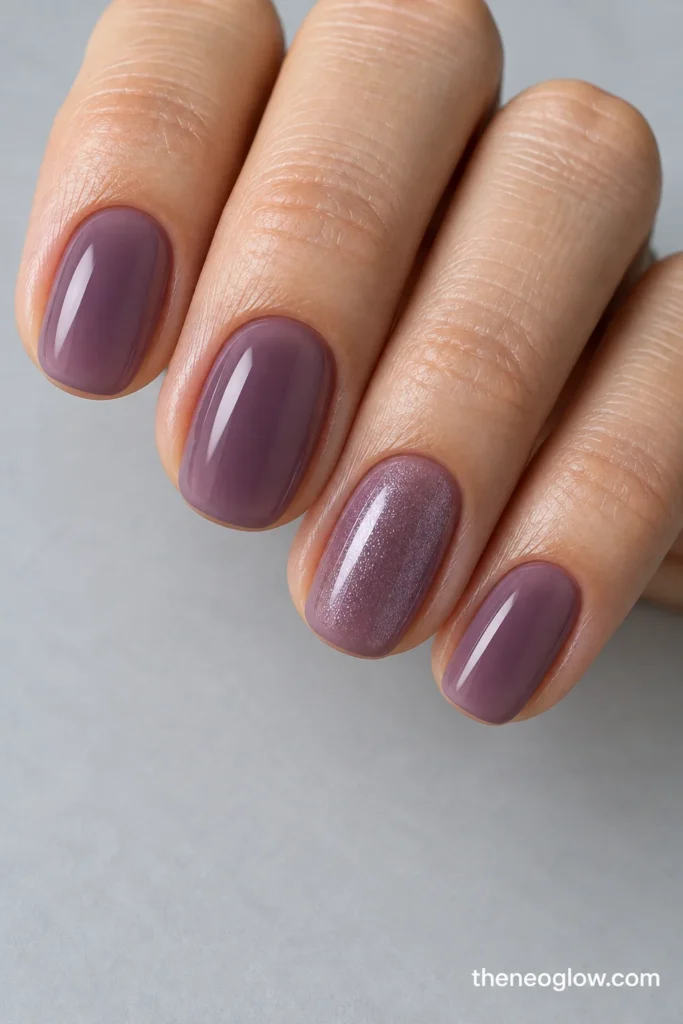
On short ovals, use sheer gray-plum jelly for the thumb, index, middle, and little finger. Give the ring finger the same translucent plum, topped with a fine silver-lilac shimmer that remains smooth rather than glittery. The finish difference makes this a subtle dinner option without drifting into holiday red. Effort: low if the topper works with the base polish.
20. Dove Gray With One Silver Square
Paint ultra-short soft squares in opaque dove-gray cream. Place one tiny flat silver square decal above the center of each middle fingernail; all other nails remain unadorned. The little geometric square is intentionally not a star, snowflake, or gemstone. Effort: low with a compatible flat decal; follow its application and sealing instructions.
21. Mist Blue With an Ivory Thumb Band
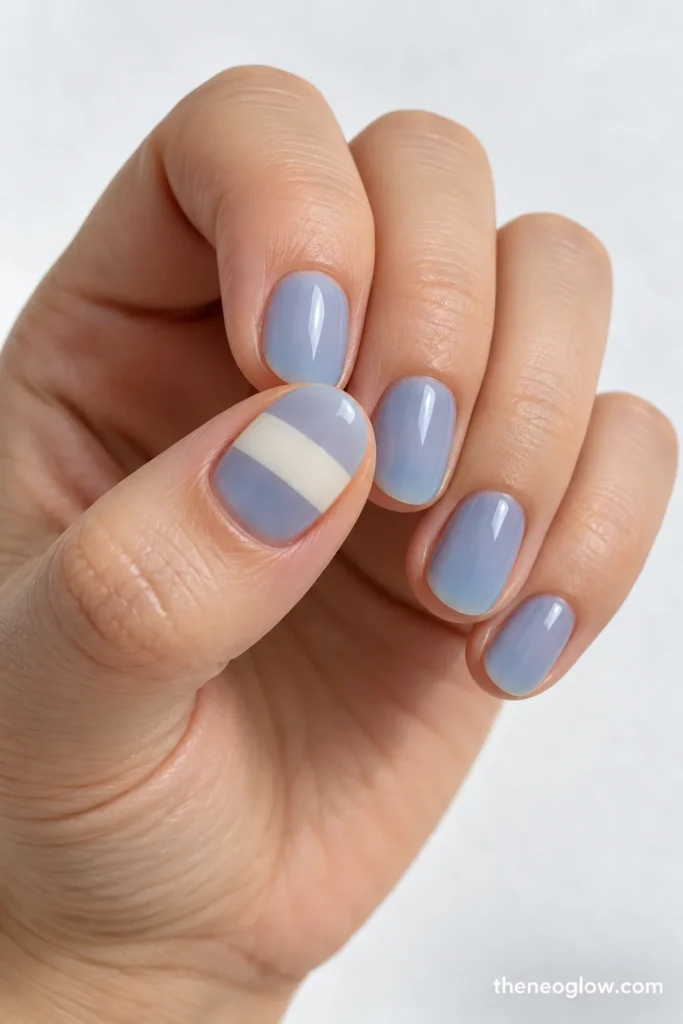
Finish short natural ovals in glossy translucent mist blue. On each thumbnail only, add a shallow, opaque ivory band across the center, leaving a blue gap both above and below it. This single horizontal color interruption reads clearly even on a small nail; avoid extending it onto every finger. Effort: easy to moderate, with a small flat brush or compatible guide.
Keep the Design Simple After Application
For most of these looks, regular lacquer is a reasonable starting point because the visuals rely on polish color, flat marks, and compatible toppers rather than built-up extensions. Work with the directions for the specific base, color, tape, decal, and finish you use. A simple-looking nail photo does not make an unfamiliar gel or enhancement system a beginner task. The FDA’s nail-product safety guidance explains why labels, ventilation, and product warnings matter when doing nails at home.
Choose finish by the maintenance you can tolerate. Sheer and jelly colors allow softer-looking growth; a darker opaque shade makes tip wear easier to notice. Matte coatings may reveal shiny rubbed areas, while tiny stickers can become inconvenient if an edge lifts. Keep every decoration flat, check for snags, and avoid using nails to pry open objects. The American Academy of Dermatology’s manicure safety recommendations explain moisturizing after removal and why cuticles should not be cut or forcefully pushed back.
Need more help matching a small design to real nail length? The short-nails guide handles shapes and free-edge tradeoffs, while simple nail designs explores beginner tools and techniques in detail. Christmas trees, holly, bows, and red-and-green festive sets belong in the separate Christmas nail ideas guide, not this winter-first collection.
For an ordinary workweek, save one of the solids, the ivory-and-ice alternation, or the two-dot thumbnail. For a dinner or January refresh, the fine shimmer and satin-versus-gloss options add polish without a full illustrated set. Pick one numbered look, keep its exact color, finish, length, and placement together, and use that as your manicure reference.