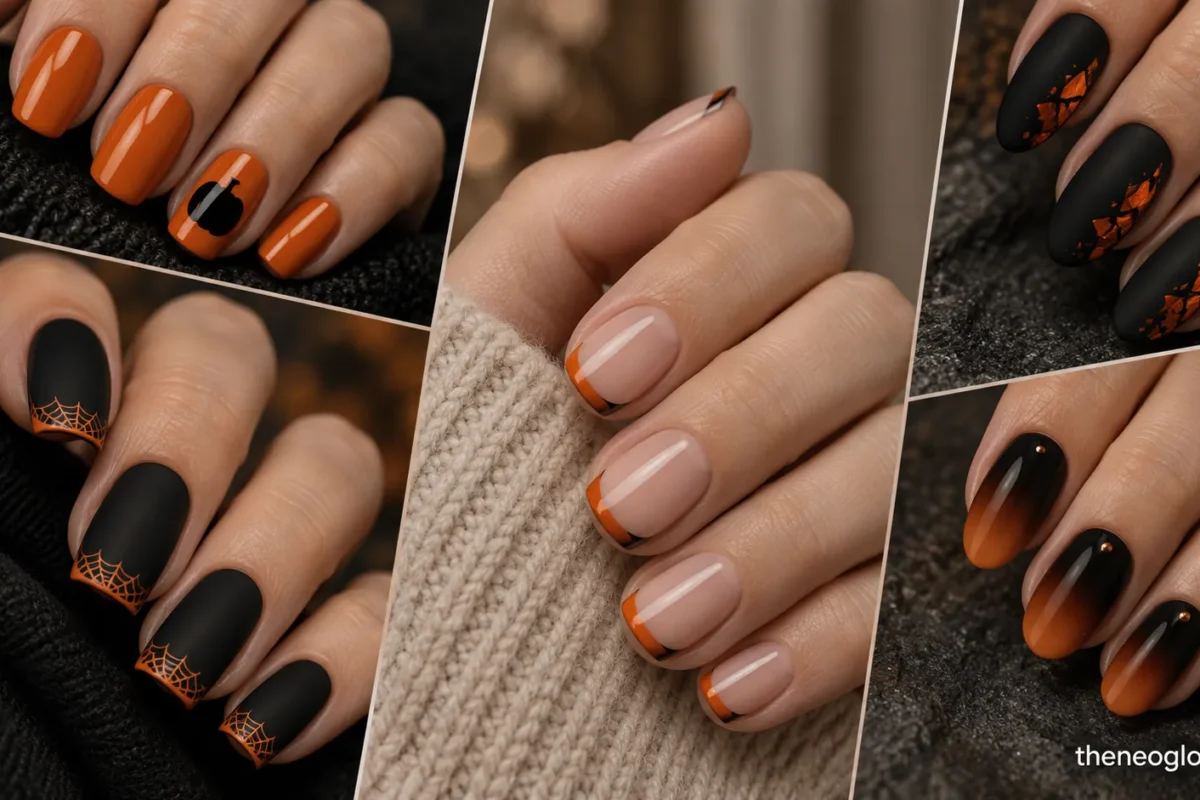
Black and orange Halloween nails can go far beyond alternating solids, cartoon pumpkins, and full-nail spiderwebs. The strongest version of this classic palette starts with one decision: how intense do you want the contrast to feel? Bright tangerine with glossy black reads playful, burnt orange with matte black feels graphic, and restrained orange linework over sheer or dark bases can look surprisingly polished.
This guide gives you 19 directions organized by intensity and finish. If you are still exploring other colors and motifs, the Halloween Nails 2026 guide covers the broader seasonal landscape.
Choose Your Black-and-Orange Intensity First
Use the palette as the structure of the manicure, not just as two colors added to every nail.
| Intensity | Orange direction | Black direction | Best finish focus | Motif density |
|---|---|---|---|---|
| Classic playful | Tangerine, pumpkin, clear orange jelly | Glossy true black | Glossy or pumpkin-led | One recognizable motif or bold color placement |
| Dark graphic | Burnt orange, ember, red-orange | Matte or reflective black | Matte or chrome | Hard edges, negative space, controlled web or shard detail |
| Subtly classy | Terracotta, rust, muted pumpkin | Sheer black, onyx, black cherry | French-led or dark glam | Fine lines, one accent, or finish-first detail |
Orange depth changes the mood as much as the artwork: tangerine reads brighter, pumpkin orange feels unmistakably seasonal, and rust or terracotta softens the contrast. On very short nails, choose placement first and preserve open space.
For any home manicure, follow the directions and warnings on your exact nail products and use them with good ventilation. The FDA’s nail-product safety guidance explains why labels, warnings, and ventilation matter.
Classic Playful Black and Orange Nails
These ideas make the Halloween palette obvious without turning every nail into a different character.
Glossy Finishes
1. Tangerine Jelly With Black Side Arcs
Start with translucent tangerine jelly and trace a slim glossy-black arc down one side of each nail. Keep the opposite side fully orange so the set still looks bright rather than heavily outlined.
For more contrast, deepen the orange toward pumpkin; for a softer version, keep the jelly translucent and limit black to a few nails.
2. Glossy Diagonal Black-and-Orange Splits
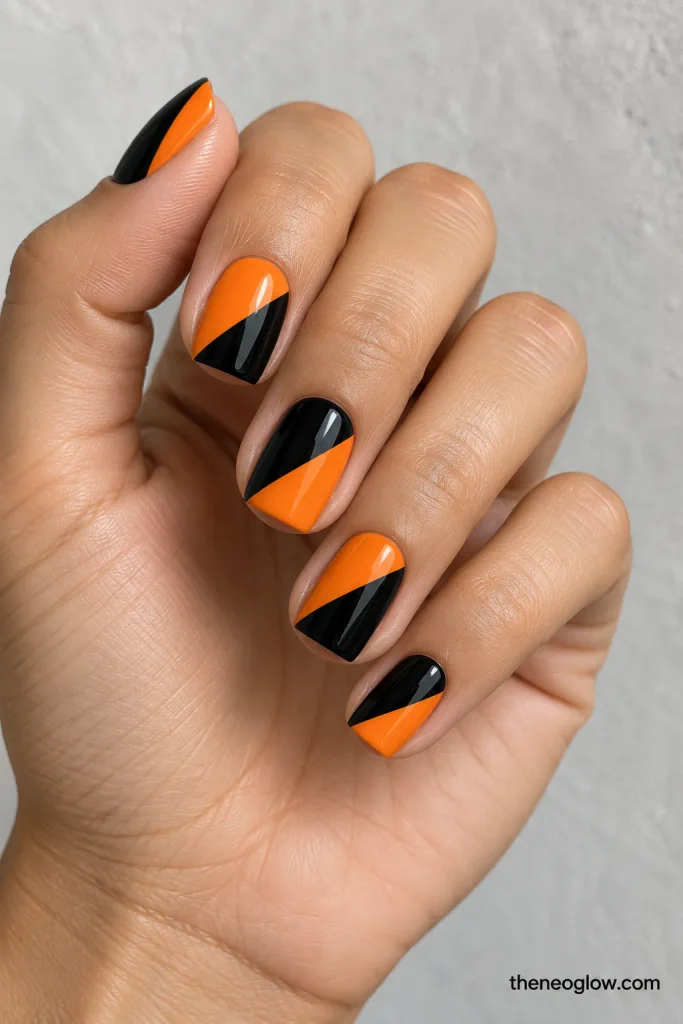
Divide each nail diagonally into black and orange, then reverse the direction from finger to finger. The changing angle adds movement without adding another motif.
Keep both halves equally glossy for a clean color-blocked finish, or let orange occupy slightly more space for a brighter result.
3. Orange Drip Edges Over Black
Instead of red “blood” drips, use saturated orange along the free edge of a glossy black base. Make the drips shallow and irregular so they look like melted Halloween color rather than long stripes.
Use the drip on a few accents and leave the remaining nails solid black when you want less visual activity.
4. Black Nails With Orange Flame Ribbons
Paint glossy black nails with narrow orange curves that sweep upward like stylized flame ribbons. Avoid yellow centers, glitter, or extra symbols; the orange line should be the only moving element.
Long almonds create a dramatic sweep; short nails can use one cropped ribbon entering from the side. No pumpkins or faces are needed.
Pumpkin-Led Finishes
5. Pumpkin-Orange Cuticle Arches With Black Stem Marks
Use pumpkin orange in shallow arches just above the cuticle, then add one tiny black stem mark to selected nails. The arches hint at pumpkin shapes without turning each nail into a full illustration.
Leave the rest sheer or black. Keeping the stem tiny preserves the palette-led look without expanding into a full pumpkin-nails gallery.
6. Glossy Orange With One Black Pumpkin Silhouette
Choose a rich glossy orange across the set and reserve one accent per hand for a flat black pumpkin silhouette. Skip the carved face, vines, leaves, and lettering.
The single silhouette gives a clear Halloween cue while keeping orange dominant. Rounded nails feel playful; almond makes the shape more graphic.
7. Candy-Corn Border With Black Solids
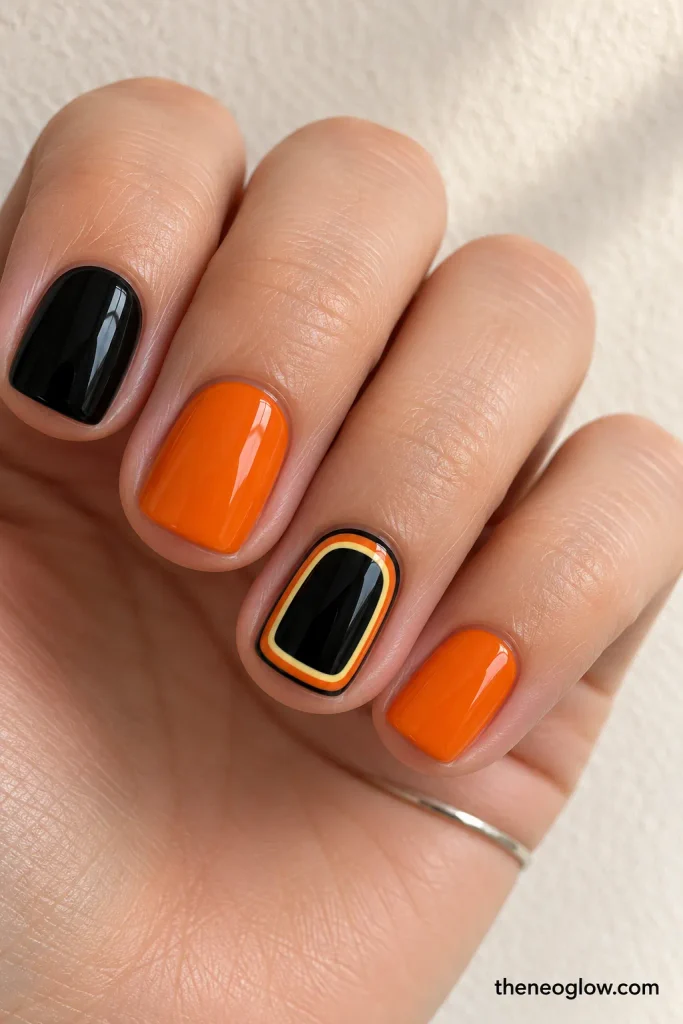
Use candy-corn color as a narrow border rather than a full striped nail. Keep orange as the largest band, add only a slim cream and yellow edge, then frame the accent with black. Paint the remaining nails glossy black and orange.
This keeps candy-corn nails recognizable without allowing white and yellow to take over the palette.
Dark Graphic Black and Orange Nails
For stronger contrast, let matte texture, sharp placement, or reflective metal do the work instead of adding more motifs.
Matte Finishes
8. Matte Black With Burnt-Orange Contour Lines
Coat the nails in matte black, then trace one fine burnt-orange line near a sidewall or around part of the free edge. Do not fully outline every nail; interrupted contour lines look more modern and leave breathing room.
For matte black Halloween nails with visible seasonal color, choose rust for softer contrast or red-orange for a sharper line.
9. Matte Orange With Black Blade Tips
Start with matte burnt orange and add angled black tips that slice across the free edge rather than following a traditional French curve. Alternate the angle on neighboring nails for a controlled graphic rhythm.
Square shapes emphasize the geometry; short squovals can use a shallower diagonal. Keep the surface motif-free.
10. Orange Web-Cage Tips on Matte Black
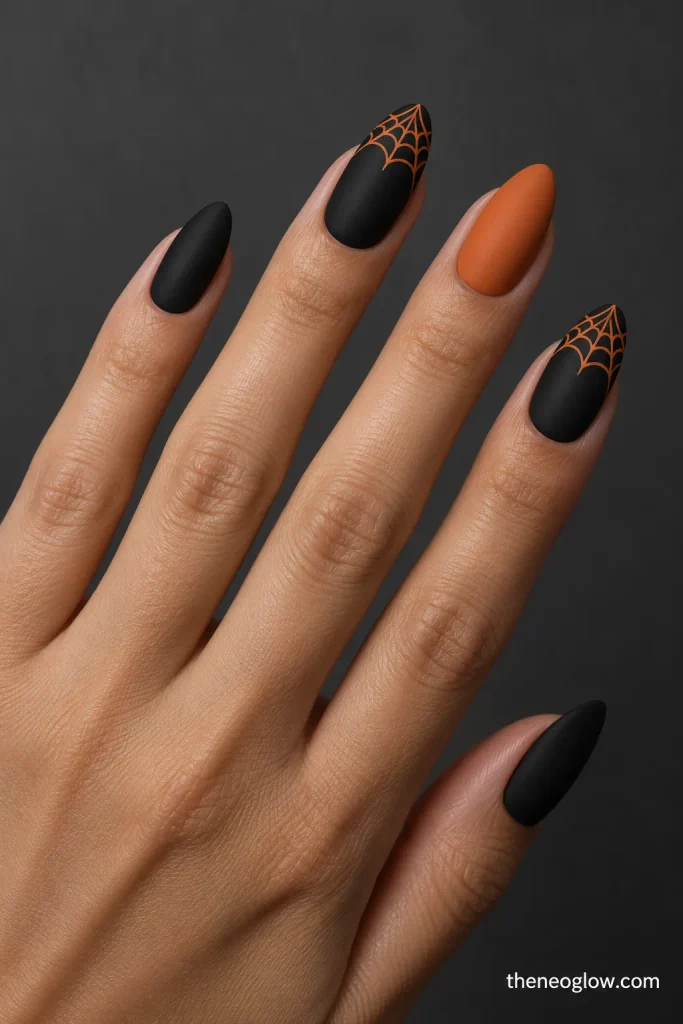
For orange spider-web nails that do not repeat a classic corner web, place the web only across the free edge of a matte black nail. Use a few thin orange spokes with small connecting curves, stopping well before the center.
Limit the web-cage effect to a few accents and keep the rest solid matte black or burnt orange. For step-by-step methods, the easy Halloween nails guide owns the DIY route.
Chrome Finishes
11. Ember-Orange Chrome Panels Framed in Black
Place reflective ember-orange through the center of the nail and frame it with slim black side borders. The metallic panel becomes the light-catching focal point while black controls the shape.
Keep the chrome warm—copper-orange or fiery orange—rather than letting it drift into mostly gold.
12. Black Chrome With Orange Crescent Cutouts
Use reflective black as the main finish and interrupt it with one or two clean orange crescent shapes near the sidewall. The orange should look like exposed color beneath the dark surface, not a separate celestial scene.
Repeat the same crescent direction and skip stars or silver so black and orange remain the entire story.
13. Orange Chrome Shards Over Matte Black
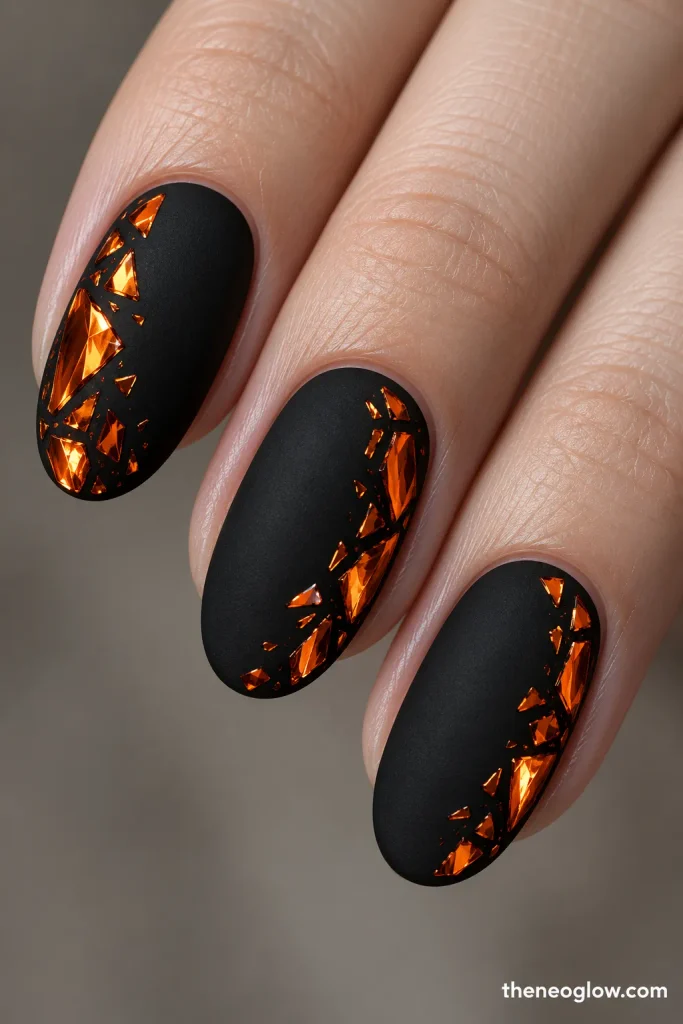
Scatter a few angular orange-chrome fragments over matte black, leaving wide areas of the base untouched. Concentrate the pieces near one edge instead of covering the whole nail.
The matte-and-reflective contrast needs no rhinestones. If your version uses gel, follow the exact gel and lamp instructions; the American Academy of Dermatology’s gel-manicure guidance adds advice on UV exposure, salon hygiene, and removal.
Subtly Classy Black and Orange Nails
Here the palette stays unmistakably Halloween, but the orange becomes narrower, deeper, or more controlled.
French-Led Finishes
14. Orange Micro Tips With a Black Shadow Line
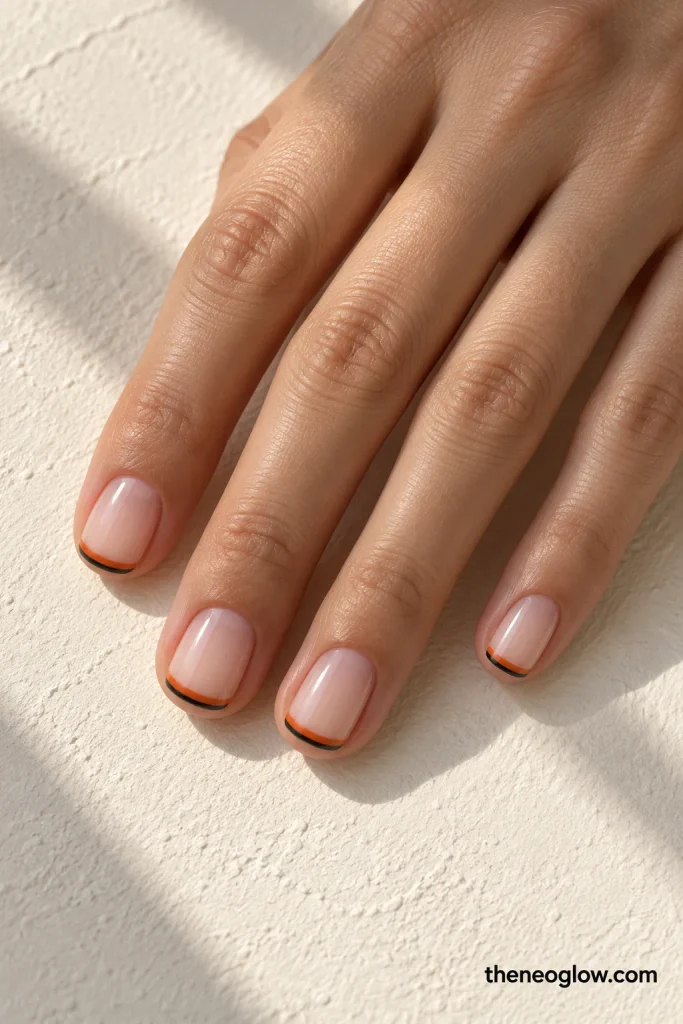
Paint a sheer neutral base, add a very slim orange French tip, then place an even thinner black line directly beneath it. Most of the nail plate should remain visible.
For softer orange French tips, choose muted pumpkin or terracotta; use tangerine for stronger contrast.
15. Black French Tips With Burnt-Orange Underlines
Reverse the color priority: use black at the free edge and trace a narrow burnt-orange underline just below it. The orange acts like a warm shadow rather than a second full tip.
Keep both lines hairline-thin on short nails; medium almonds can carry a slightly deeper black tip.
16. Side French in Orange and Black
Move the French structure away from the center. Sweep orange along one outer edge and add a slim black line beside it, leaving the opposite side sheer.
This asymmetric black-and-orange French manicure keeps the color in one controlled zone without turning this palette guide into a full technique tutorial.
Dark-Glam Finishes
17. Smoked Orange Cat-Eye With Black Edges
Choose a deep orange magnetic effect that shifts between ember and copper, then frame the outer edges in black. Keep the reflective beam narrow so the manicure reads dark first and glowing second.
This is a strong party option when you want depth without painted motifs. Follow the exact system used by your salon or product.
18. Glossy Black With an Amber-Orange Foil Veil
Keep glossy black dominant and place a thin veil of amber-orange foil along one side of selected nails. The foil should look irregular and airy rather than fully metallic.
A tiny amount of muted gold can support the reflection, but orange should remain the visible accent. Skip crystals when jewelry already adds sparkle.
19. Black-to-Burnt-Orange Ombré With One Gold Pinpoint
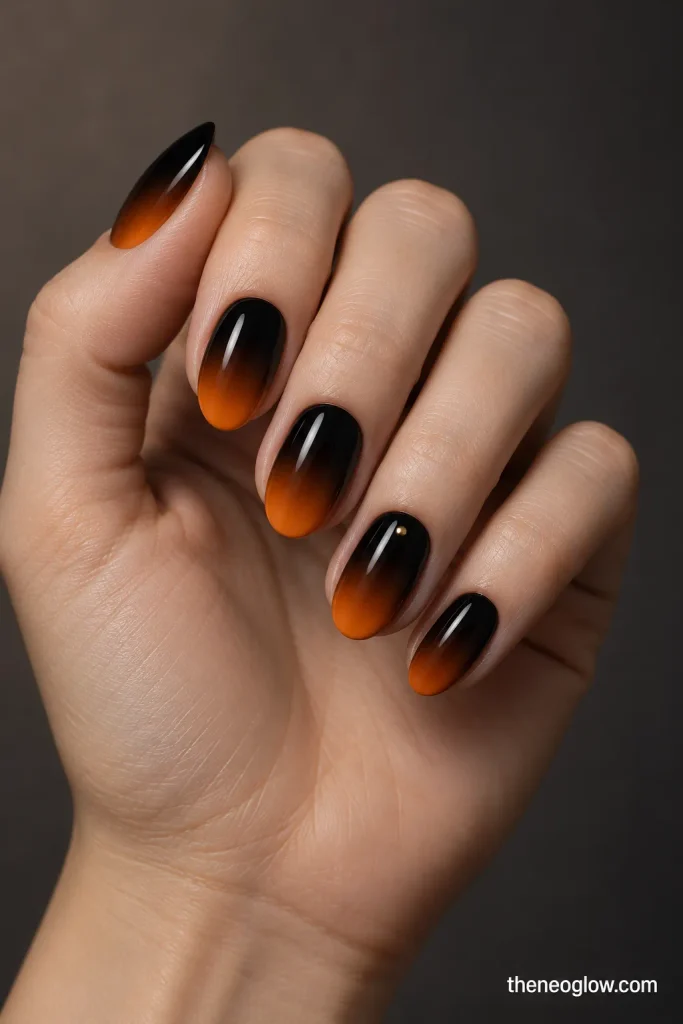
Blend black into burnt orange so the transition sits through the middle of the nail rather than forming a hard tip. Use one tiny gold pinpoint near a cuticle on each hand, and leave everything else unembellished.
The gradient supplies dark-glam mood without a literal motif. Medium oval or almond nails give the fade more room; short nails can tighten the transition.
How to Pick the Right Finish
If you want the most obvious Halloween result, start with glossy tangerine, pumpkin orange, or a single recognizable accent. For a sharper fashion look, move toward matte black, burnt orange, and angular placement. For a quieter manicure, let sheer space, micro tips, dark gradients, or one reflective detail carry the palette.
If “subtle” matters more than strict black-and-orange dominance, compare NeoGlow’s classy Halloween nails guide before choosing your final reference. It owns the broader polished route across taupe, oxblood, plum, muted orange, and neutral bases.
When you save a reference, note orange depth, black finish, nail shape, accent placement, and how many nails carry art. Those details make a request more precise than the palette name alone.
Choose One Palette Rule and Keep It Consistent
Choose one rule and repeat it: one orange depth, black finish, line style, or accent position. Playful sets can carry a motif; graphic sets rely on contrast; classy versions need less art and more control.
Save the idea that matches your real plans, then decide whether you need technique help. For basic at-home execution, use the easy Halloween nails guide. For a broader mix of spooky, cute, dark, graphic, and quick-change options, return to the Halloween Nails 2026 guide.