Halloween nails 2026 can be playful, dark, polished, or barely spooky. With October 31 approaching, the useful question is not which photo looks most dramatic: it is which design fits your nail length, weekday plans, and the time you have left to arrange it. These 27 looks cover everything from plum jelly and small seasonal motifs to metallic tips and party-ready press-ons. Each has a clear color structure and placement, so you can compare the actual manicure rather than an entire photo shoot. Start with the quick guide, then save the one idea that fits your calendar.
Find Your Halloween Look Without Overthinking It
| Your plans | Start with | What makes it work |
|---|---|---|
| Workdays before Halloween | 1–5, 17 | Shorter shapes, controlled contrast, minimal raised detail |
| Casual celebrations | 6–10, 22, 25 | Readable seasonal accents without a full themed set |
| Costume party or evening event | 11–16, 19–21 | Dark color, reflective effects, or more deliberate geometry |
| Little time to prepare | 23–27 | Repeatable finishes, decals, or printed press-ons |
A design can look different on a short square than on a medium almond. Compare both shape and artwork before committing. For sheer bases, use a pink, peach, caramel, or cocoa tint that gives the contrast you want; there is no single neutral that works for everyone.
Subtle Halloween Nails for Everyday Wear
1. Blackberry Jelly Short Squovals
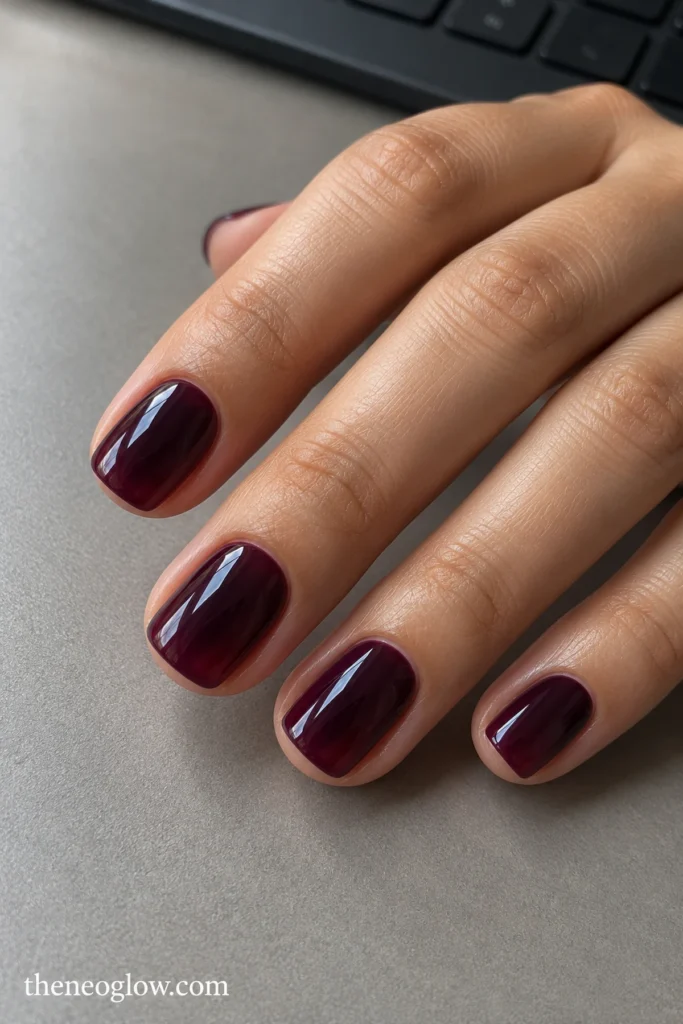
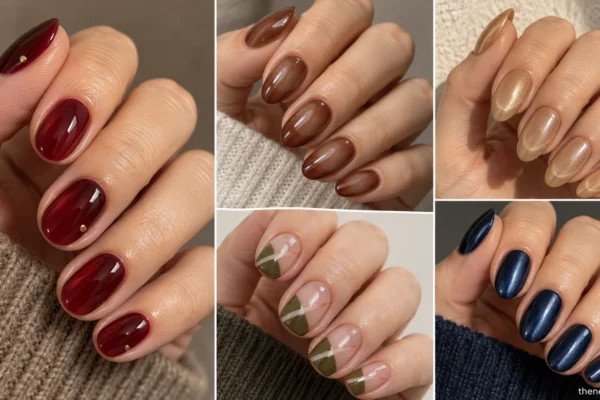
A translucent blackberry coating makes genuinely short squovals look deep plum in brighter light and almost black in shadow. Keep all ten nails smooth and free of icons. The visible jelly depth is what separates this from an opaque black manicure, and its rounded corners make the overall silhouette practical for typing.
2. Sheer Neutral Nails With Black Cuticle Pin-Dots
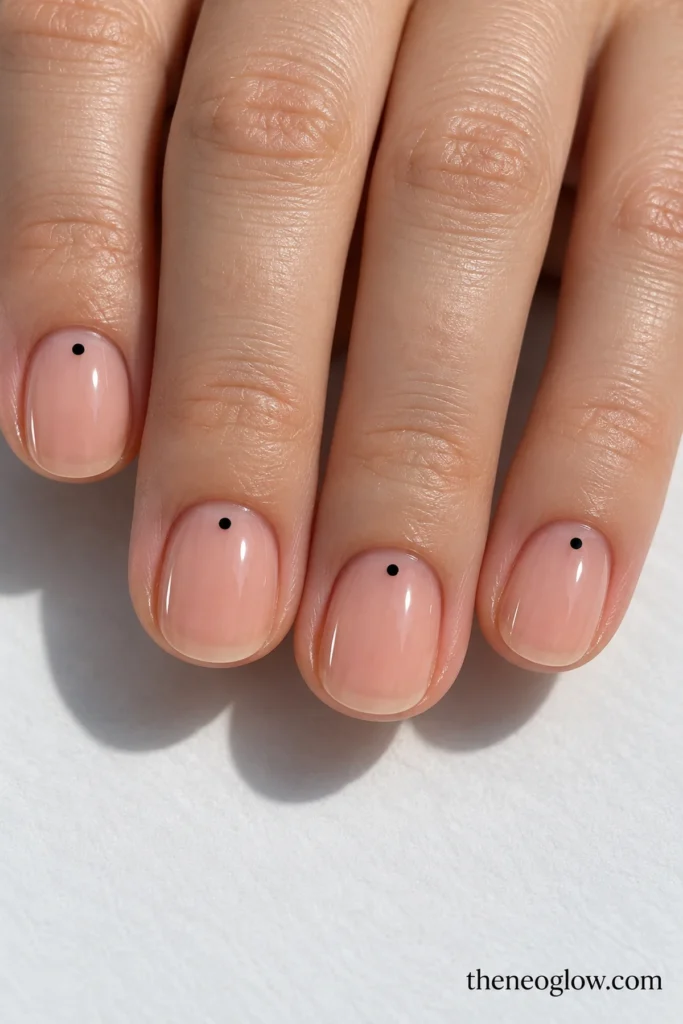
On short ovals, place one sharply defined black dot just above the cuticle on each finger. A translucent peach, rose, or cocoa base leaves generous space around the dots. Keep their diameter and distance from the cuticle consistent; scattered confetti would create a completely different effect.
3. Smoky Taupe With Silver Crescent Accents
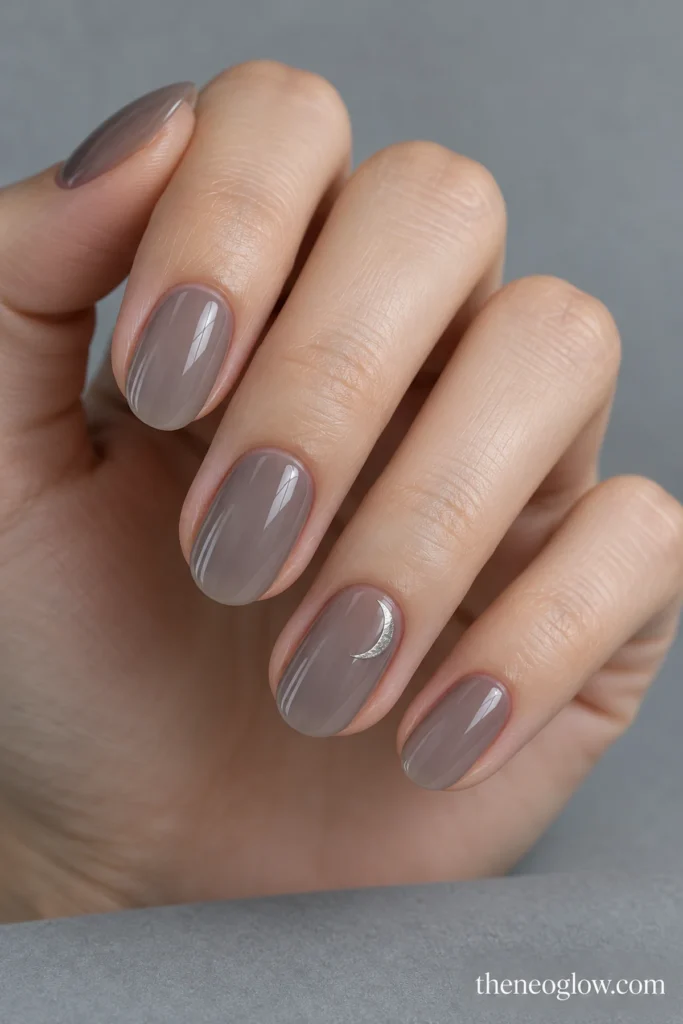
Medium-short ovals in translucent gray-taupe get one narrow metallic crescent toward the lower outer edge of each ring finger. The crescent follows the curve of the nail rather than sitting centered like a full moon. Leave the other eight nails plain and glossy for a quiet nighttime reference.
4. Espresso Nails With Tortoiseshell Accent Pairs
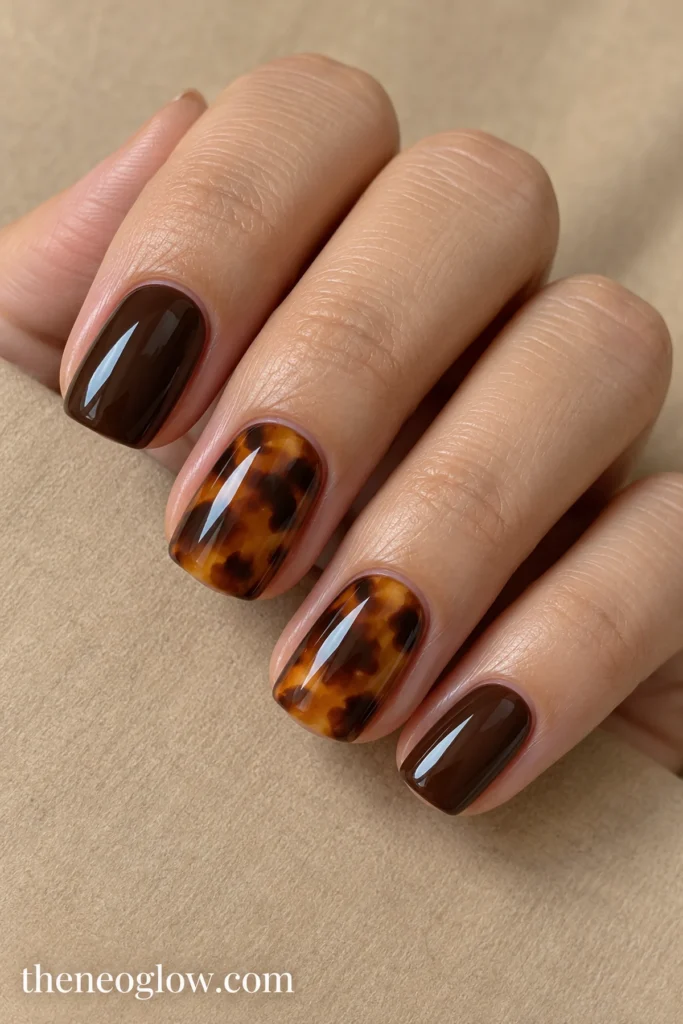
Eight short rounded nails carry glossy espresso cream. Two accent nails have translucent amber sections layered with irregular cocoa and dark-brown patches to create a tortoiseshell effect. The warm patterned accents distinguish this manicure from the cooler plum and charcoal options nearby.
5. Burgundy Nails With Cropped Cobweb Corners
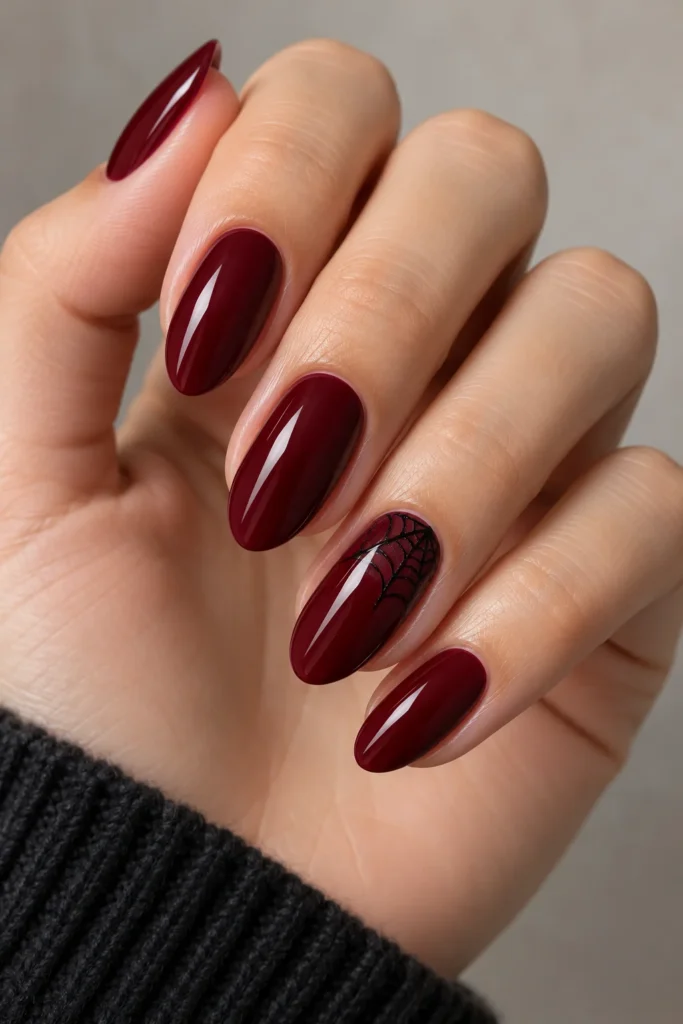
Use opaque muted burgundy on soft-square nails, then let a thin black web enter from the upper outside corner of only the ring fingers. Keep the spokes and connecting curves confined to one edge, with most of the wine-colored surface uninterrupted. It has a clearer Halloween signal than ideas 1–4 but stays relatively restrained.
Cute Halloween Accents With Real Personality
6. Blush Ghosts Peeking Over Two Nail Tips
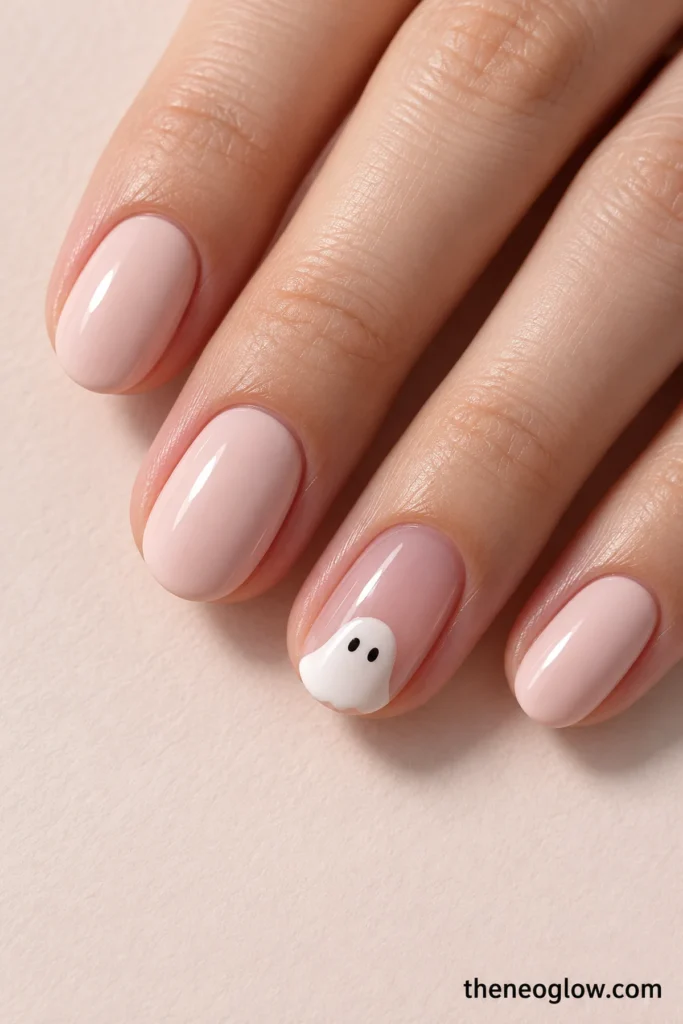
Paint medium-short ovals in pale blush cream, reserving two translucent accent nails. On each accent, a small opaque-white ghost rises from the free edge, with only its upper body and black dot eyes showing. Keep the other nails plain. For more ghost-first layouts, NeoGlow’s cute ghost nails gallery explores that motif in greater depth.
7. Cream-and-Sage Mini Pumpkin Garden
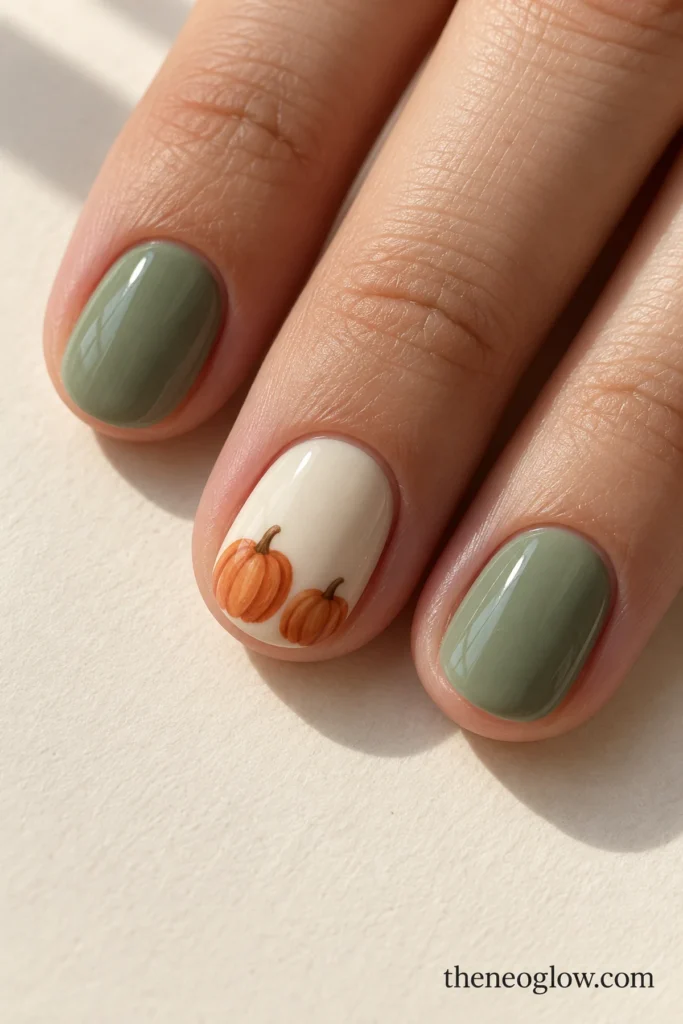
Alternate creamy ivory and muted sage across short ovals. On two ivory accents, place a pair of tiny terracotta pumpkins toward the tip, with distinct curved lobes and fine brown stems. Leave the sage nails solid. The garden arrangement feels playful without putting a jack-o’-lantern face on every finger.
8. Candy-Corn Triangles on Orange Jelly
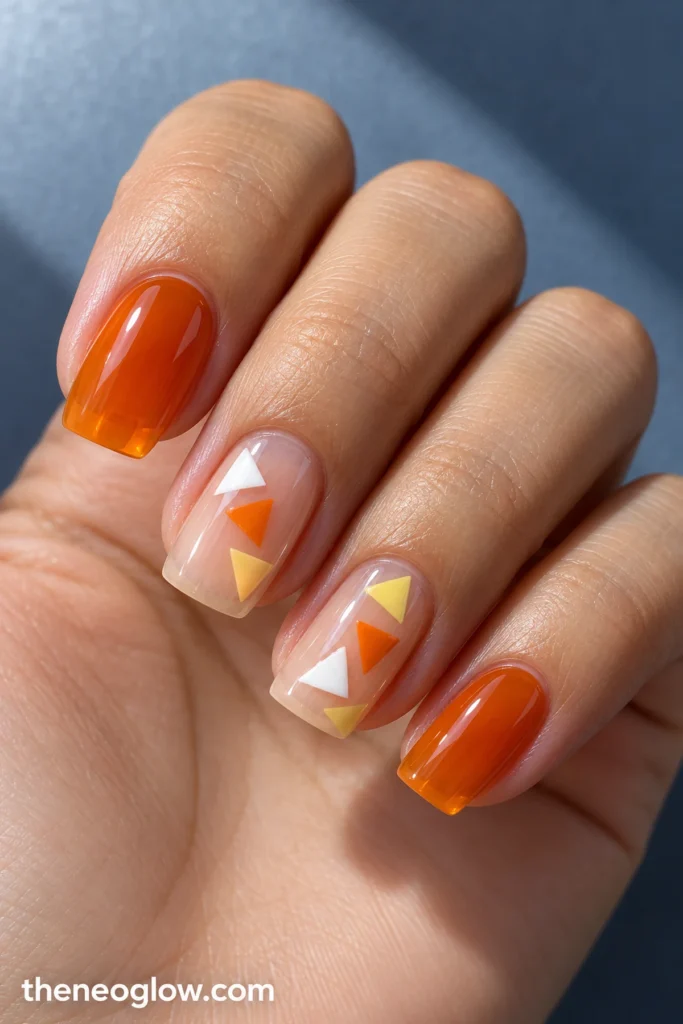
Two clear accent nails carry a loose diagonal trail of tiny white, pumpkin-orange, and butter-yellow triangles; the remaining medium squovals are translucent orange jelly. The separate shapes look like scattered paper confetti, not horizontal candy-corn stripes. If you want orange and black to be the main event instead, see the black-and-orange Halloween nails guide.
9. Lavender Nails With Single Eyeball Accents
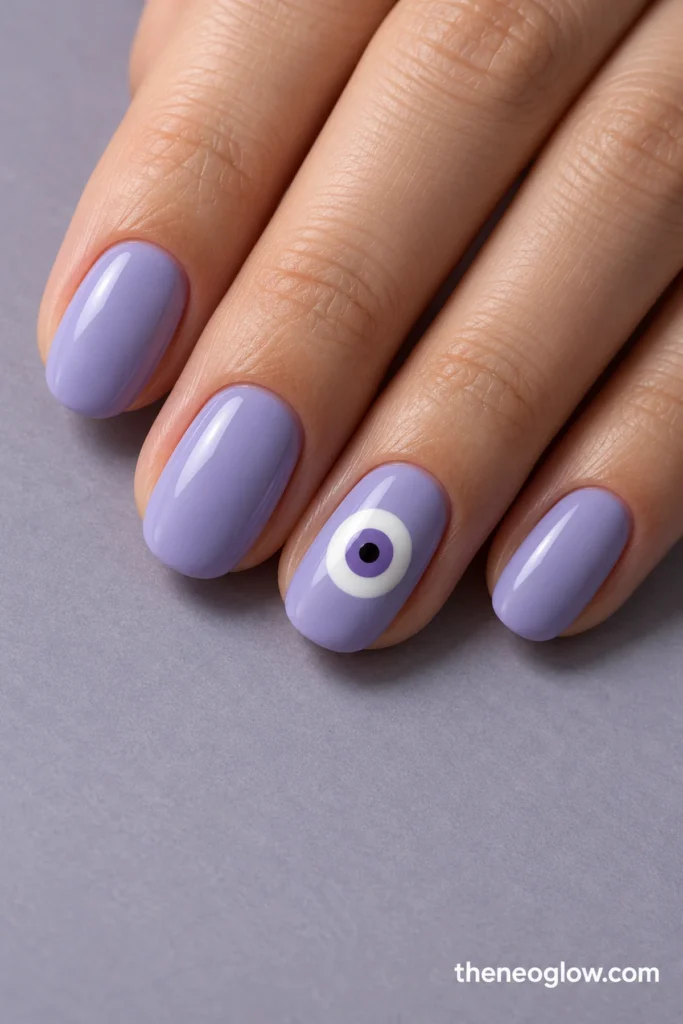
Coat medium rounded nails in cool lavender, then reserve one nail per hand for a glossy white circle with a violet iris and a crisp black pupil. Surround the eye with open lavender space, not extra veins or horror effects. The circle is an intentional focal point rather than a repeated dot pattern.
10. Sage-and-Lilac Patchwork With Fine Stitches
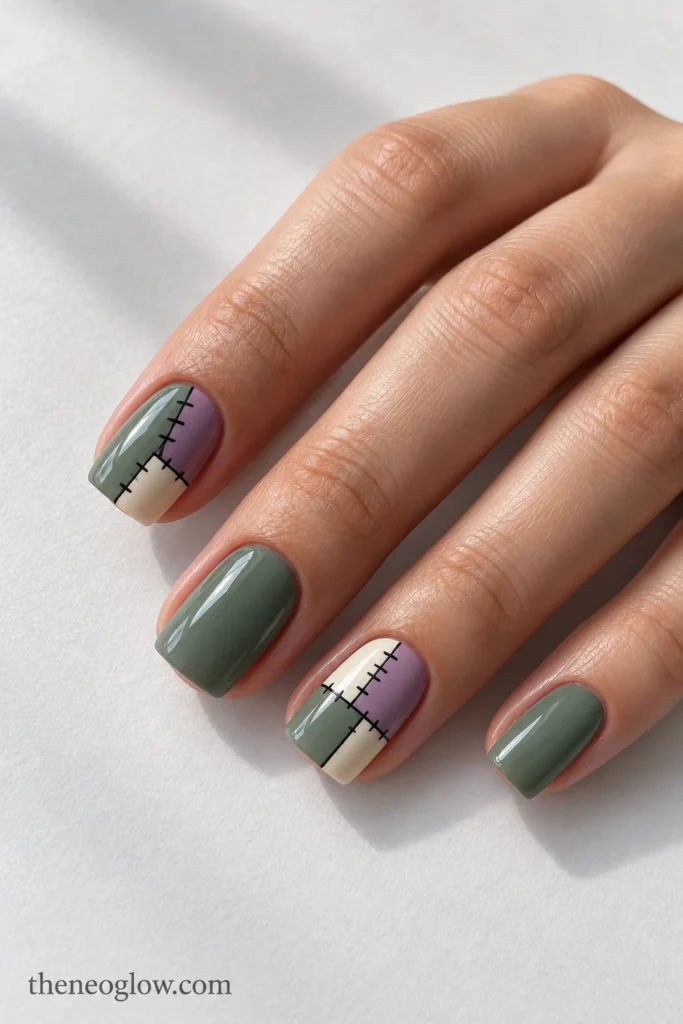
Two medium square accents combine flat blocks of sage, dusty lilac, and cream, divided by fine black stitch marks. Paint the other nails solid sage. Straight color boundaries and a few short cross-stitches deliver the patchwork effect without imitating a specific movie character.
Darker Looks for Parties and Night Plans
11. Oxblood Velvet Cat-Eye Ovals
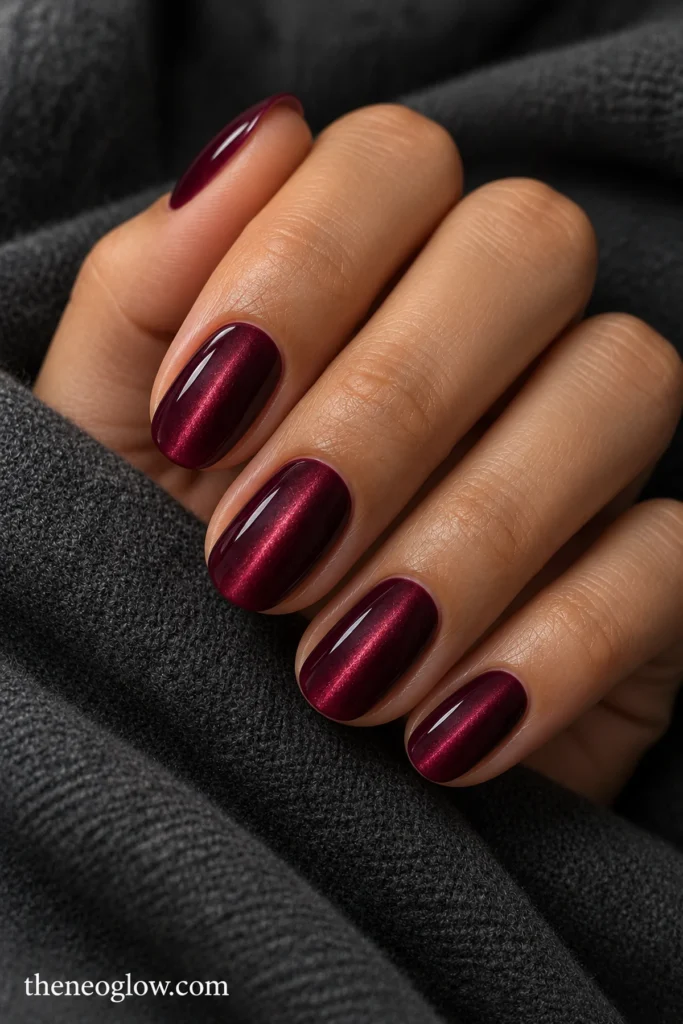
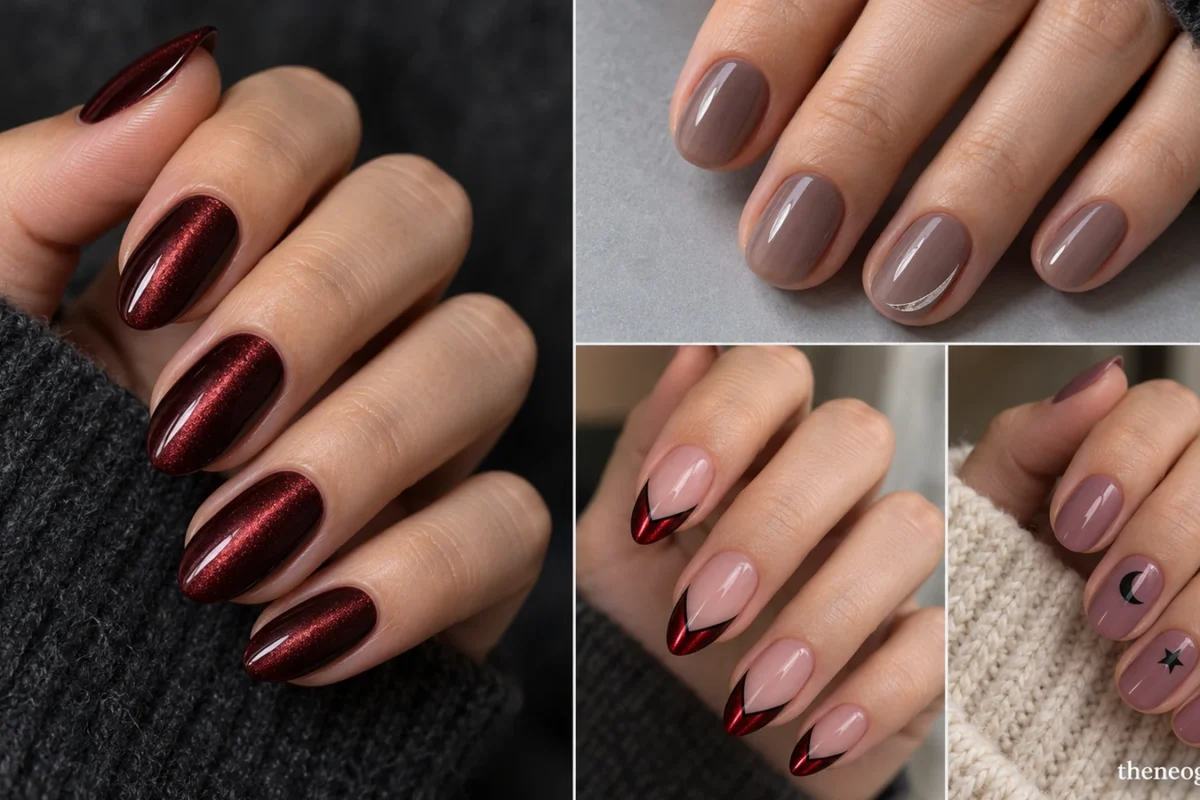
A deep wine-red magnetic finish sends a narrow reflective beam down each medium oval nail. No painted symbols are needed: the contrast comes from burgundy edges and the shifting luminous center. Keep the direction of the beam consistent so the set looks deliberate under evening lighting.
12. Black Lace Along One Side of a Sheer Nail
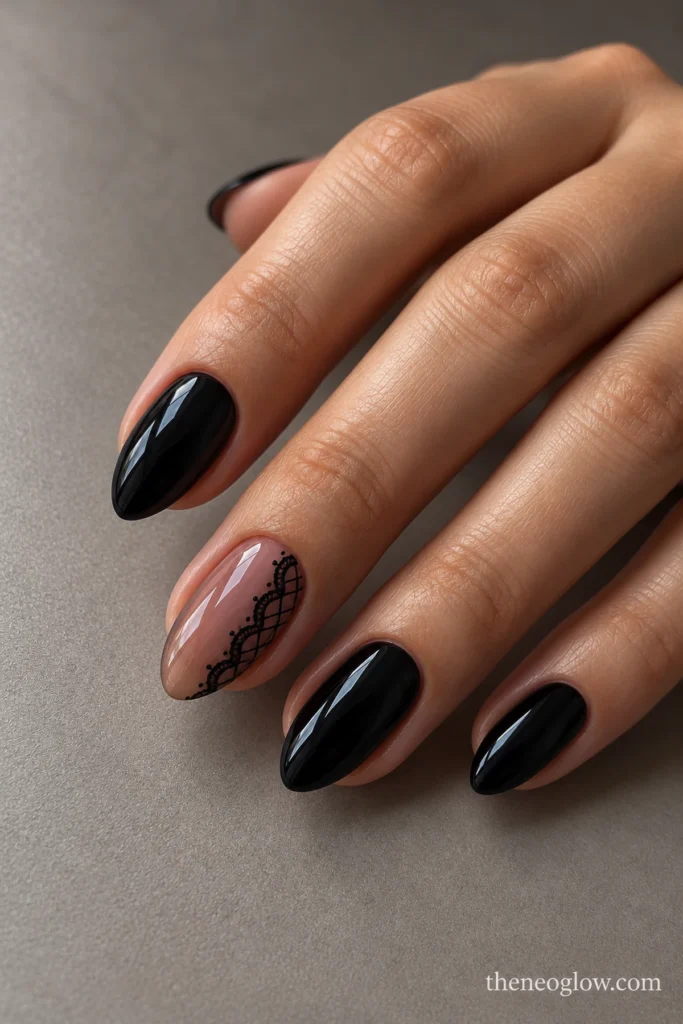
On medium almonds, place delicate flat black scallops and fine lattice on the outer third of two transparent neutral accents. Paint the remaining nails black cream. The asymmetry gives lace enough room to read, while the unpainted center keeps it distinct from a full black nail.
13. Wine-Red Aura With Translucent Black Tips
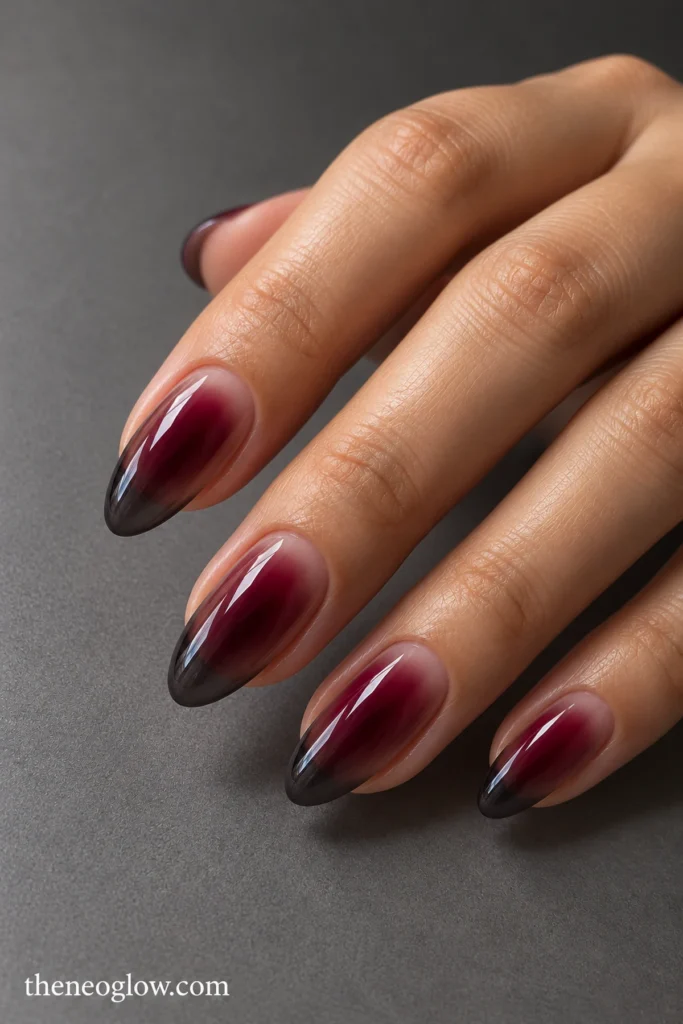
Let a soft garnet-red glow spread through the center of each medium almond, fading into a clear base before it meets smoky black jelly at the free edge. The red is blended, not painted as drops. This dramatic option is about color depth rather than a vampire or blood-drip illustration.
14. Gunmetal Foil Fragments Under Gray Jelly
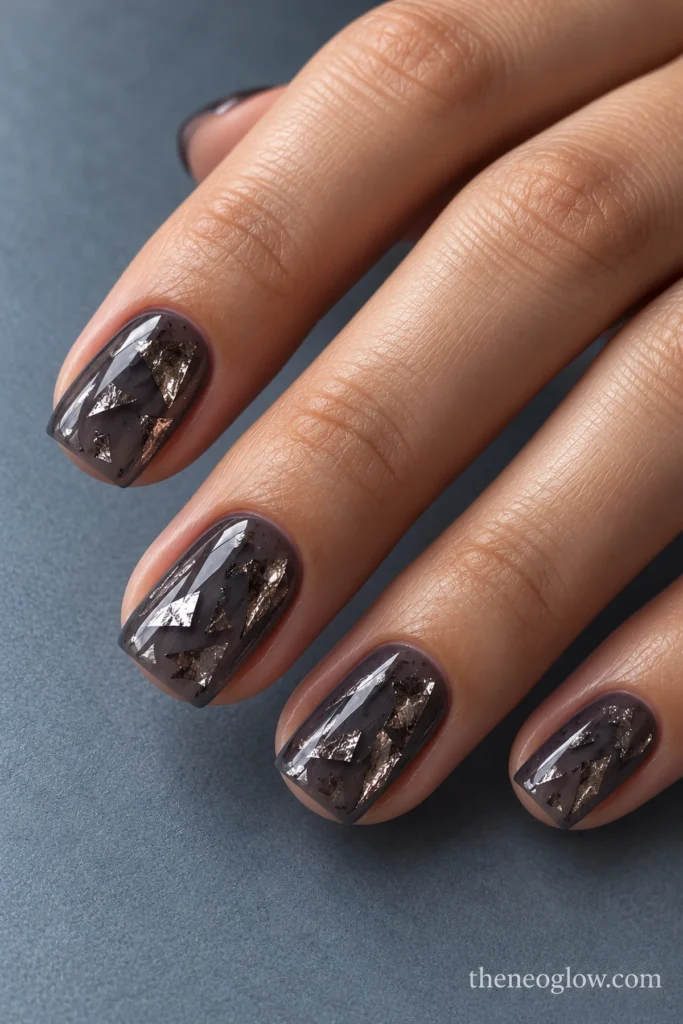
Embed scattered flat gunmetal foil shards beneath a transparent smoky-gray finish on medium square nails. Leave noticeable gaps between the fragments, and vary their irregular shapes. The surface should be smooth, with fractured reflections rather than bulky stones or mirror-chrome coverage.
15. Plum-to-Black Ombré With Cuticle Crystals
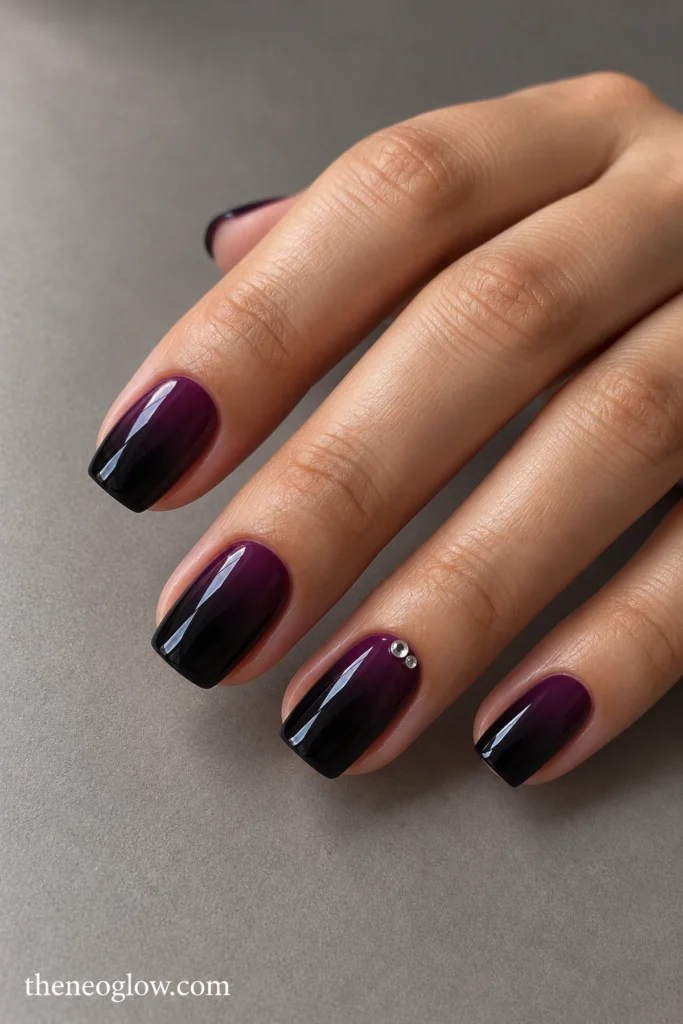
Fade rich plum at the cuticle into opaque black at the tips of medium tapered squares. Add one or two tiny silver crystals at the base of each ring finger, not a full rhinestone border. This is a more decorated evening option, especially if you are comfortable with small raised details.
16. Sculpted Black Rose Accent on Coffin Nails
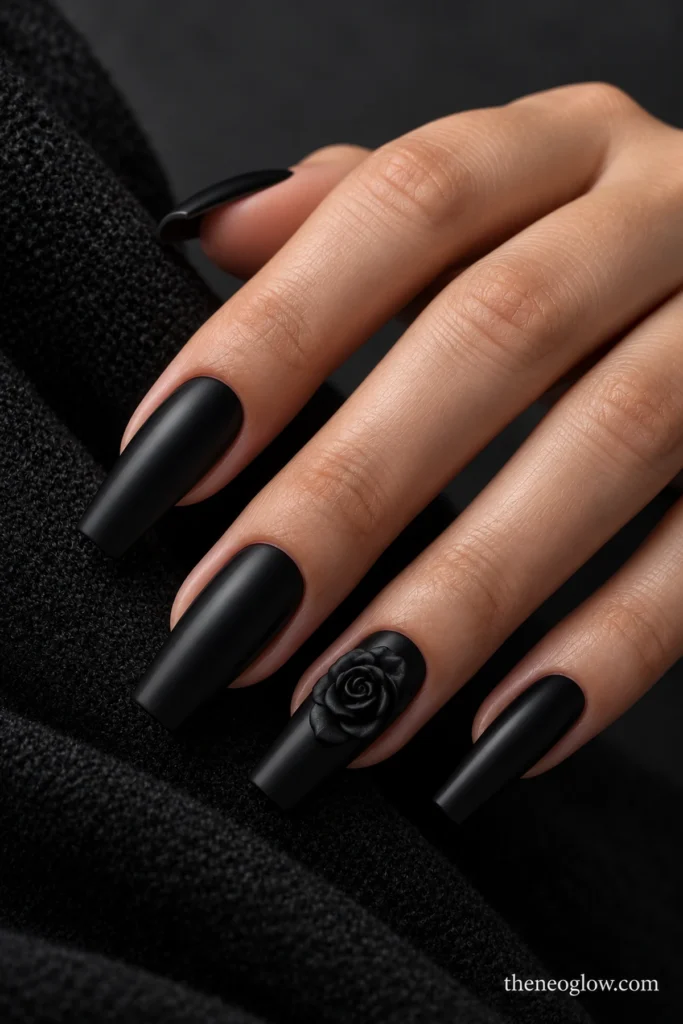
Keep long coffin nails satin black and make one ring finger a low-profile, tone-on-tone black rose with layered petals near its center. The other nails remain undecorated. This is the sculptural statement in the collection; ask about the finished height if you regularly wear gloves or handle delicate fabrics.
Graphic Edges and Reflective Details
17. Black Micro Tips With a Single Silver Star
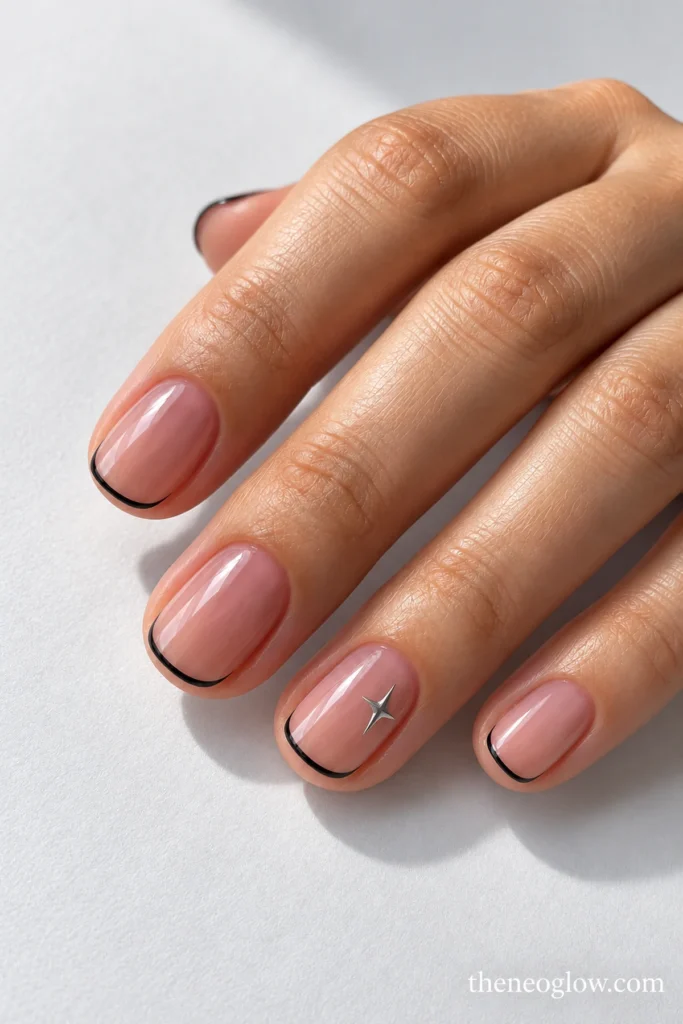
Give short ovals a sheer neutral base and hairline black tips. Add one flat silver four-point star off-center on a single accent nail. Most of the nail plate stays visible, so the look emphasizes a crisp border instead of multiple miniature Halloween characters.
18. Copper-Chrome Arcs Above the Cuticles
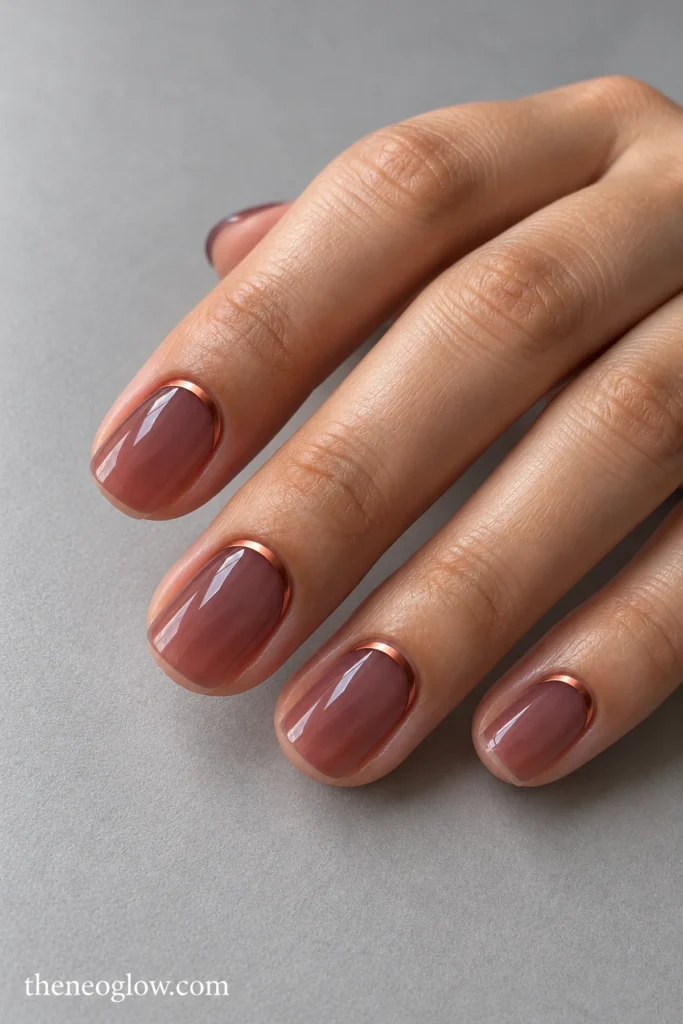
Paint slim copper-chrome curves just above the cuticle on medium rounded-square nails with a transparent pink-brown base. The curves stop short of both sidewalls and do not continue to the tips. Warm metallic reflection creates a distinctly different composition from a traditional French manicure.
19. Red Chrome V-Tips With Black Outlines
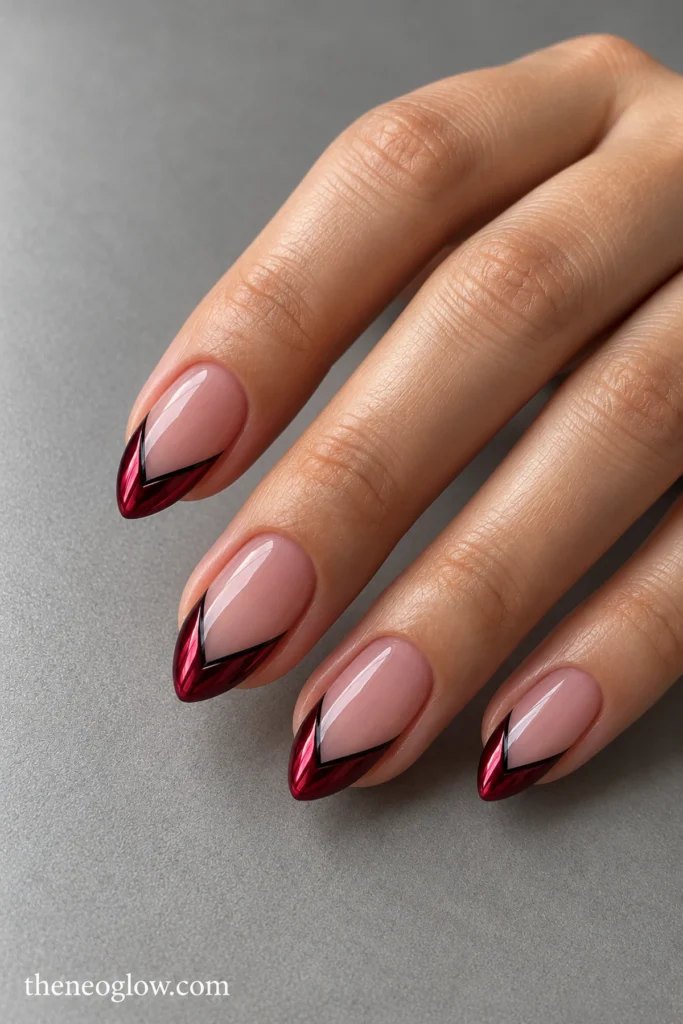
On medium almonds, shape reflective blood-red polish into shallow V-shaped tips, then trace each V with one thin black outline. Keep the rest of the nail translucent. Crisp symmetry and a mirrored red edge distinguish the design from blended aura nails or actual painted drips.
20. Smoky Gradient Tips With One Matte Nail
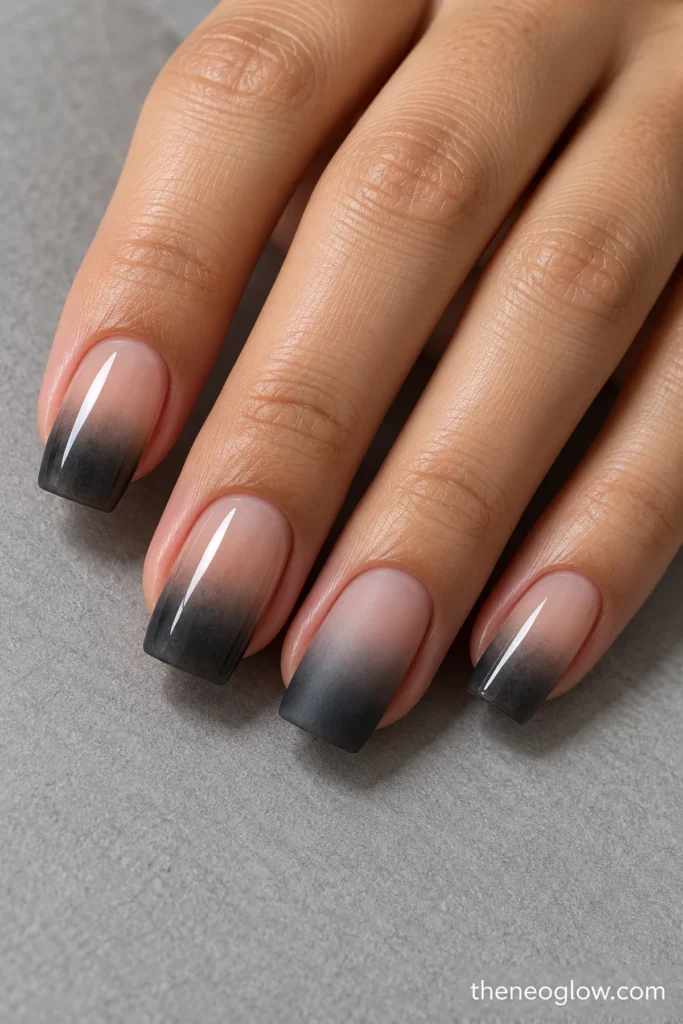
Blend charcoal from the tips of medium soft-square nails into clear centers, leaving the cuticles transparent. Seal most nails glossy and finish one accent matte. The fade stays the same across the hand; the single texture change creates the surprise without adding another motif.
21. Off-Center Gunmetal Eclipse Tips
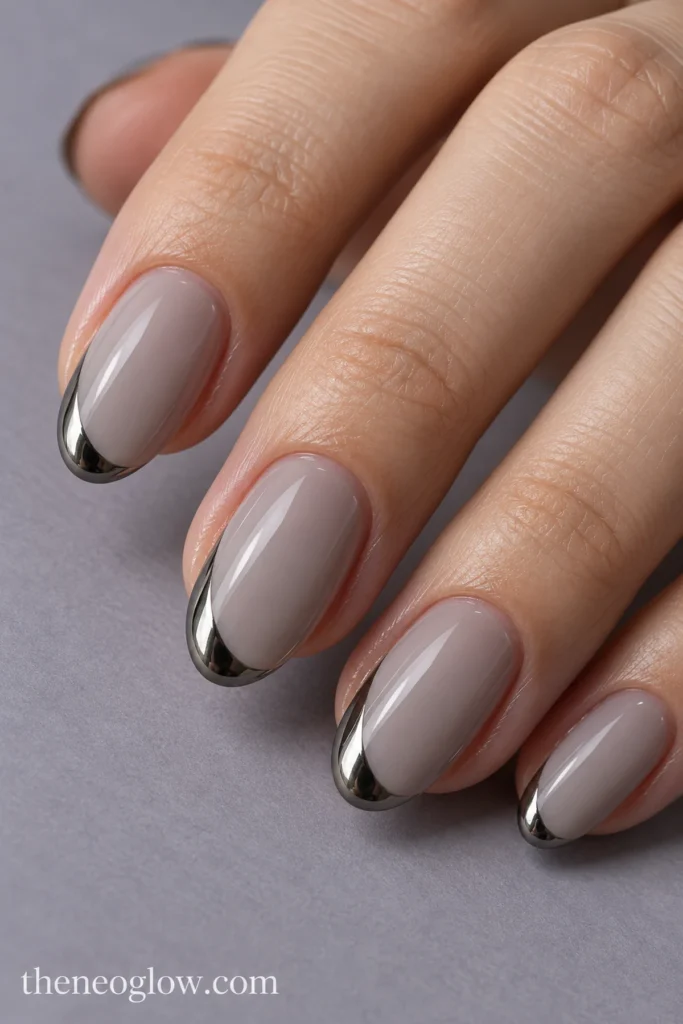
Over milky gray-taupe medium ovals, curve dark gunmetal chrome around just one side of each free edge. The reflective arc should cover no more than one side of the tip, leaving an intentionally open opposite edge. Reverse the direction on the other hand for balanced asymmetry.
Short, DIY, and Last-Minute Options
22. Pumpkin-Orange Dot Trails on Short Rounds
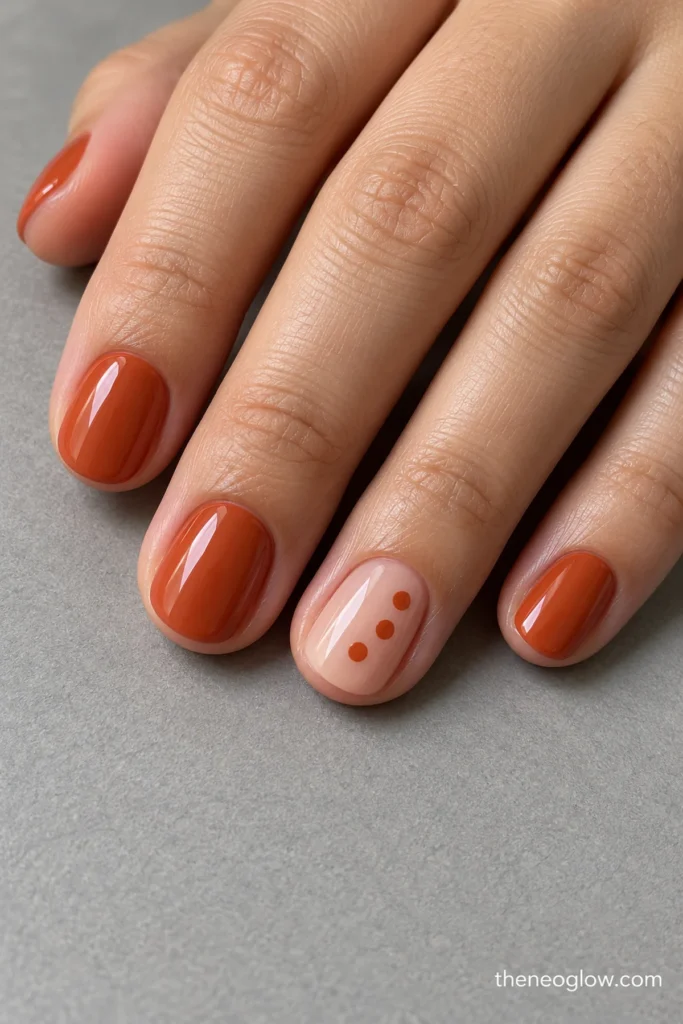
Arrange three small burnt-orange dots in a rising diagonal on each accent nail over a translucent warm base. The other short rounds carry soft terracotta cream. Unlike a painted pumpkin face, the trail is an abstract nod to the color, and it remains legible on a limited nail plate. For more designs built specifically around very short nails, browse short Halloween nails for work, school, and parties.
23. Matte Black With Clear Gloss Polka Dots
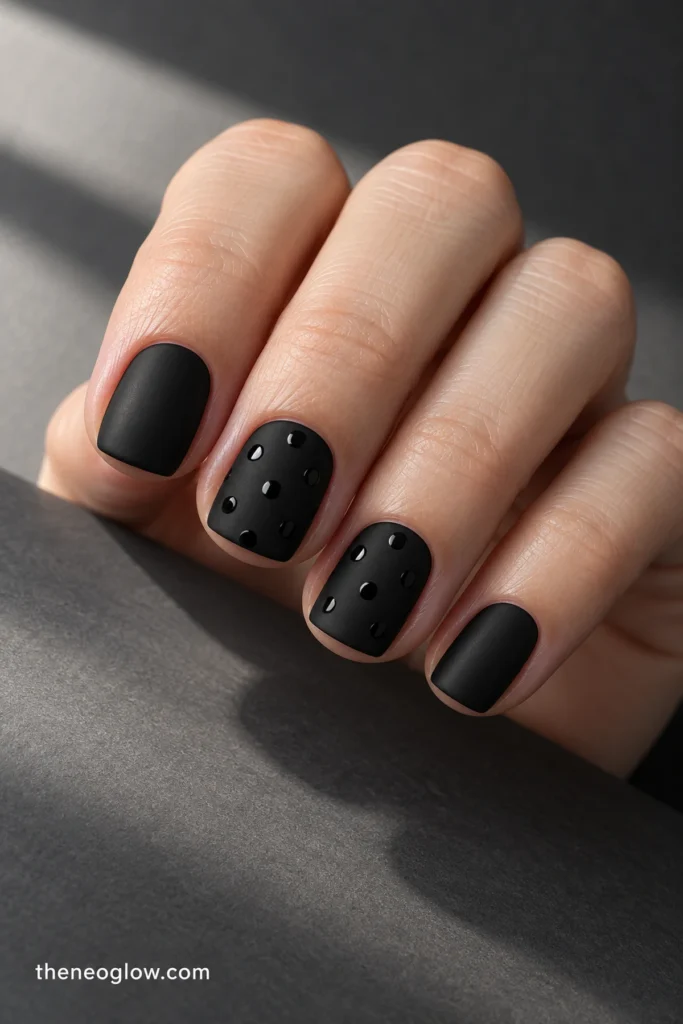
Short soft-square nails get opaque black topped with a matte finish. Add evenly spaced dots of clear gloss across two or three nails, with the others remaining matte. The pattern appears when it catches the light; it needs no orange accent or white outline.
24. Charcoal Dry-Brush Smoke on Clear Nails
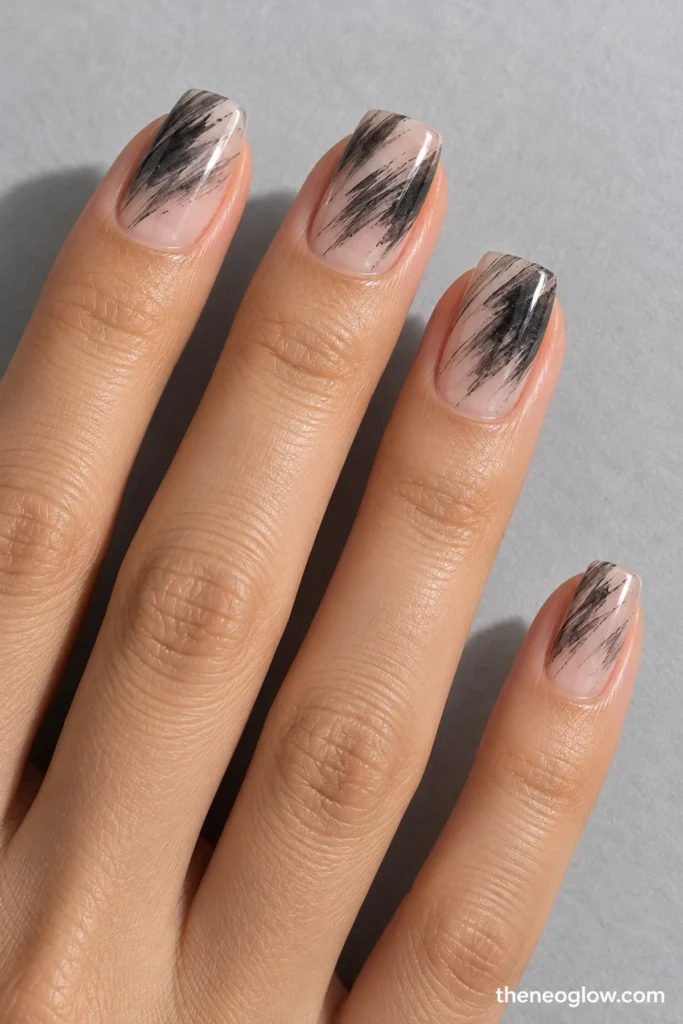
Sweep broken charcoal-gray brush marks diagonally across short ovals with a clear or translucent base, then place a little deeper black near just one side. The gaps between the strokes are part of the design. Test the brush on a spare tip first so the smoky texture does not become a full gray coat.
25. Dusty Mauve With Moon-and-Star Decals
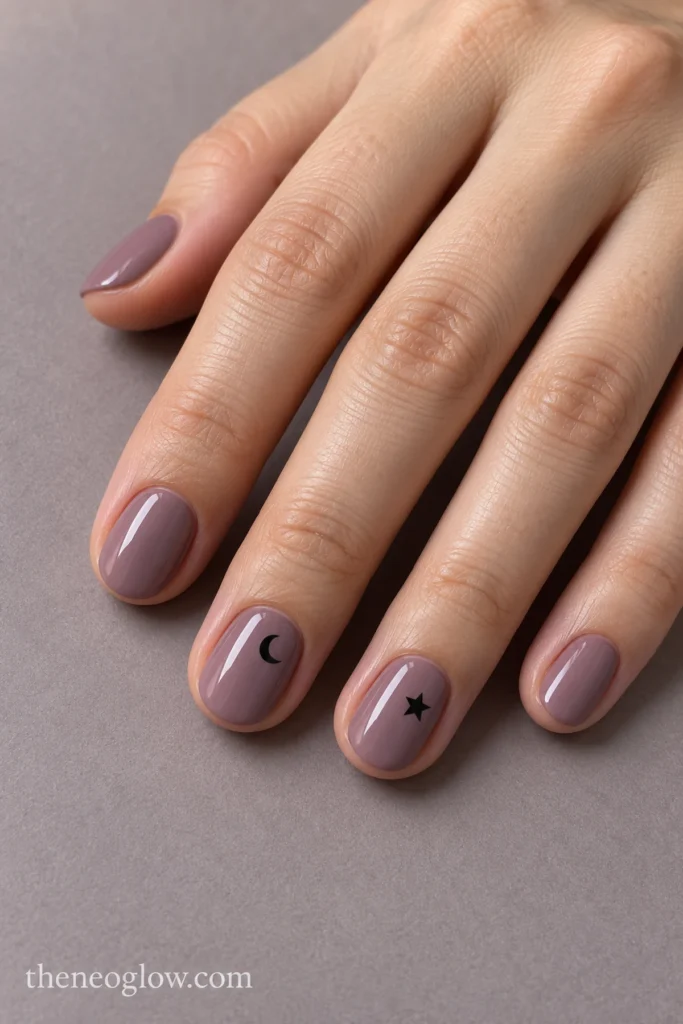
Cover short ovals in opaque dusty mauve and place a tiny flat black crescent on one nail and a single black star on its neighbor. Repeat the same alternating sequence on the other hand. Ready-made decals make the lines more predictable; NeoGlow’s easy Halloween nail ideas go deeper into beginner tools and shortcuts.
26. Smoky-Glass Short Oval Press-Ons
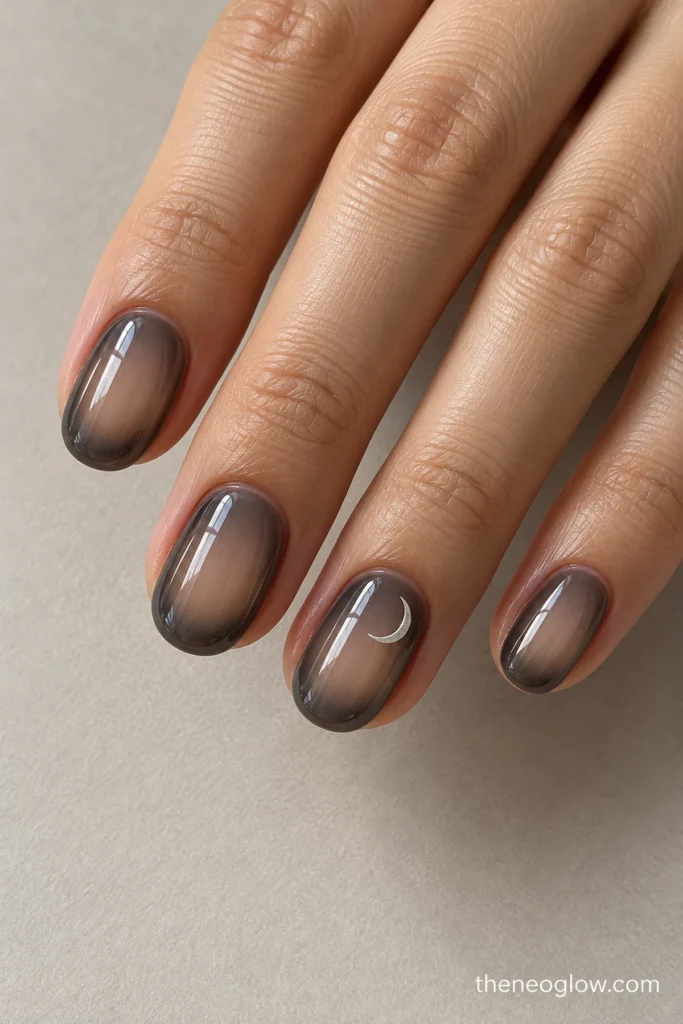
Choose short oval tips with translucent charcoal edges, clear centers, and one slim silver crescent on each ring finger. Dry-fit every tip before using adhesive; a good fit covers the natural nail sidewall to sidewall without pinching or overlapping skin. This offers a printed design without asking for a longer nail shape.
27. Black-and-Cream Harlequin Press-Ons
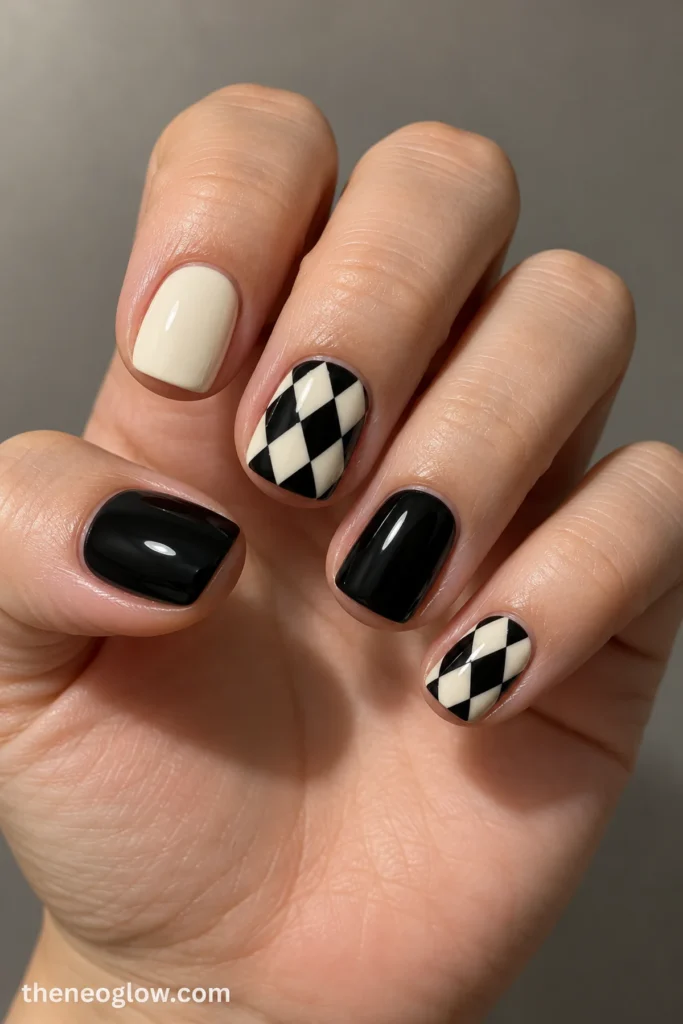
A short soft-square set uses two accent nails with sharply defined black-and-cream diamonds; the other nails are glossy black or cream solids. The opaque graphic pattern reads clearly from a distance. Keep the diamonds flat and precise rather than mixing in moons, pumpkins, or extra costume graphics.
The Last-Minute Halloween Nail Route
If you already have a manicure you like, consider adding only one or two flat accent details rather than replacing the entire set. If you can paint your own nails, ideas 23–25 use repeated marks, texture, or decals instead of intricate illustrations. If a salon appointment is already arranged, take one reference from ideas 11–21 and specify the shape, opacity, finish, and exact accent count. For a removable party look, consider ideas 26 or 27 and allow time to check tip fit and your adhesive directions.
Regular polish works for solid shades, dots, decals, and some blended effects. Magnetic beams, precisely layered chrome, and sculpted accents generally call for a compatible professional system or a ready-made design. Before using polish, glue, or remover at home, follow the product warnings and work in good ventilation; the FDA’s guide to nail-care product safety explains label precautions and possible reactions.
If you select gel, decide how it will come off before your appointment. Do not pick or pry the coating off; the American Academy of Dermatology’s gel polish removal guidance explains a dermatologist-recommended approach and precautions. Different press-on adhesives and salon systems have different instructions, so do not apply one removal method to every product.
What to Save Before Your Appointment
Save a close-up that shows the whole nail rather than only the art. Your note needs five details: natural or extended length, shape, base opacity, accent placement, and finish. For example: “Medium oval, sheer wine base, smoky black tips, one red aura through the center, smooth glossy finish, no extra symbols.”
If you are going to a party on October 31, select the design that also works for the days around it. A glossy blackberry set can continue into November; printed harlequin accents make more sense when you want the Halloween pattern for just the event. One precise reference is more useful than a folder of competing looks.