A snowflake can disappear into a pale manicure, overwhelm a short nail, or turn into a little white asterisk if its branches are too crowded. The most convincing snowflake nails give the motif a defined size, enough contrast, and a deliberate place to sit. That might mean a tiny six-spoke mark at the tip, a bold blue-and-white pattern, or fine silver crystals arranged across longer nails.
These 19 ideas focus on the snowflake itself, not a second general Christmas gallery. Each has a specific base, shape, finish, and arrangement, followed by a practical guide to spacing, symmetry, and what to simplify for real short nails.
Match the Snowflake to the Space
| Your nail space or goal | Motif treatment | Ideas to see |
|---|---|---|
| Very short, limited drawing room | One legible six-spoke mark or a larger thumbnail feature | 1, 2, 3 |
| Medium squares or ovals | Repeated crystals, side placement, or a bordered panel | 4–10 |
| Pink with noticeable snowflakes | High-contrast chains, color-blocked tips, or finish contrast | 11–14 |
| Party or salon reference | Metallic lattice, negative space, and layered crystal detail | 15–19 |
A useful scale rule: leave a visible band of base color around a complete snowflake. Six straight rays can be enough on a small plate; forks, dots, and secondary branches need more room. A four-point glint is a star, not a detailed snowflake, so use six spokes when the motif should be unmistakable.
Simple Snowflake Nails With Clear Placement
1. Smoke-Blue Tip-Edge Flakes
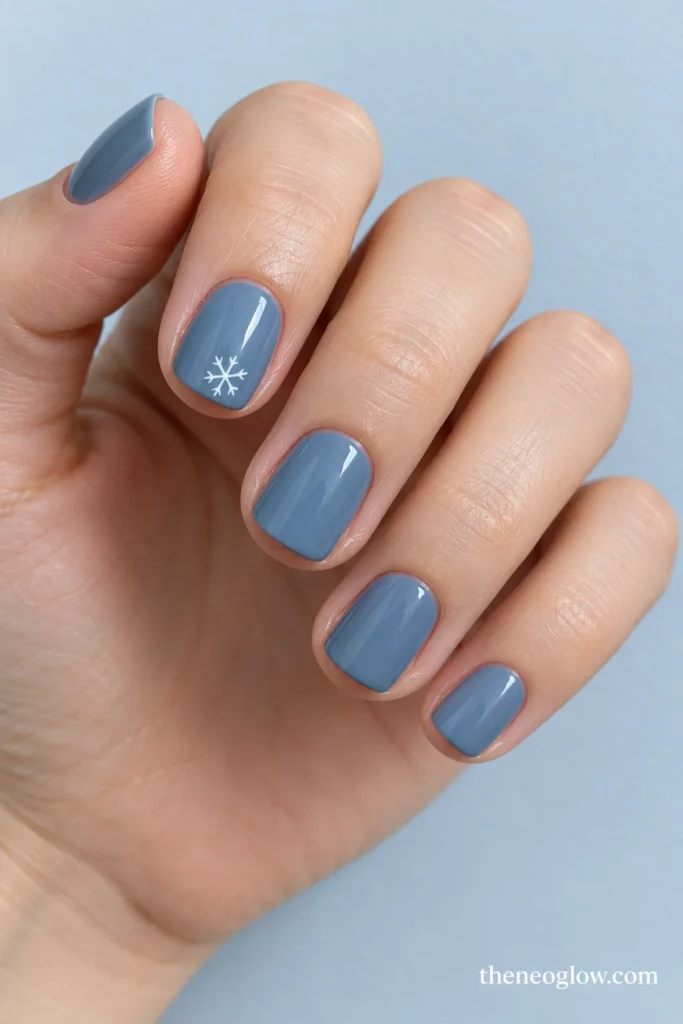
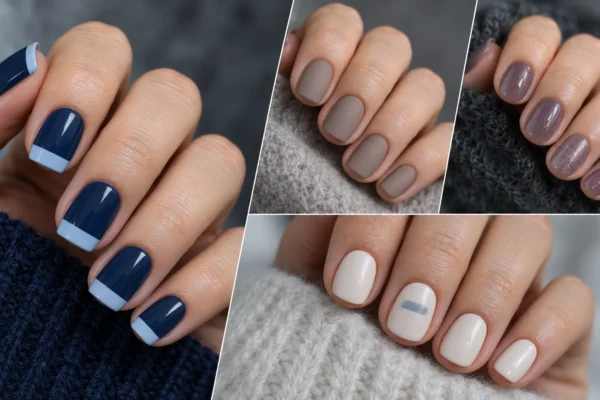
On very short glossy smoke-blue squovals, paint a miniature opaque-white six-spoke snowflake just inside the free edge of each index nail. The other nails stay solid blue. Give the mark six clean rays without forked ends; its position near the tip, rather than the center of an accent nail, is the feature. A small flat decal is an easier alternative to freehand symmetry.
2. Lavender Cuticle Crystal Arcs
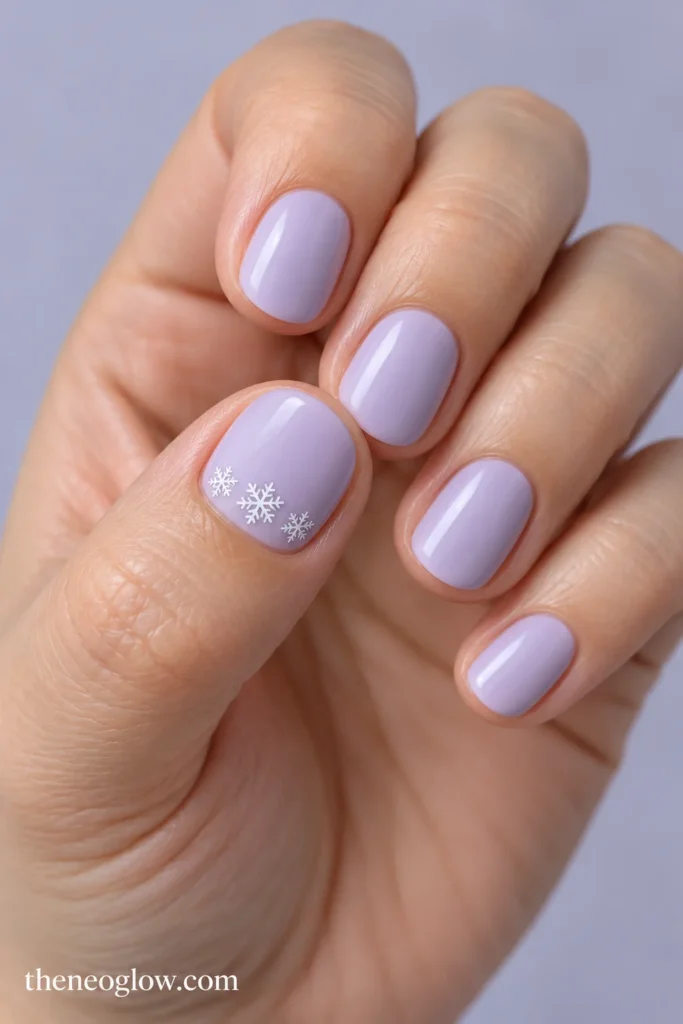
Short rounded nails wear an opaque pale-lavender cream with three tiny white snowflakes following the cuticle curve on each thumbnail. Keep the middle flake slightly larger than its neighbors and let the remaining four nails stay lavender. This is a curved group of separate crystals, not one snowflake surrounded by dots. A flat transfer works better than trying to freehand three intricate symbols on a tiny surface.
3. Sea-Glass Double-Scale Thumbnail
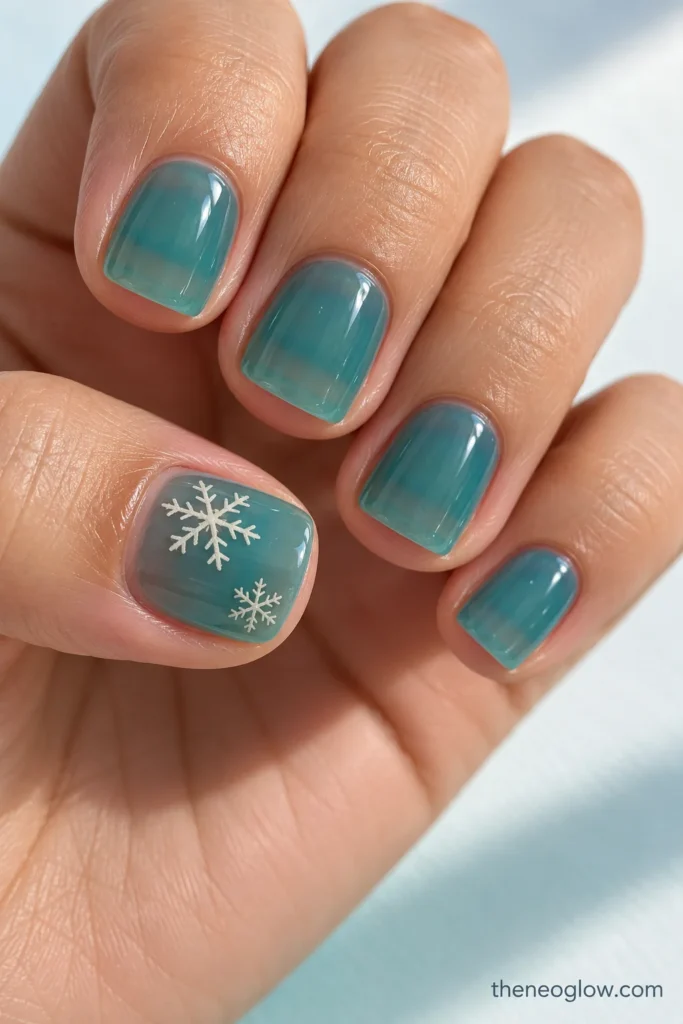
Choose translucent sea-glass teal on very short natural squares. Place one medium ivory six-arm snowflake high on the thumbnail and a second, visibly smaller one near its lower opposite corner. Leave a generous teal gap between the two; the remaining nails get uninterrupted jelly color. The contrasting sizes help the thumb carry a complete miniature composition without spreading crowded symbols to the pinkies.
4. Milky Gray Snowflake Border
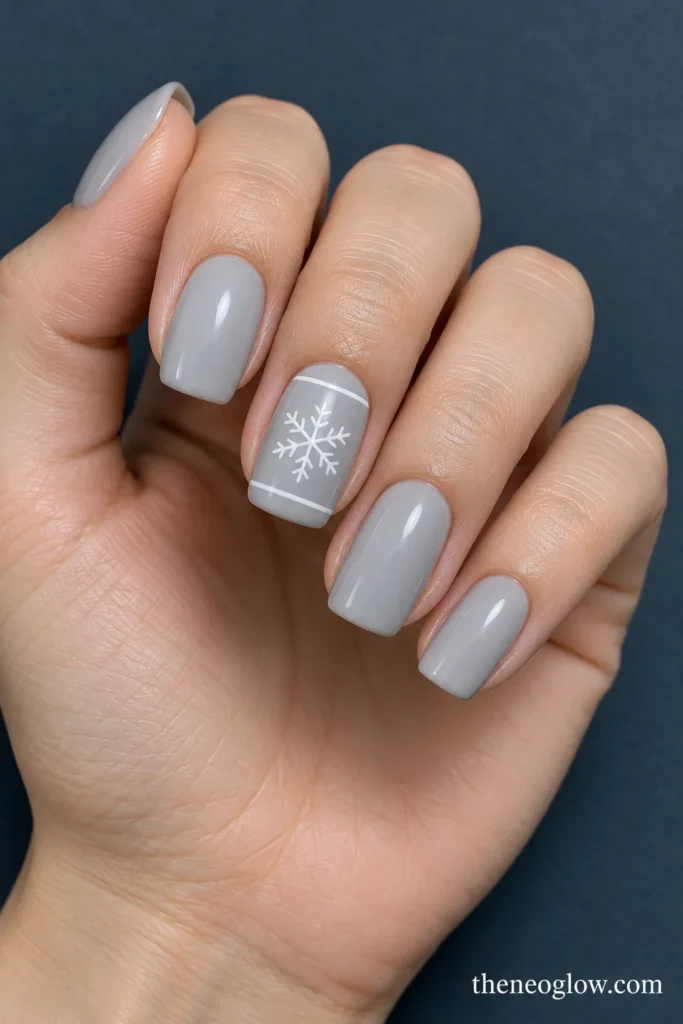
Medium soft squares in milky cool gray get narrow white horizontal borders near the base and tip of the middle fingernail. Between those two lines, center one precise six-armed white snowflake with short paired branches; all other nails remain milky gray. The two borders frame the motif like a printed panel instead of scattering flakes across the whole hand. Keep the snowflake clear of both lines.
5. Mauve Diagonal Crystal Corners
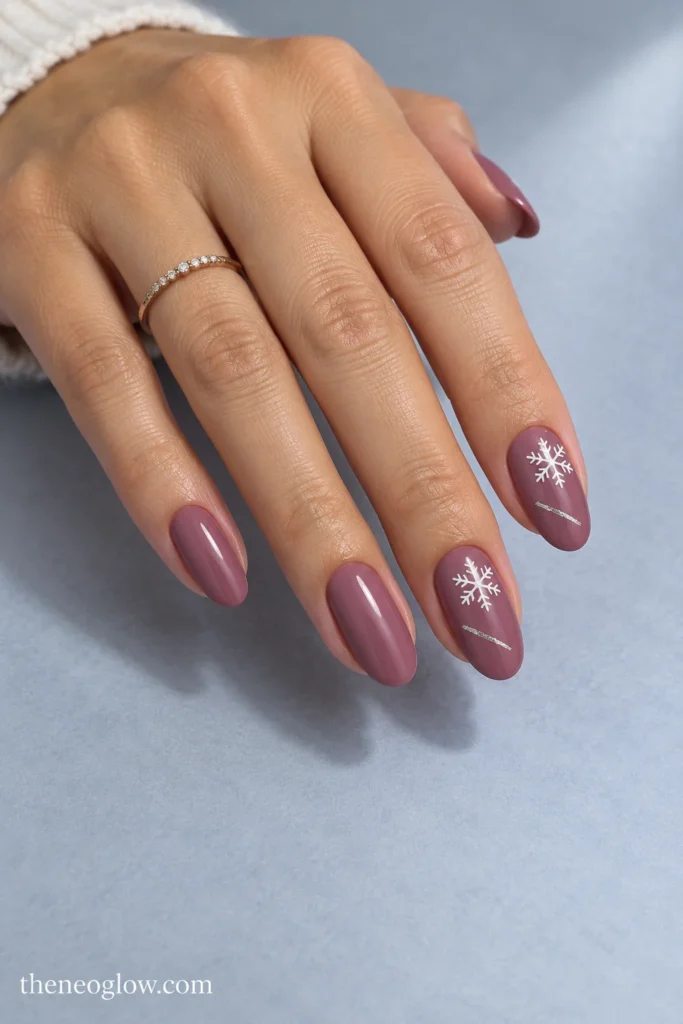
Give medium glossy mauve ovals a single white snowflake on each index and ring finger, positioned in the upper outer quarter with one ray pointing toward the tip. Across the same two nails, place a short silver line well below the snowflake to create a diagonal visual path. This isn’t a cropped edge motif: each complete crystal fits inside the nail and stays visibly separate from its metallic companion.
Blue and White Snowflake Nails
6. Cobalt Blueprint Repeats
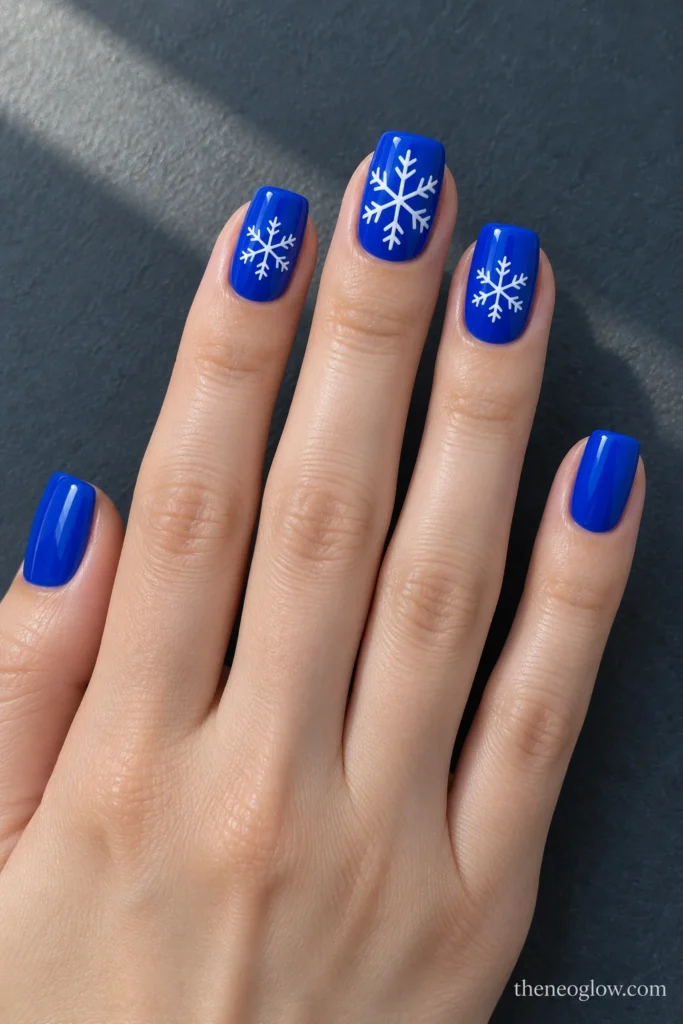
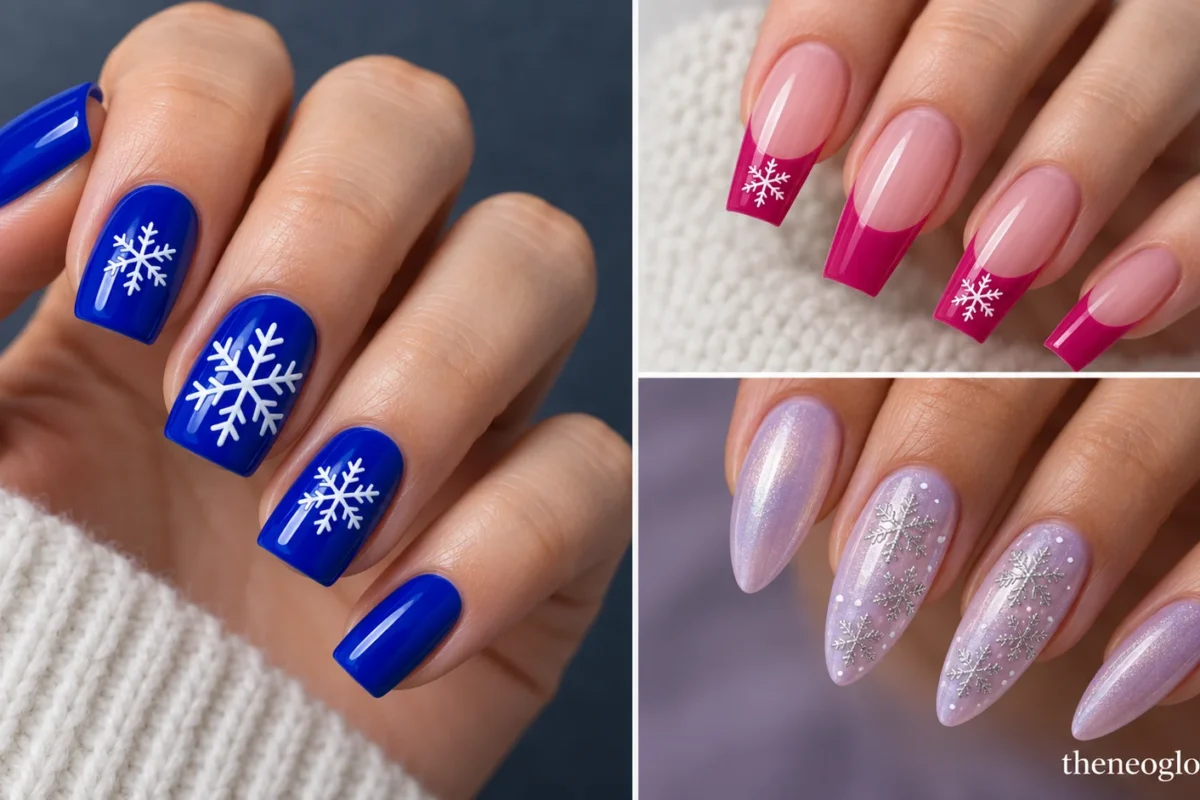
Medium square nails painted in opaque electric cobalt become a high-contrast snowflake pattern. Draw one large white six-armed crystal on the middle nail and smaller complete versions on the index and ring; leave thumb and pinky cobalt. Give every branch the same simple V-shaped fork and keep each center open. The different scales create a purposeful print without filling every finger.
7. Periwinkle Two-Ink Crystals
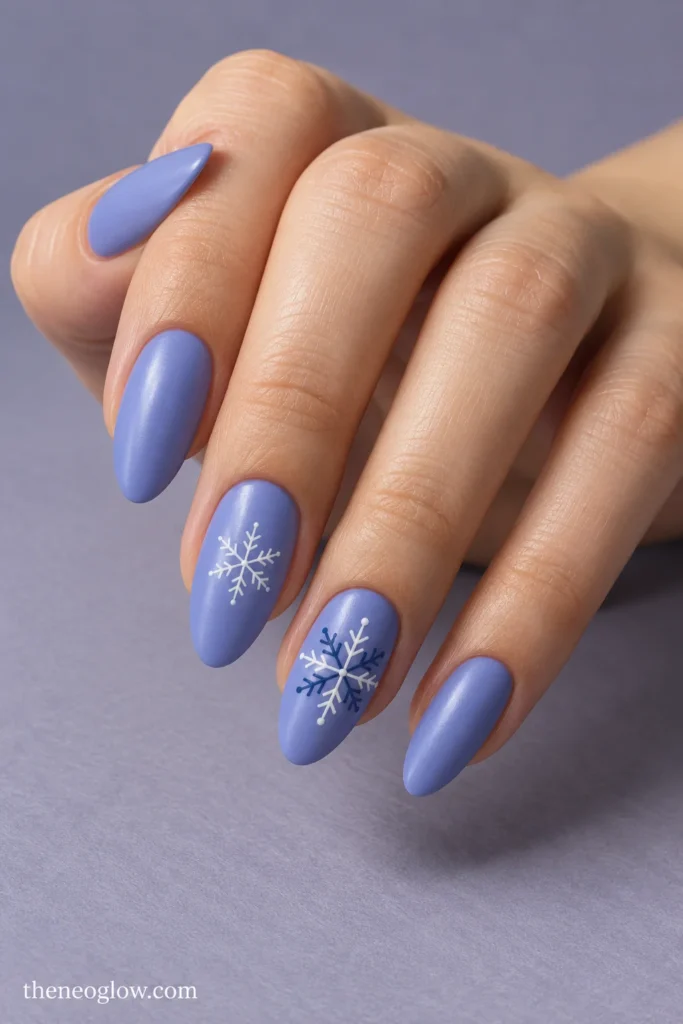
A soft periwinkle base covers medium almond nails with a satin finish. On the ring nail, alternate icy-white and deep-indigo spokes around a single six-point center, keeping the colors separate; the middle nail gets a smaller white-only crystal. The split-color structure makes this distinct from an ordinary white flake over blue. Precise alternating spokes are better treated as fine salon linework.
8. Navy Windowed Snowflake Squares
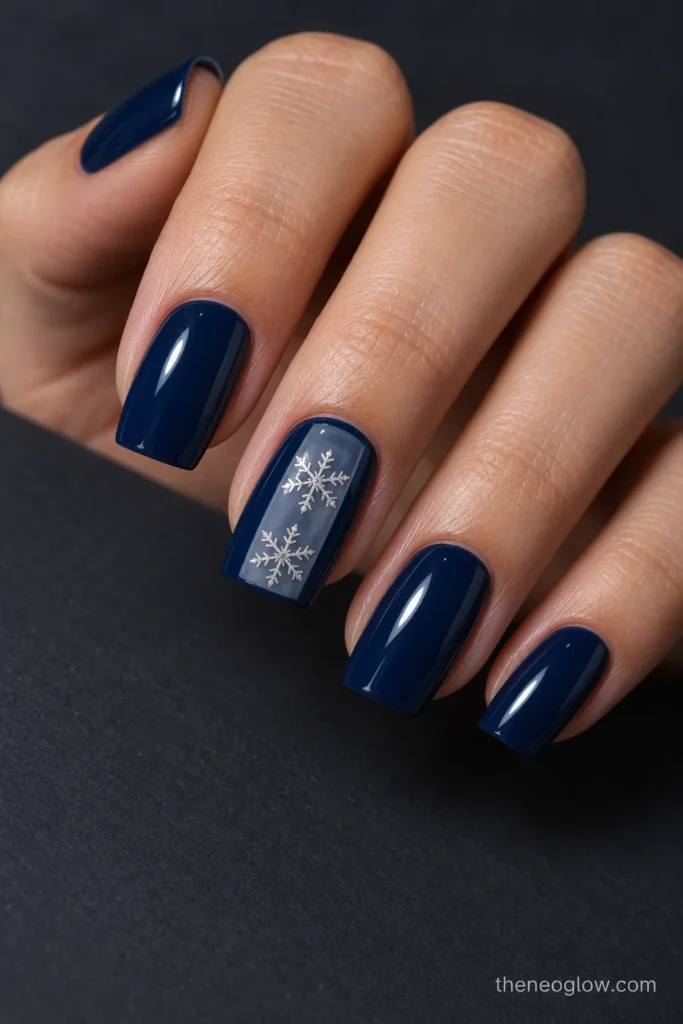
On medium navy-blue squares, reserve a vertical translucent blue-gray rectangular panel down the center of each middle nail. Paint two small silver-white snowflakes inside the panel, one above the other, separated by a clear gap. The other nails remain glossy navy. The panel gives the silver marks a consistent background and makes the design resemble an icy window rather than scattered glitter.
9. Blue Jelly Layered Crystal Ovals
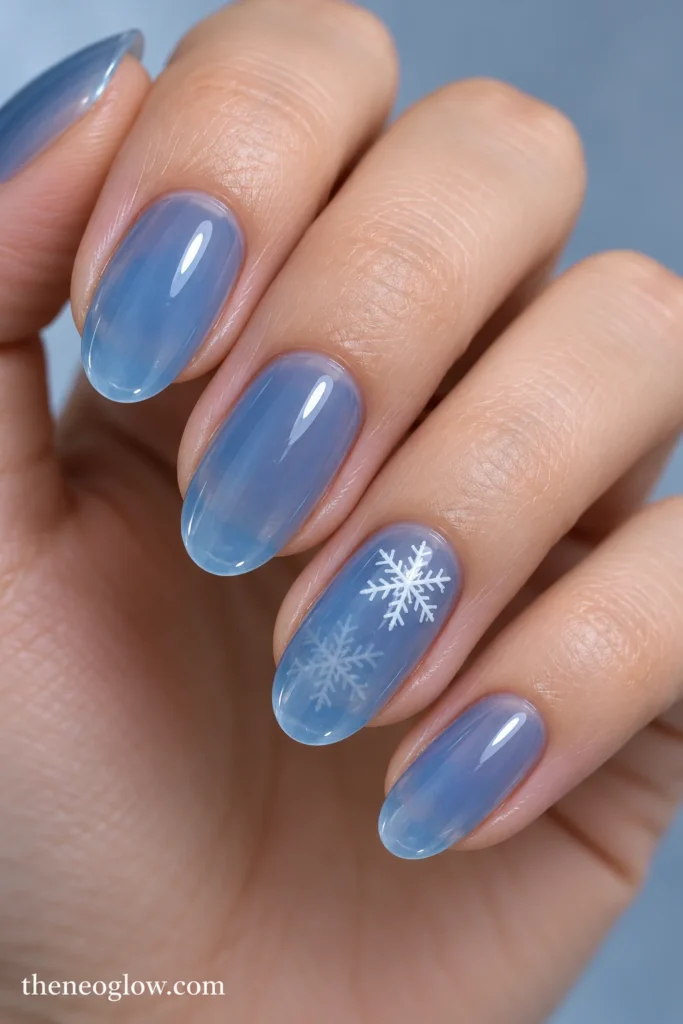
Medium ovals carry a transparent icy-blue jelly wash. A thin white snowflake sits beneath a further translucent blue layer on the ring nail, while a second, sharper white crystal is placed over the finished blue field near the upper third. The overlapping opacity gives a foreground-and-background effect, so neither snowflake needs glitter. This is layered salon artwork, not a quick two-stroke DIY.
10. Porcelain With Ink-Blue Rosettes
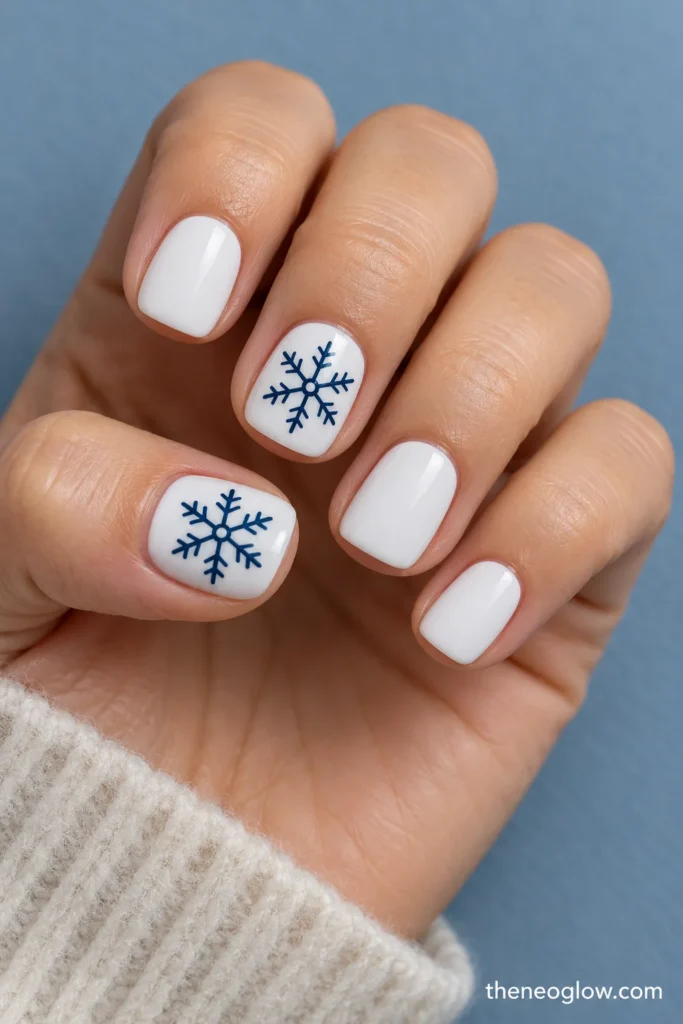
Bright opaque porcelain-white short squovals show compact midnight-blue six-point snowflakes on the thumbs and middle fingers. Add a small navy circle at each center and one short V fork at the end of every arm; the remaining nails are clean white. Strong blue outlines keep the snowflakes visible against the white base. For more white-led holiday finishes without additional crystal patterns, explore NeoGlow’s white Christmas nails collection.
Pink Snowflake Nails Beyond One Accent
11. Blush Crystal-Chain Squares
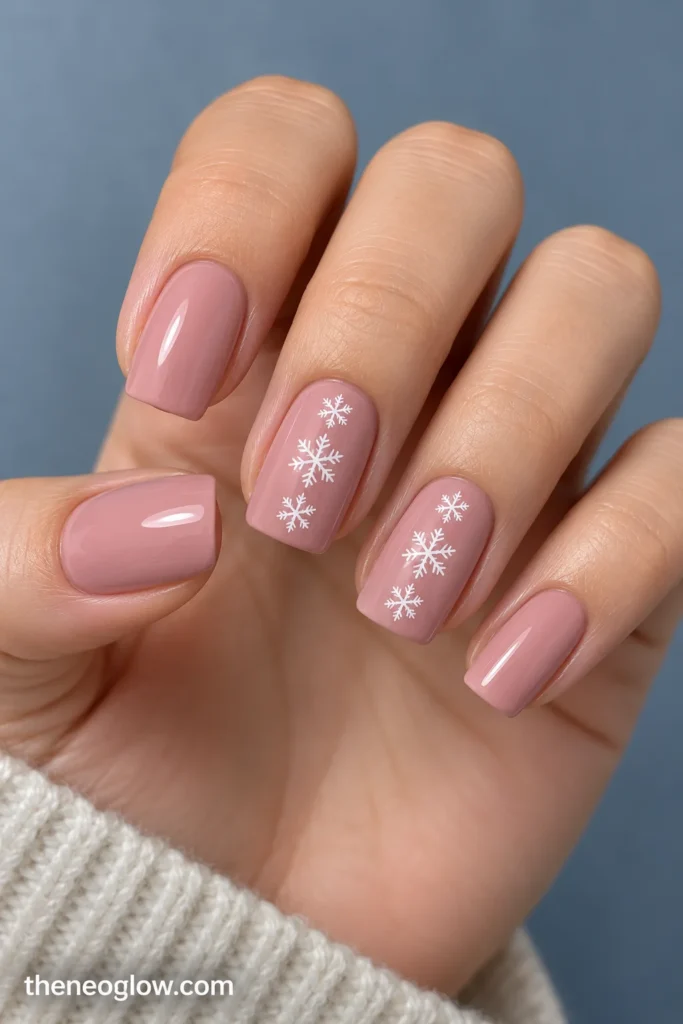
Medium soft-square nails wear opaque muted blush gloss. Along the middle and ring nails, align three tiny white six-spoke snowflakes vertically, largest near the center and smallest toward the cuticle. Do not join them with a line or scatter extra dots. The repeated rhythm is the design, so each little crystal needs a visible pink space between it and the next.
12. Berry-Pink Snowflake French Windows
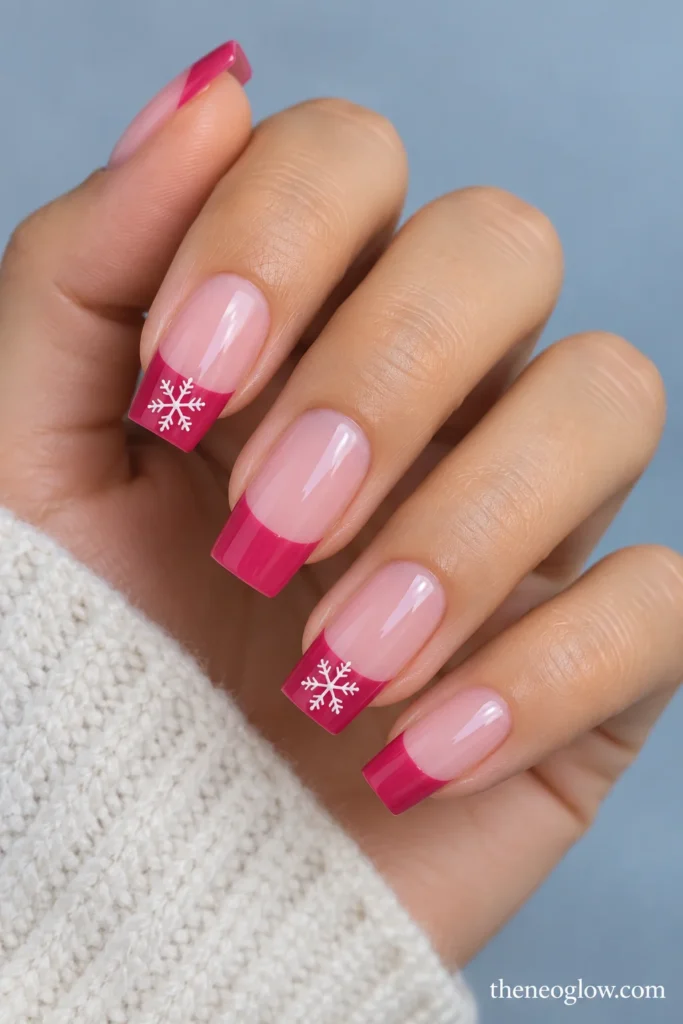
Over sheer cool-pink medium coffin nails, add an opaque raspberry French band wide enough to contain a single small white snowflake on each index and ring tip. Keep the other raspberry tips blank. The snowflake belongs fully inside the colored tip instead of floating on the pink nail bed. A wide tip and flat detailing are essential; this composition should not be squeezed onto a nearly edgeless nail.
13. Dusty-Rose Double-Outline Crystal
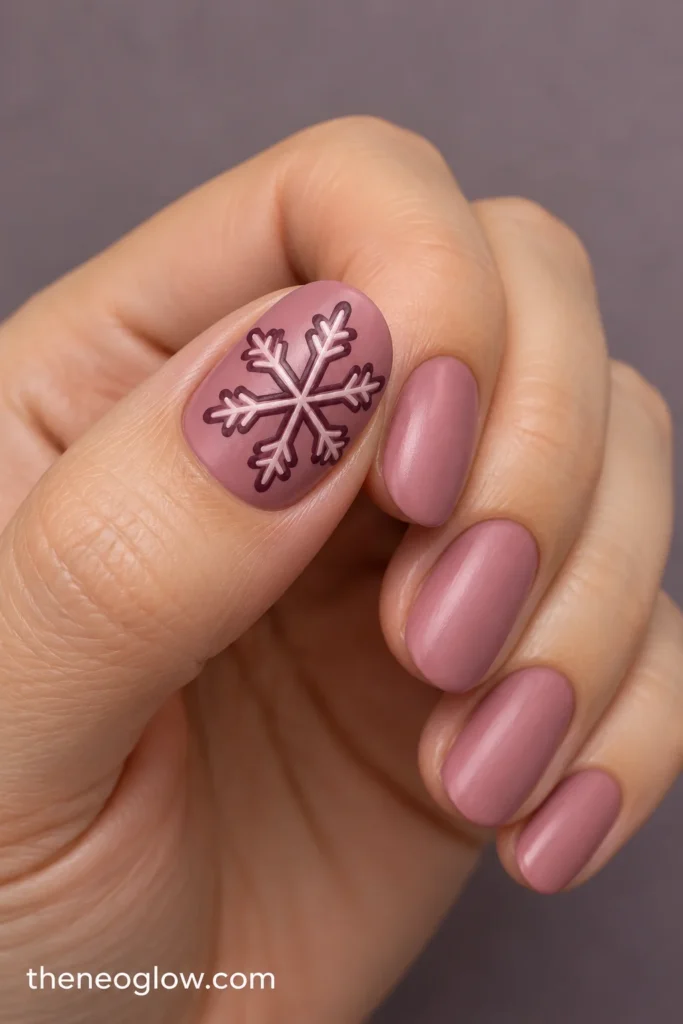
Paint short-to-medium ovals in smooth, opaque dusty-rose satin. Each thumbnail carries one relatively large six-armed snowflake drawn with a deep-plum outer line and a thinner pink-white line just inside it; the other nails are plain rose. Leave the spaces between arms open so the doubled outline stays intelligible. It is a strong color route for someone who prefers contrast without icy blue.
14. Orchid Chrome Matte Flake Masks
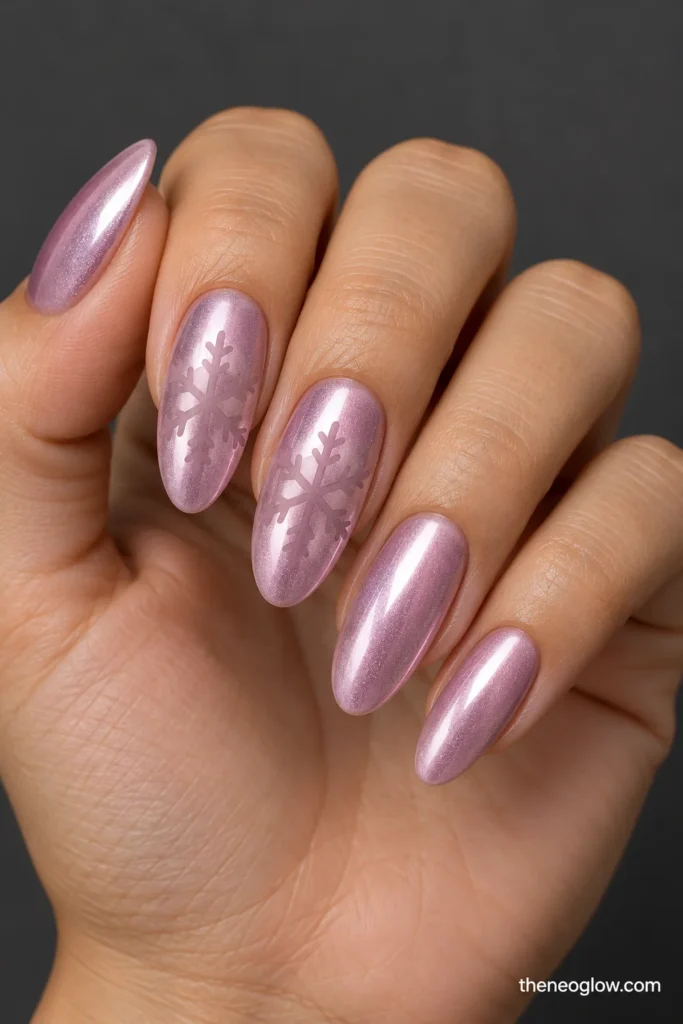
Medium oval nails get an even pearly orchid-pink chrome appearance. On each index and ring finger, set one flat matte, opaque-white six-arm snowflake over the reflective field. The contrast is between a luminous base and a nonreflective, clearly edged motif rather than between two bold colors. A technician should confirm how the selected chrome and matte artwork can be combined within the same compatible product system.
Silver and Statement Snowflake Patterns
15. Graphite Snowflake Lattice
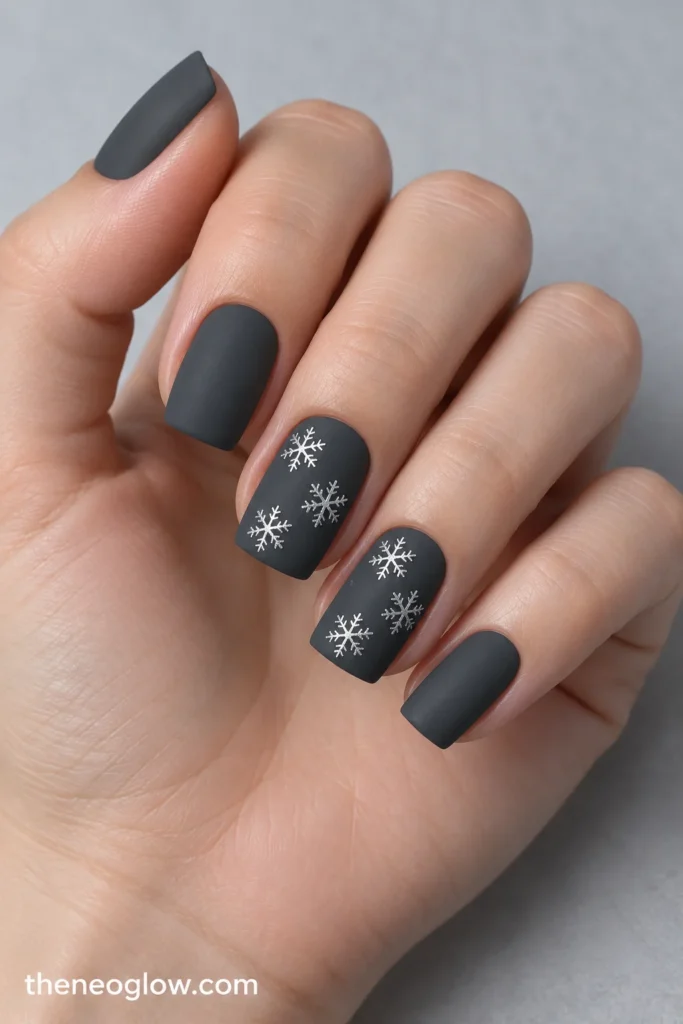
Opaque matte graphite medium squares become a repeating pattern of thin metallic-silver crystals on the middle and ring nails. Show three complete six-armed snowflakes per accent, arranged like offset tiles with no branches touching; other nails stay unpatterned graphite. The background creates strong contrast while the careful spacing avoids turning the lattice into an indistinct silver mesh.
16. Pewter Mirror Crystal Medallions
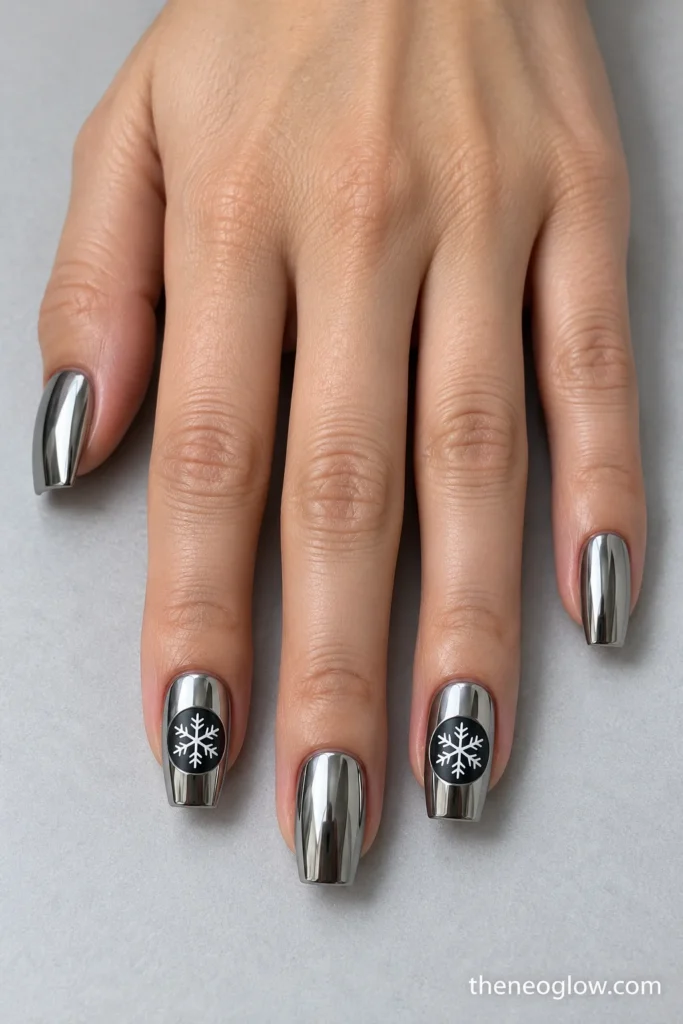
Use a smooth reflective pewter finish on medium tapered-square nails. The index and ring fingers each get one flat circular deep-charcoal window centered on the nail, holding a crisp white six-spoke snowflake. Keep a visible metallic border around each circle. This defined medallion composition is a higher-precision salon choice, unlike flakes painted directly across chrome.
For trees, bows, and other seasonal designs that do not center on the snowflake motif, see NeoGlow’s broader Christmas nail ideas collection.
17. Burgundy and Antique-Gold Snowfall Path
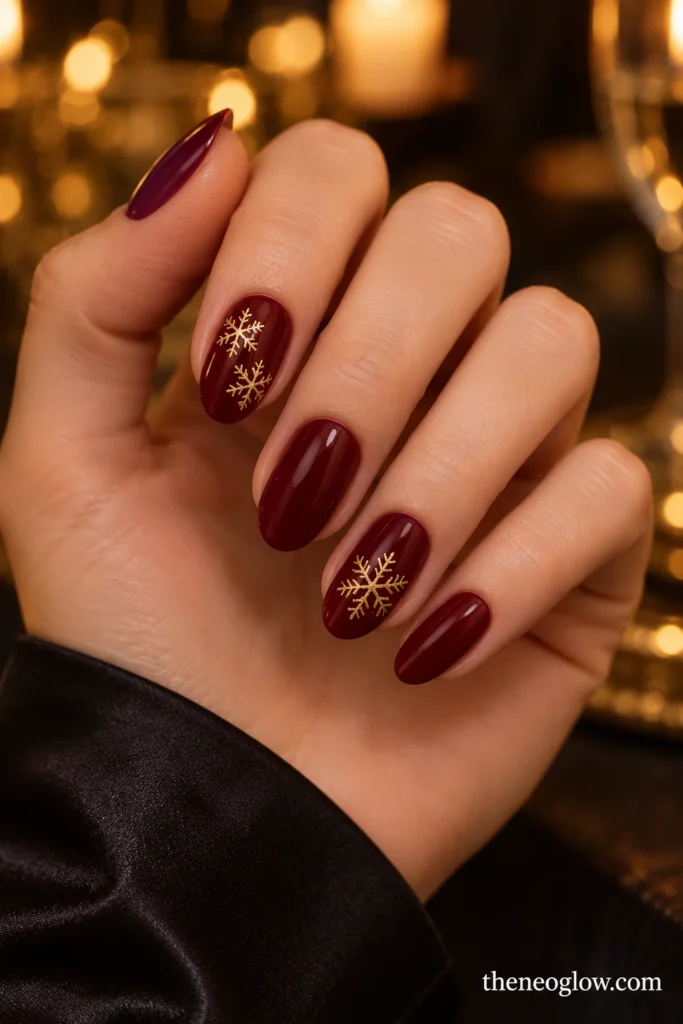
Medium glossy burgundy ovals feature two fine antique-gold snowflakes descending diagonally on the index nail and one larger gold crystal low on the ring nail. Keep the remaining fingers solid wine, with no holly, ribbon, or stars. The gold branchwork is festive enough for a December dinner but the deep base still works through the colder months. Each complete symbol needs its own dark margin.
18. Spruce Matte-to-Gloss Crystal Print
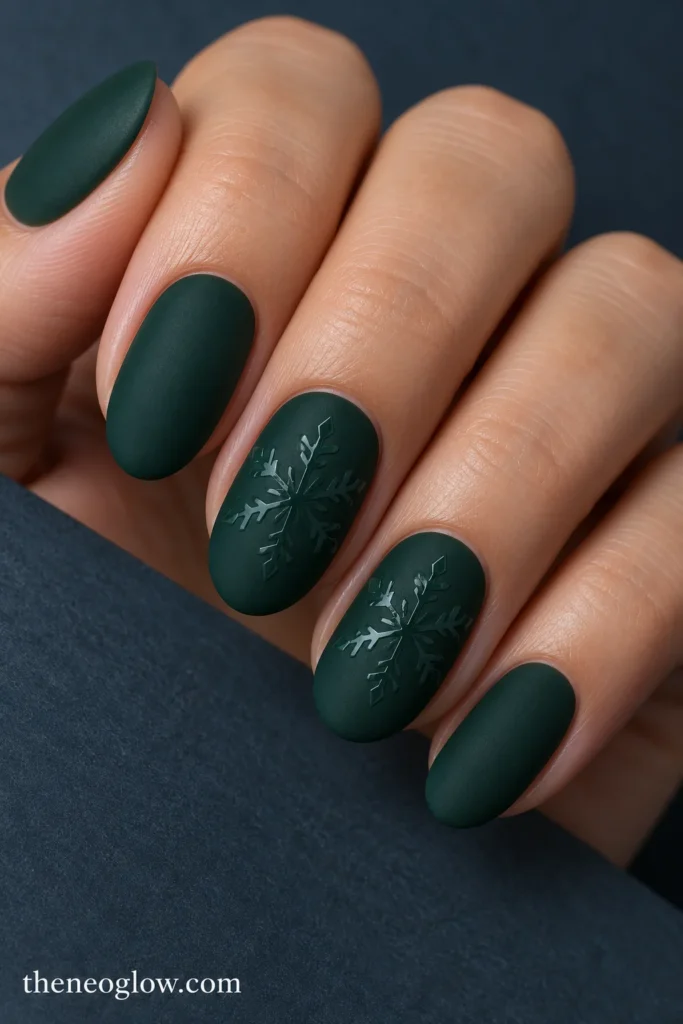
On medium soft-oval nails, apply deep spruce-green matte color. Two accent fingers show generous, clear glossy six-arm snowflakes in the same green family, visible only where the light catches them. Make the crystal arms broad and separated rather than hairline thin; the finish contrast would disappear on microscopic branches. Request this from a salon familiar with matching matte and glossy finishes.
19. Lilac-Silver Crystal Cascade
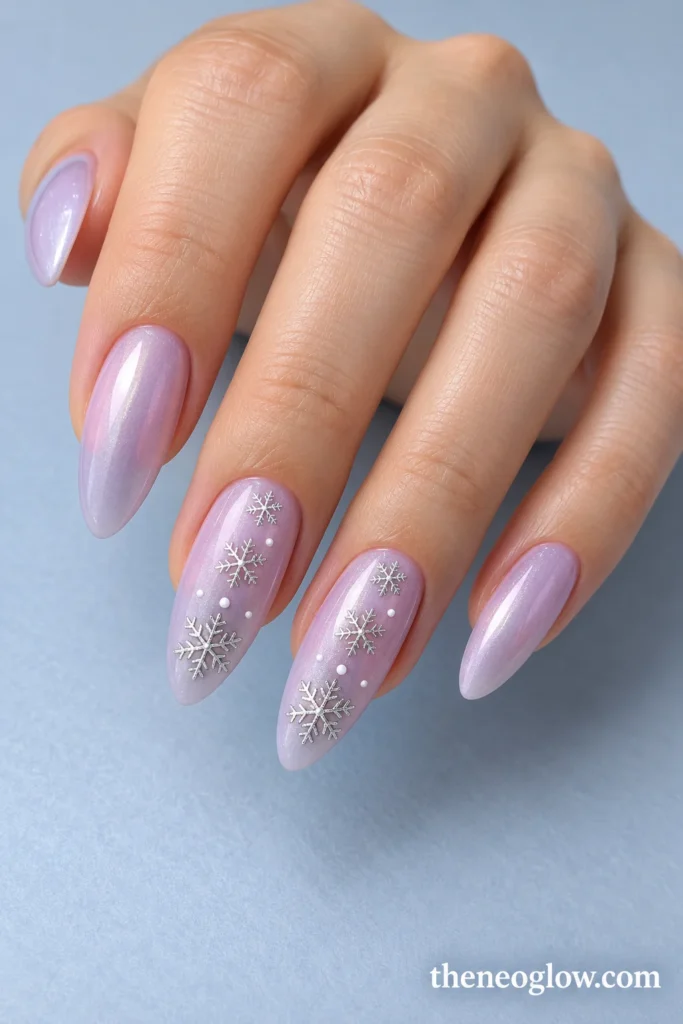
Long tapered almond nails wear a sheer icy-lilac pearl base. Across the middle and ring fingers, arrange three finely outlined silver snowflakes on a descending diagonal: medium near the tip, smaller at mid-nail, smallest toward the side of the cuticle. Tiny white dots can fill two gaps, but no crystals touch. The graduated motif sizes and longer plate create the statement, without raised charms or bulky decorations.
Keep the Six Arms Readable on Short Nails
A convincing snowflake begins with three crossing lines that form six rays. For a beginner-friendly version, let those rays remain plain. On a wider nail, add one small matching V-shaped fork to each arm. Work from the center outward so the branches have similar length; do not try to fix crowding by piling on more white paint.
Place a complete snowflake where the nail is broadest. Keep a thin margin of bare base color around all six tips, and choose a different arrangement if a ray would run straight into a sidewall. When there is no room, enlarge the motif on the thumb and leave the narrower nails solid or use a few small marks. This is more readable than reducing every fork to a dot.
For DIY, a six-stroke flake, a stencil, or a flat decal is realistic. A fine detail brush helps with straight rays, while a dotting tool can finish their ends. OPI’s nail-art tool and negative-space tutorials show simple ways to use dotting tools and tape. Intricate metallic outlines, chrome masking, and layered jelly crystals are better references for an experienced technician.
For other tiny Christmas motifs beyond snowflakes, browse short Christmas nails; this guide stays focused on the six-arm pattern.
Save a Reference That Can Actually Be Recreated
When requesting a set, specify the nail length and shape, base opacity, finish, number of decorated fingers, snowflake size, and exact placement. “Short smoke-blue squovals, white six-spoke flakes just inside the index tips, no other artwork” is clearer than asking for “simple snowflake nails.” For idea 16, name the pewter mirror base and the separate charcoal circular windows.
Think about maintenance before requesting layered artwork. Fine white lines can show a chip against a dark background; matte-and-gloss contrast may become less obvious as the surface picks up marks. Follow the instructions for the exact polish or enhancement system. If you choose gel, don’t peel or scrape it off; the American Academy of Dermatology’s guide to removing gel nail polish at home explains how to protect the surrounding skin and remove the coating carefully.
Snowflakes also work after the holiday itself. If you want colors, chrome, or cold-weather finishes without a repeated Christmas motif, NeoGlow’s winter nails guide covers that broader direction.
Your Best Snowflake Design Is the One With Room Around It
Choose one focal style and keep its proportions intact: a six-spoke tip mark on short nails, multiple separated crystals across medium squares, or a metallic cascade on a longer set. Save the numbered look along with its base color and motif placement. The reference will be far more useful than a cropped picture of snowflakes with no visible nail shape.