The trick with christmas toe nails is deciding what should still look festive when only part of your pedicure peeks out of a sandal. A tiny painted bow may be lovely close up but disappear from standing distance; a confident red, frosty white, or evergreen base does more of the visible work. These 18 ideas are designed for short, natural toenails, with specific artwork for the two big toes and a simpler color plan for the other eight. You’ll also find a quick visibility test, manicure pairings, and salon wording worth saving before your December appointment.
The Christmas Pedicure Visibility Test
Check your saved reference at three distances: close enough to see brushstrokes, arm’s length, and standing up in the shoes you expect to wear. Pick the detail level that still looks intentional at the last distance.
| Your priority | Give the big toes | Give the smaller toes | Start with |
|---|---|---|---|
| Festive color you can spot easily | Full red, white, or green with one strong accent | Solid coordinating cream | 1, 5, 9 |
| A recognizable Christmas symbol | One bow, tree, holly sprig, or ornament | A single supporting shade | 10, 14, 18 |
| Holiday pattern without visual clutter | Two or three broad stripes or checked sections | Plain or alternating solids | 4, 11, 12 |
| Light-catching party finish | Magnetic red, pearl, foil, or glitter | Matching color without extra artwork | 2, 8, 16 |
Keep the toenails close to their natural, short shape. These ideas describe the polish and artwork—not a need to turn toenails into long squares, almonds, or extensions.
Red Christmas Pedicures With a Distinct Focal Point
1. Cherry Lacquer With an Ivory Corner Snowcap
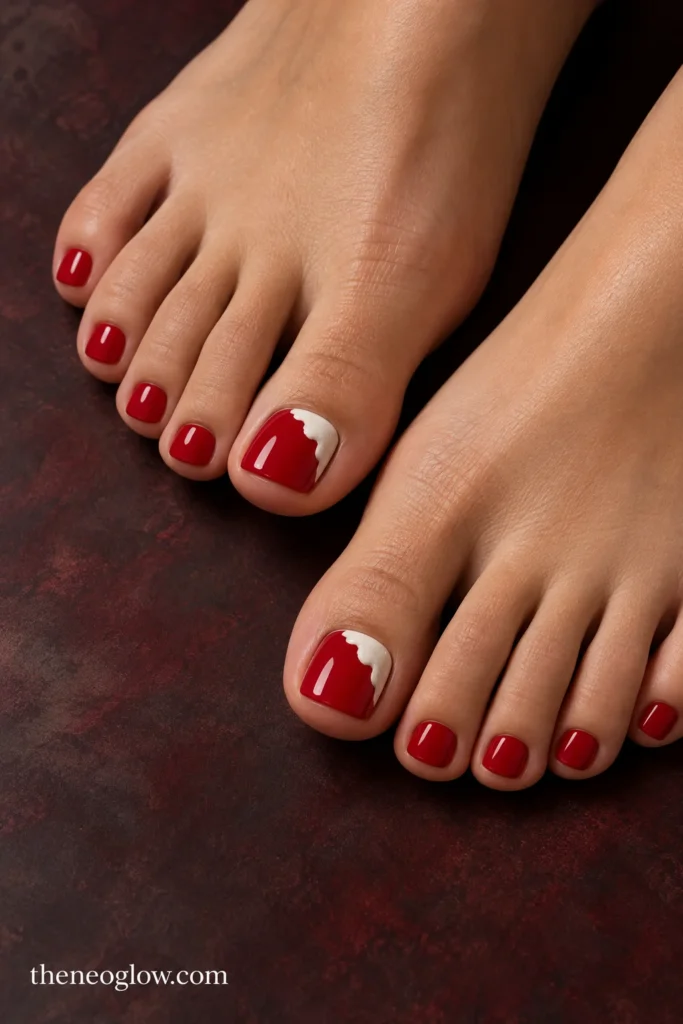
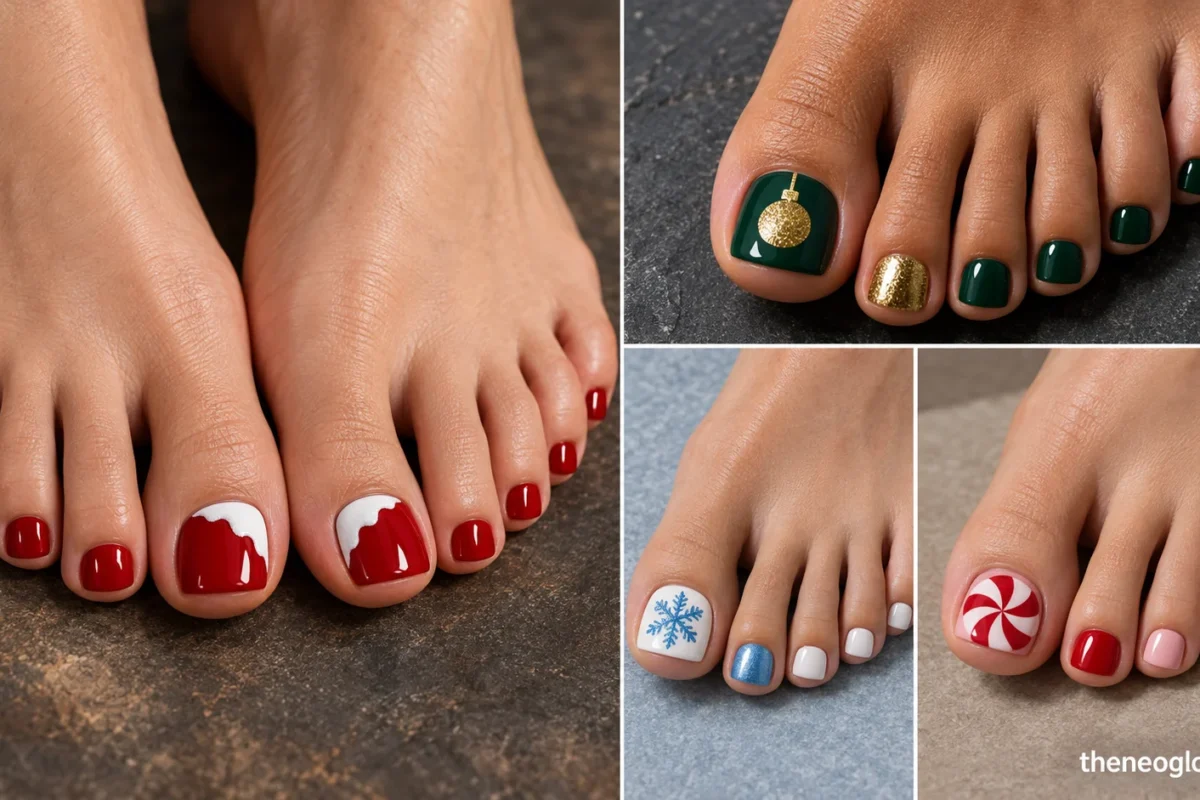
Cover all ten short, naturally squared toenails in opaque, glossy cherry red. On each big toe only, paint a broad, uneven ivory snowcap entering from the upper outside corner, leaving most of the red uninterrupted. The asymmetric pale accent looks like settling snow; the smaller toes stay solid red. This is a clear red Christmas toe nails option that does not require miniature characters.
2. Cranberry Magnetic Big Toes With Creamy Red Companions
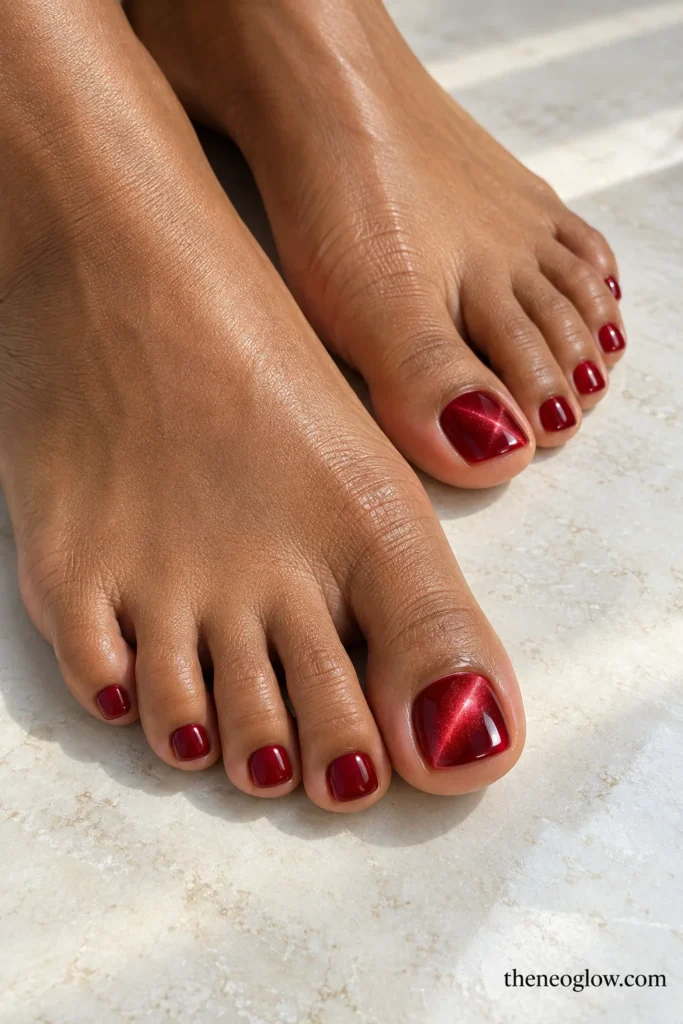
Apply deep cranberry magnetic polish to both big toenails, directing its soft light reflection diagonally across each broad plate. Use opaque cranberry cream on the other eight toes, matching the shade depth without copying the shimmer. The finish moves in the light, while the overall effect remains unmistakably berry red even when the magnetic band is hard to see.
3. Oxblood Gift-Tag Accent
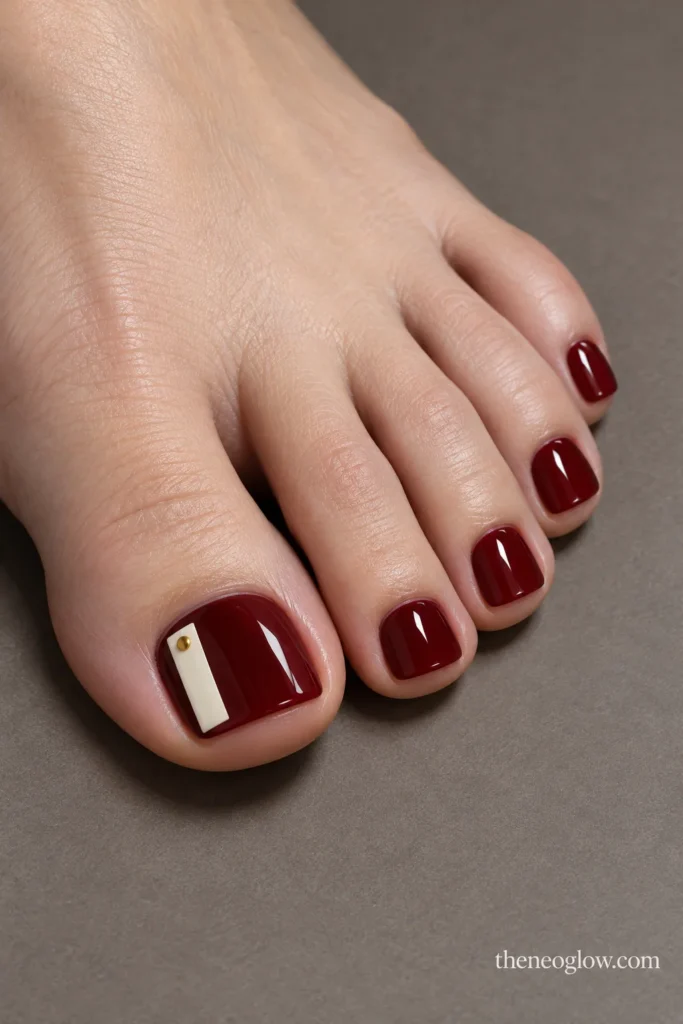
Start with high-gloss oxblood on all toes. Make each big toe a tiny wrapped present by adding one narrow, vertical ivory gift-tag rectangle near the outer side, topped with a single metallic-gold dot where a string would attach. Keep the rectangle flat and large enough to read. The smaller nails remain entirely oxblood, making this more tailored than a full illustrated gift box.
4. Ruby and Fir Checked Edge
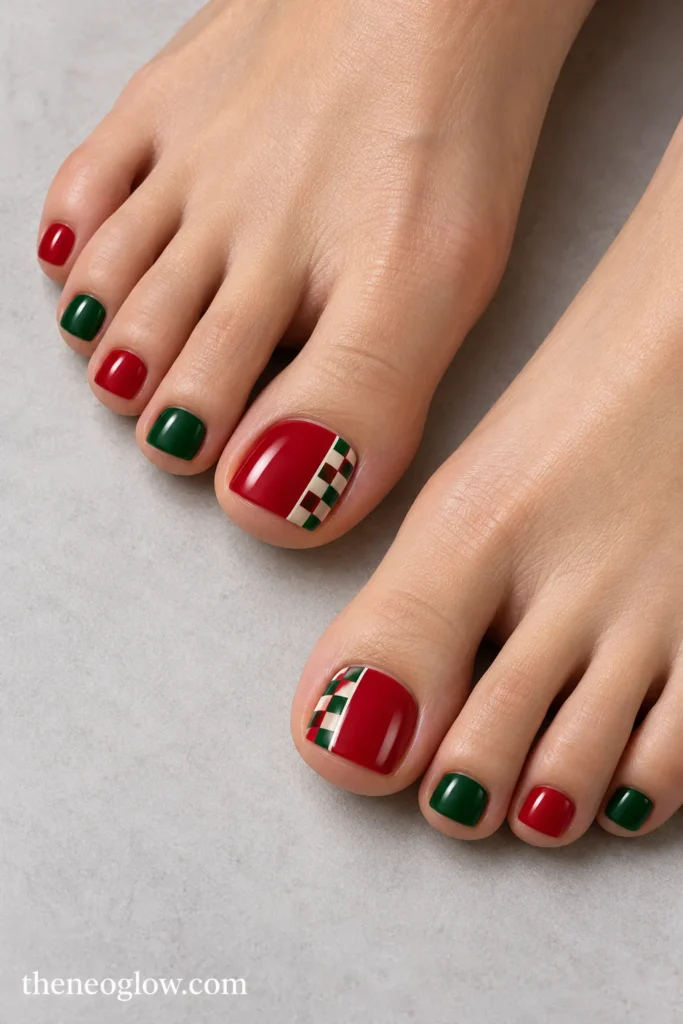
On a glossy ruby-red big toe, fill the outermost third with a low-count checker of forest green and ruby squares, separated by thin ivory boundaries. Limit the pattern to two rows of large blocks. Alternate plain ruby and forest-green smaller toes for a recognizable red-green rhythm from several feet away. The checked edge, not a whole plaid blanket, is the point.
White and Snowy Looks That Suit Short Toenails
5. Snow-White Big Toe With a Blue Iceflake
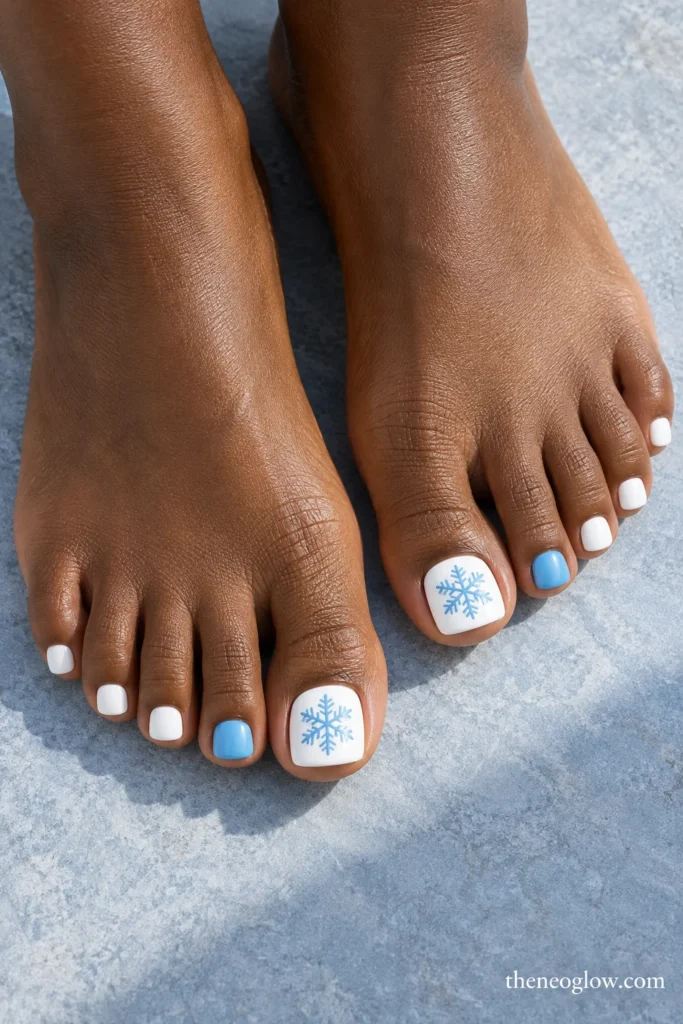
Use fully opaque snow-white cream on both big toes, adding one medium six-arm icy-blue snowflake slightly above center. Cover the smaller toes in the same white, but use a single icy-blue second toe on each foot to reinforce the cool palette. Avoid extra mini snowflakes: the big-toe artwork should be the only intricate element.
6. Milky White With Scarlet Side Ticks
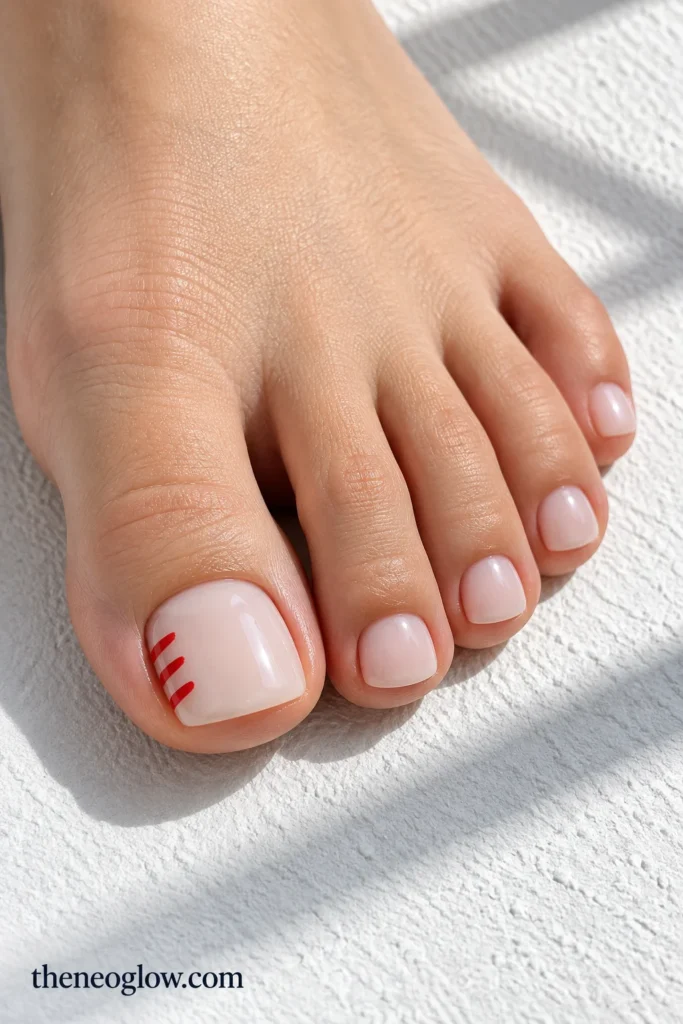
Paint the entire pedicure a translucent milky white, allowing a soft hint of the natural nail to show. Along the outer side of each big toenail place three short, evenly spaced scarlet dashes, angled like tiny ribbon notches. The other toes stay plain milky white. This minimal white Christmas toe nails design reads snowy first and festive only when you look closer.
7. Porcelain White With Frosted Windowpanes
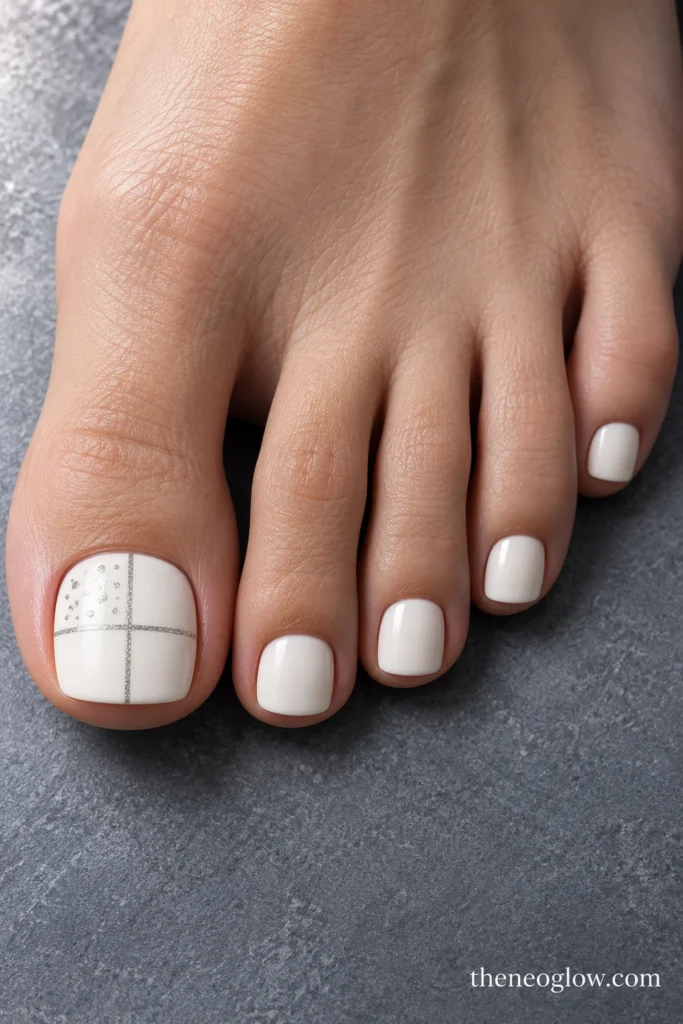
Choose an opaque warm porcelain-white base with a satin finish on all toes. Cross the center of each big toenail with one pale-silver vertical line and one horizontal line, creating four broad windowpanes; outline only the top-left pane with tiny silver-white frost dots. Keep the smaller toes satin white. Broad geometry avoids the cramped look of a detailed snow scene.
8. Oyster Pearl With a Silver Falling-Snow Trail
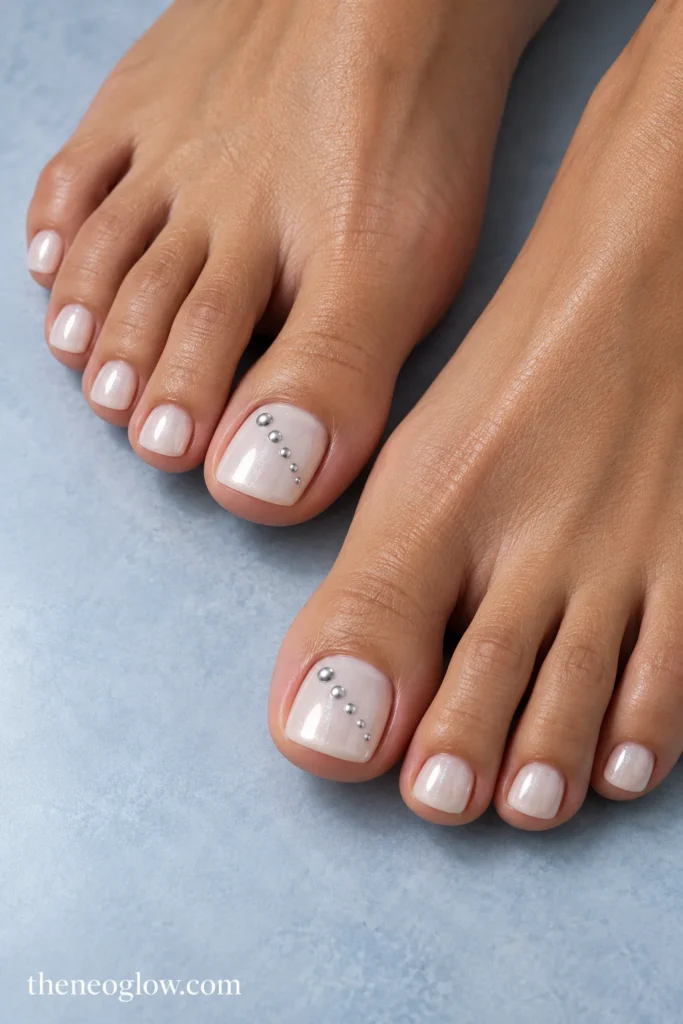
A sheer oyster-white base topped with cool pearlescent sheen covers all toenails. On the two big toes, scatter five distinct silver dots in a descending diagonal, largest near the upper corner and smallest at center. Skip the dots on the other eight toes; the pearl layer carries the effect. From sandal distance this looks like icy gloss, with the snowfall visible when seated.
Evergreen, Candy-Cane, and Graphic Christmas Details
9. Forest Green With a Cream Christmas-Tree Cutout
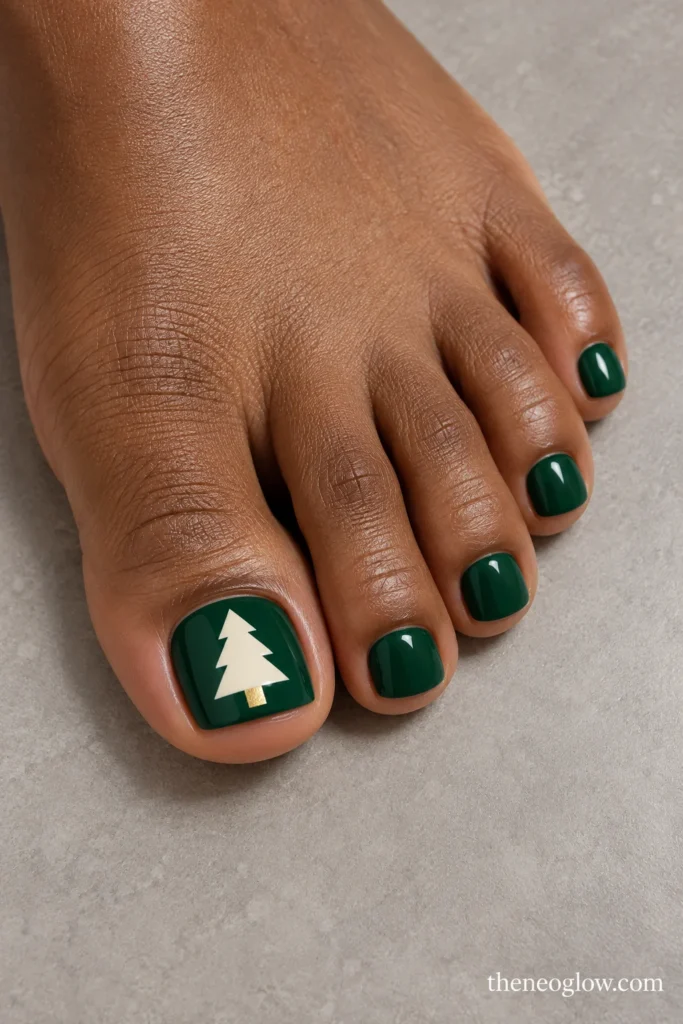
On the big toes, use opaque forest green and leave a centered stepped triangle of creamy negative space shaped like a simple Christmas tree. Make three broad tiers, not microscopic needles, and add one small gold square at the base for a trunk. Finish the smaller toes solid forest green. The tree silhouette stays distinct even with a short, nearly square big-toe edge.
10. Jade Holly Corner With Ruby Berries
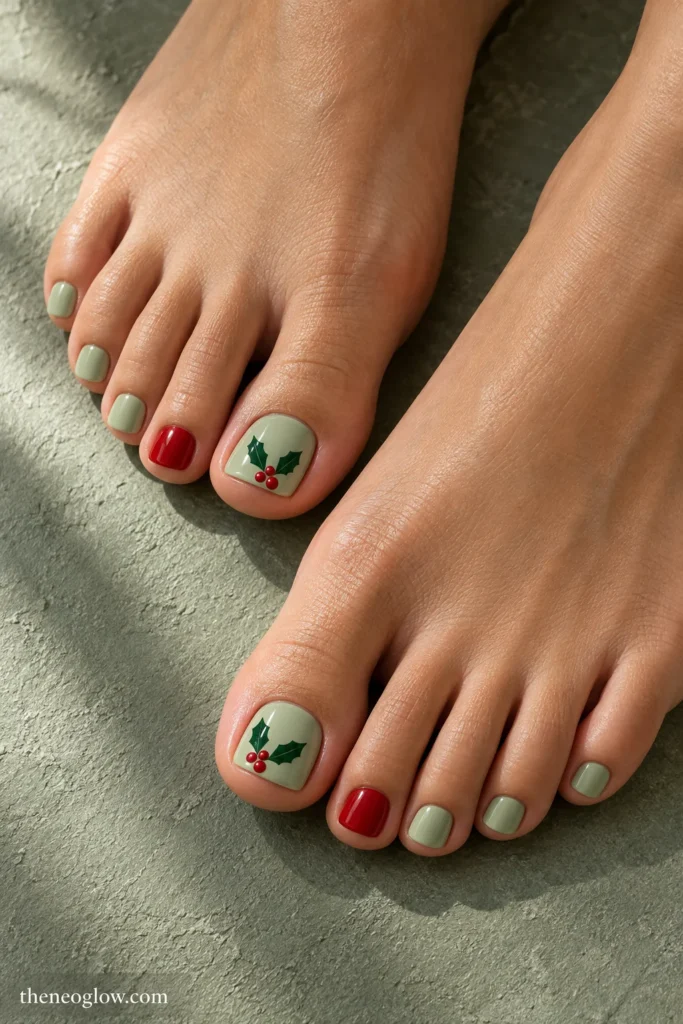
Coat the toes in pale, opaque jade-green cream. On each big toenail add two dark-green pointed holly leaves emerging from the inside corner and three glossy ruby-red berry dots at their base. Leave most of the jade visible. Give the second toe on each foot ruby-red polish and keep the remaining smaller nails jade. The berries provide a color cue without a crowded wreath.
11. Scarlet Candy-Cane Diagonal French
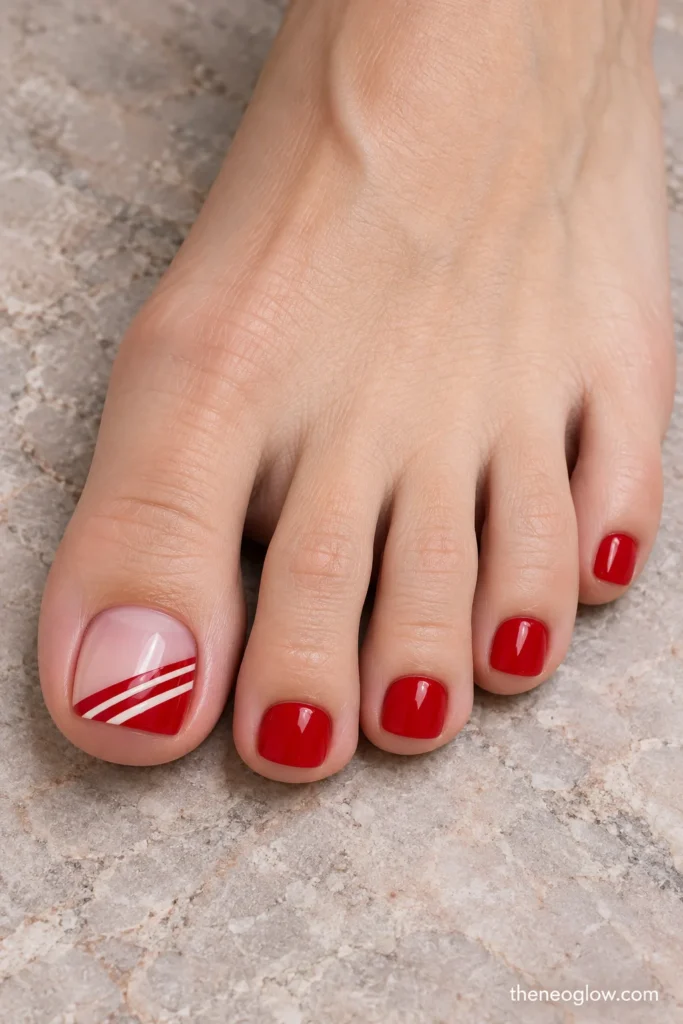
Begin with a sheer pink-beige base. Across each big-toe free edge paint one wide diagonal scarlet French wedge, then cut across that red wedge with two slender ivory stripes. The smaller toes get solid scarlet rather than stripes too thin to read. For a more detailed explanation of edge depth and line placement, see NeoGlow’s French tip toe nails guide.
12. Peppermint Pinwheel Big Toe
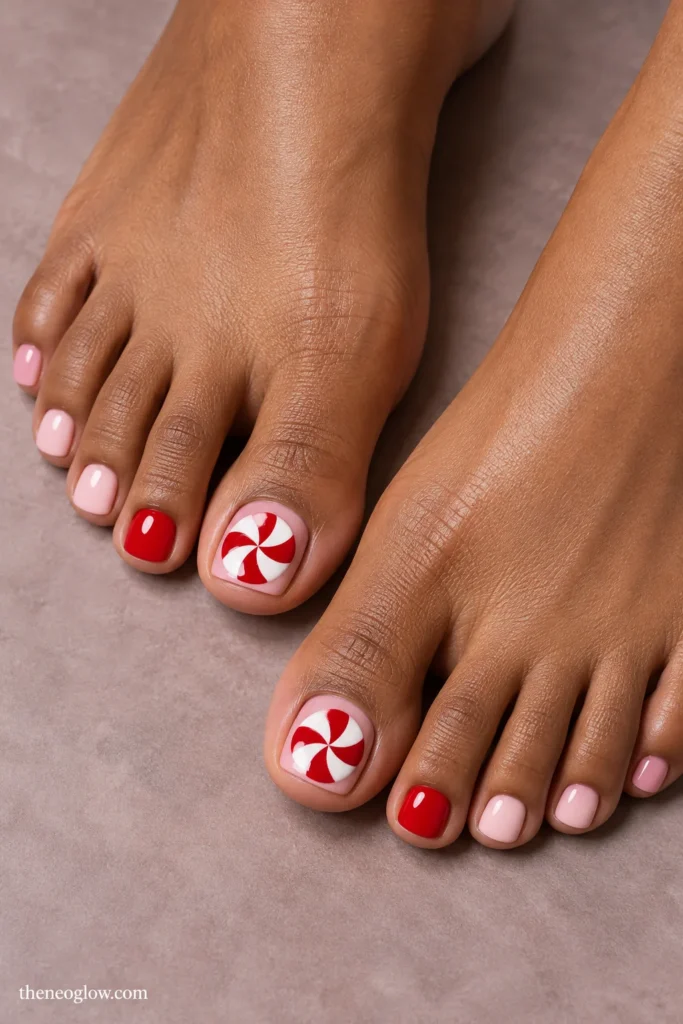
Keep all nails creamy blush pink. In the middle of each big toenail paint one flat round peppermint disk, made from six broad alternating red and white curved wedges; leave a blush border around the candy. Paint the two second toes glossy red, and leave the remaining toes blush. This is a centered motif rather than the angled free-edge design above, and it needs only one candy per foot.
13. Spruce and Cranberry Ribbon Crossing
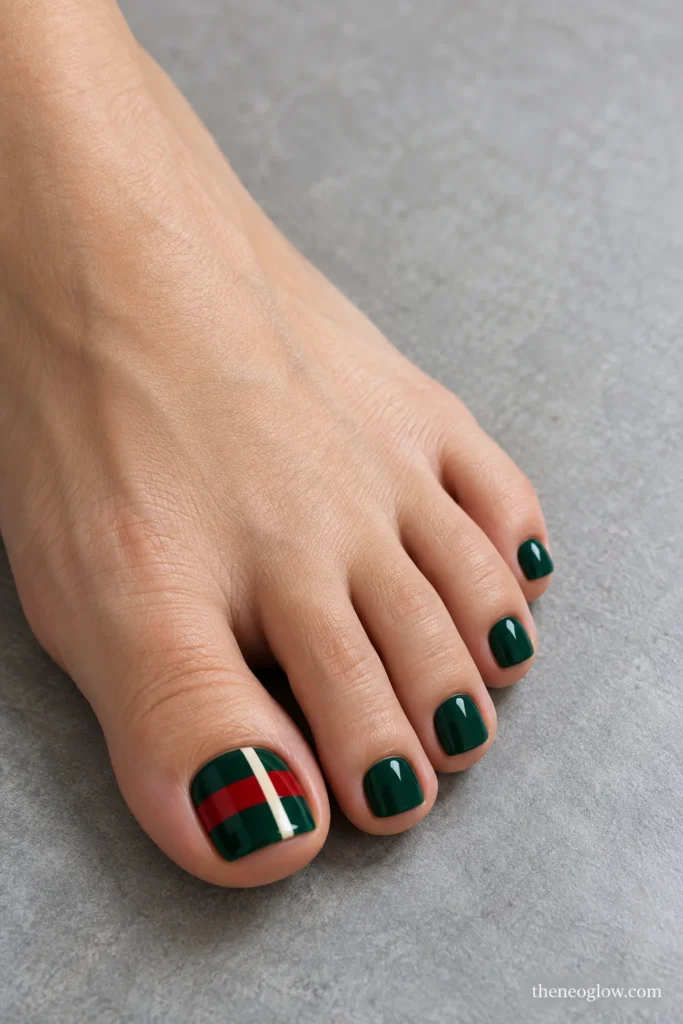
Use opaque deep spruce-green cream on all ten toes. On each big toenail, paint one broad horizontal cranberry band and one narrower vertical ivory line crossing it off-center, like flat wrapping ribbon. No bow, gem, or raised pieces are needed. The smaller toes stay spruce; an ivory-and-cranberry crossing gives the two big toenails enough seasonal contrast.
Little Christmas Motifs, Kept Flat and Readable
14. Vanilla Base With One Flat Red Bow
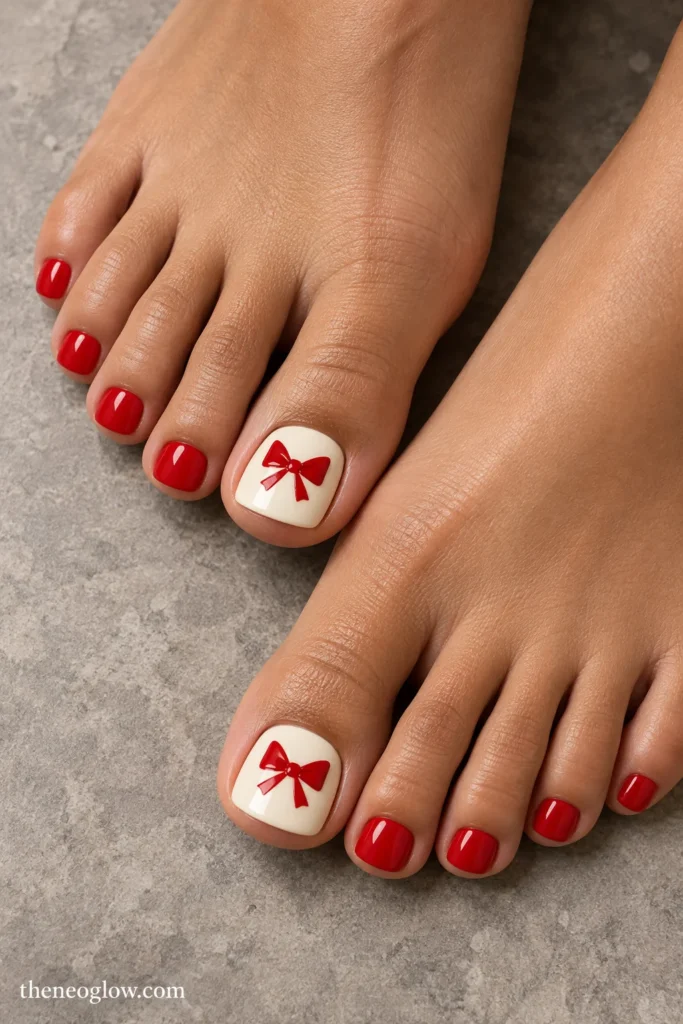
Try creamy warm-vanilla polish on the big toes and glossy tomato-red polish on all smaller toes. Center one red bow on each big toenail: two solid triangular loops, one small knot, and two short ribbon tails, all painted flat. Do not shrink bows onto the pinky toes. This playful option works best when the loops remain simple silhouettes rather than lacework.
15. Midnight Snow-Globe Window
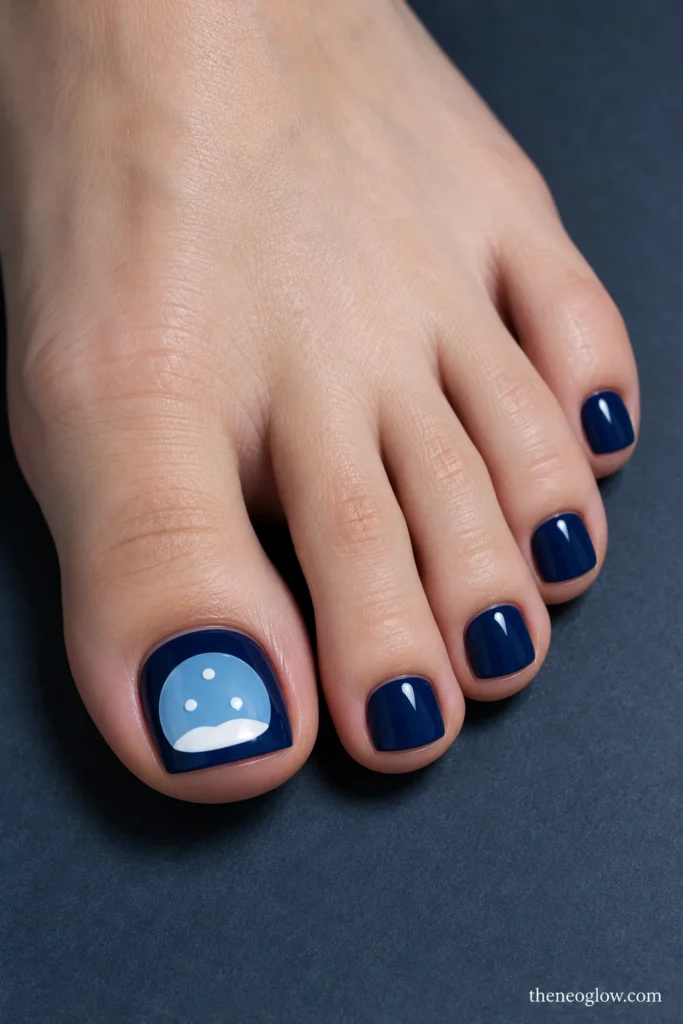
Set glossy midnight-blue polish across every toe. Each big toenail gets a large rounded pale-blue window centered inside the dark field, with one short white snowy baseline and three separated snow dots inside. Omit houses, lettering, and miniature people. The smaller toes stay midnight blue, allowing the circular window to read like a snow globe without trying to paint an entire winter village.
Gold and Party-Finish Pedicures
16. Merlot With a Champagne Glitter Tip-Fade
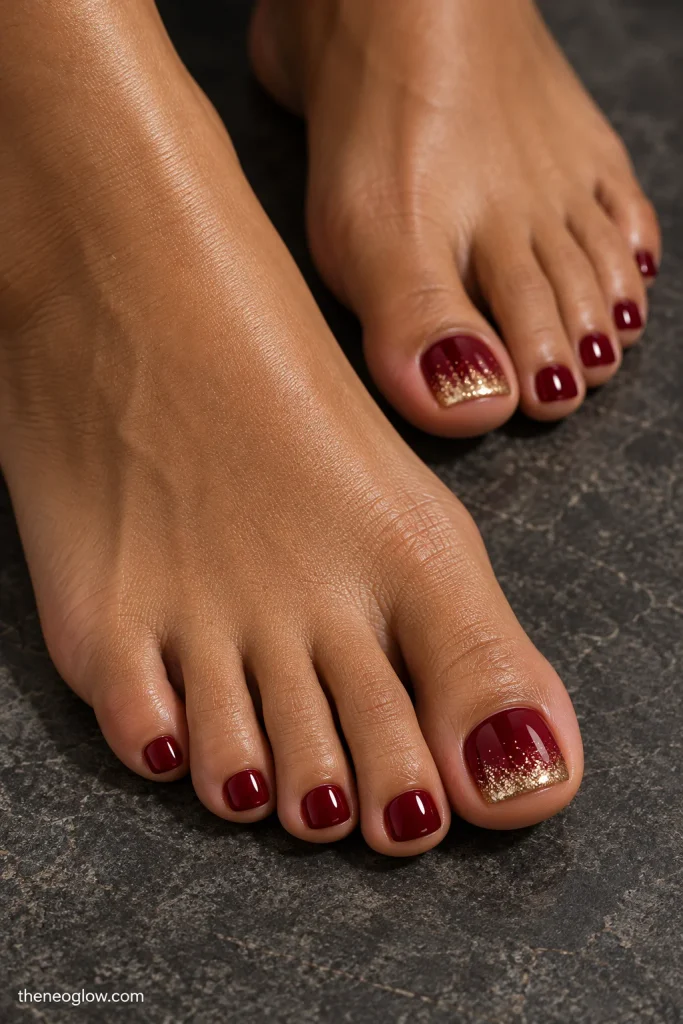
Paint the smaller toenails opaque glossy merlot. On each big toe, start with the same wine shade and fade very fine champagne-gold glitter down from the free edge to roughly the top third. Keep the glitter brightest at the tip rather than near the cuticle. The red base carries the Christmas identity while the metallic gradient gives a party-ready flash.
17. Black-Cherry With Antique-Gold Foil Tiles

Use black-cherry cream on all toenails. Lay three or four irregular, flat antique-gold foil rectangles in the lower outside quadrant of each big toenail, separated by visible dark-red gaps. Keep the pieces smooth, rather than stacked or raised. Leave the smaller toes plain black cherry. The scattered metallic blocks look like a miniature mosaic, distinctly different from glitter or mirror chrome.
18. Evergreen With a Hanging Gold Ornament
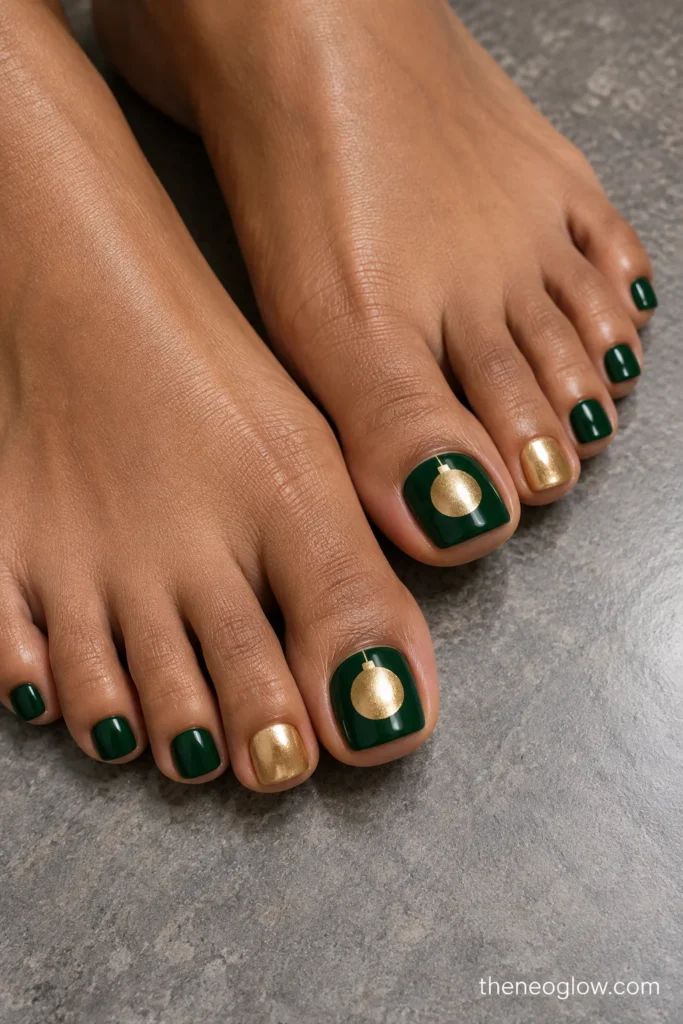
Cover every toenail with glossy, opaque evergreen. Paint one large flat metallic-gold ornament circle in the upper center of each big toenail, plus a very short gold hanger line connecting it toward the cuticle. The ornament should have a solid smooth fill, no gem or dangling charm. Give the second toe on each foot warm metallic gold and leave the rest evergreen for a confident green-and-gold finish.
Turn a Saved Reference Into a Salon Request
Your technician needs five details, in this order: natural toenail length; base opacity and color; big-toe motif; simpler-toe colors; and surface finish. A workable request for idea 11 is: “Short natural toenails, sheer pink-beige big-toe bases, one diagonal scarlet French wedge with two ivory stripes on each big toe, eight solid scarlet smaller toes, high gloss.”
For an understated set, replace the script with: “Milky-white sheer polish on all ten toes, three short red dashes along the outside edge of each big toe only, glossy topcoat.” Point to the exact reference instead of asking for “cute Christmas feet,” which leaves scale and placement ambiguous.
A natural toenail outline matters more than copying the shape in a fingernail photo. The American Podiatric Medical Association’s pedicure pointers for salon and home visits explain straight-across trimming, salon-tool hygiene, and why cuticles should not be cut. These are preparation questions to discuss with the technician, not extra nail-art steps.
Make the Manicure Coordinate, Not Compete
Pair red snowcap toes with a plain red manicure, or use ivory accents on the hands. Jade holly toes can sit beside solid forest-green nails. For the gold ornament design, repeat just the gold shade as a narrow hand accent instead of painting ornaments on every fingernail.
Browse NeoGlow’s Christmas nail ideas for hands if you want a larger manicure design; its full gallery serves a different purpose from these toe-scale references. For additional ways to match colors or finishes across hands and feet, use the matching nails and toes guide.
Plan for Shoes, Touch-Ups, and Removal
Try your planned sandals against the completed design before leaving: a strap can hide a side motif, while full ruby, snow-white, and evergreen still read clearly. If you will be in closed shoes, keep the decoration painted flat and allow regular lacquer to set according to its product directions before putting shoes on.
For a home polish session, follow the exact product’s label and ventilation instructions. If you choose gel, do not peel it when the holiday is over. The American Academy of Dermatology’s guide to removing gel polish from fingernails or toenails gives a detailed method and explains why forcing off the coating is a poor substitute for proper removal.
Pick one design that suits the shoes and events you actually have planned. Save its big-toe close-up alongside the smaller-toe color plan, then take both the image and the five-part request to your appointment.