A festive manicure can fit a nail that barely reaches your fingertip. These short Christmas nails start with natural square, squoval, round, and shallow oval shapes, then give the artwork a realistic amount of space. You will find narrow tips that do not pretend there is extra length, one-feature accents that remain recognizable, and color or texture changes that work on smaller plates. Each of the 21 looks has its own distinct design, rather than twenty-one names for red polish. First, check how much usable surface you actually have; then save the shape and scale note beside your favorite image.
Set the Scale Before Choosing the Art
Here, short means the nail finishes near the fingertip, with no extension and at most a small visible free edge. The thumbnail can carry a larger illustration; the little finger may need only a color echo. Do not demand the same artwork at the same size on all ten nails.
| Your nail | Give the design this space |
|---|---|
| Very short square | One angled tip, slim border, or corner block |
| Squoval | Micro chevrons, little bows, or a shallow detail following the edge |
| Round | One recognizable silhouette or softly curved accent |
| Shallow oval | Cropped snowflakes, one swirl, or a small central ornament |
If your nail has almost no free edge, keep it round, square, or squoval instead of filing the supported sides to imitate almond. Compare the silhouettes in NeoGlow’s short nail-shape guide before choosing the artwork. The shape guide handles the shaping decision; the ideas below handle Christmas-scale placement.
Festive Details That Fit Along a Short Tip
1. Scarlet Diagonal Slice Tips
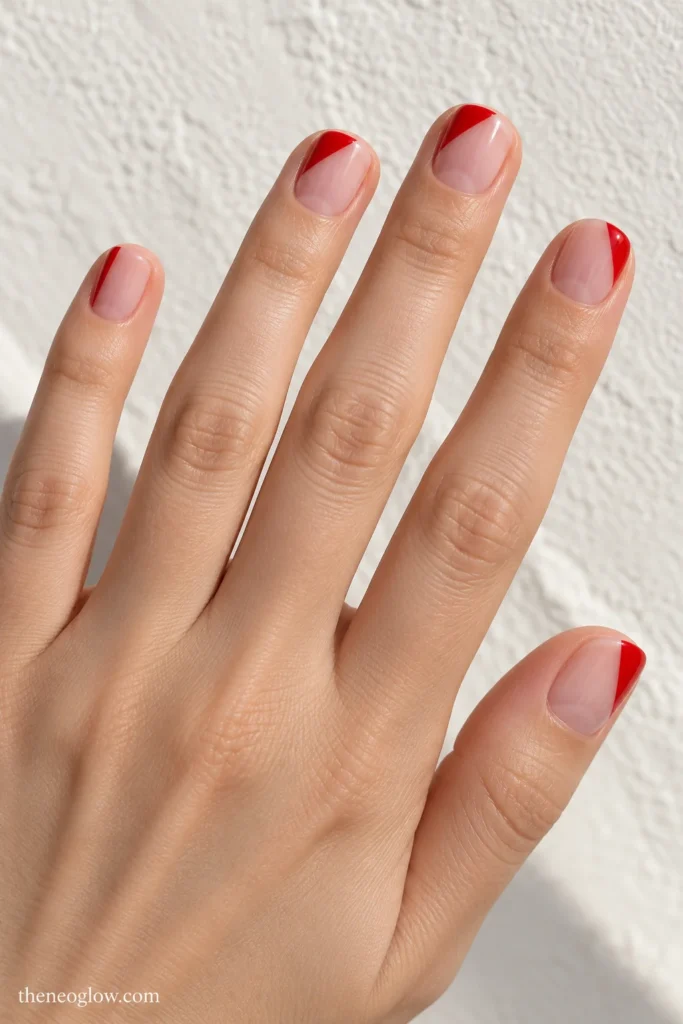
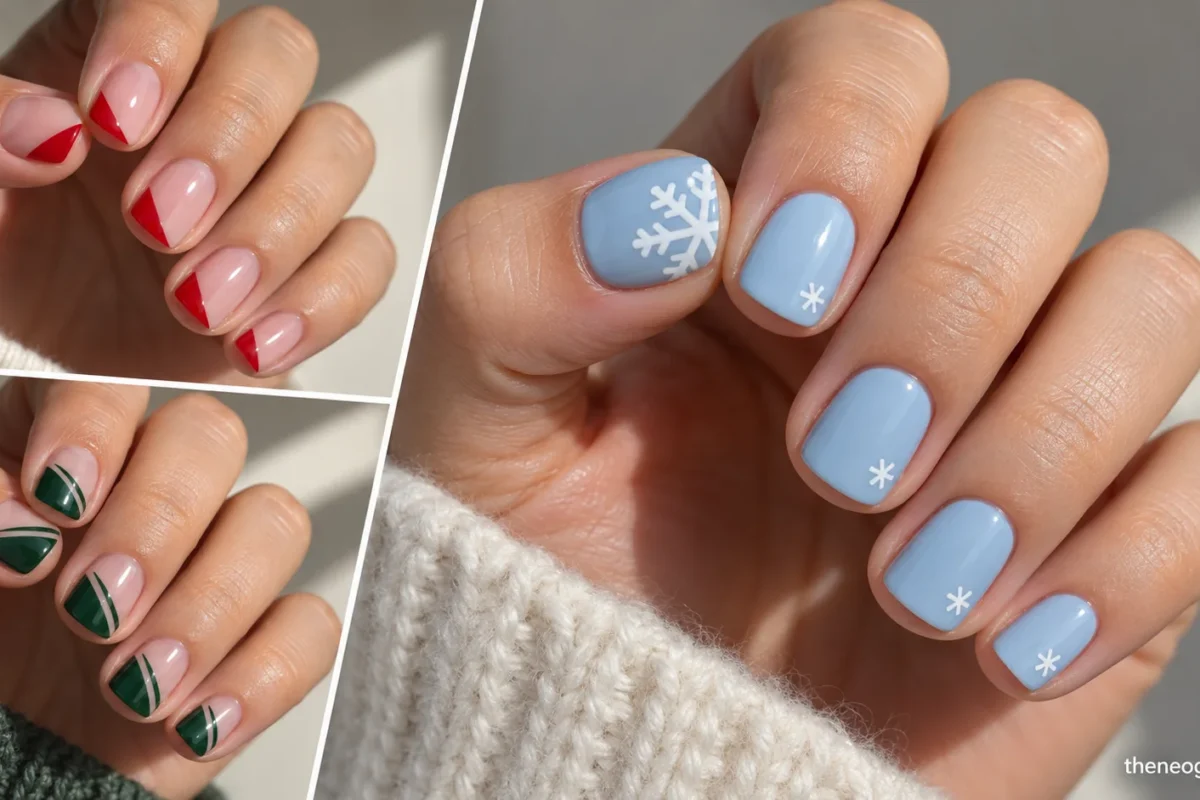
On very short square nails, leave a transparent rosy base and fill only one slanted outer tip corner with glossy true red. Repeat the red slice on each finger, alternating left and right. Unlike a full French band, the diagonal wedge stays recognizable even without a long free edge.
2. Evergreen Micro Chevron Edges
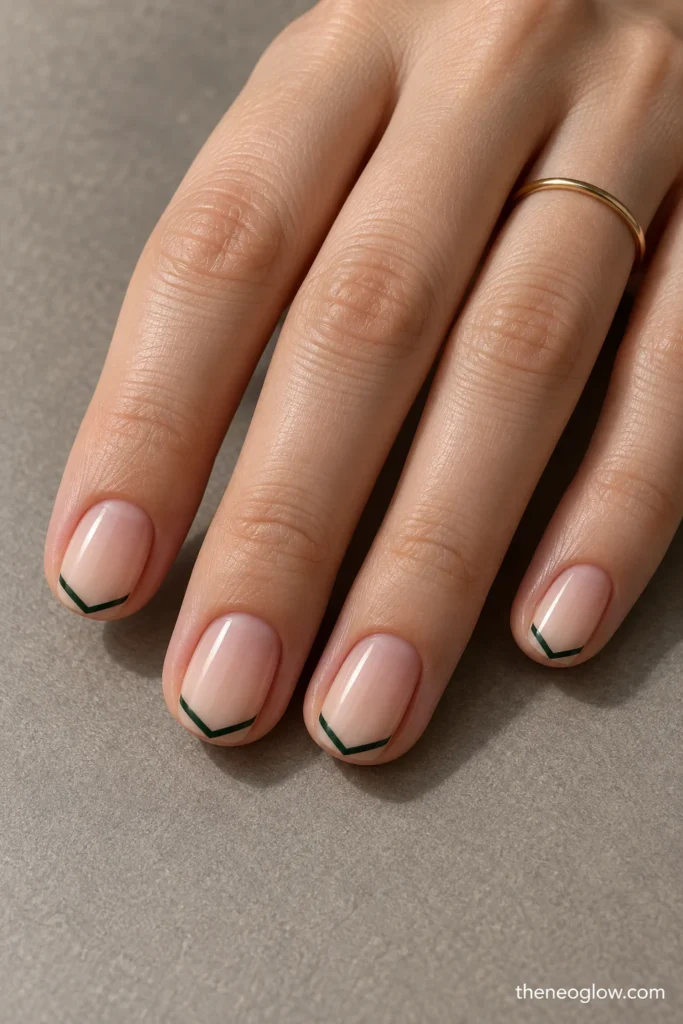
Draw a narrow, dark-pine V across the edge of each short squoval nail over sheer beige. Let the V meet just inside the center of the tiny tip; avoid building a tall pointed extension. The straight sides make the geometric green outline readable with very little polish.
3. Candy-Cane Corner Notches
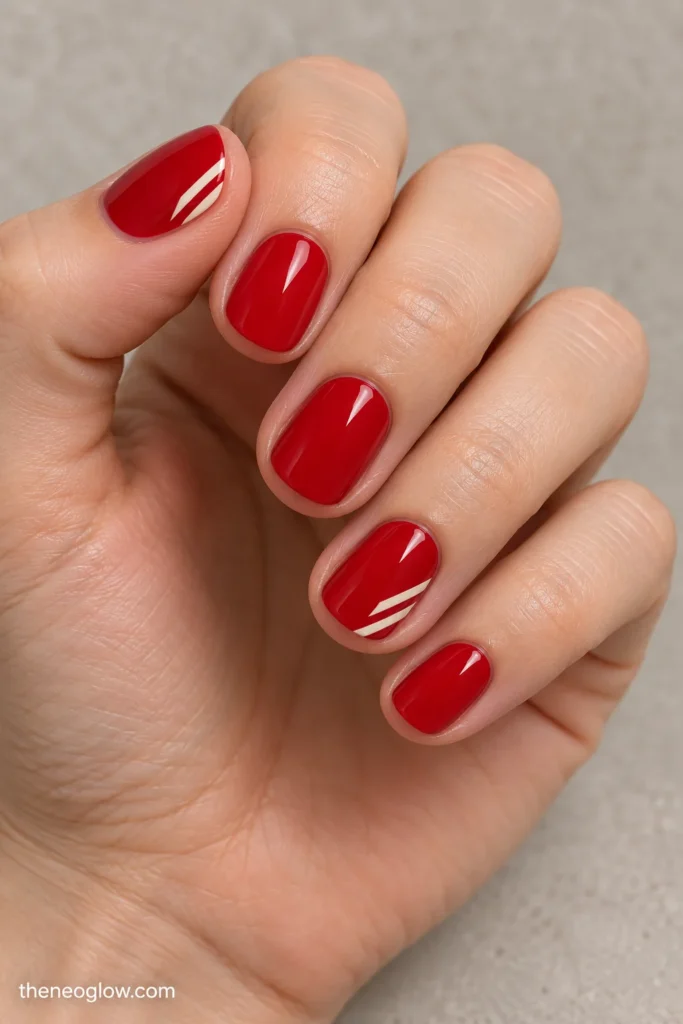
Use cherry-red cream on short rounds and add two short, parallel ivory diagonal marks near one outer corner of each thumbnail and ring finger. These are little striped notches, not a fully wrapped candy cane or a broad peppermint French. Leave the other nails uninterrupted red.
4. Powder-Blue Snowcap Sides
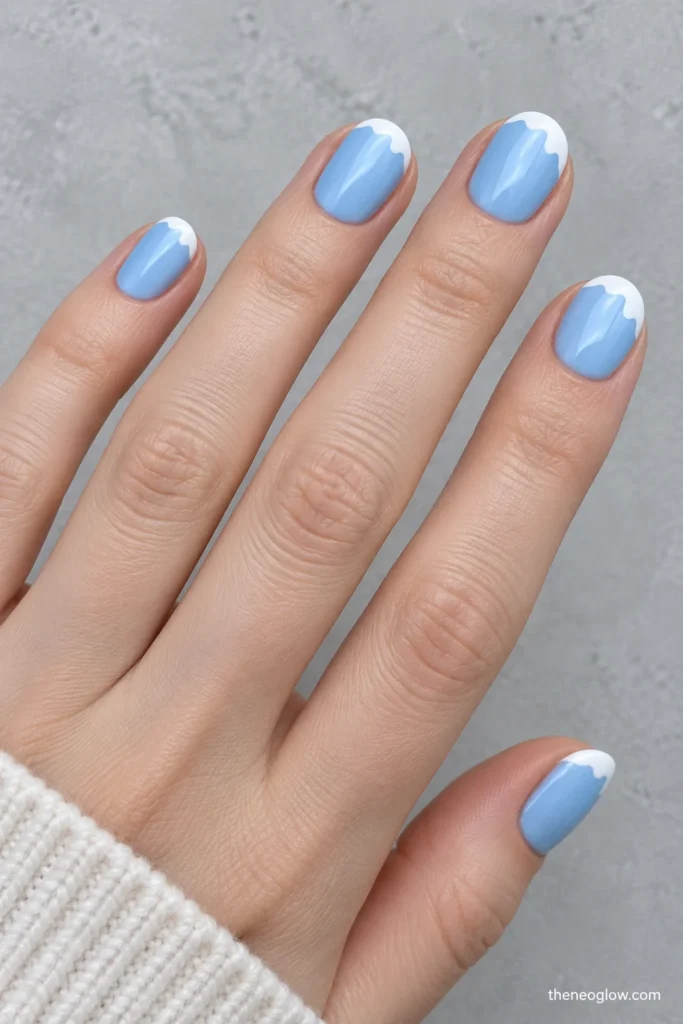
Give shallow ovals a misty blue opaque base, then paint an irregular white curve across only the outer third of the tip. The soft edge resembles a small snowy bank. Preserve blue space below it so the effect does not become an ordinary white French manicure.
5. Burgundy Tips With a Gold Seam
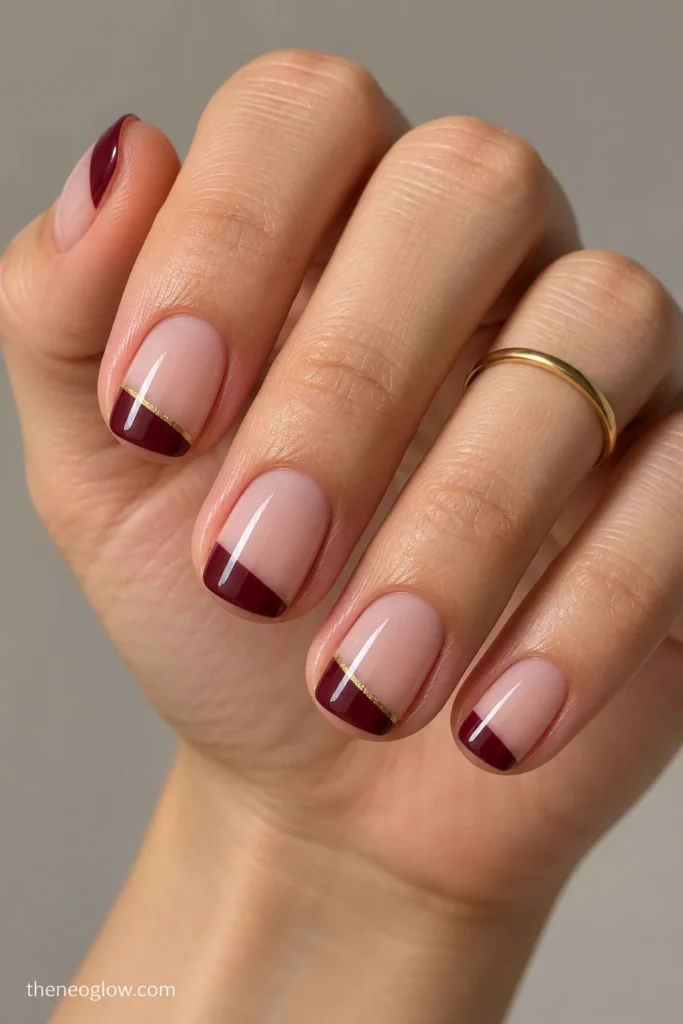
On short soft squares, angle a slim burgundy tip across the free edge of a milky-beige nail. Add a hairline gold stroke where the burgundy meets the base, restricted to two accent fingers. The metallic seam defines the small shape without requiring a second full tip layer.
Use the Corners and Cuticle Area
6. Flat Ribbon-Knot Bases
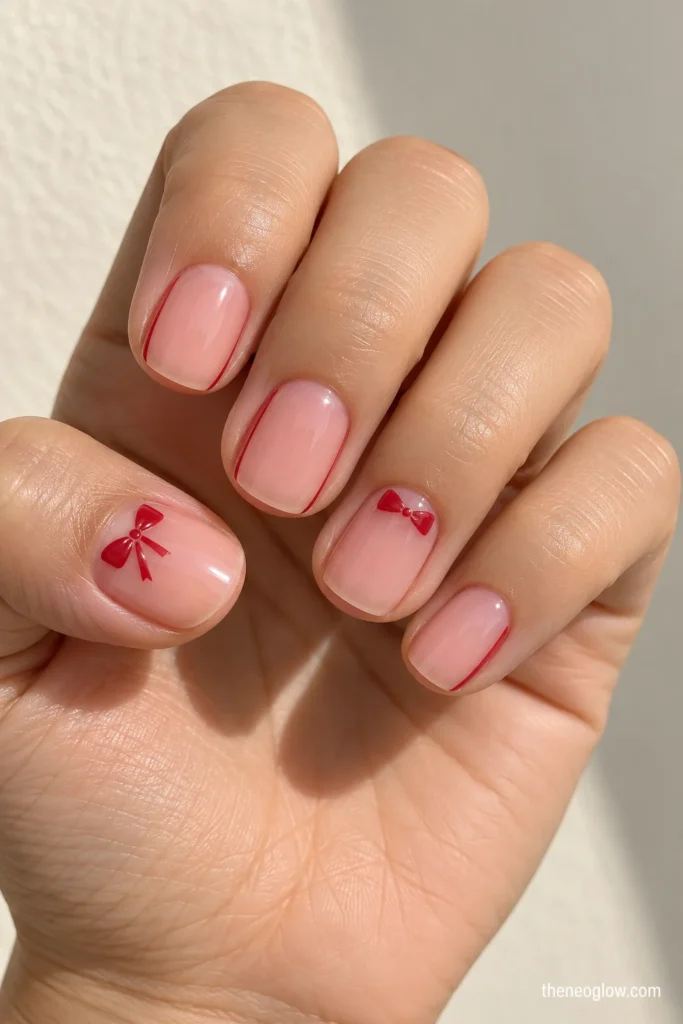
A short rosy squoval can hold a bow without a raised charm. Paint two small red triangular loops touching at a central dot near the base of each ring finger; add two very short tails only on the wider thumb. Keep the remaining nails translucent pink with a red side edge.
7. One-Sided Pine-Needle Frame
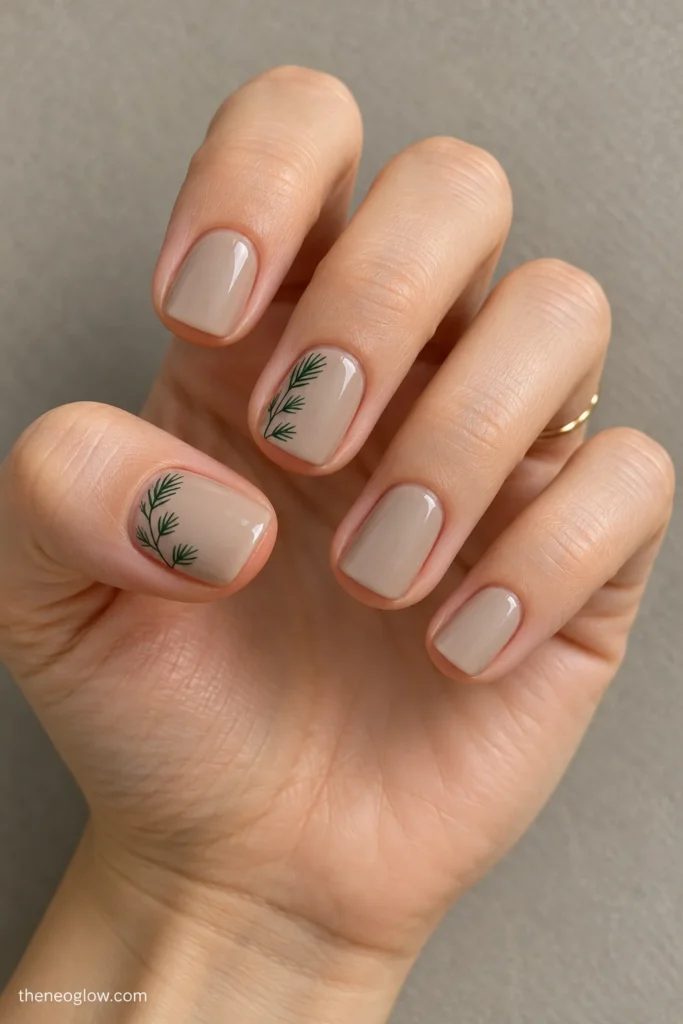
Start with glossy warm-stone square nails. On the thumb and middle finger, trace a fine forest-green stem down one side and attach only three paired needle strokes angled inward. The design uses the side margin, leaving the middle of the short plate open instead of squeezing in a complete tree.
8. Cranberry Bead Arc
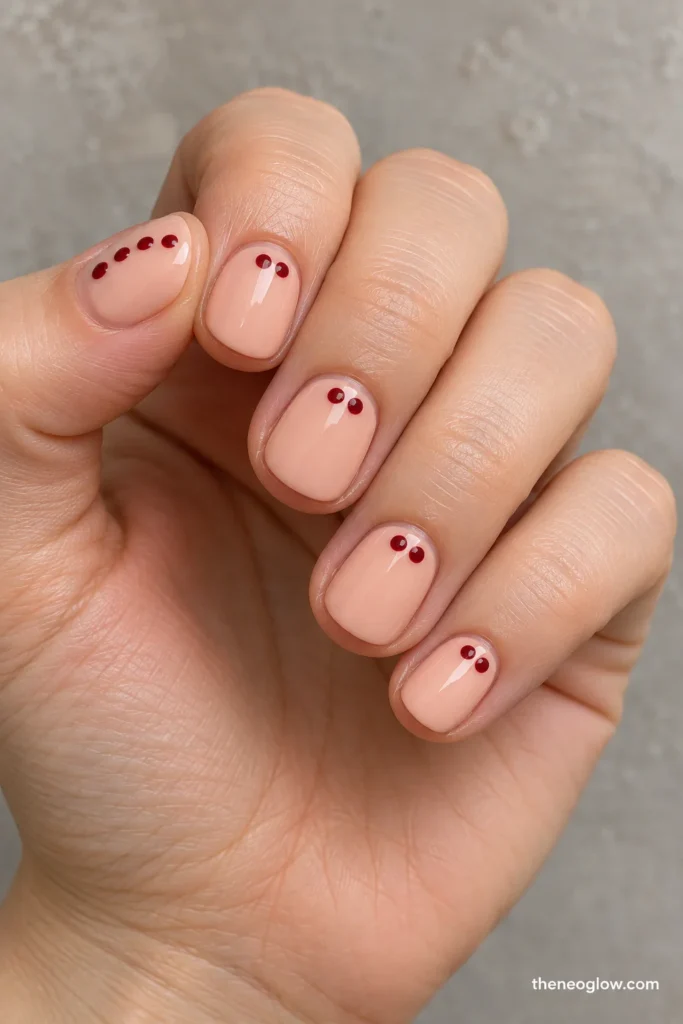
On ultra-short round nails, position four small cranberry dots in a shallow arc just above the cuticle of each thumb; give the smaller fingers a two-dot version. Use an opaque pale-peach base and glossy topcoat. The changing dot count is intentional scaling, not missing decoration.
9. Cream Mitten Thumbnail
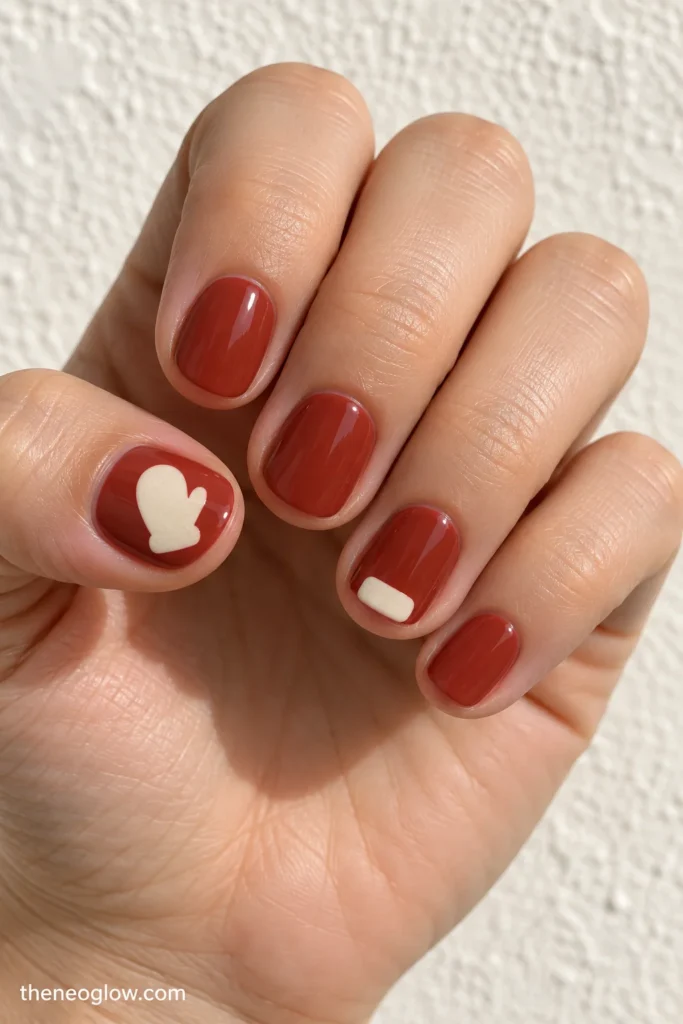
Paint short natural rounds a soft brick red. Place one solid cream mitten silhouette, with one obvious thumb bump and no knitted lines or lettering, in the center of each thumbnail. The remaining nails are red, with a tiny cream cuff-shaped block on the ring fingers to connect the set.
10. Gingerbread Icing Scallops
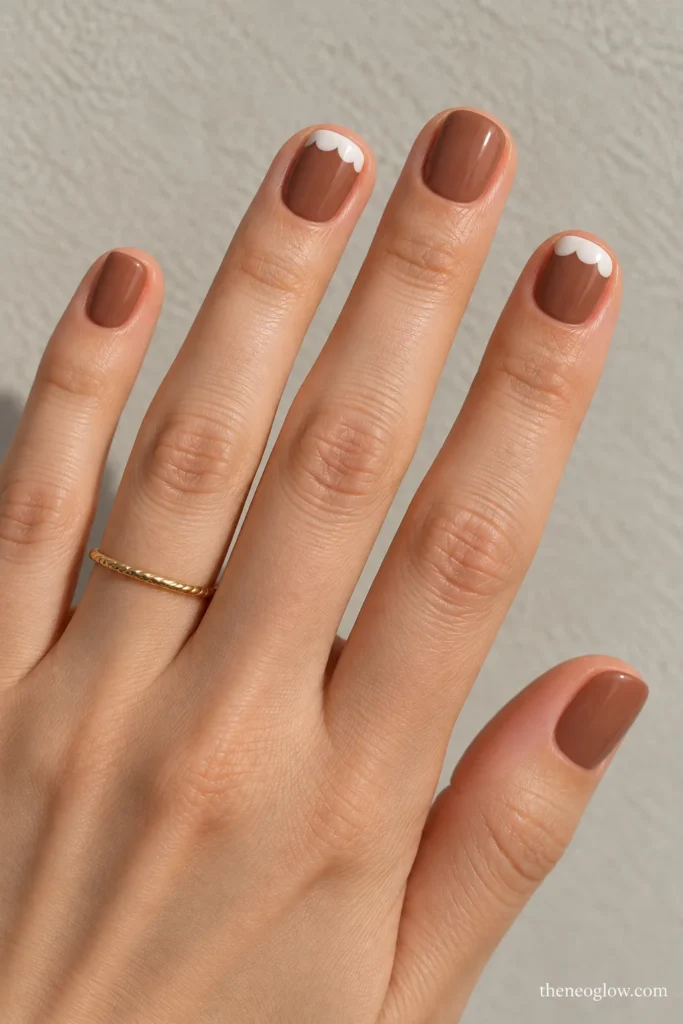
Coat very short squares in opaque warm cocoa. Paint a shallow white scalloped line beside the cuticle on the index and ring fingers, like the edge of iced gingerbread. Two or three broad scallops fill the width; attempting eight miniature loops would turn the design into visual noise.
Give One Nail the Recognizable Motif
11. Cropped Porcelain Snowflake
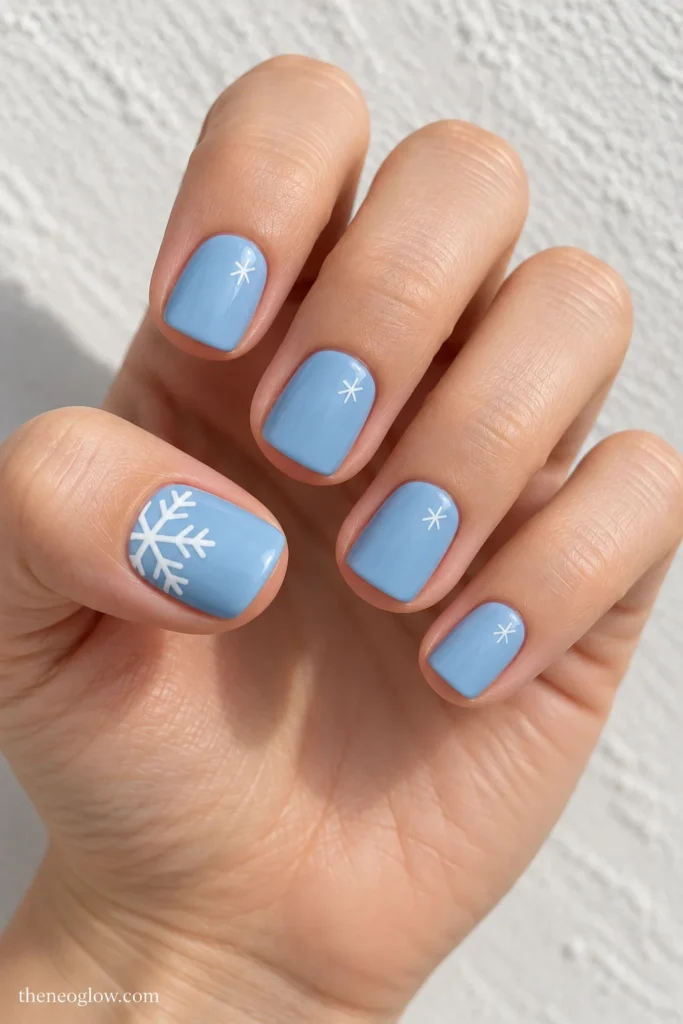
Powder-blue squovals keep this winter design light. On each thumbnail, paint half of a white six-armed snowflake entering from one side; show only the main arms and a short fork on each visible branch. The other fingers receive one tiny white asterisk, so no small nail must hold the full symbol.
12. Matte Wine-Red Bauble
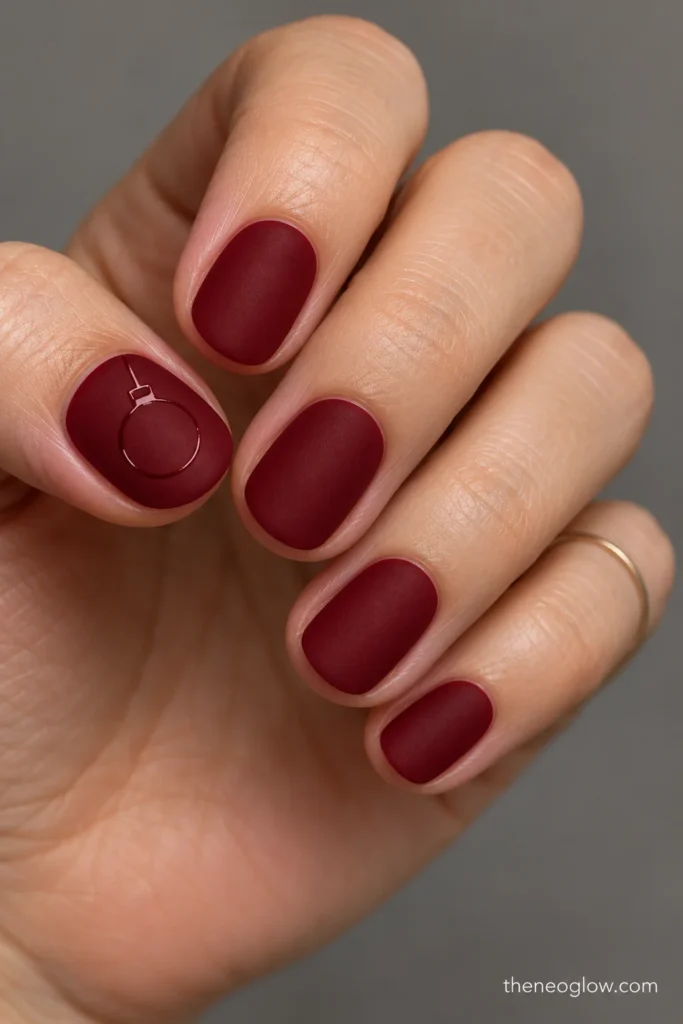
Use deep wine-red matte polish on short ovals and draw one small glossy circle with a tiny straight hanger on the thumb. The finish contrast creates an ornament without adding a metallic gem. Leave the circle open inside and keep all other nails plain matte wine red.
13. Fir-Tree Silhouette on Cream
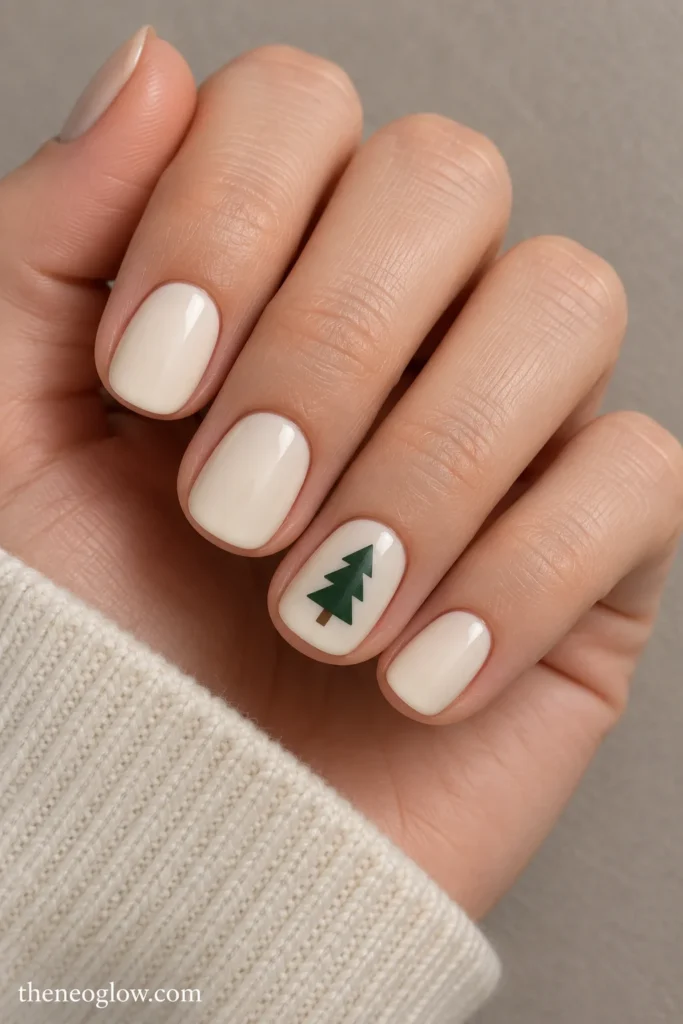
Paint short rounds warm ivory. Build a simple dark-green tree on one ring finger with three solid, gradually wider stacked triangles and one tiny brown trunk. Skip garlands, eyes, stars, and snow. On narrow pinkies, repeat only the ivory base; one clear tree per hand tells the story.
14. Mini Gift-Box Cross
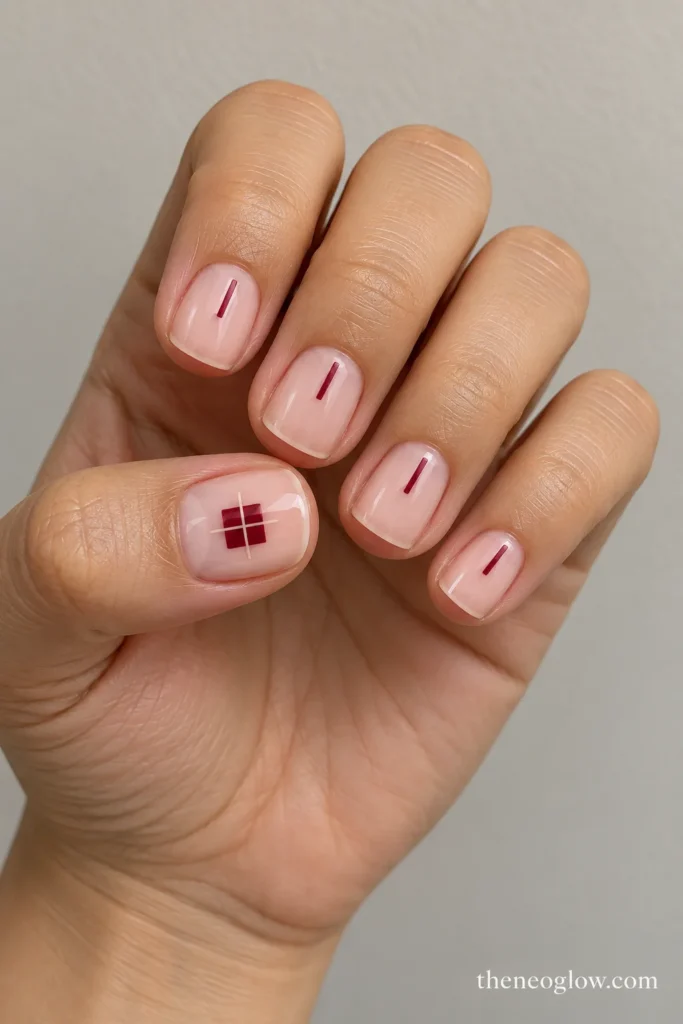
Choose a barely-there blush base on short squares. Place a compact cranberry square in the center of each thumb, then cross it with one vertical and one horizontal thin cream line. It reads as a wrapped package without a microscopic bow. Keep the other nails blush with a single cranberry stripe.
15. Berry-and-Ivory Checker Patch
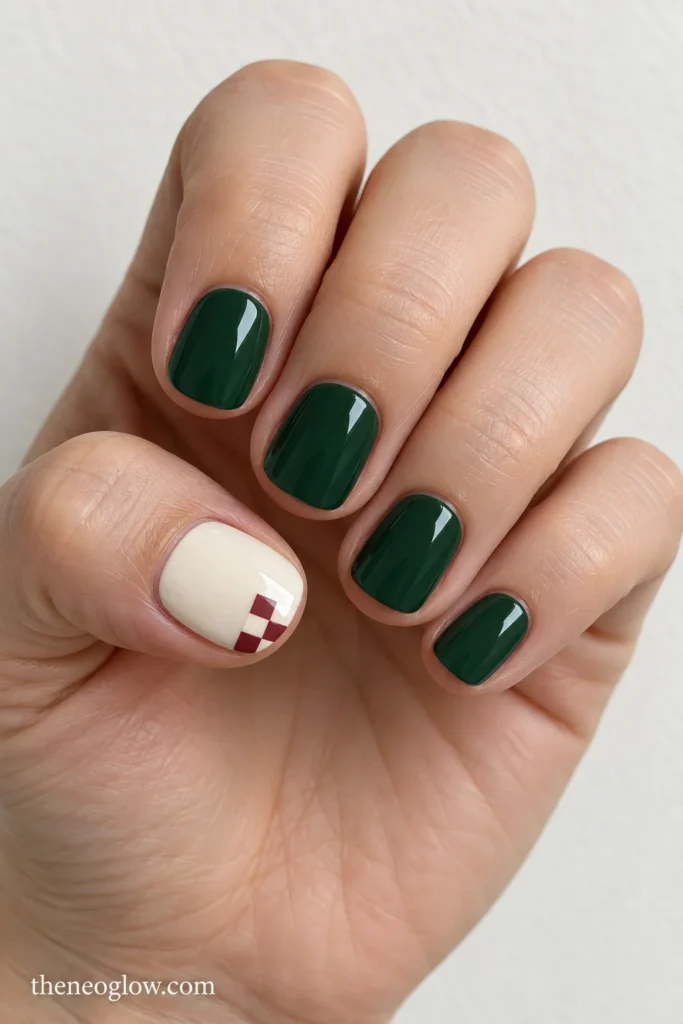
Use glossy forest green on short squovals, reserving one ivory thumbnail on each hand. At the outer lower corner of that thumb, make a two-by-two checker patch in cranberry and ivory, with crisp squares big enough to distinguish. Do not carry a miniature all-over checkerboard onto the pinkies.
Let Finish and Negative Space Carry the Rest
16. One-Stroke Peppermint Swirl
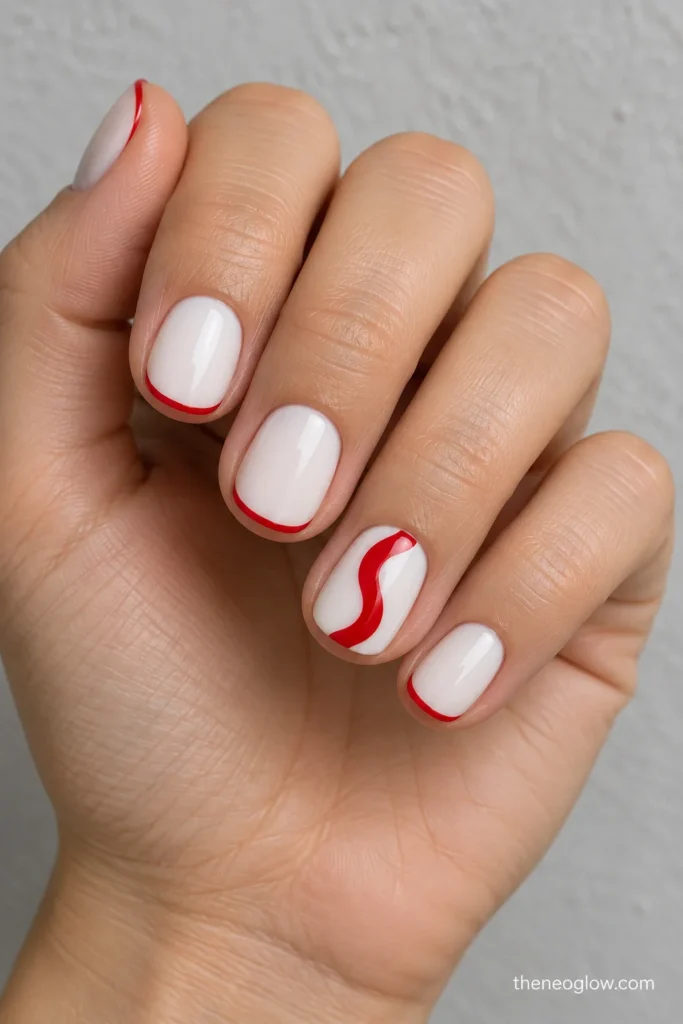
On very short ovals, use opaque marshmallow white and draw a single broad curved scarlet S on each ring finger. The arc stops before the sidewalls, with no tiny alternating stripes. A thin red edge on the remaining nails links the accents without repeating the swirls ten times.
17. Plum Jelly With Copper Foil Marks
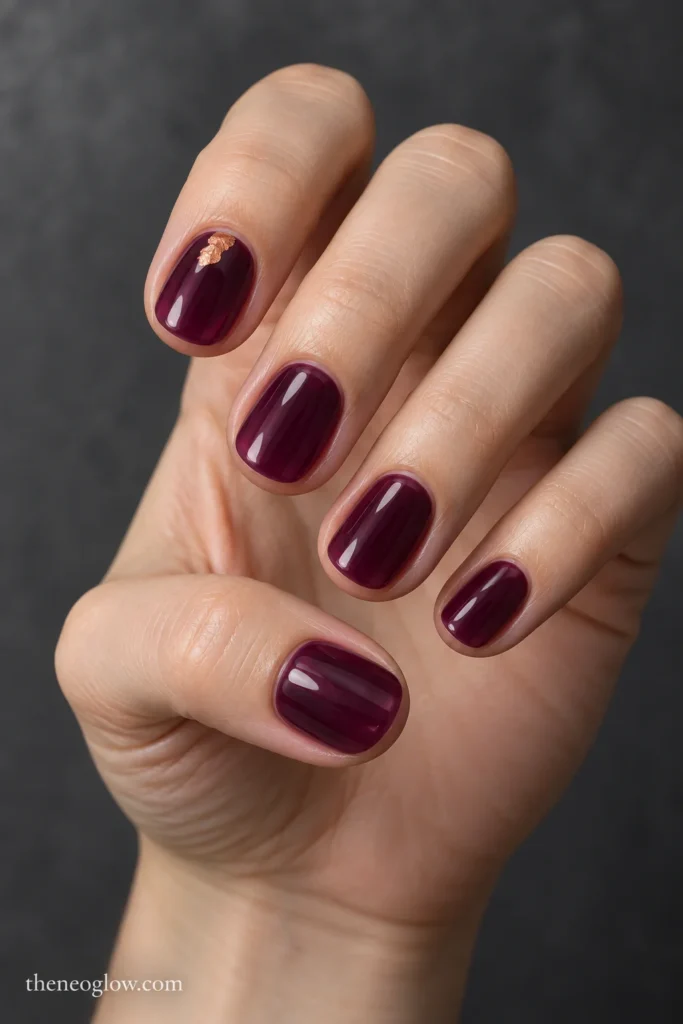
Choose translucent deep-plum jelly for short natural rounds. Place one small, irregular copper-colored flat foil-style mark near the base of each index nail; smaller fingers stay jelly-only. The reflective irregularity contrasts with the smooth transparent color, rather than turning the set into chunky glitter.
18. Midnight Sky Four-Point Glints
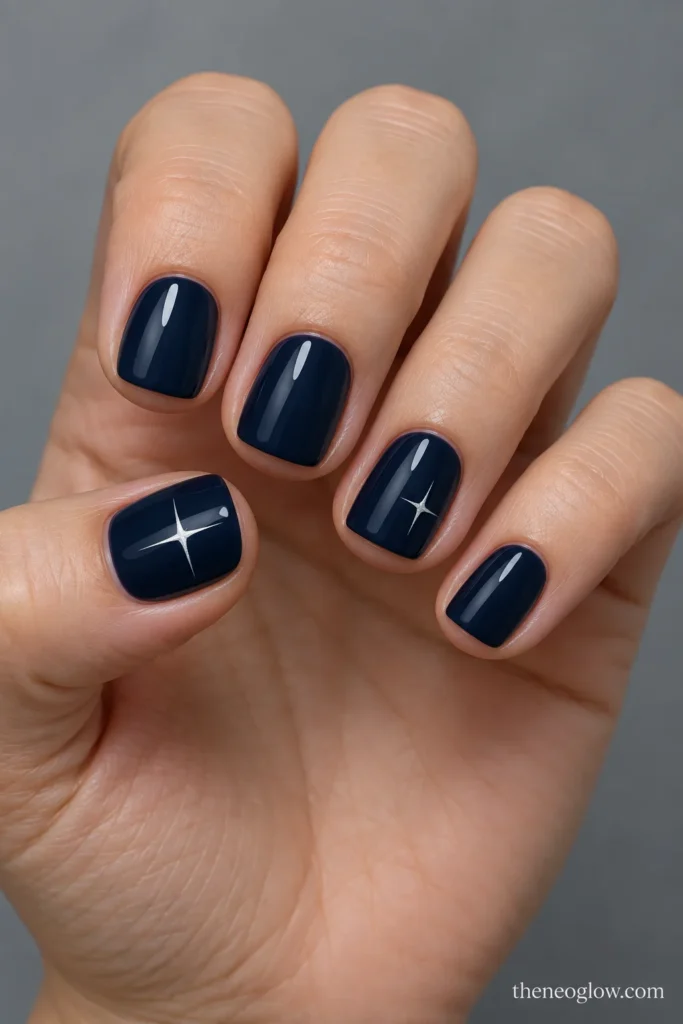
Short squares carry opaque midnight-navy cream, with one fine silver four-point glint set off-center on each thumb and one smaller glint on the ring fingers. Avoid a full constellation, glitter dust, or a second snowflake. The motif is crisp enough to remain readable on a compact plate.
19. Forest Negative-Space Slash
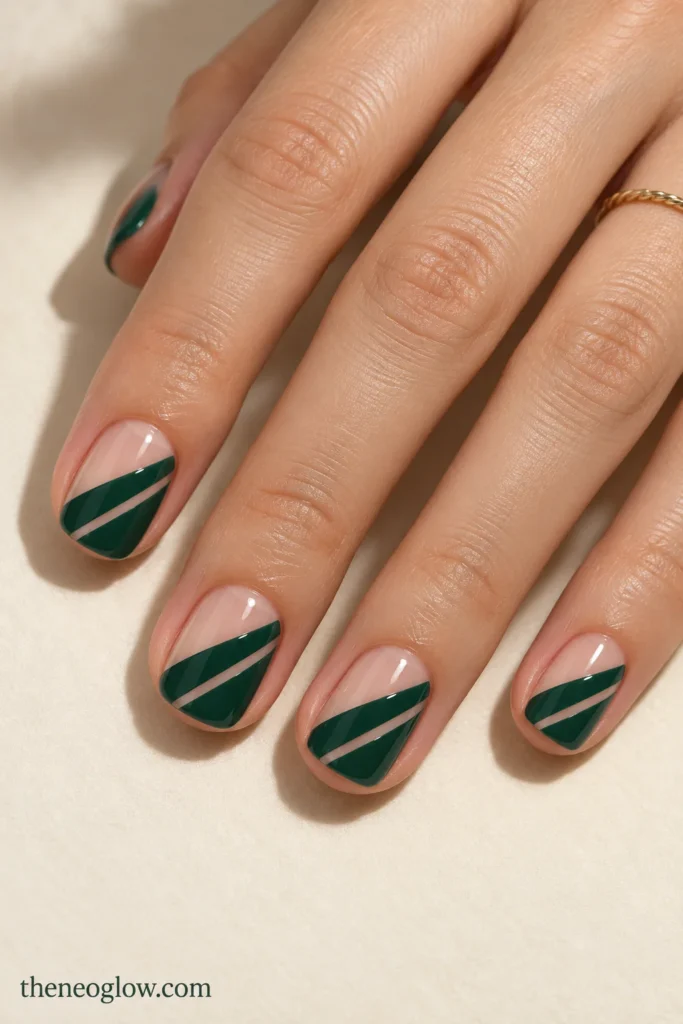
Paint a diagonal evergreen field over the lower outer half of each short squoval nail, but leave a clean, narrow bare stripe cutting through that field. Finish with gloss, with no stones or lettering. The stripe turns a simple green block into a clearly composed graphic Christmas manicure.
20. Icy Ornament Outline
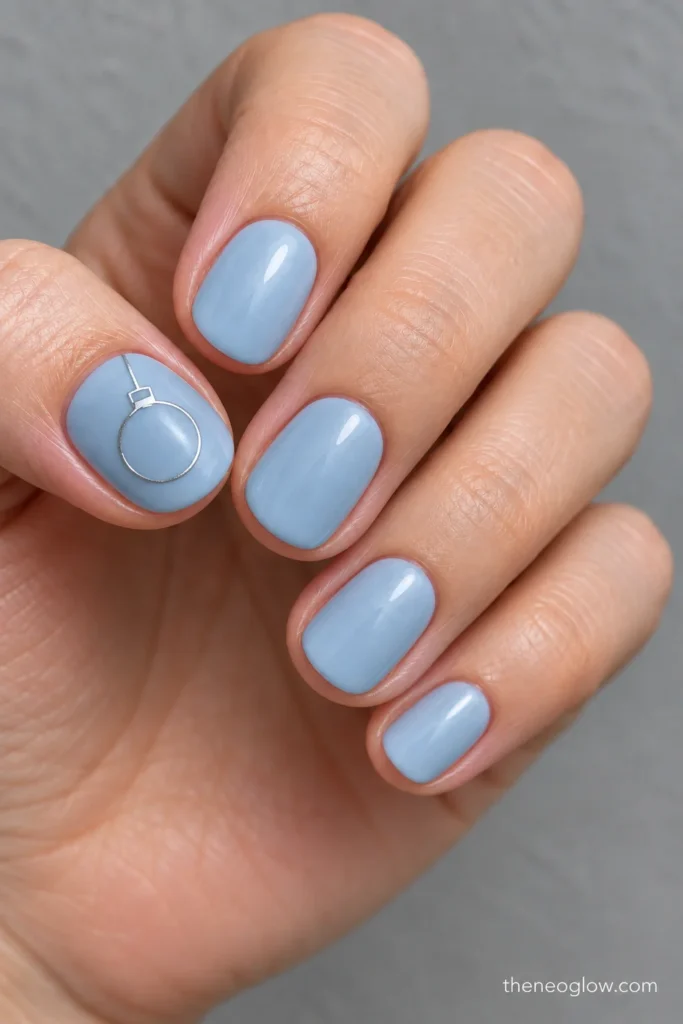
A short shallow oval gets a misty ice-blue base. On each thumbnail, add one modest silver circular outline with a tiny flat cap attached at the top; the smaller nails remain blue with a restrained pearl sheen. The circular ornament must fit inside the nail boundary, not hang off a fake extended tip.
21. Three-Bulb Tree-Light Trail
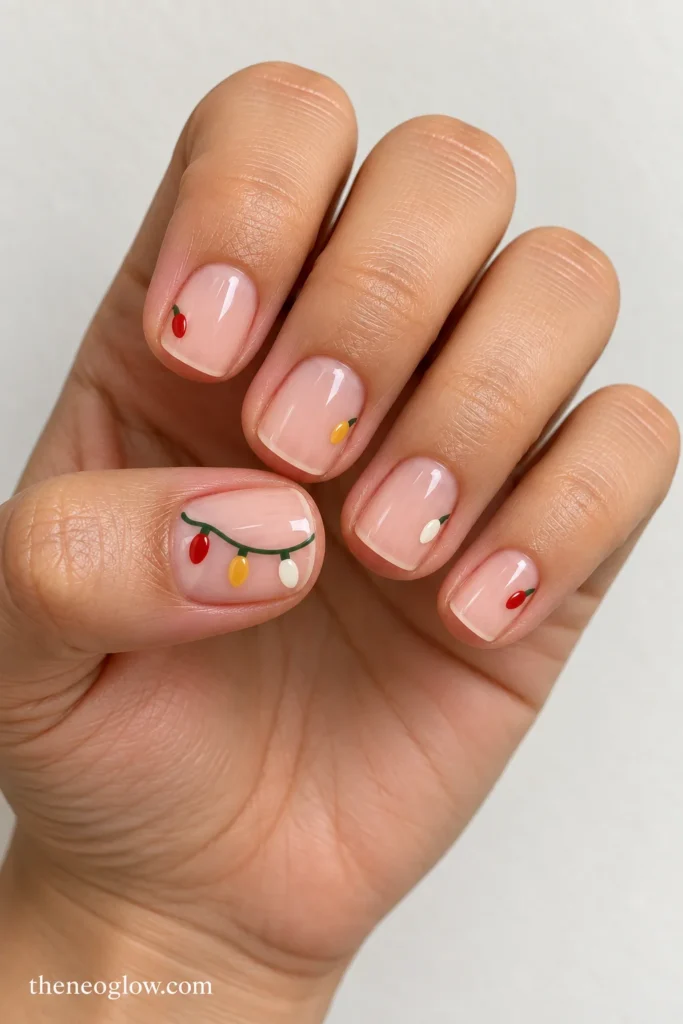
Keep short squovals sheer pink. Across each thumbnail, curve one fine green line and place just three flat oval light bulbs in red, warm yellow, and ivory. On the other nails, use one single painted bulb near a side edge. The negative space makes the cord legible without squeezing a long strand onto every finger.
Make a Saved Reference Work on Your Own Nails
Save the design with four notes: natural shape, visible free edge, artwork location, and accent count. If your thumbnail is larger than your other plates, use it for the main icon and give the remaining fingers a small color or line echo. For a tiny French, draw a test line along your actual nail edge before choosing the final band width. If the colored band hides most of the visible nail, switch to a diagonal corner or side detail.
For regular polish on very short nails, avoid loading the brush with more color than the plate can hold. OPI’s professional nail-lacquer lessons include a short-nail demonstration on capping the free edge before the main application, plus a lesson on cleaning accidental polish flooding. Follow the instructions for your own products rather than assuming every polish system behaves identically.
Keep the preparation gentle. The American Academy of Dermatology’s nail-trimming guidance explains how to smooth uneven edges, avoid cutting cuticles, and moisturize after trimming. Those steps matter more than trying to make every natural nail an identical canvas.
If you type for long periods, test the finished free-edge length on your normal keyboard and see NeoGlow’s nails-for-typing guide for the detailed fit decision. This collection deliberately uses flat details rather than raised bows or oversized charms.
Which Christmas Nail Reference Should You Save?
For almost no free edge, start with the scarlet slices, bead arcs, icing scallops, or forest negative-space slashes. For a recognizable character or seasonal object, use the wider thumb for the mitten, fir tree, gift box, or ornament. If you want more decorative or longer holiday sets, browse NeoGlow’s broader Christmas nail ideas instead of forcing that gallery onto a tiny plate. Save one of these 21 looks alongside its shape and scale note, then keep the real nail length—not the inspiration photo’s length—as your starting point.