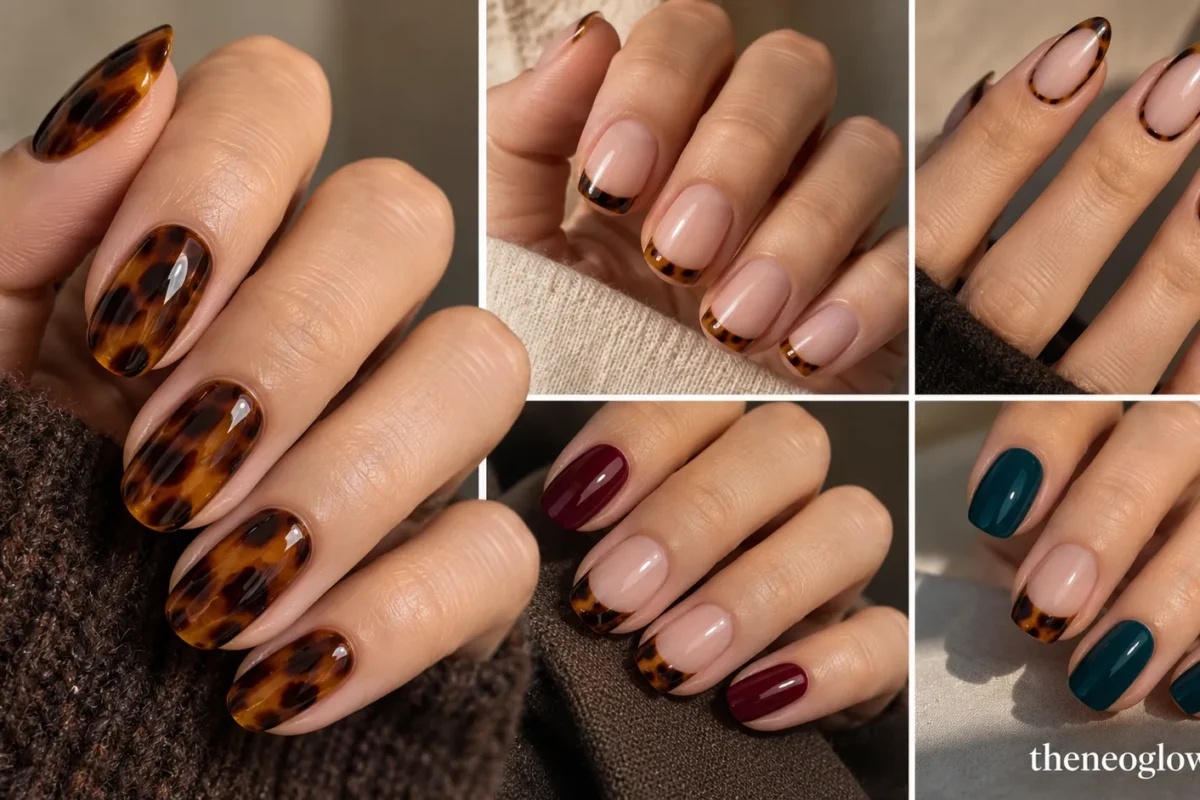
Tortoiseshell nails work best when the pattern has room to look layered rather than spotted. The recognizable effect comes from translucent amber or honey color, irregular brown and near-black shapes, and visible overlap between lighter and darker areas. For fall 2026, current Vogue coverage includes tortoiseshell in jelly, turquoise-paired, and micro-tip directions, which makes the pattern useful far beyond one full-cover brown set.
This guide treats tortoiseshell as a design system. Compare full coverage, French tips, side placement, frames, negative space, short-nail scaling, and color pairings before deciding how much pattern you actually want.
Choose Your Pattern Density First
| If you want | Use this structure | Best place to start |
|---|---|---|
| Barely there | micro French, side stripe, cuticle cuff | Ideas 2–6 |
| Balanced | half-nail, center panel, accent rhythm | Ideas 7–12 |
| Statement | full cover, framed tortoise, layered mixed set | Ideas 13–18 |
If your nails are genuinely short, choose the shape before the artwork. A short square or squoval gives you a stable edge for French placement, while a shallow oval works well for curved cuffs and small panels. NeoGlow’s best nail shape for short nails guide compares those outlines in more detail.
What Makes Tortoiseshell Look Like Tortoiseshell
Think in translucent layers, not leopard spots. Start with a warm transparent base, place uneven darker islands with different sizes and softness, then let another sheer warm layer visually sink some of those shapes into the background. The pattern should have depth, not a row of identical dots.
For a regular-polish reference, OPI’s Outta Your Shell tortoiseshell tutorial uses irregular dark shapes, overlapping sheer color, and a final translucent layer to build dimension. If you use a gel or blooming-gel system, follow that system’s exact instructions for application and curing rather than copying lacquer steps.
18 Tortoiseshell Nail Ideas
1. Full-Cover Amber Glass Ovals
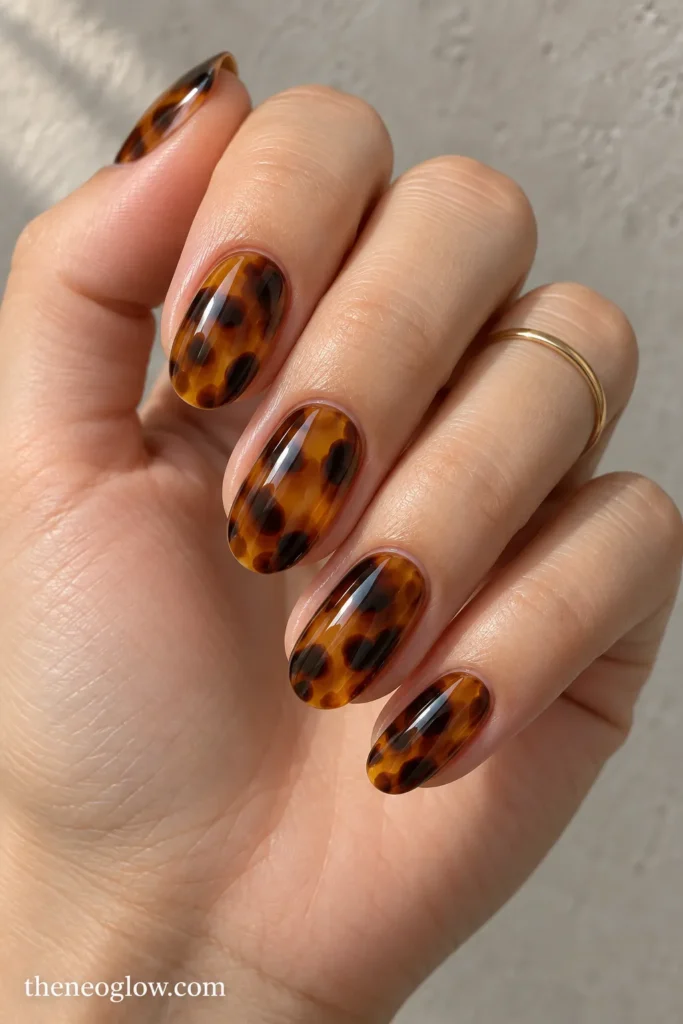
Use medium oval nails with translucent amber across the full plate, then layer cocoa and near-black patches so lighter honey areas still show between them. Keep the shapes irregular and different on every nail. A high-gloss finish makes the depth easiest to read and gives you the clearest classic reference before you move into partial placements.
2. Short Tortoiseshell Micro French
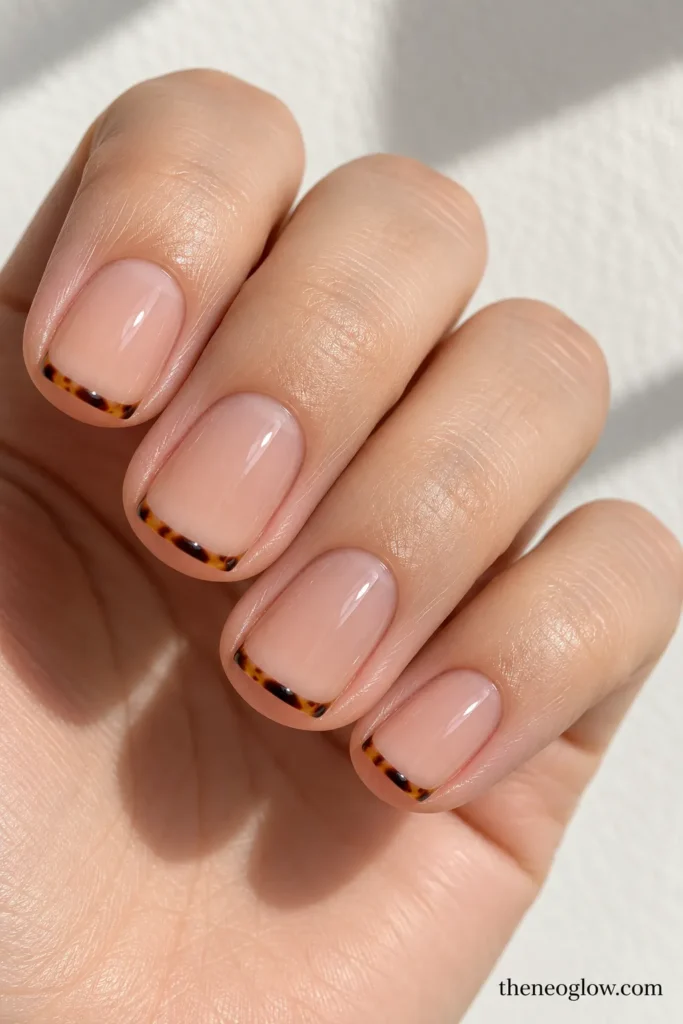
On short squoval nails, keep the base sheer beige-pink and compress the tortoiseshell into an ultra-thin French edge. The tip should show tiny amber, brown, and dark fragments without becoming a thick band. This is the most useful route when you like the pattern but want most of the natural-looking base visible.
3. Deep Tortoiseshell French on Almonds
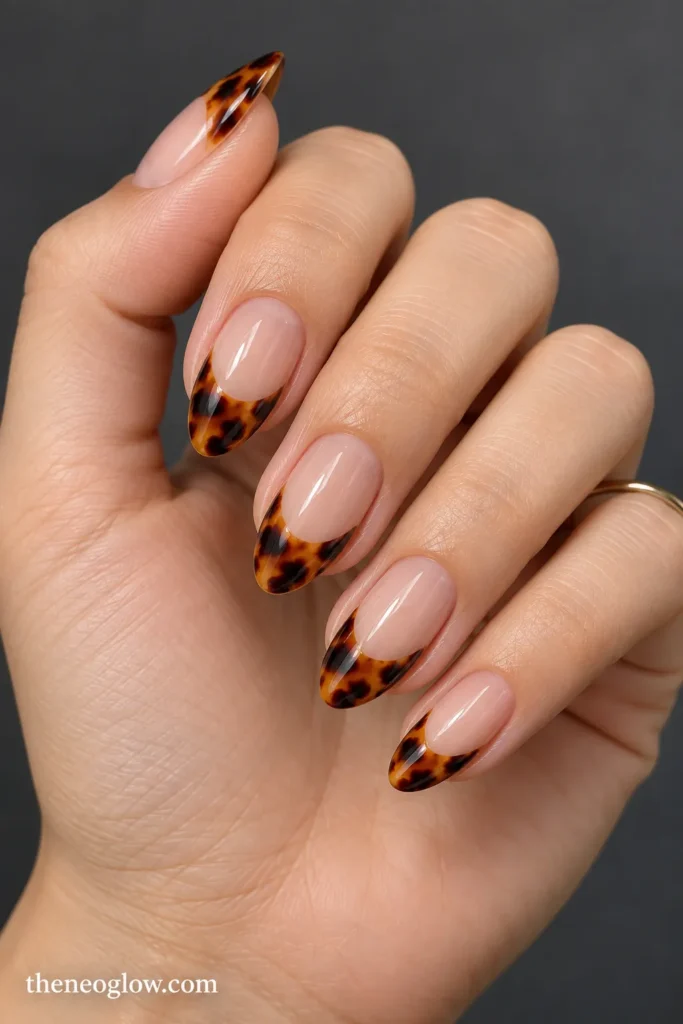
Give medium almond nails a deeper French section that starts higher at the sides and curves toward the center. Keep the tortoiseshell pattern only inside that tip zone, with a clean sheer base below. More surface area lets the shell layers remain recognizable without turning the entire nail into full coverage.
4. One-Side Tortoiseshell French
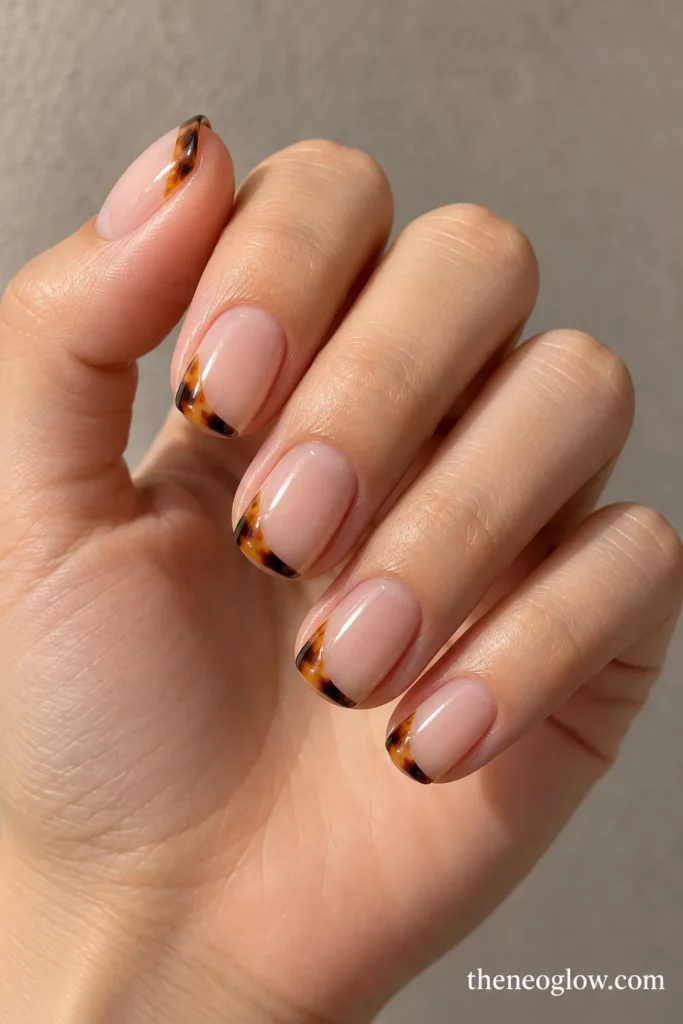
Instead of tracing the whole free edge, place a narrow tortoiseshell curve along one side of each tip. Let it begin near one corner and fade before reaching the opposite side. The asymmetry creates movement and uses less pattern than a standard French, making it easier to pair with office clothes or simple jewelry.
5. Tortoiseshell Cuticle Cuffs
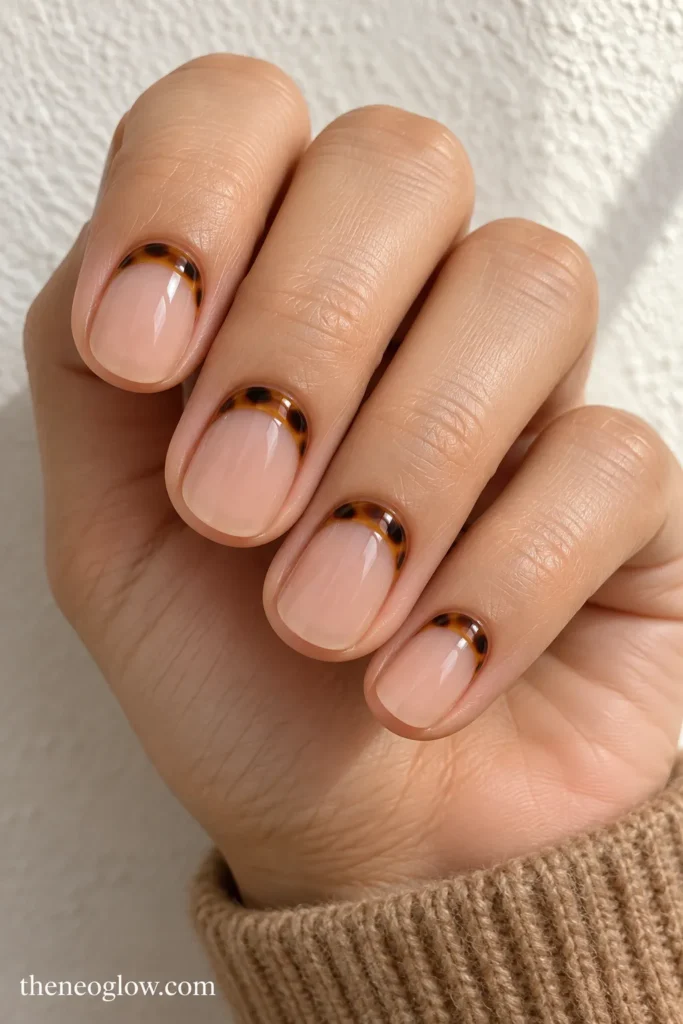
Move the pattern to the base of the nail. Paint a shallow tortoiseshell crescent that follows the cuticle line on short ovals or squovals, then leave the rest sheer. Keep the cuff narrow enough that the center remains open. This reverses the usual French placement without copying a full half-moon manicure.
6. Double-Corner Tortie Windows
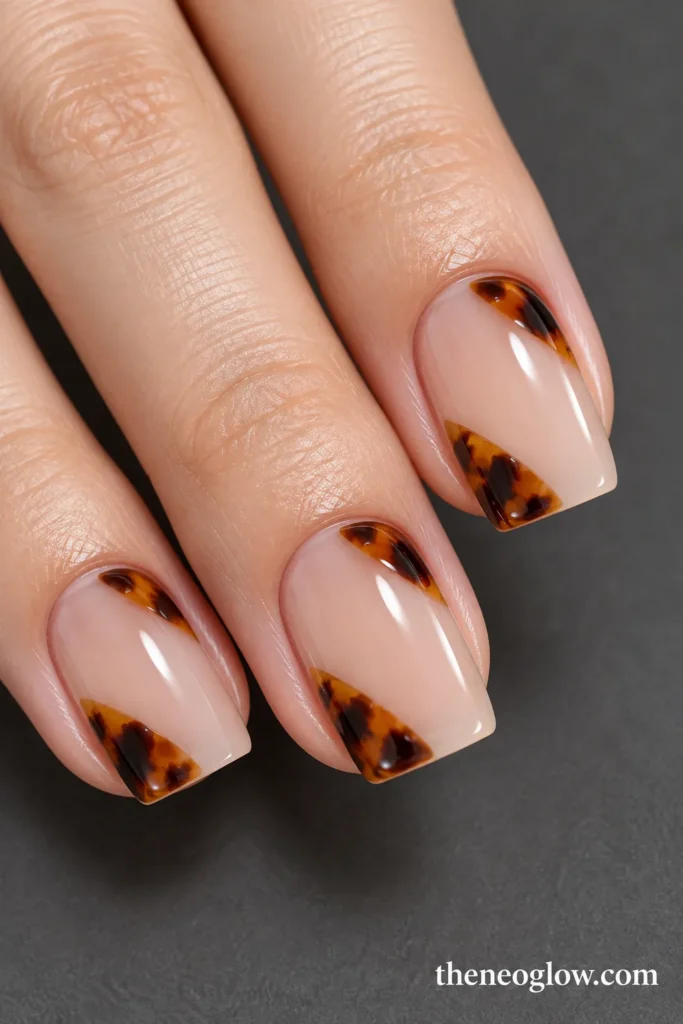
Use medium soft-square nails with two small tortoiseshell sections in opposite corners—one near the cuticle side and one near the tip—while the center stays sheer. The two separated zones make the pattern feel intentional and graphic. Keep each corner cropped so the design does not read like a nearly full tortoise nail.
7. Diagonal Half-Nail Tortoiseshell
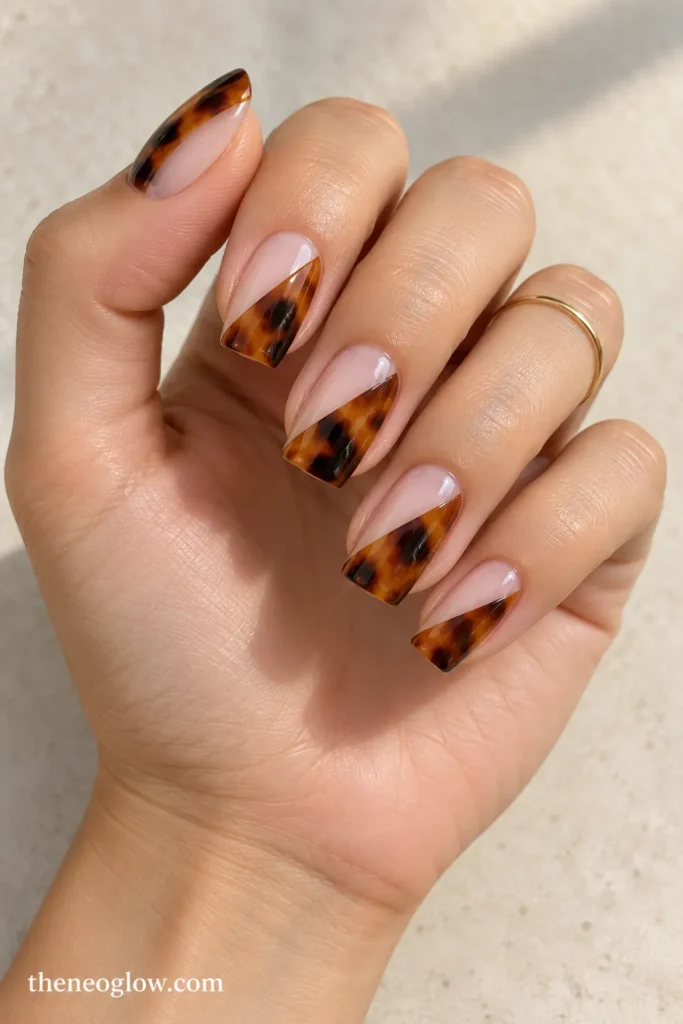
Divide the nail on a diagonal from one lower sidewall to the opposite upper edge. Fill only one half with layered amber tortoiseshell and leave the other half translucent nude. A sharp boundary keeps the structure modern, while the mottled pattern inside the colored half supplies the softer organic contrast.
8. Floating Center Tortie Panel
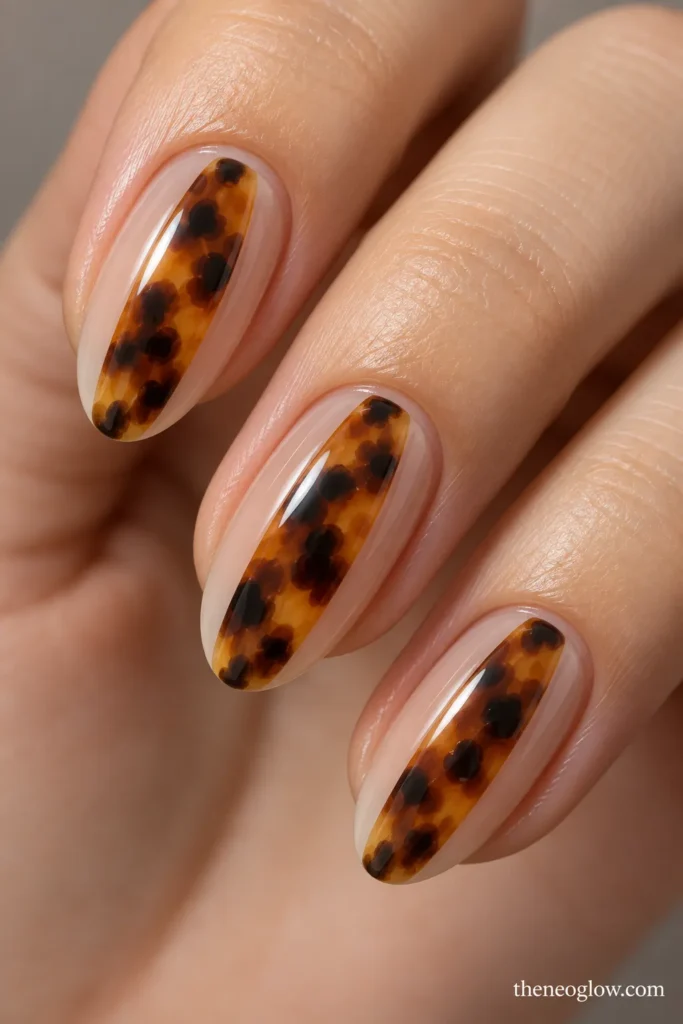
Create one narrow vertical panel of tortoiseshell through the middle of a medium oval nail, leaving a sheer border on both sides. The panel can widen slightly near the center and taper toward the tip. This concentrates the detail where it is easiest to inspect without framing or covering the full plate.
9. Tortoiseshell Outline Frame
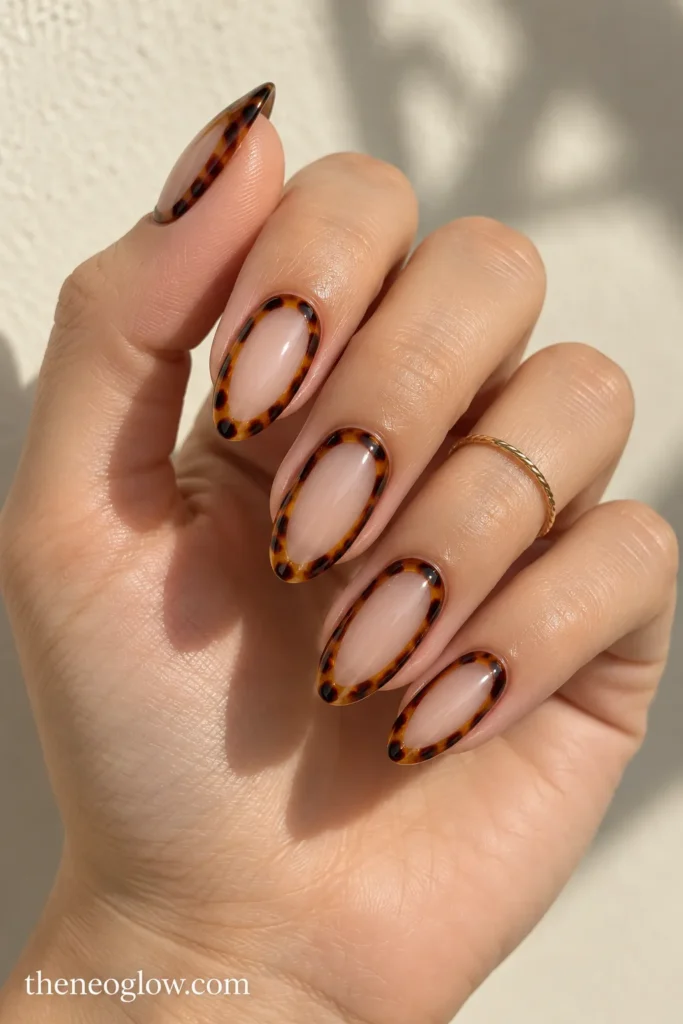
Trace a slim tortoiseshell border around the outer perimeter of a sheer nail and leave the center open. Medium almond or oval nails give the frame enough length to show amber, brown, and dark variation. Keep the border uneven within its narrow width so it looks like shell pattern rather than a solid brown outline.
10. Split-Tip Tortoise and Espresso
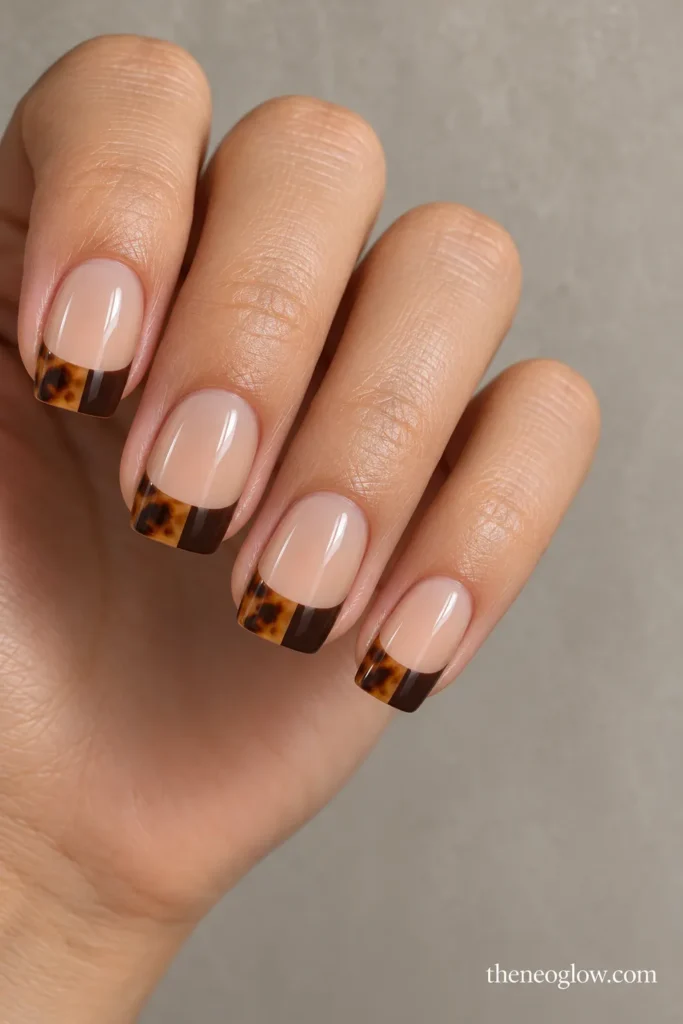
Divide a medium French tip into two sections: tortoiseshell on one side and opaque espresso on the other. Use a sheer neutral base and keep the split clean. This gives you pattern plus solid color within one tip structure, while the rest of the nail stays quiet enough for the two finishes to remain readable.
11. Burgundy Solids With One Tortie French Pair
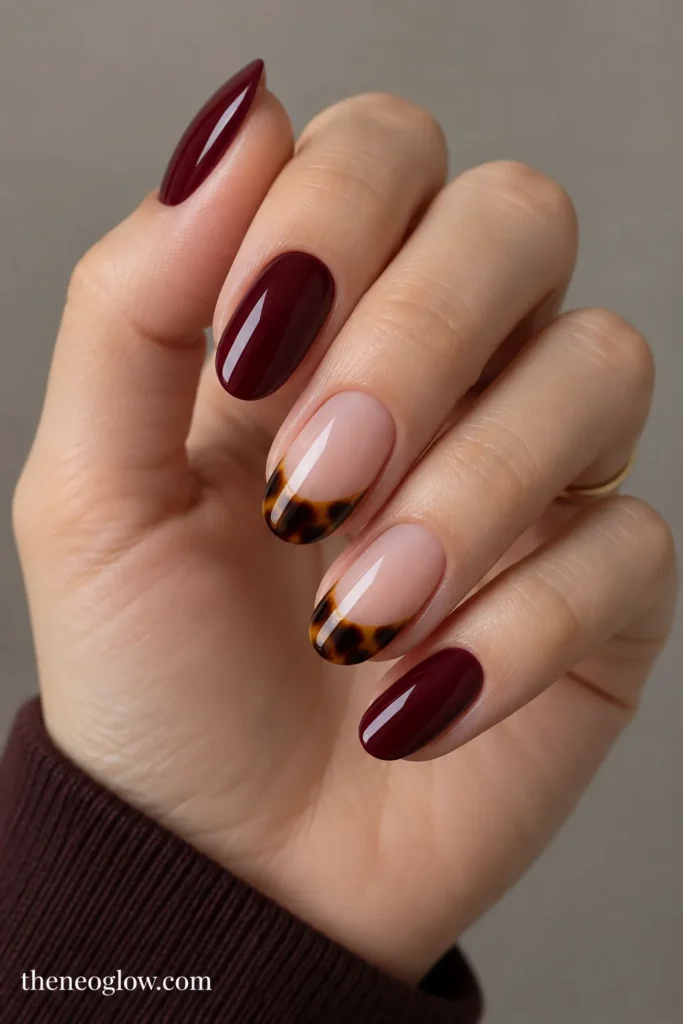
Paint most nails glossy burgundy, then use a sheer base with tortoiseshell French tips on two accent nails. The color pairing gives the set a deeper fall direction without tinting the shell itself red. Keep the tortoise accents separate from the burgundy solids so each element retains a clear role.
12. Burgundy Side Blocks With Tortie Accents
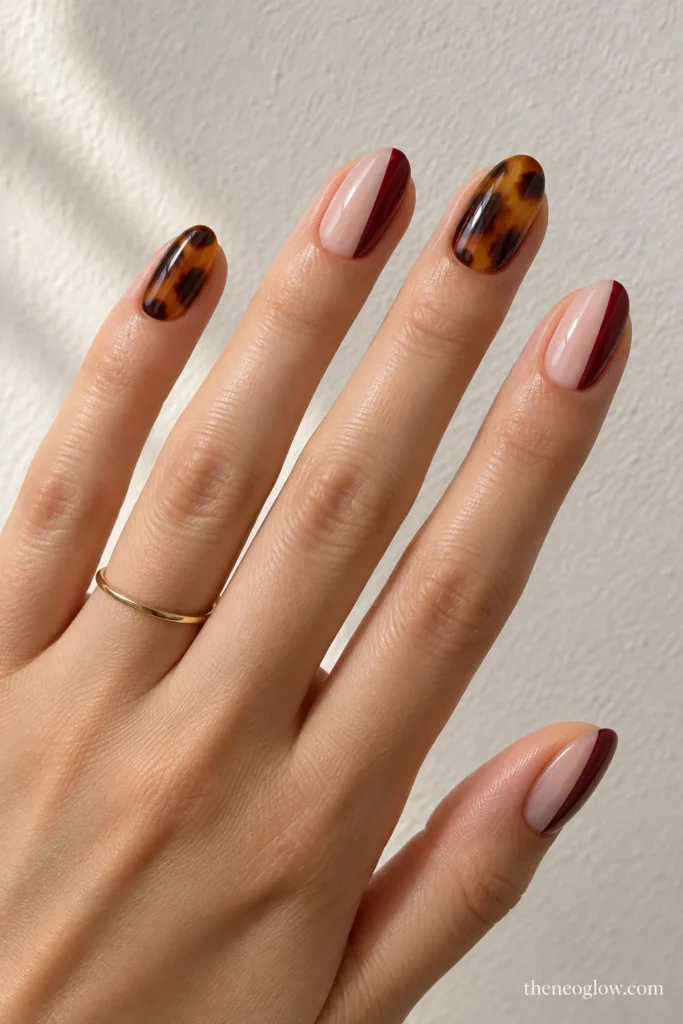
Use translucent tortoiseshell on two medium oval accents, then add narrow burgundy side blocks to the remaining sheer nails. This is different from an all-burgundy set because the solid color becomes a placement detail rather than the background. Match the gloss level across the hand to keep the mixed structures cohesive.
13. Teal Solids With Tortoiseshell Tips
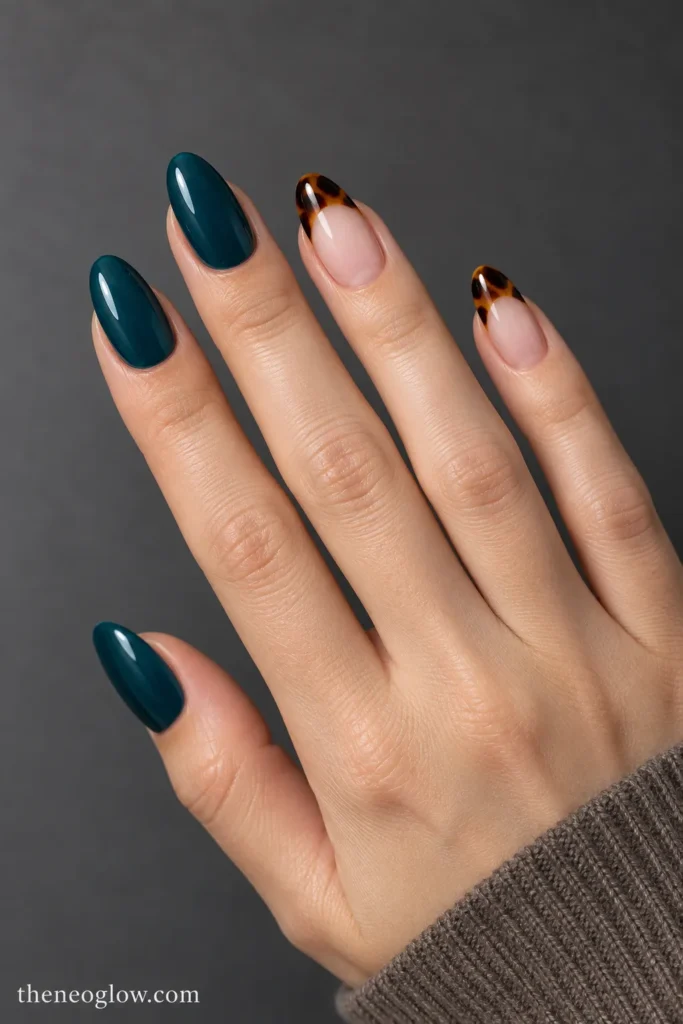
Pair two or three tortoiseshell French nails with opaque deep teal solids. The cool teal gives strong contrast against the amber-brown pattern and keeps the set from looking like five variations of brown. Use the same nail shape across the hand so the color contrast feels deliberate rather than randomly mixed.
14. Tortoiseshell With a Black Micro Edge
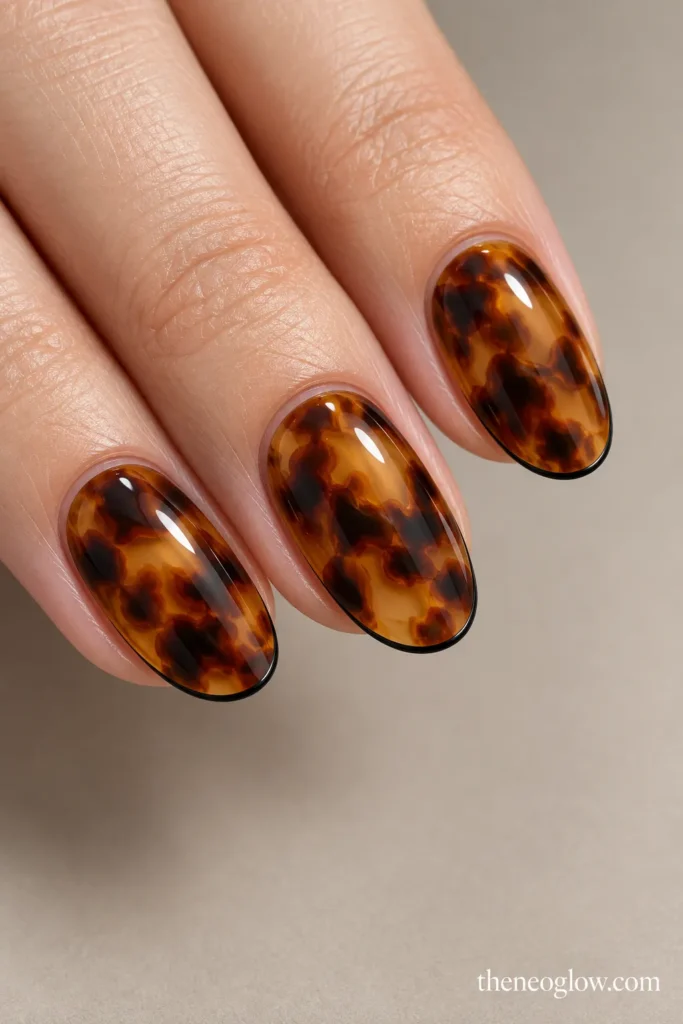
Start with full translucent tortoiseshell on medium ovals, then trace only the free edge with a hairline black French tip. The black line should be visibly thinner than the shell pattern beneath it. This adds a crisp boundary to an organic design without hiding the layered amber and brown underneath.
15. Matte Tortoiseshell With Glossy Islands
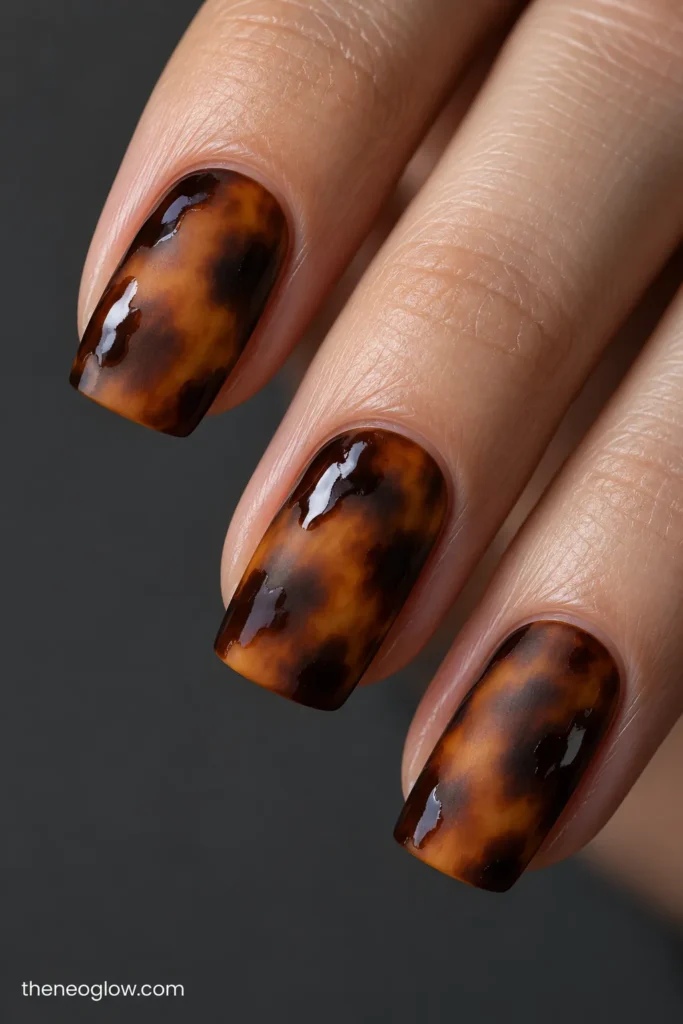
Create a full tortoiseshell base, finish the nail matte, then restore gloss only over a few irregular darker islands. The color structure stays classic, but the design changes when light moves across the surface. Use medium nails so the finish contrast has enough area to show without requiring extra charms or metallic detail.
16. Sheer Oat Nails With One Tortie Center Stripe
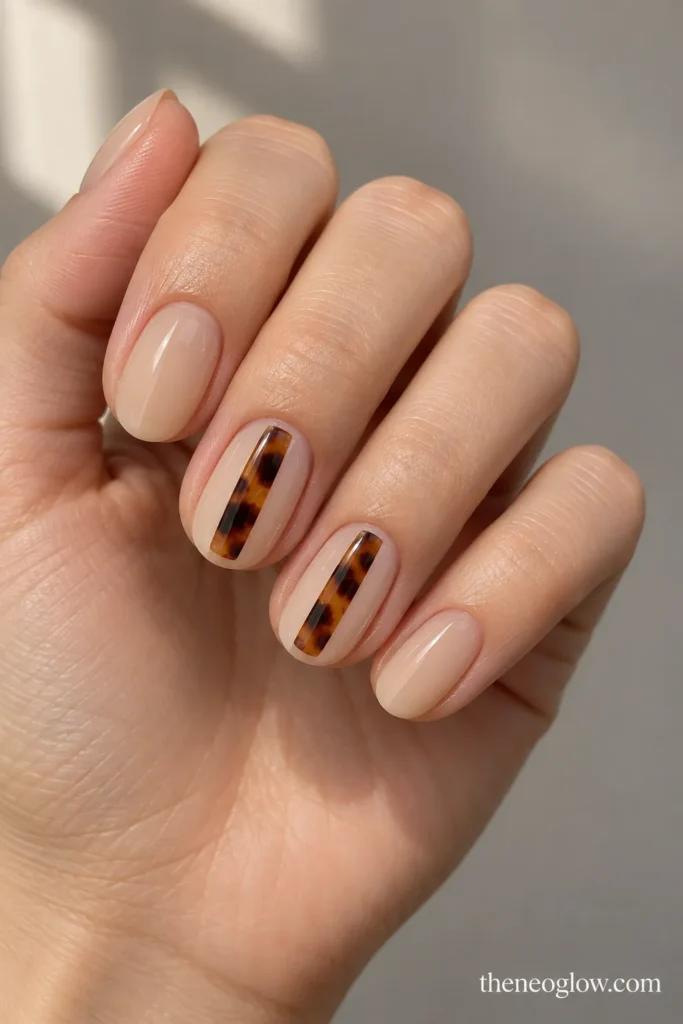
Keep most nails translucent oat-beige. On two accents, add a narrow tortoiseshell stripe running from near the cuticle toward the tip without touching either edge. The stripe should be wider than a hairline but narrower than a half-nail panel. This is a restrained accent-set route with a clear vertical placement.
17. Alternating Full Tortie and Clear-Framed Tortie
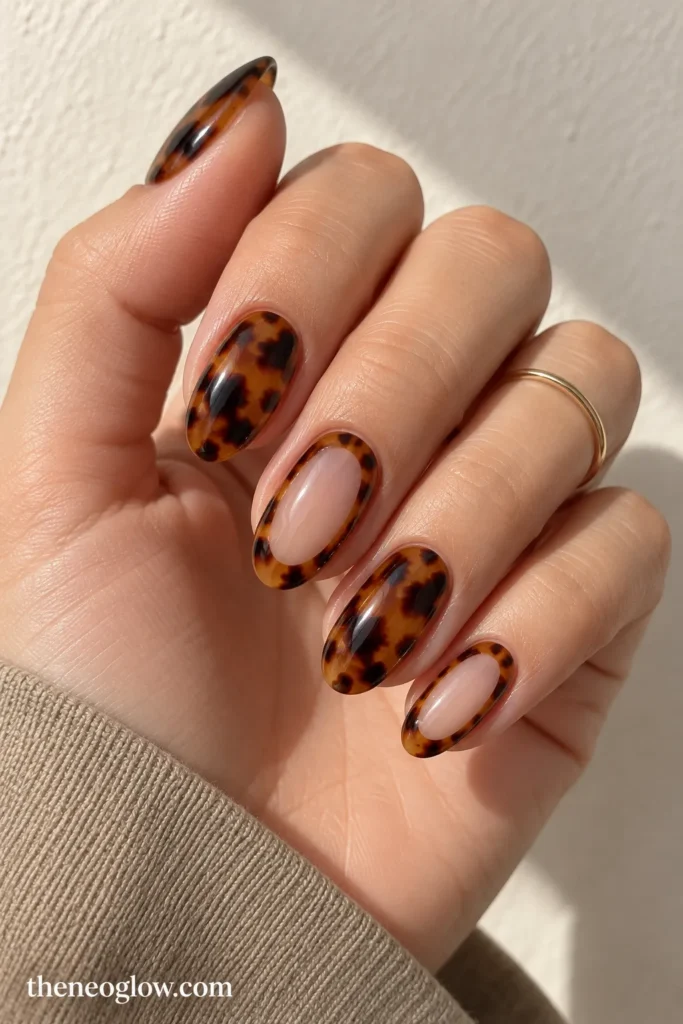
Alternate between full-cover tortoiseshell nails and nails that use tortoiseshell only as a thin outer frame around a sheer center. Keep the same amber, cocoa, and near-black palette on both structures. The repeated color family unifies the hand while the coverage alternates between dense and open.
18. Mixed Tortoiseshell Placement Set
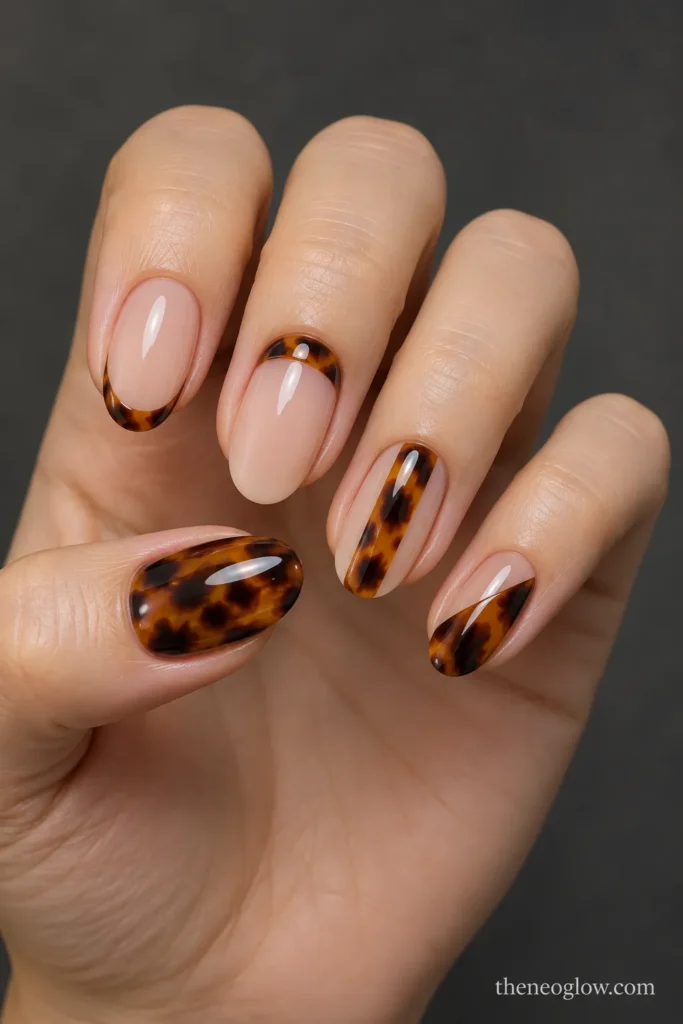
Use one placement per finger while keeping one shared palette: a micro French, a cuticle cuff, a center panel, a diagonal half-nail, and one full-cover tortoiseshell. Repeat the same five structures on the other hand instead of inventing ten unrelated designs. This creates a statement set based on placement variety, not extra colors or charms.
How to Keep the Pattern From Looking Muddy
Leave some amber or honey base visible around the darkest marks. If every layer becomes opaque, the pattern loses the glassy depth that separates tortoiseshell from a flat brown camouflage effect. Vary the size and softness of the dark areas, and avoid spacing them like repeated polka dots.
For minimal designs beyond this pattern family, NeoGlow’s simple nail designs guide is a better place to compare single lines, micro accents, and easy negative-space ideas.
How to Choose the Right Tortoiseshell Version
Choose by coverage before color. If you want the pattern to stay subtle, start with a micro French, cuff, or stripe. If you want more detail without full coverage, use a half-nail, center panel, frame, or two-accent structure. Choose full tortoiseshell only when you want the mottled depth to lead the manicure.
For other autumn motifs, finishes, and colors, use NeoGlow’s Fall Nails 2026 guide rather than turning this pattern page into a general seasonal roundup.
Save the idea whose placement matches your real nail space, then note the base opacity, pattern zone, darkest shade, and finish. Those four details are more useful than asking for “tortoiseshell nails” without showing how dense or how minimal you want the pattern.