Easy Halloween nails should be easy in practice, not just simple-looking in a photo. The ideas below are built for regular polish, basic household substitutes, stickers, wraps, or press-ons, with no salon-level painting required. Each design includes the minimum tools, a realistic difficulty level, active art time, a common mistake, and a shortcut when your first attempt is not cooperating. If you need the full prep-and-polish sequence before starting, use NeoGlow’s at-home manicure routine as your foundation. Then choose the design that matches the tools and time you actually have.
Pick Your Easiest Route First
The times below are active art estimates after your base color is ready; regular polish still needs its own setting and drying time. For the fastest route, choose alternating solids, one accent nail, stickers, wraps, or press-ons. Dots and drips are the next step because small differences usually still look intentional. Micro French tips, tape blocks, and spiderwebs need more control.
Before painting, work in a ventilated area, keep nail products away from heat or flame, and follow the warnings on your exact products. The FDA’s nail-product safety guidance is a useful deeper reference for labels, ventilation, reactions, and safe use. For regular lacquer, OPI’s application directions also show a standard clean-and-dry nail, color, and topcoat sequence; follow the directions for your own polish system when they differ.
| If you have | Start with | Active art time |
|---|---|---|
| Polish only | Alternating solids or one black accent | 5–10 min |
| Toothpick or bobby pin | Confetti, eyes, ghost, pumpkin | 8–15 min |
| Tape or tip guides | Color block, half-moons, micro French | 15–25 min |
| Stickers or wraps | Decal accents or full-cover wraps | 10–20 min |
| Almost no time | Predesigned press-ons | 10–15 min |
19 Beginner-Friendly Halloween Nail Ideas
1. Black-and-Orange Alternating Nails
Tools: Black polish, orange polish, topcoat.
Difficulty: Very easy. Time: 5–10 minutes active.
Steps: Alternate black and orange across the hand, using thin coats and one finish on every nail.
Common mistake: Adding extra art because the solids feel “too plain,” then turning a clean set into a crowded one.
Shortcut: Use one coat of an opaque formula if your polish is designed for it.
Short-nail adaptation: No change needed; solid color works at any natural length.
2. One Black Accent Nail
Tools: Nude, taupe, gray, or burgundy polish; black polish; topcoat.
Difficulty: Very easy. Time: About 5 minutes active.
Steps: Paint four nails in one base shade and make the ring finger glossy black. Repeat on the other hand.
Common mistake: Mixing several accent colors and losing the simple Halloween contrast.
Shortcut: Start with an existing neutral manicure and repaint only one nail per hand.
Short-nail adaptation: Keep the black accent fully solid rather than adding a tiny motif.
3. Orange-and-Black Confetti Dots
Tools: Sheer or pale base, orange and black polish, toothpick or dotting tool.
Difficulty: Very easy. Time: 8–12 minutes.
Steps: Add separated orange and black dots over two accent nails, leaving visible base between them.
Common mistake: Reloading the tool too heavily, which creates blobs instead of dots.
Shortcut: Use the rounded end of a bobby pin for larger dots and a toothpick for smaller ones.
Short-nail adaptation: Use five to seven dots per accent instead of covering the whole nail.
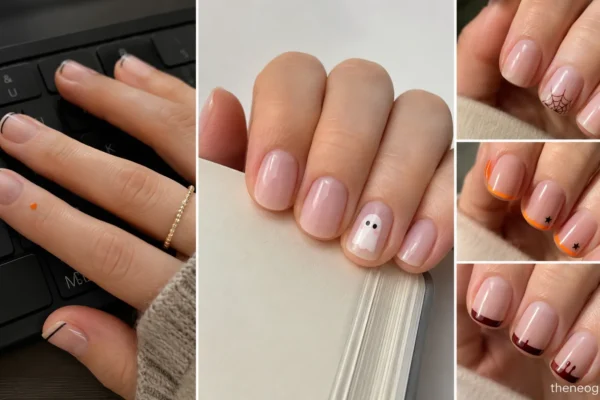
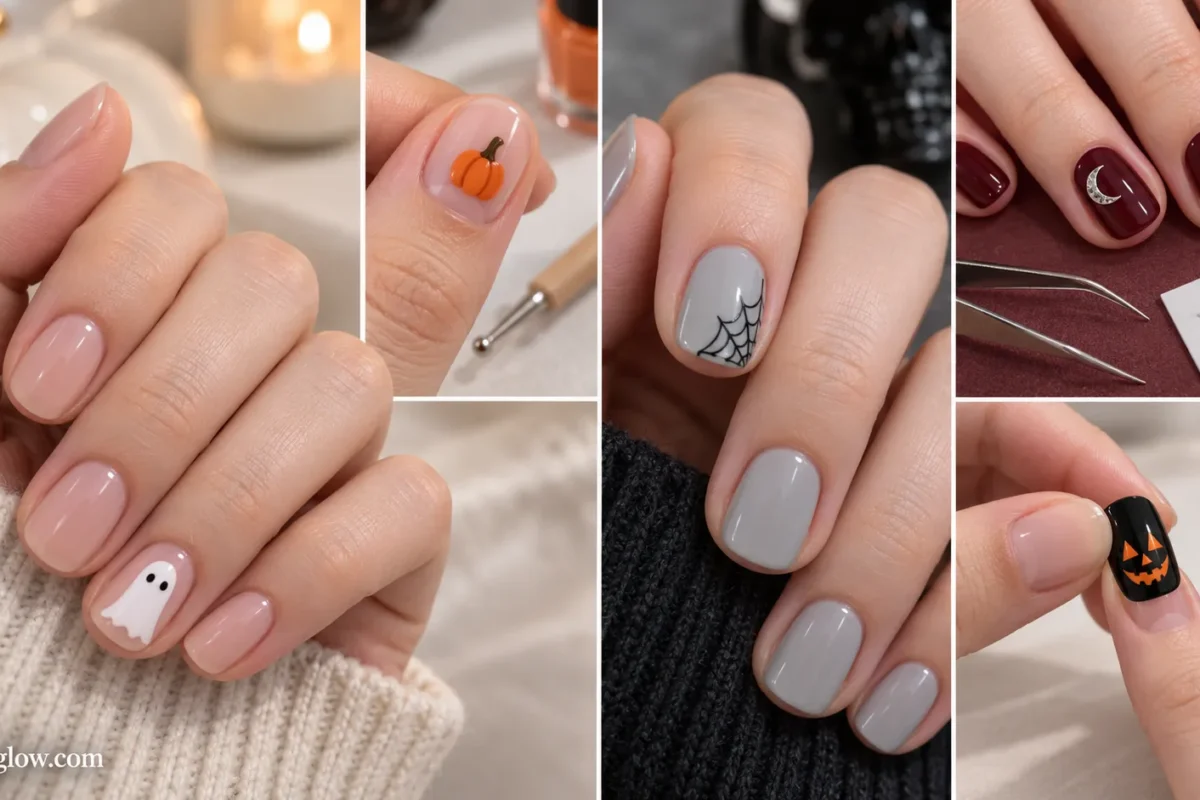
4. Tiny White Ghost Accent
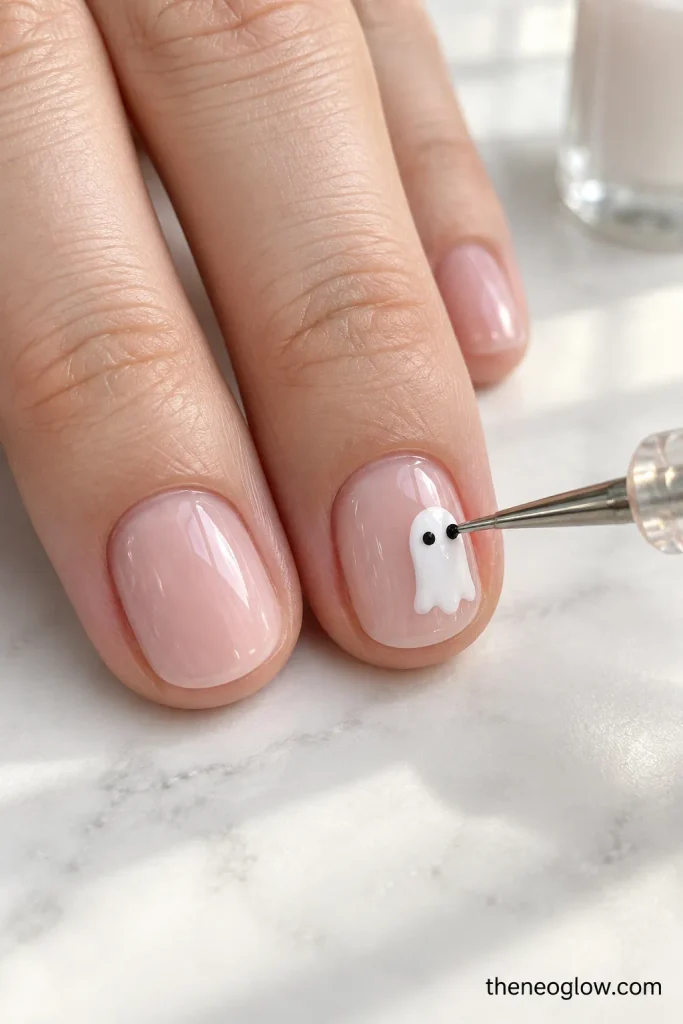
Tools: Sheer nude or blush base, white polish, black polish, toothpick.
Difficulty: Easy. Time: 10–12 minutes.
Steps: Make one small white oval, pull a little polish downward for the body, then add two black eye dots after the white sets.
Common mistake: Making the ghost too large and losing the clean space around it.
Shortcut: Use a tiny ghost decal instead of painting the shape.
Short-nail adaptation: Place one cropped ghost near a sidewall rather than centering a full figure.
5. Peeking Eye Nails
Tools: Black or deep-purple polish, white polish, black polish, dotting tool or toothpick.
Difficulty: Easy. Time: 10 minutes.
Steps: On one or two dark accent nails, place two white dots side by side, let them set, then add smaller black pupils.
Common mistake: Positioning the pupils in different directions on every nail, which can look chaotic.
Shortcut: Use small round nail stickers for the white eye bases.
Short-nail adaptation: One pair of eyes per nail is enough.
6. Mini Pumpkin Accent
Tools: Sheer base, orange polish, brown or dark-green polish, dotting tool or toothpick.
Difficulty: Easy. Time: 10–15 minutes.
Steps: Build one small orange circle from a dot, then add a short stem after it sets. Keep the other nails orange, nude, or clear.
Common mistake: Adding a face, vines, leaves, and multiple pumpkins to the same small nail.
Shortcut: Skip the stem and use a simple orange half-circle at the side edge.
Short-nail adaptation: Crop the pumpkin into one corner.
7. Burgundy Blood-Drip Tips
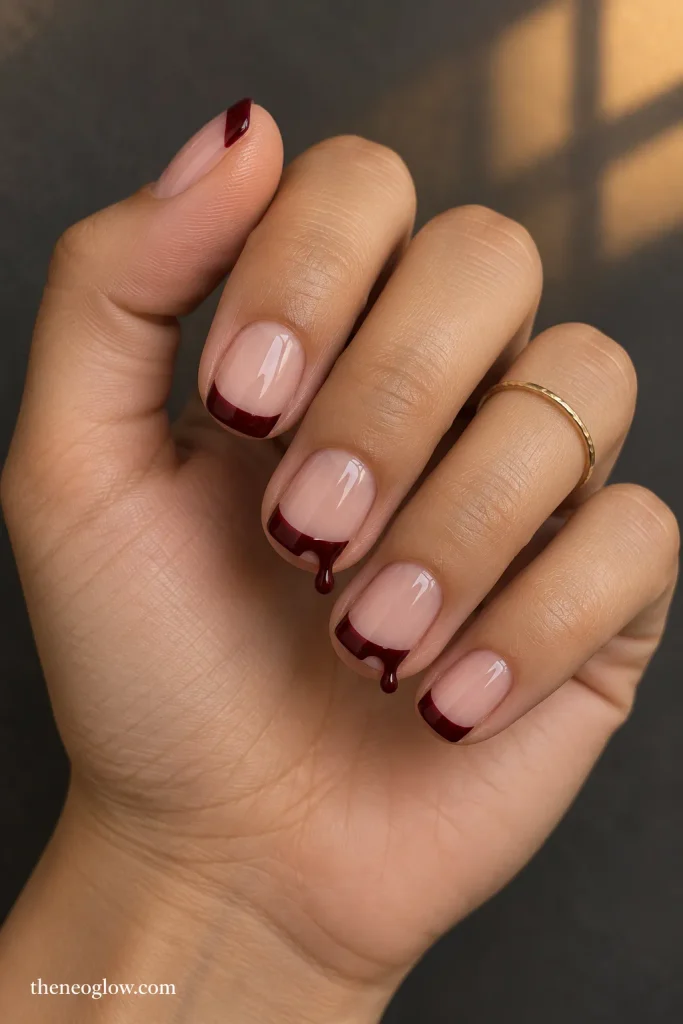
Tools: Sheer base, burgundy or red polish, toothpick or dotting tool.
Difficulty: Easy. Time: 12–15 minutes.
Steps: Paint a narrow red tip, add two or three small dots below it, then connect each dot upward with a short line.
Common mistake: Making every drip the same length, which can look more like stripes.
Shortcut: Put the drip on only two accent nails and keep the rest solid burgundy.
Short-nail adaptation: Use one or two shallow drips instead of extending them toward the cuticle.
8. One Tiny Spider Accent
Tools: Nude or pale-gray base, black polish, toothpick or fine brush.
Difficulty: Easy to medium. Time: 12–15 minutes.
Steps: Make one larger black dot for the body, a smaller dot for the head, then add short legs with minimal polish.
Common mistake: Drawing long legs before the dots set and pulling the body out of shape.
Shortcut: Use a flat spider decal on one ring finger.
Short-nail adaptation: Use six short leg marks rather than squeezing in a detailed eight-leg illustration.
9. Mummy Stripe Accent
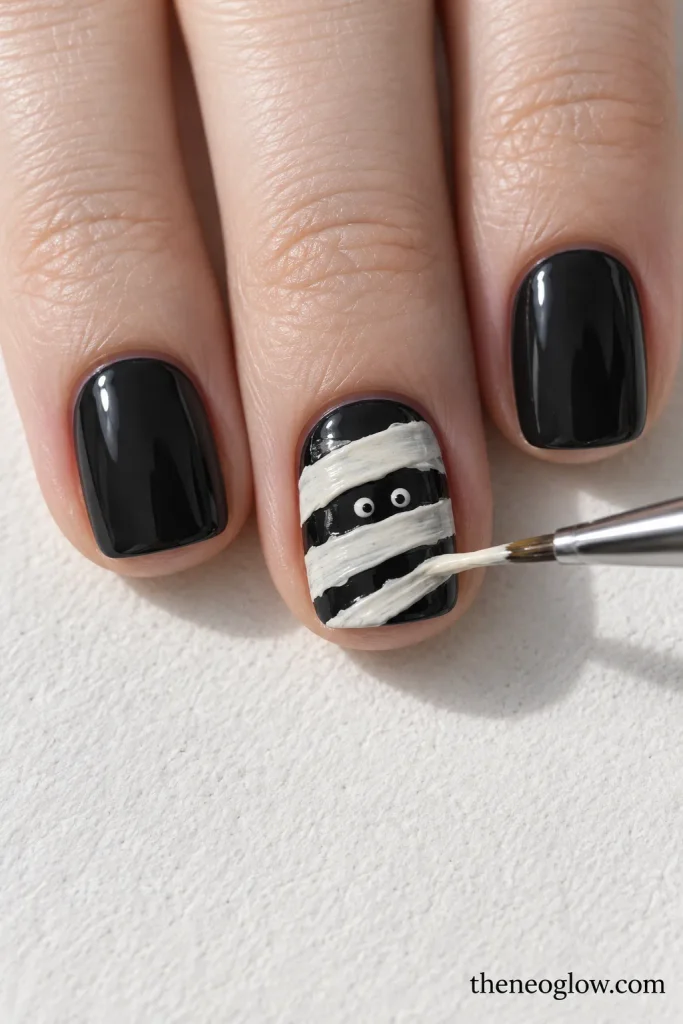
Tools: Black or charcoal base, off-white polish, narrow brush or striping tape, two tiny black eye dots.
Difficulty: Easy to medium. Time: 15 minutes.
Steps: Add a few diagonal off-white bands across one accent nail, leaving one small dark gap for two eyes.
Common mistake: Filling the entire nail with equal-width stripes, which can make the design look like a barcode.
Shortcut: Cross thin striping tape over a dry base and seal it according to the tape directions.
Short-nail adaptation: Use three bands and one eye gap.
10. Black Glitter Fade Tips
Tools: Sheer, gray, or black base; black or charcoal glitter polish; topcoat.
Difficulty: Very easy. Time: 8–12 minutes.
Steps: Wipe most glitter from the brush, tap the remaining sparkle at the free edge, and fade it slightly downward.
Common mistake: Using a fully loaded brush, which turns the fade into a solid glitter block.
Shortcut: Apply glitter only to the ring and middle fingers.
Short-nail adaptation: Keep the fade shallow so the base remains visible.
11. Black Micro French Tips
Tools: Sheer nude or blush base, black polish, fine brush or French-tip guides.
Difficulty: Medium. Time: 15–20 minutes.
Steps: Trace a very slim black line along the free edge. Correct the curve before topcoat rather than thickening the whole tip.
Common mistake: Chasing symmetry by adding more black until the line becomes bulky.
Shortcut: Use curved French guides or predesigned micro-French stickers.
Short-nail adaptation: Make the line hairline-thin; do not invent extra length with a deep painted band.
12. Corner Spiderweb Nail
Tools: Nude, gray, or milky base; black polish; fine brush or toothpick.
Difficulty: Medium. Time: 15–20 minutes.
Steps: Draw three short lines from one corner, then connect them with two small curved cross-lines. Limit the web to one or two nails.
Common mistake: Starting with a full-nail web, which multiplies every shaky line.
Shortcut: Use a corner-web decal and leave the other nails solid.
Short-nail adaptation: Draw only two spokes and one connecting curve.
13. Candy-Corn Color Block Accent
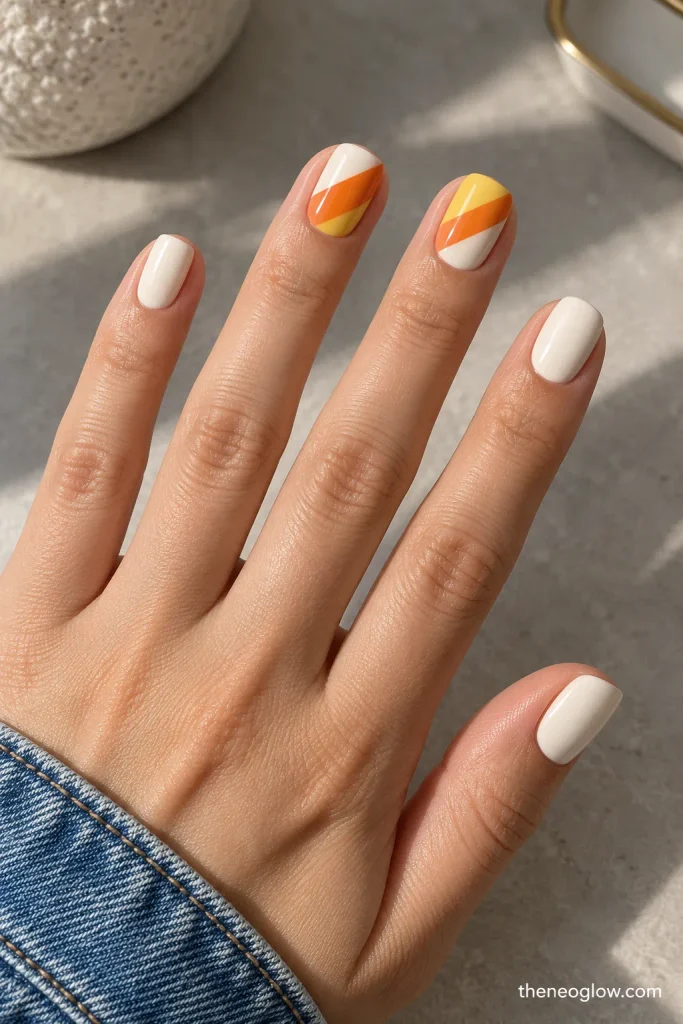
Tools: White, orange, and yellow polish; small pieces of tape.
Difficulty: Medium. Time: 20–25 minutes.
Steps: Paint the lightest base first and let it become firm. Use tape to create one orange section and one yellow section on selected accents.
Common mistake: Placing tape over soft polish and lifting the base when it is removed.
Shortcut: Use the candy-corn palette as three alternating solid nails instead of a striped accent.
Short-nail adaptation: Use diagonal blocks rather than three narrow horizontal bands.
14. Orange Half-Moon Nails
Tools: Orange polish, round reinforcement stickers or curved guides, topcoat.
Difficulty: Easy to medium. Time: 15–20 minutes.
Steps: Place a curved guide near the cuticle, paint the exposed nail orange, and remove the guide while the color is still workable.
Common mistake: Failing to press the guide down at the sides, allowing polish to leak underneath.
Shortcut: Leave only two half-moon accents and paint the remaining nails solid orange.
Short-nail adaptation: Make the bare crescent shallow so it does not consume the nail plate.
15. Black-and-Orange Checker Corner
Tools: Nude or pale base, black and orange polish, thin tape or a tiny flat brush.
Difficulty: Medium. Time: 20–25 minutes.
Steps: Build a small two-by-two checker only in one corner of an accent nail. Keep the rest of the set black, orange, or sheer.
Common mistake: Attempting a full checkerboard on every nail before mastering one small block.
Shortcut: Use a checker decal and trim it to a corner accent.
Short-nail adaptation: Use two contrasting squares instead of four.
16. Moon-and-Star Sticker Accents
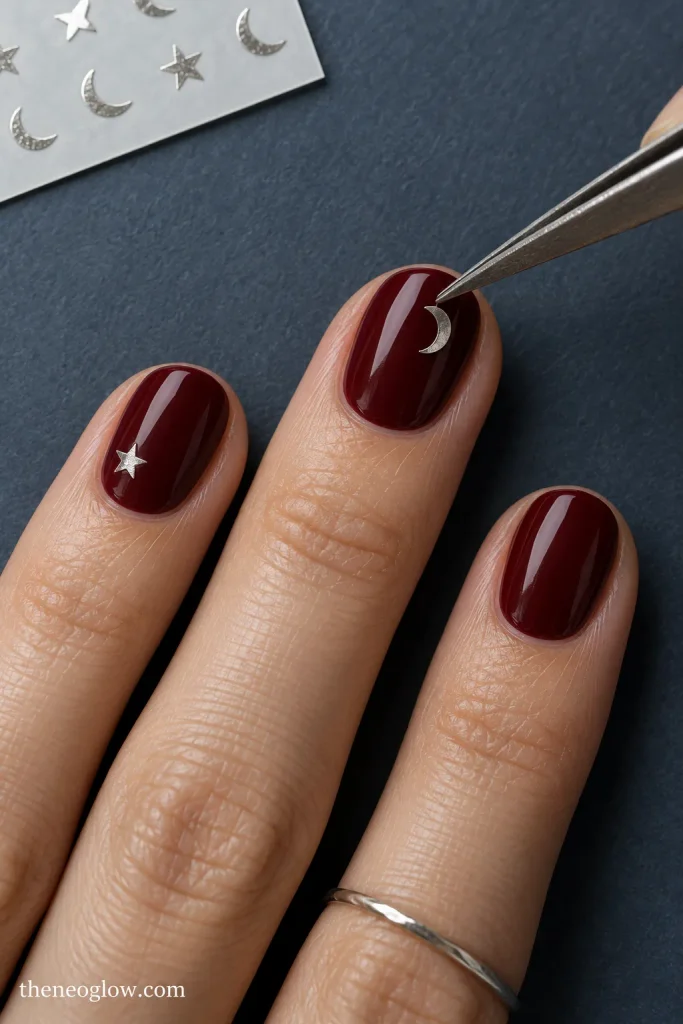
Tools: Dark blue, black, or burgundy base; small moon and star stickers; tweezers; topcoat if the sticker maker recommends it.
Difficulty: Very easy. Time: 8–10 minutes.
Steps: Let the base become firm, place one small sticker on two or three nails, and press every edge flat.
Common mistake: Applying stickers over soft polish, which can dent or wrinkle underneath.
Shortcut: Make this the entire manicure: one sticker on each ring finger, nothing else.
Short-nail adaptation: Choose the smallest motifs and use one per nail.
17. Halloween Decals on a Sheer Base
Tools: Sheer pink or nude polish, Halloween water decals or adhesive decals, tweezers, topcoat when directed.
Difficulty: Very easy. Time: 10–15 minutes.
Steps: Choose one motif family—ghosts, bats, pumpkins, or stars—and use only two to four decals across the hand. Apply them according to the decal maker’s directions.
Common mistake: Mixing unrelated decal sizes and styles until the set loses visual consistency.
Shortcut: Keep eight nails sheer and decorate only two accents.
Short-nail adaptation: Crop edge decals or choose micro motifs instead of full-nail illustrations.
18. Full-Cover Halloween Nail Wraps
Tools: Predesigned nail wraps, file, prep items supplied by the wrap maker.
Difficulty: Very easy. Time: 15–20 minutes.
Steps: Match each wrap to the nail, apply it to a clean dry surface, smooth from the center outward, and finish the free edge exactly as your product directs. Dashing Diva’s nail-wrap tutorial shows its own sizing, smoothing, filing, and removal method; use that guidance only for compatible Dashing Diva strips.
Common mistake: Stretching or placing a wrap onto skin, which can create wrinkles or lifting.
Shortcut: Mix solid black wraps with two patterned Halloween accents.
Short-nail adaptation: Trim excess close to the free edge before filing when your wrap system permits it.
19. One-Night Halloween Press-On Set
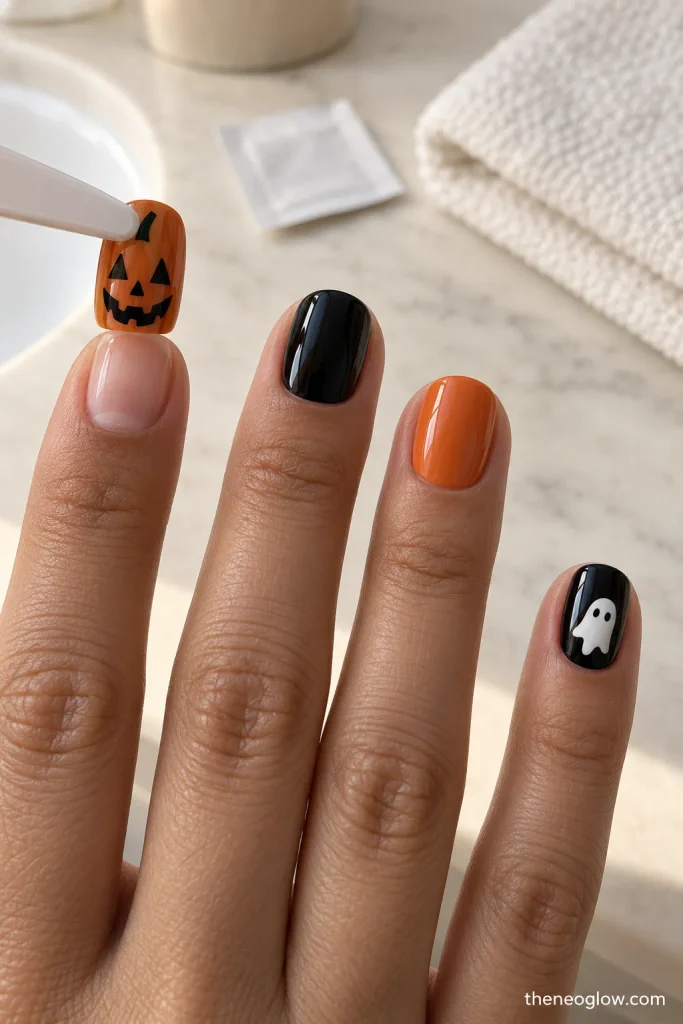
Tools: Predesigned press-ons and the exact prep and adhesive system supplied with them.
Difficulty: Very easy. Time: About 10–15 minutes once sizes are selected.
Steps: Fit every tip before application. It should cover the natural nail from sidewall to sidewall without pinching or overlapping skin. Apply and later remove the set according to its exact directions; never force a resistant nail off. NeoGlow’s vacation press-on guide covers the broader fit, adhesive, and removal decisions. If you use KISS imPRESS, follow KISS’s specific preparation, hold-time, water-wait, and removal instructions rather than transferring those directions to another system.
Common mistake: Choosing a design first and checking fit second.
Shortcut: Pick a short predesigned set with repeated solids plus one or two Halloween accents.
Short-nail adaptation: Choose a short shape that follows your natural width instead of filing a very long set down after application.
How to Keep Beginner Nail Art From Looking Messy
Choose one technique per manicure. If your set already has dots, you usually do not need a web, a pumpkin, glitter, and lettering too. Repeating the same base shade, accent placement, or finish makes small differences between hands look intentional.
Let the base become firm before tape, stickers, or detailed art. Keep a small cleanup brush nearby, and use the least polish you can control. If you want more practice with dots, tape, stickers, and beginner placement without Halloween motifs, NeoGlow’s easy summer nail designs guide breaks those methods down in a separate seasonal context.
If you notice irritation, swelling, pain, or another concerning reaction while using a nail product, stop using it and follow the product directions; the FDA nail-product guidance explains when reactions should be reported and why label instructions matter.
Which Easy Halloween Nails Should You Try First?
If this is your first attempt, start with alternating solids, one black accent, confetti dots, or stickers. Move to ghosts, pumpkins, drips, and spiders once you are comfortable controlling small amounts of polish. Save micro French tips, tape blocks, and corner webs for a night when you have more patience.
For a nonseasonal menu of low-detail manicures, browse NeoGlow’s simple nail designs. If you need a Halloween look at the last minute, skip the guilt about hand-painting: a correctly fitted press-on or well-applied wrap is a practical shortcut, not a failed DIY attempt. Pick one route, gather only the tools it needs, and keep the rest of the set simple.