Polka dot nails can look crisp and modern—or uneven and crowded—depending on four choices: dot size, spacing, density, and placement. This guide gives you 18 structurally different patterns rather than repeating one layout in new colors. You will find restrained micro dots, graphic borders, negative-space arrangements, dot flowers, and larger statement designs, with practical adjustments for short nails. The goal is a playful manicure without visual noise, whether you use regular polish at home or bring a precise salon reference.
Choose the Right Dot Size, Density, and Placement
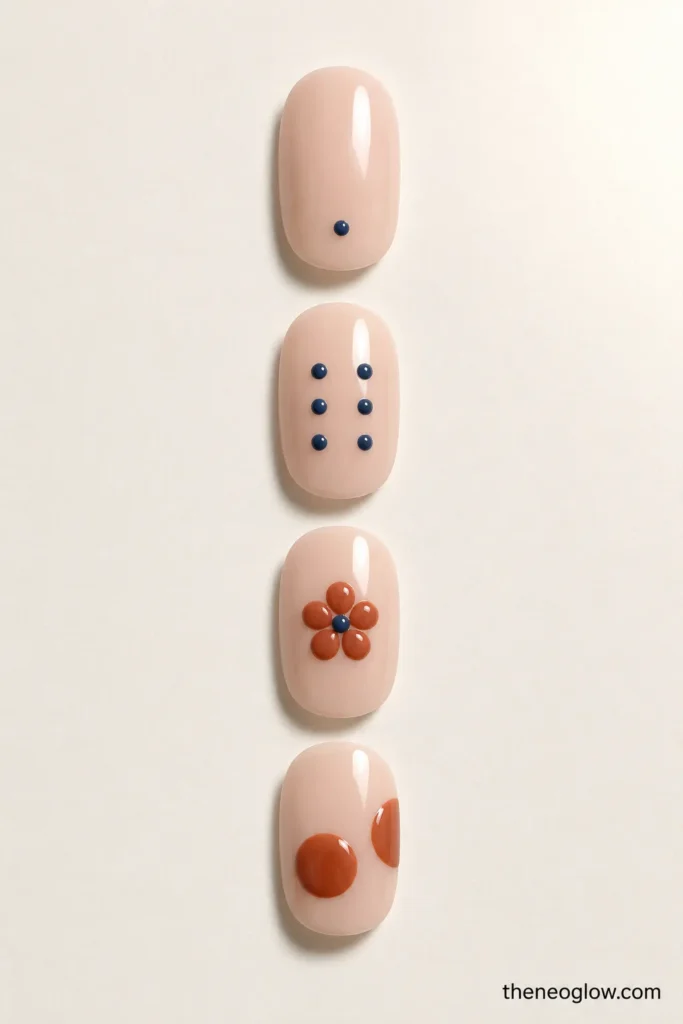
| Look You Want | Dot Size | Density | Placement |
|---|---|---|---|
| Minimal and work-friendly | Pinpoint to small | One to five dots per nail | Cuticle, side, or single trail |
| Balanced and colorful | Small to medium | Repeated but spaced | Grid, diagonal, border, or alternating zones |
| Floral | Small petals with a smaller center | One bloom or several mini blooms | Corner, edge, or scattered |
| Graphic statement | Medium to oversized | Fewer, more deliberate circles | Full nail, half nail, or graduated sequence |
Small dots suit short nail plates because they preserve visible base color. Medium dots are easier to read from a distance, while oversized circles need more room and usually look cleaner on medium-length oval, almond, or squoval nails.
How to Make Dot Nail Art Look Clean
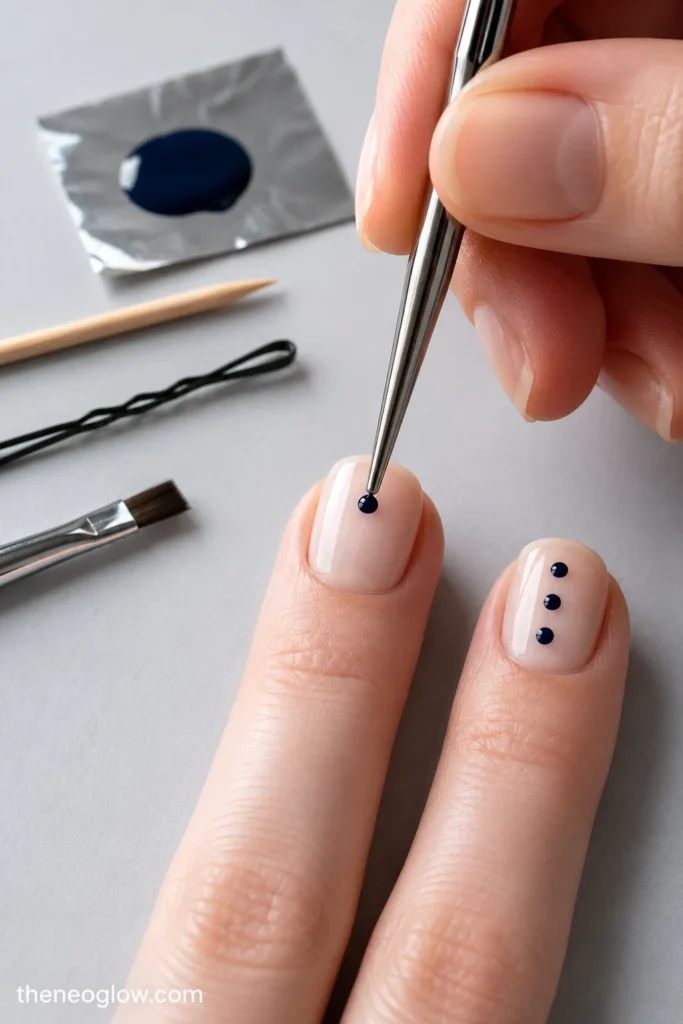
A double-ended dotting tool gives the most predictable circle sizes, but a toothpick creates micro dots and the rounded end of a clean bobby pin can make a larger circle. Put a small puddle of polish on foil or a disposable palette rather than dipping repeatedly into the bottle.
Load only the rounded tip, test one dot on foil, then place the tool straight down and lift it straight up. Reload when the circles begin shrinking. For consistent spacing, mark the center or two end points first, then fill the gaps. This anchor-dot method is easier than trying to judge every space independently.
When one dot lands too large, do not keep pressing it. Wipe it away before it sets, or turn the pattern into a deliberate graduated sequence by making nearby circles progressively smaller. A small cleanup brush dipped in lacquer remover can refine the skin and perimeter. Let regular-polish dots dry before floating topcoat over them with light pressure; OPI’s dot tutorials likewise place the pattern after the base color and before the final topcoat. See OPI’s beginner polka-dot method.
For a broader collection of tape, sticker, ombré, and accent techniques, visit these easy summer nail designs instead of forcing dots into every beginner manicure.
Minimalist Micro-Dot Nails
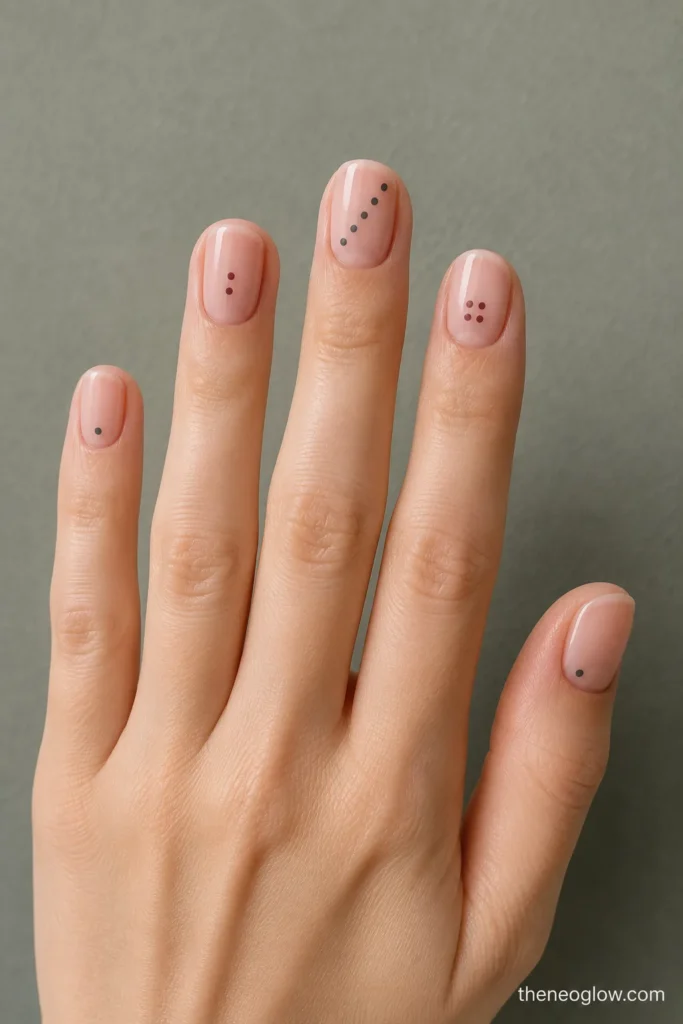
1. Single Offset Micro Dot
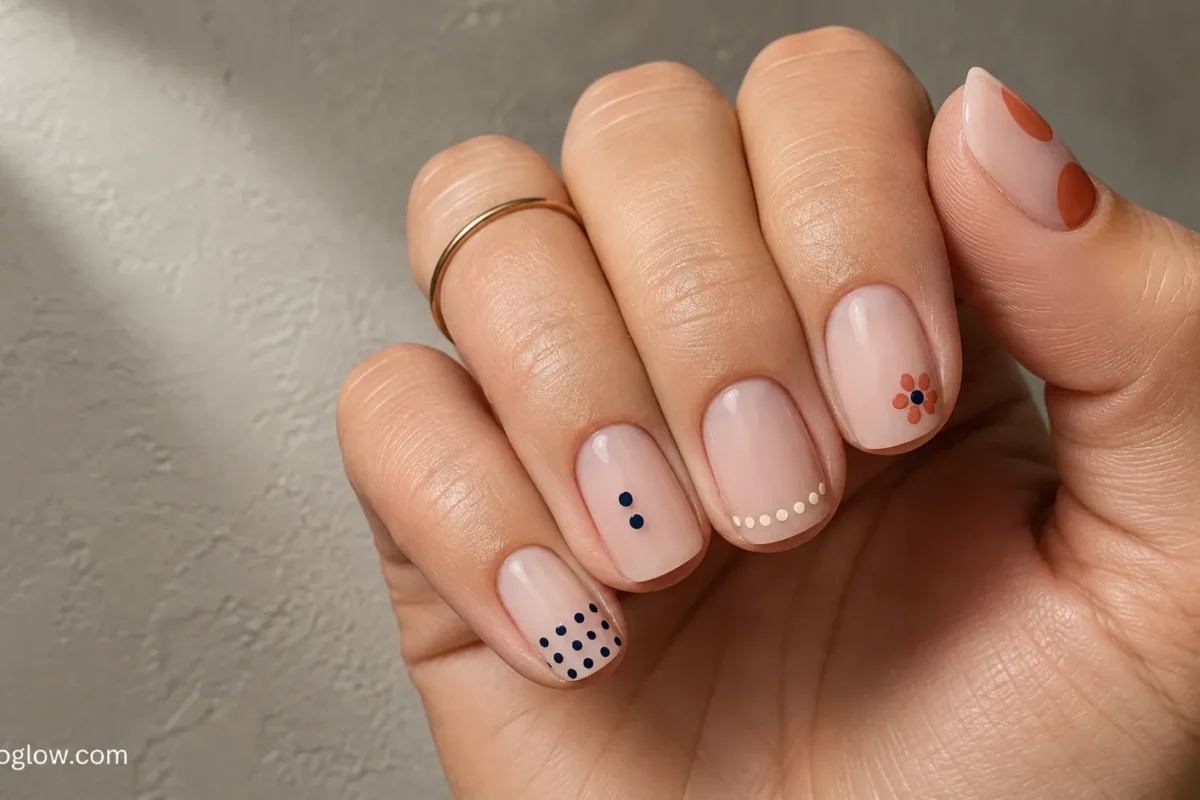
Place one tiny dot slightly to the outer side of each cuticle rather than centering it. The repeated offset creates direction across the hand while keeping most of the base visible. Try black over sheer pink, navy over mint, or white over a warm beige.
2. Twin-Dot Vertical Pair
Stack two micro dots vertically near the center of every nail, leaving a clear gap between them. Use one color for a restrained look or two related shades for subtle contrast. The narrow arrangement fits short round and squoval nails especially well.
3. Staggered Micro-Dot Trail
Run three or four tiny dots diagonally from the lower sidewall toward the opposite tip. Space them evenly but avoid forming a solid stripe. This creates movement without covering the nail and gives a salon technician a clear placement map to repeat.
4. Tonal Mini Grid
Build a small two-by-two or three-by-two grid using a dot color only slightly darker than the base. The low contrast makes the geometry feel refined rather than cartoonish. Keep the grid centered and leave a generous border of untouched base around it.
Border and Edge Dot Patterns
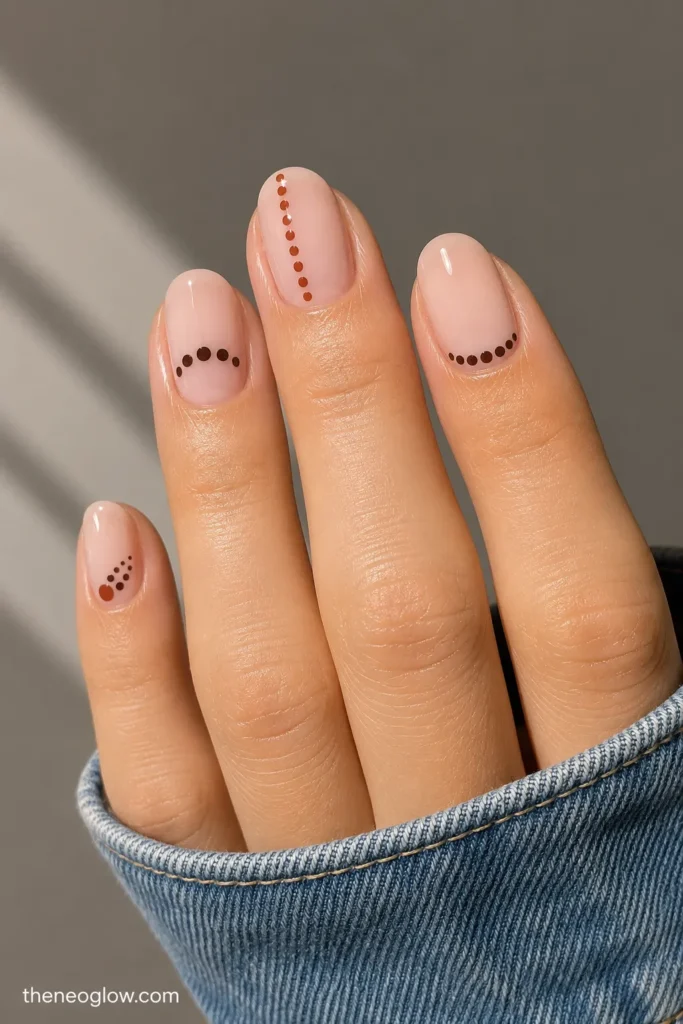
5. Cuticle Arc Border
Arrange three to five dots in a shallow curve that follows the cuticle line. Place the center dot first, then match the dots on each side. This symmetry method works with one color or a center dot in a contrasting shade.
6. One-Side Dot Border
Create a vertical row of evenly spaced dots along one sidewall while leaving the rest of the nail plain. A narrow border visually lengthens short nails and looks especially clean over a sheer or milky base.
7. Dotted French Tip Chain
Replace a solid French line with a chain of small circles across the free edge. Keep every dot the same size and let a sliver of base show between them. On very short nails, use five or fewer dots so the tip does not become a thick band.
8. Corner Dot Fan
Start with one medium dot in a lower corner, then fan smaller dots outward in two short rows. The structure feels decorative but controlled because the pattern stays confined to one area. It also makes an effective accent on only two nails.
Negative-Space Dot Nail Art
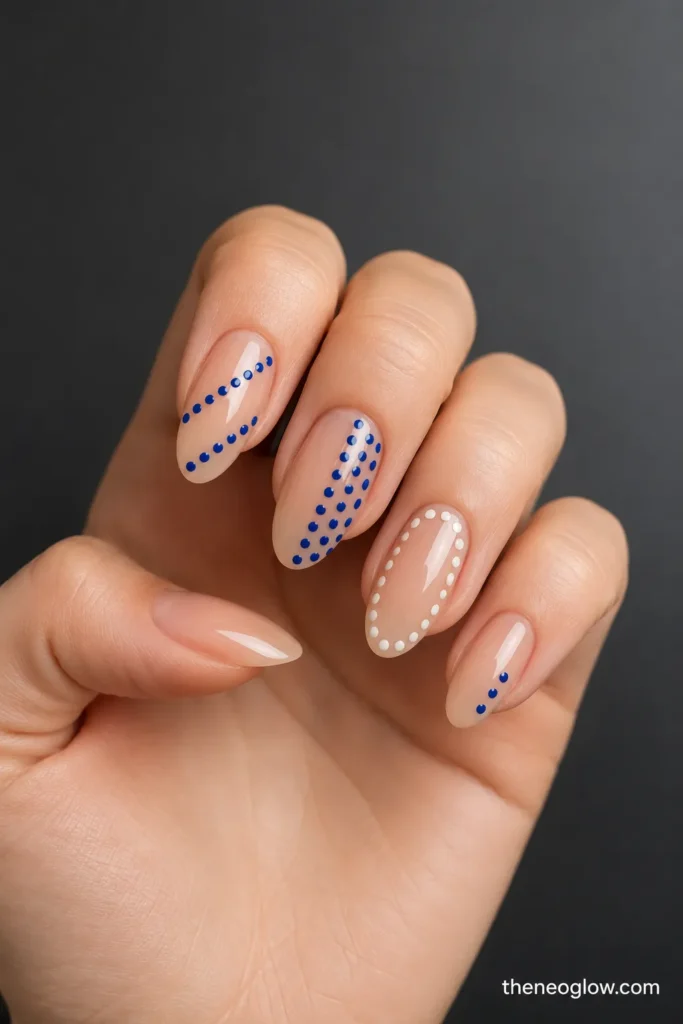
9. Diagonal Dotted Sash
Place two parallel diagonal rows across a sheer base, leaving open space between the rows. Use matching sizes for a crisp graphic result, or alternate small and medium dots for a softer rhythm.
10. Half-Nail Polka Field
Cover only one vertical half of each nail with evenly spaced dots and leave the other half completely bare or sheer. A clean imaginary center line is enough; you do not need to add a painted divider.
11. Floating Center Window
Arrange dots around the outer perimeter while leaving an oval-shaped open area in the center. The negative-space “window” prevents a high-density design from feeling heavy and gives medium almond nails an elongated focal point.
12. Alternating Bare and Dotted Panels
Divide the manicure by finger rather than within each nail: fully dot two nails, use a narrow dot border on two, and leave one nail with a single micro dot. Repeating the same palette ties the three densities together without making every nail identical.
Dot Flower Nails
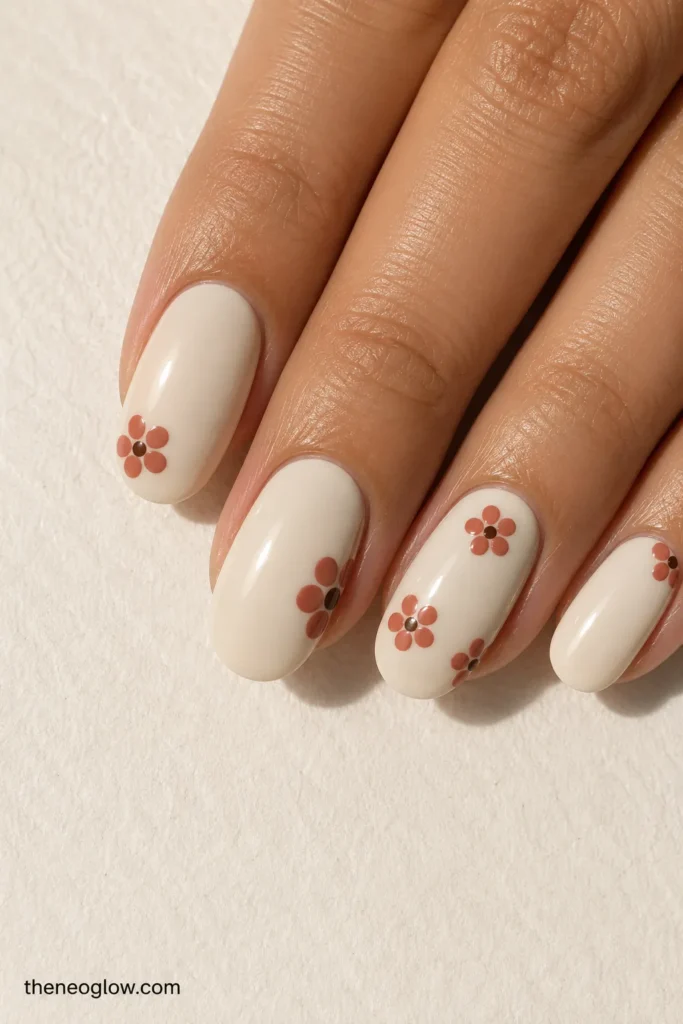
13. Single Five-Petal Bloom
Make five evenly sized dots around a smaller contrasting center. Place the center first if symmetry is difficult, then add petals at the top, bottom, left, and right before filling the final gap. One bloom near a corner feels more adult-friendly than covering every nail.
14. Half-Flower Edge Bloom
Position the flower center just beyond the side edge so only three petals appear on the nail. This cropped placement turns a familiar dot flower into a modern border detail and works well on short nails.
15. Mini Blossom Constellation
Scatter three tiny flowers across one or two accent nails, changing their orientation but keeping the petal size consistent. Leave enough space between blooms for the base to remain visible. Sally Hansen’s flower tutorial also builds a bloom from a center dot and surrounding dots. See the dot-flower steps.
For more low-detail florals, lines, and sticker options, the guide to simple nail designs covers techniques that do not depend on a full dotted pattern.
Statement Polka Dot Nails
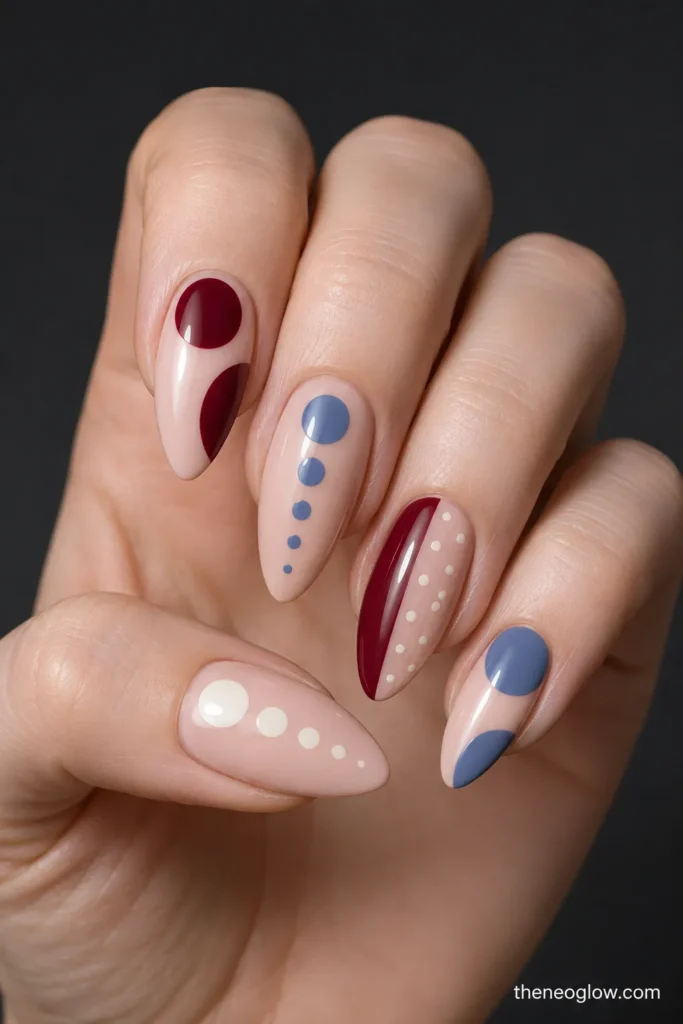
16. Oversized Pop-Art Circles
Use two or three large circles per nail instead of many small dots. Crop some circles at the side or tip so the pattern feels printed rather than carefully centered. High-contrast combinations such as cobalt and white or cherry red and blush make the scale intentional.
17. Graduated Bubble Dots
Begin with one medium dot near the cuticle and reduce the size as the sequence travels toward the tip. The gradual change disguises tiny inconsistencies better than a row that demands identical circles. Repeat the same direction on every nail for cohesion.
18. Color-Blocked Dotticure
Paint one diagonal or curved section of the nail in a solid shade, then add dots only over the opposite section. The design combines a clean color block with a separate dotted field, creating two distinct surfaces without requiring extra embellishment.
Troubleshooting Uneven Dots and Spacing
If dots become smaller as you work, reload the tool rather than pressing harder. If the row drifts, stop and place the final anchor dot, then distribute the remaining circles between the anchors. When symmetry is slightly off, repeat the same imperfection on the matching side or convert the layout into an intentional stagger.
Blobby circles usually come from too much polish, a tool dragged sideways, or a second press into the same wet dot. Test the load first and use one straight press. For regular polish, wait until raised dots feel set before adding topcoat; use a generous bead and glide rather than scrubbing the brush over the art.
How to Adapt Polka Dots for Short Nails
Short polka dot nails look clearest when one design decision leads the set. Choose micro dots, a single border, a cropped flower, or one negative-space panel instead of combining several patterns on each nail.
Use fewer dots rather than squeezing the spacing. A five-dot French chain can look cleaner than ten tiny circles, and one corner bloom can be more readable than a full floral field. Short square and squoval shapes suit grids and borders, while short oval nails soften diagonal trails and flowers. Browse these short summer nails for more small-scale design references that are not limited to dots.
Choose One Pattern and Build Around It
Start by choosing the structure—not the color. Decide whether you want a micro accent, border, open-space pattern, flower, or statement circle. Then select two or three shades with enough contrast for the dots to remain visible.
Save the pattern that best matches your nail length and patience level. At home, test your polish load and spacing on foil first. At a salon, show the placement, dot size, and density you want rather than describing the manicure only as “polka dots.”