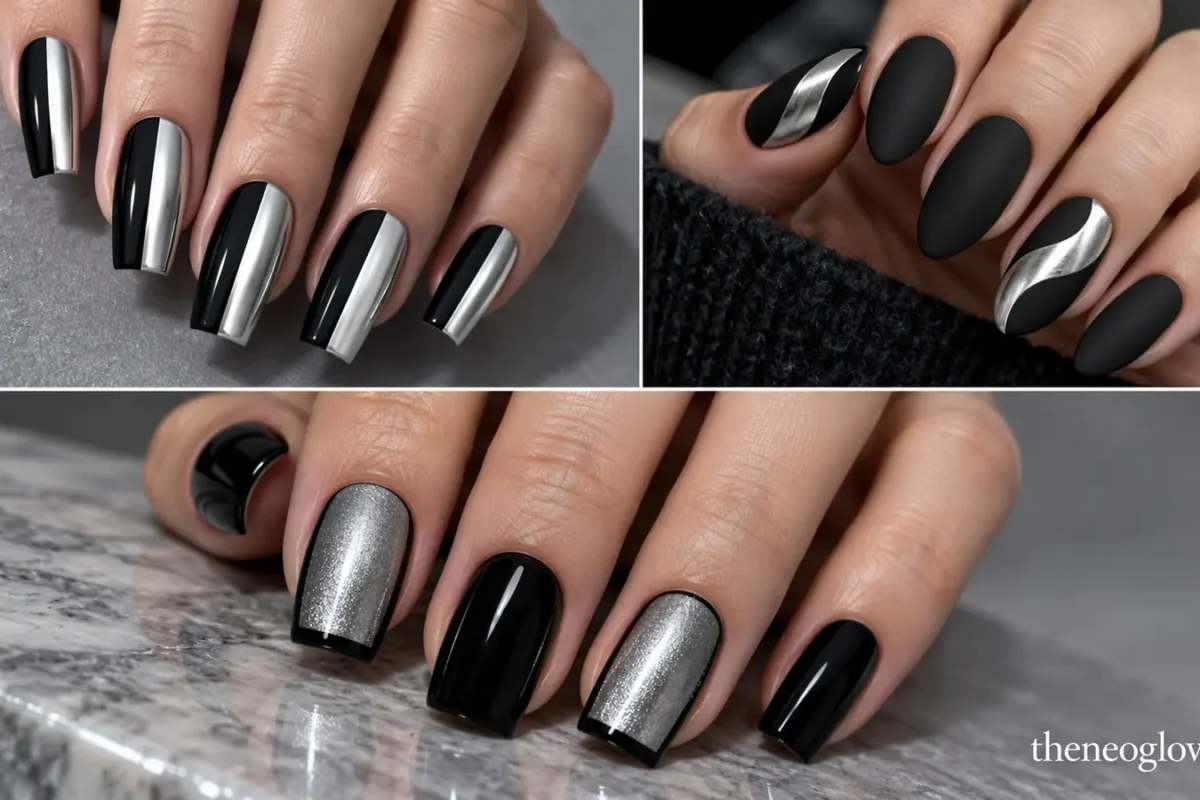
Black and silver nails can be quiet enough for an ordinary workday or reflective enough for a New Year’s Eve outfit. The useful distinction is not simply how much sparkle you add. An opaque black base makes a fine silver edge look sharp; a satin silver field with a black cap creates a stronger two-color block; and magnetic particles produce light that moves rather than a fixed metallic shape.
These 19 manicure ideas keep both colors recognizable while changing length, placement, opacity, and finish. Start with the comparison, then save the exact design that works for your nails instead of asking for an unspecified “black and silver set.”
Find Your Black-and-Silver Balance
| Your priority | Start with | Visual payoff | Practical consideration |
|---|---|---|---|
| Low-detail, short nails | 1, 2, 4 | Clean color contrast | Keep silver details wide enough to see |
| Graphic two-color structure | 6, 9, 10 | Crisp divisions | Straight boundaries need precision |
| Visible party shine | 11, 13, 15, 19 | Chrome or glitter reflection | Tip wear and surface marks stand out |
| Movement rather than painted art | 17, 18 | Magnetic silver glow | Check the effect in more than one light |
| A softer, translucent option | 16 | Smoky depth | Silver must remain visible beneath the tint |
For this palette, “silver” might mean subdued steel, bright platinum, fine glitter, or a mirror finish. Those options are not interchangeable. If silver itself is your main interest rather than the two-color contrast, NeoGlow’s silver nails guide compares the wider silver family.
Clean Contrast for Everyday Nails
1. Alternating Onyx and Satin Silver Rounds
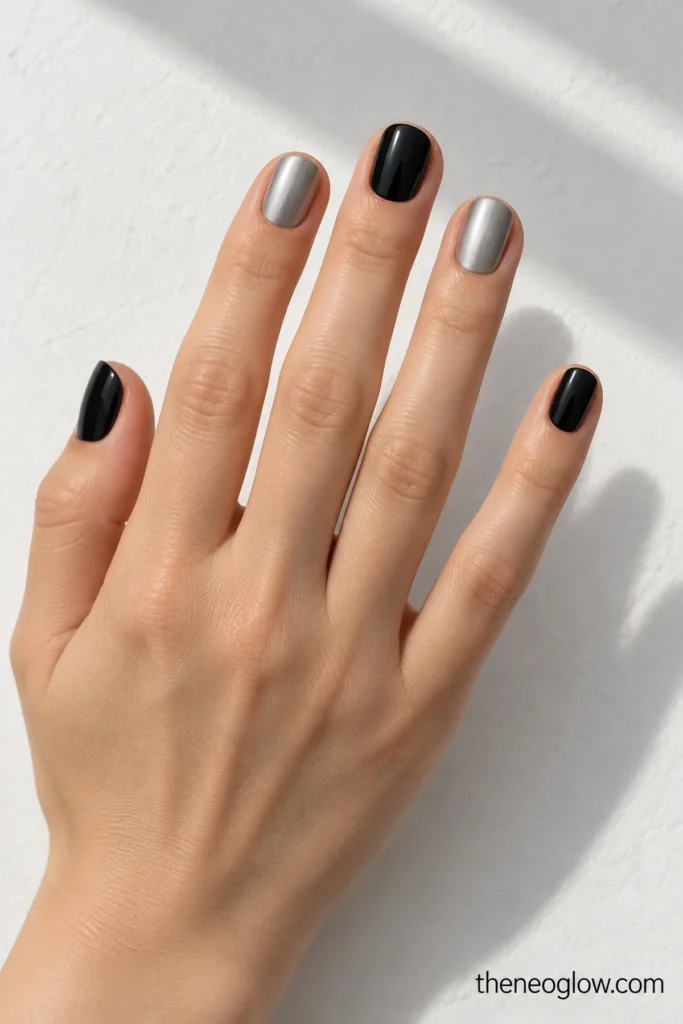
Keep naturally short, rounded nails simple: glossy opaque black on the thumb, middle, and pinky, with smooth satin-platinum silver on the index and ring. The silver should look like solid brushed metal, not glitter or mirror chrome. Repeating that pattern across both hands creates a clear black-and-silver manicure without line art. It is also a useful reference if you prefer painting with ordinary polish.
2. Razor-Silver Edge on Black Squovals
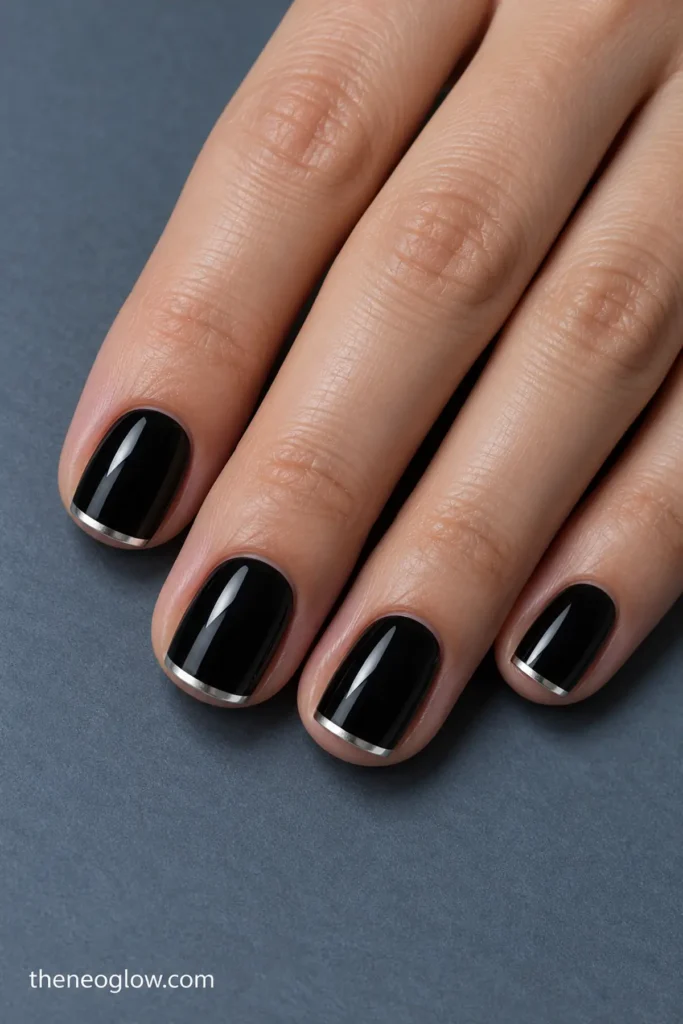
Paint very short squoval nails in opaque patent black, then trace one exceptionally narrow cool-silver metallic strip directly along every free edge. The silver line runs straight across the tip and does not dip into a deep French curve. This is the most restrained option here, but its crisp edge is easy to recognize. Keep the band visible rather than reducing it to an almost invisible hairline.
3. Inverted Platinum Half-Moons
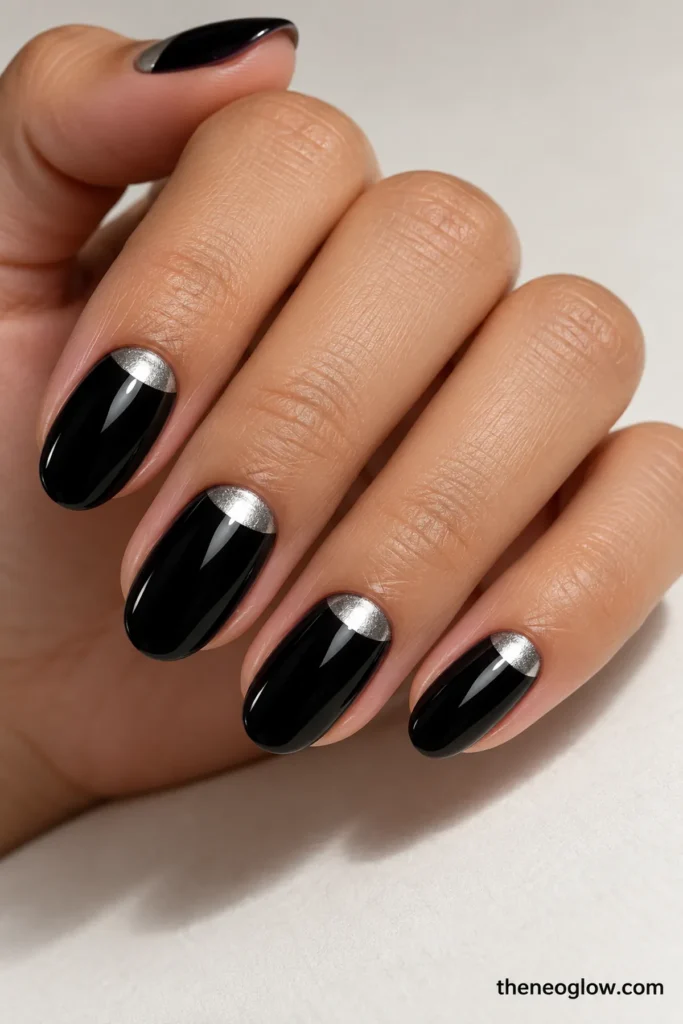
On medium oval nails, retain glossy ink black from the center to the tips. Add one opaque, shallow platinum-silver semicircle hugging each cuticle, with a clean curved border and no separate outline. Unlike a French tip, the silver sits at the nail’s base. It gives the two-color pairing a vintage graphic quality without the extra texture of glitter or foil.
4. Silver Side-Window Notches
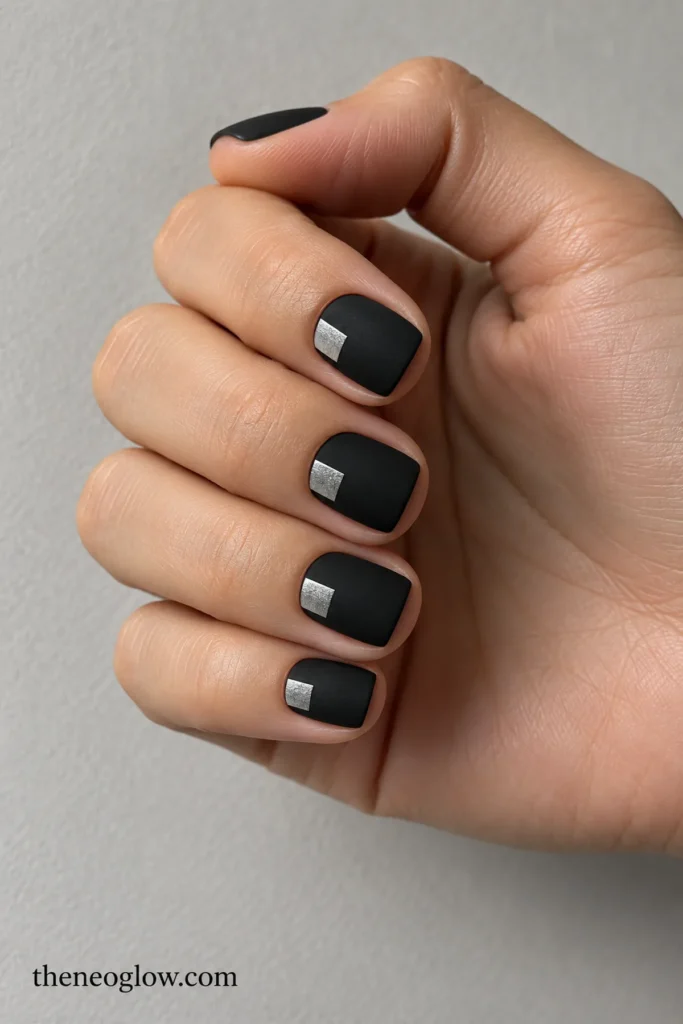
Start with short, flat-tipped square nails in matte black. On the left sidewall of every nail, place one small, solid rectangular silver window centered halfway between cuticle and tip. Leave black visible above, below, and to the right of each block. The repeated side notches feel architectural, while the broad black field prevents the design from turning into a silver manicure with a dark accent.
5. Single Lightning Thread
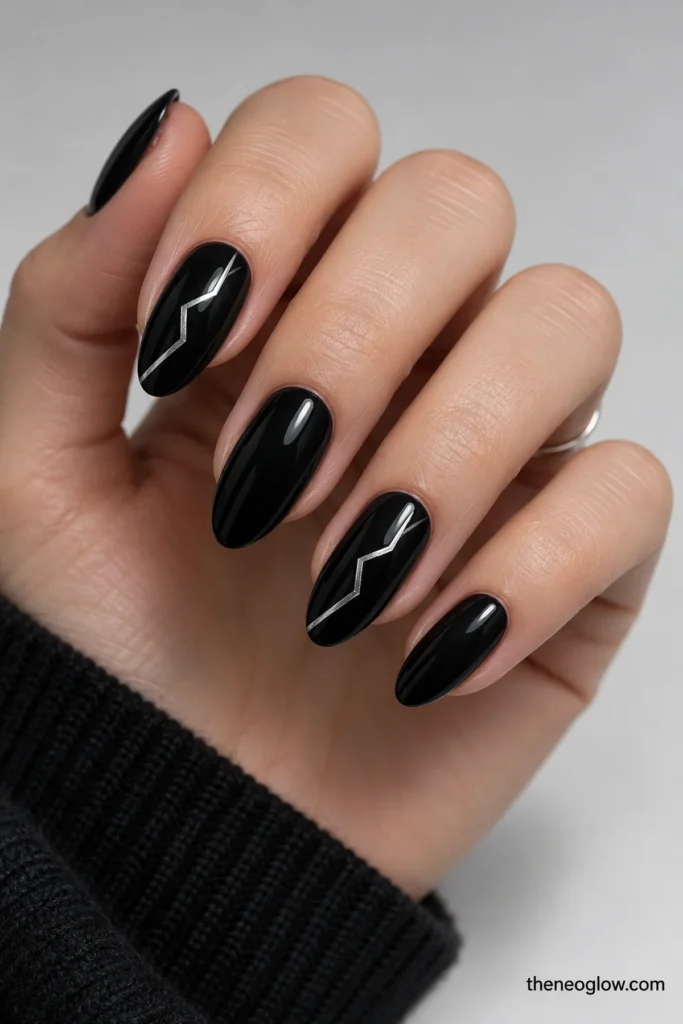
Give medium almond nails a glossy black finish and reserve only the index and ring nails for artwork. On each accent, draw one narrow angular silver zigzag from the lower-left area toward the upper-right tip, with two sharp directional bends. The other nails stay fully black. This is an intentionally graphic bolt, not a starburst, marble vein, or magnetic streak, so the silver line must have clear corners.
French Tips and Graphic Color Blocking
6. Center-Seam Split Coffins
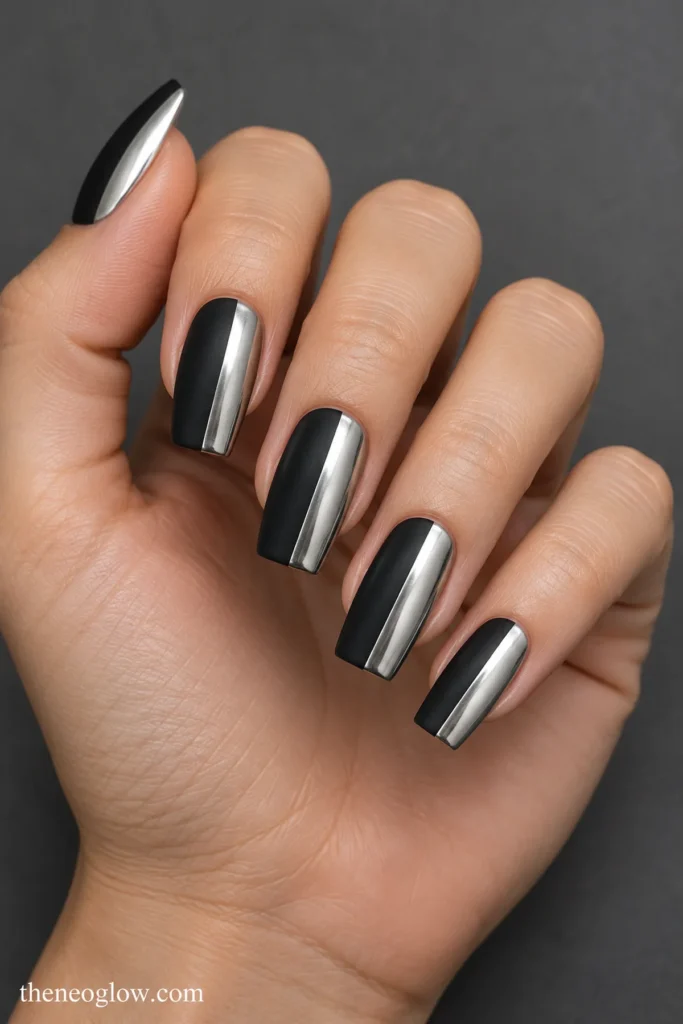
Divide each medium coffin nail vertically into two equal fields: opaque satin black on the left and reflective silver on the right. Carry the straight seam from cuticle to squared-off free edge without an added dividing line. Both colors have equal visual weight, unlike a black manicure decorated with silver marks. A consistent split direction across the hand is more effective than alternating sides at random.
7. Chevron Chrome Tips
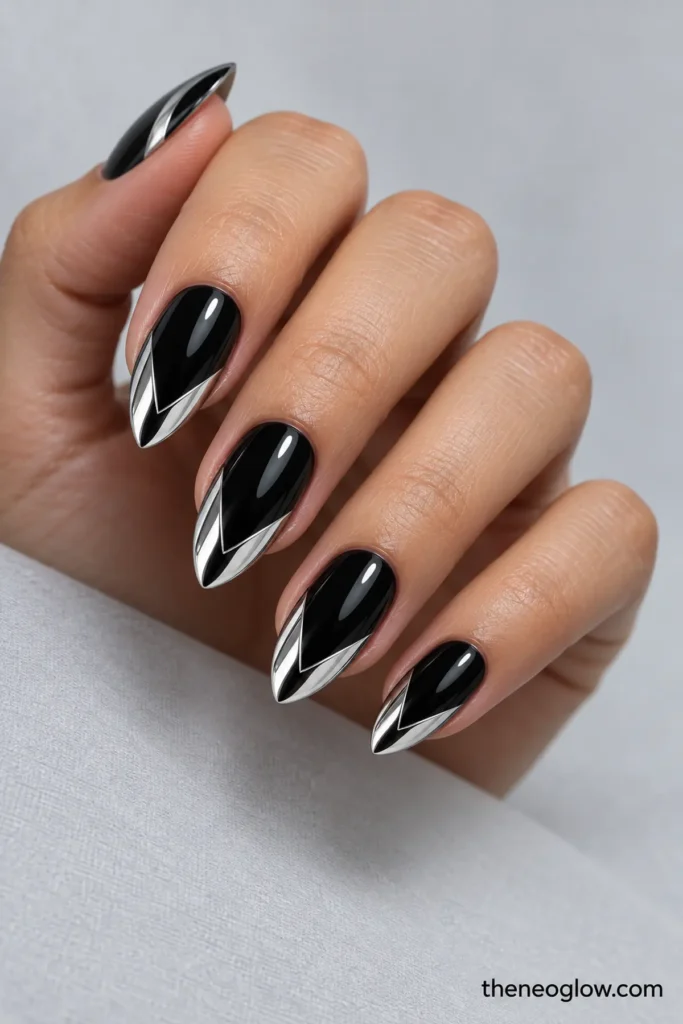
A medium almond shape gives this design space for a sharp metallic V. Coat every nail in opaque glossy black, then paint two broad, silver-chrome triangular arms that meet at the tip, leaving a black triangular opening between them. The silver forms a chevron rather than a full curved French band. Keep the chrome confined to the outer third so the black base remains unmistakable.
8. Silver Side-Cuff French
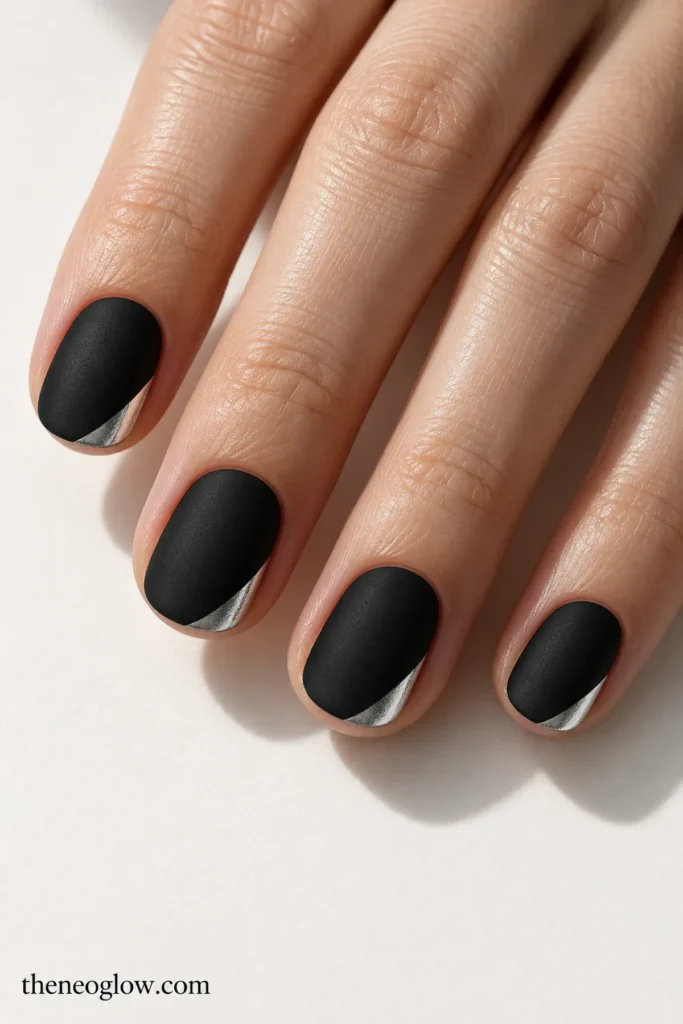
For short oval nails, use a velvet-matte black base and wrap a moderately broad silver-metallic cuff around only the right outer corner of each free edge. The silver begins at the sidewall and bends across a small section of the tip; it never crosses the entire nail. The asymmetric metallic corner has more presence than Idea 2’s hairline edge while demanding much less space than the chevron in Idea 7.
9. Black Band French on Satin Silver
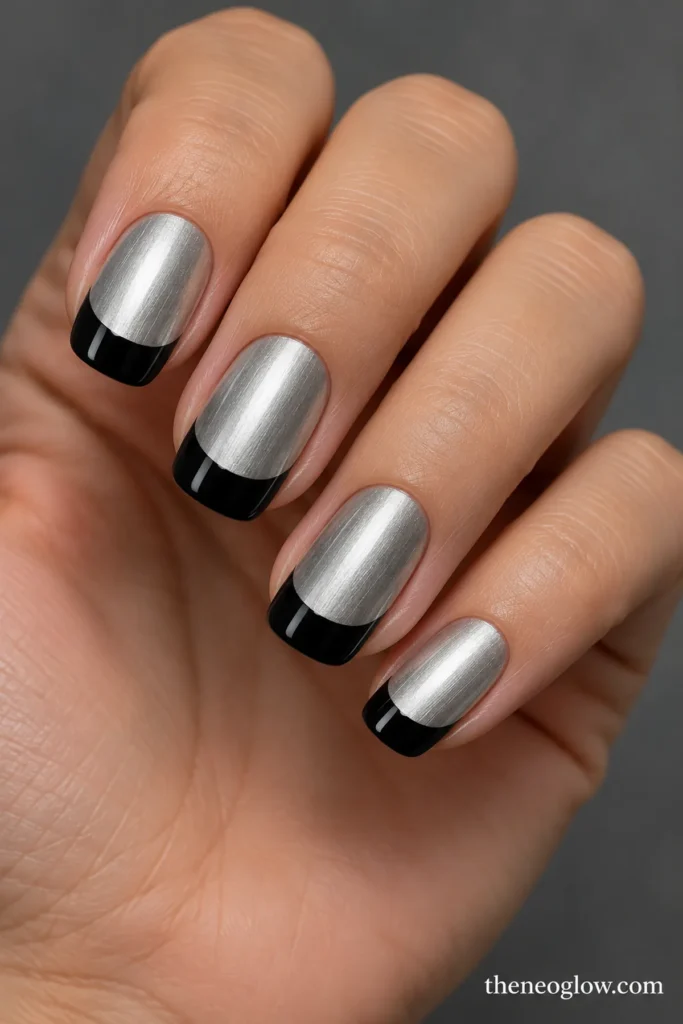
Reverse the usual dark base on medium rounded-square nails. Use opaque cool satin silver from the cuticle through the main plate, then finish each tip with a deep, curved, glossy black band occupying roughly the outer third. Do not add another silver outline to the black cap. The soft-reflective base and patent-black tip give this manicure an almost tailored two-fabric appearance.
10. Staggered Silver Bars on Black
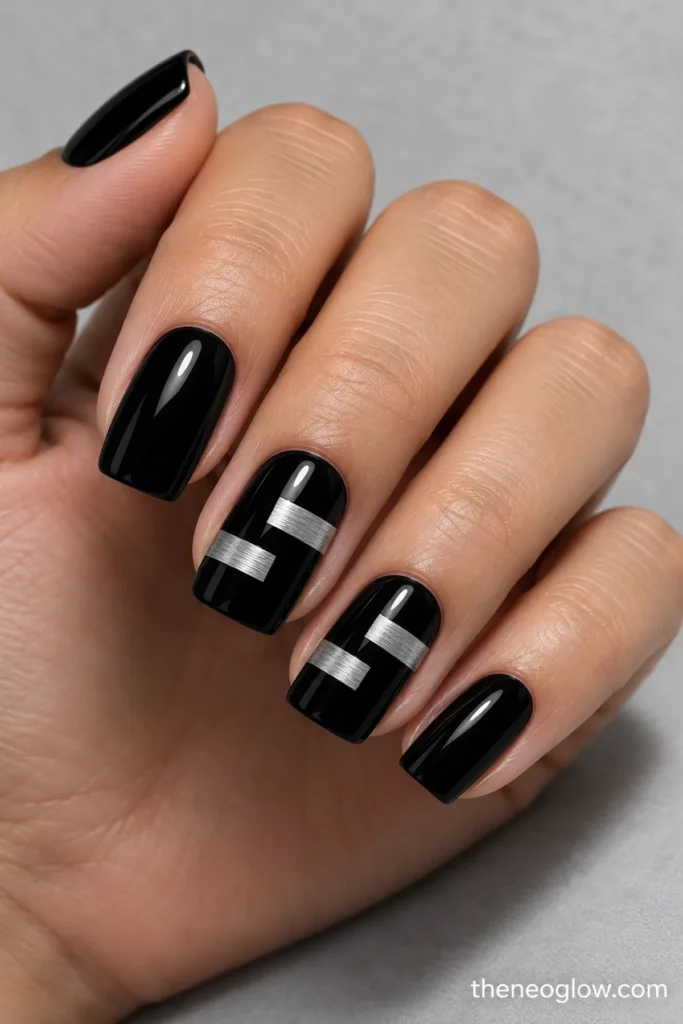
Paint medium soft-square nails opaque black. On the middle and ring fingers, add two separate horizontal brushed-silver bars: a lower bar starting from the left side and an upper bar starting from the right. Stop each before the opposite edge and preserve a clean black gap between them. All remaining fingers stay black. The offset construction looks deliberate and geometric rather than striped across every nail.
Mirror, Glitter, and Translucent Silver Details
11. Liquid Chrome Ribbon
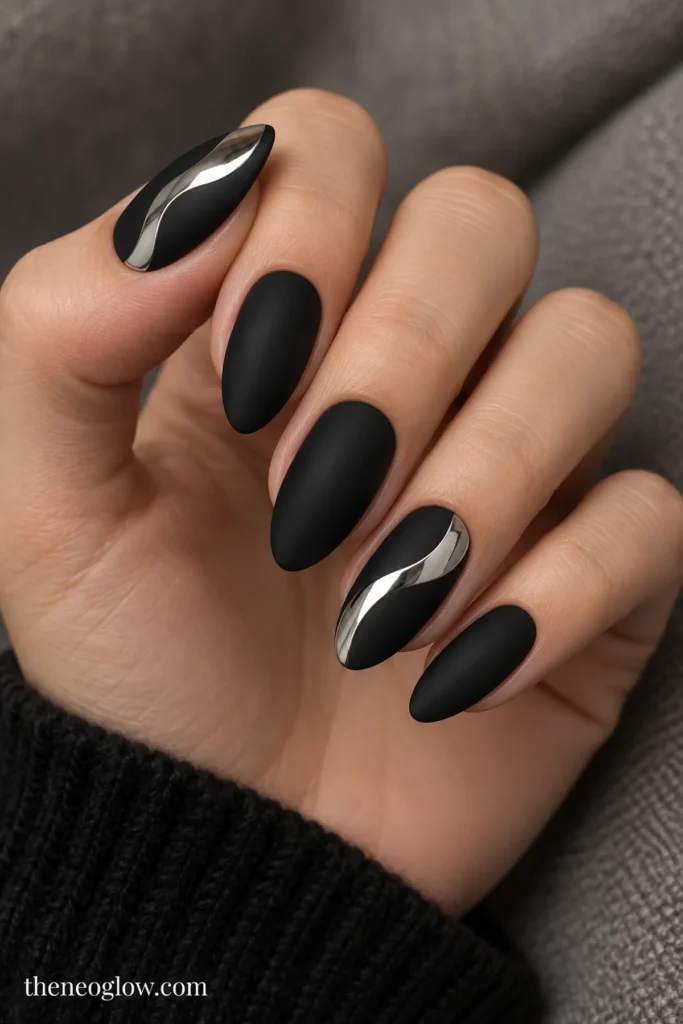
Keep medium almond nails matte black, then place one broad, fluid-looking silver mirror ribbon across the thumb and ring nails. Each ribbon begins close to one lower side, curves into a loose S through the center, and finishes near the opposite upper side. The silver must remain a flat, highly reflective painted surface—not a raised charm. Plain black nails between the accents give that single continuous curve room to stand out.
12. Silver Portholes on Matte Black
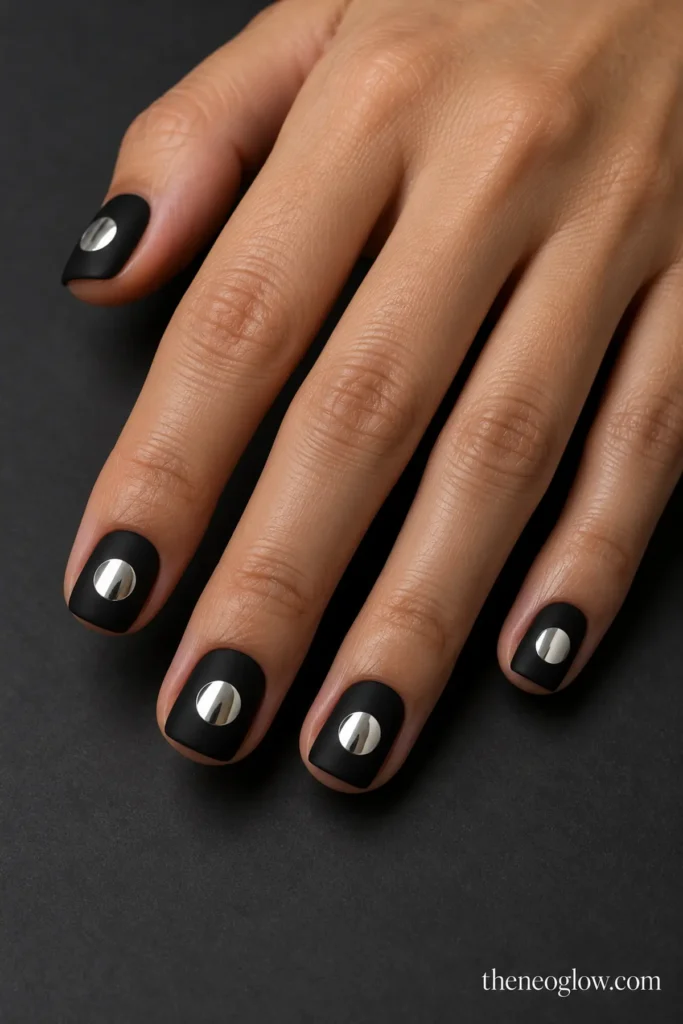
Short soft-square nails wear matte onyx with one large, neatly centered circular silver-chrome disk on each nail. Each disk occupies roughly one-third of the visible nail width, surrounded by an uninterrupted black border. Think of a clean metal inset rather than scattered dots: one circle, one position, and no added stars or gems. This makes a recognizable design even on compact natural nail plates.
13. Shattered-Mirror Tile Pair
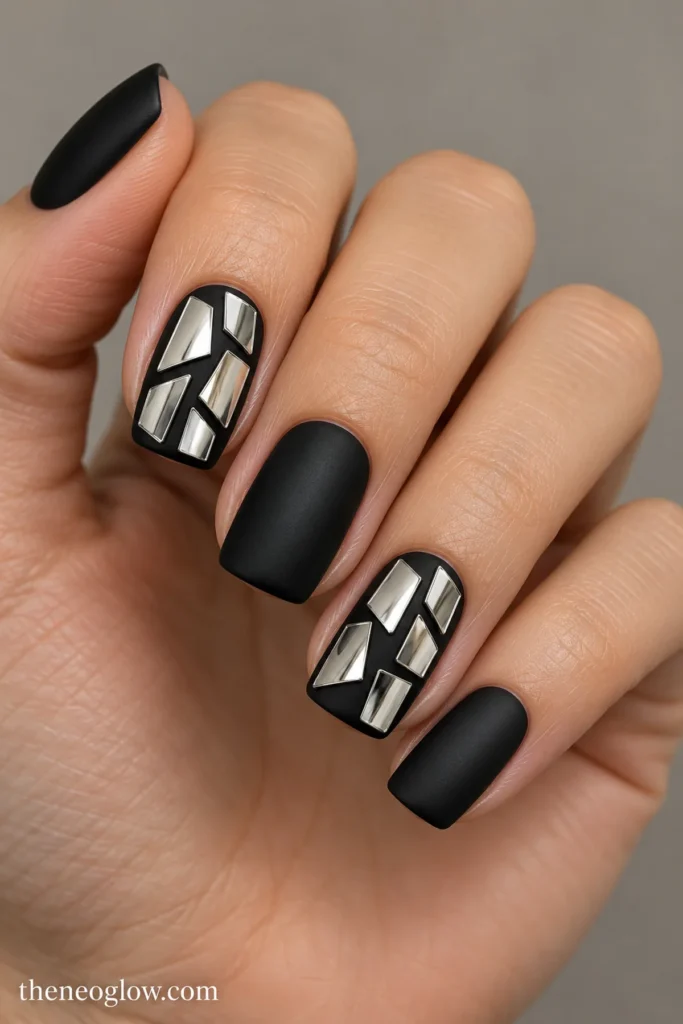
On medium squovals with a satin-black base, fill the index and ring nails with four to six uneven rectangular silver-chrome tiles, leaving slim black channels between them. Keep their edges angular and their surfaces flat, like separate pieces of a broken mirror arranged carefully in place. The thumb, middle, and pinky remain black. Unlike loose foil flakes, the tiles have definite straight sides and deliberate spacing.
14. Black-to-Silver Nightfall Ombré
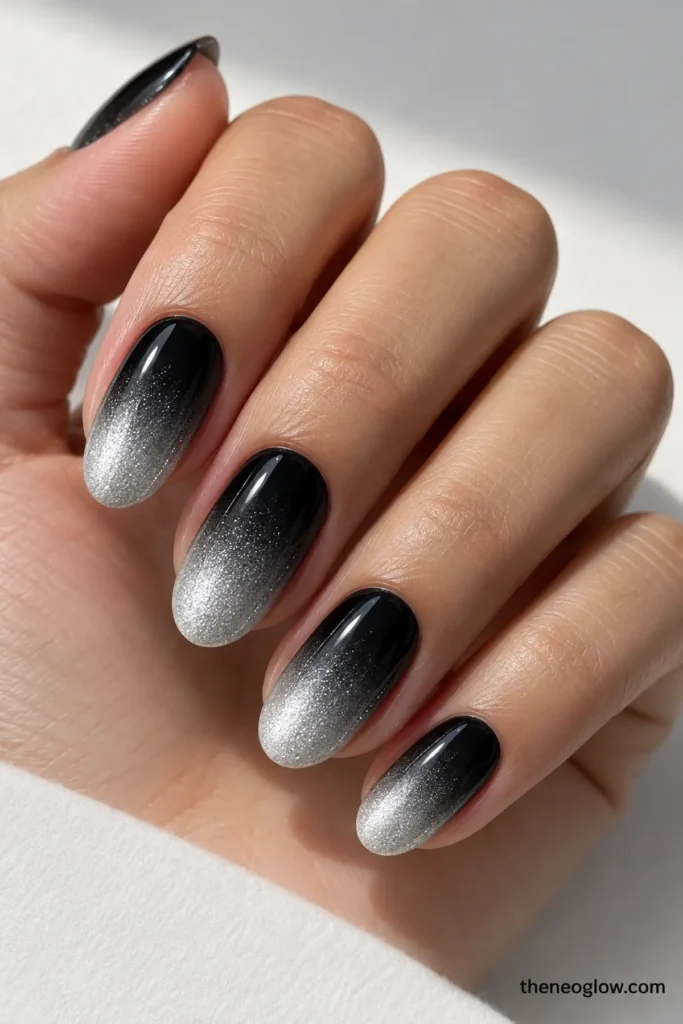
Medium oval nails transition smoothly from opaque true black around the cuticles to luminous silver shimmer at the tips. The blend occupies the central third; neither color should collapse into uniform gray. Use a fine metallic finish with no visible chunky sequins. This is a full-nail tonal transition rather than a French edge, with enough black left near the roots to keep the pairing distinct from plain silver ombré.
15. Silver Glitter Cuticle Sweep
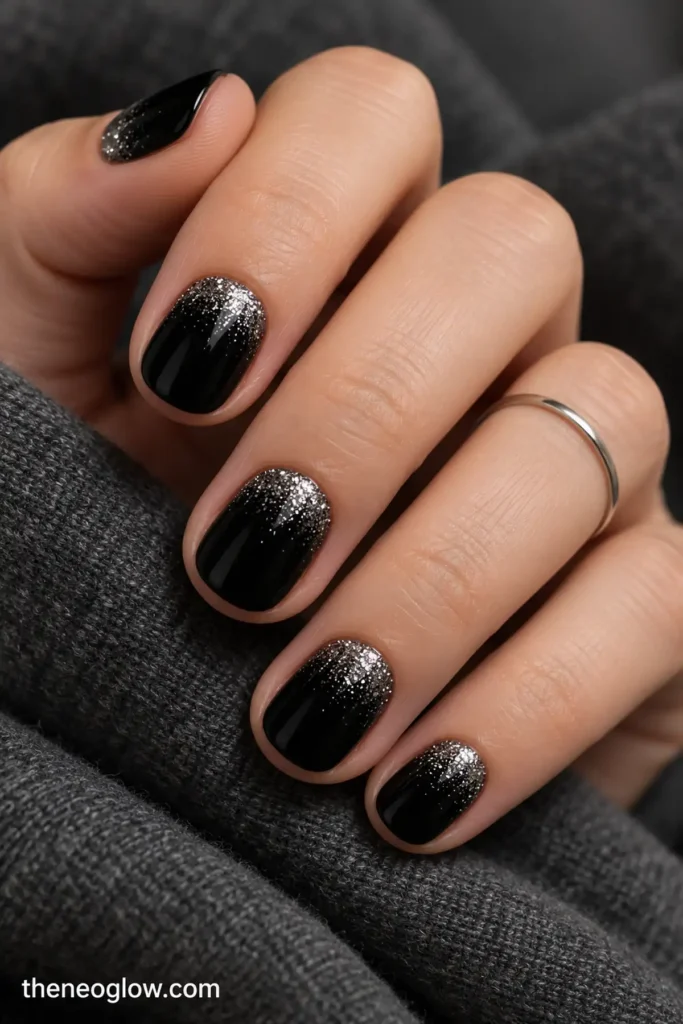
Cover short round nails with glossy opaque black and concentrate fine, cool-silver glitter in a broad crescent at the cuticle. Let a small amount of sparkle disperse upward only to the middle of the plate, leaving the outer tips solid black. The placement is the opposite of a glitter French, and the particles should be visibly separate from one another. This offers a party accent without long extensions.
16. Smoky Jelly With Underlaid Silver Waves
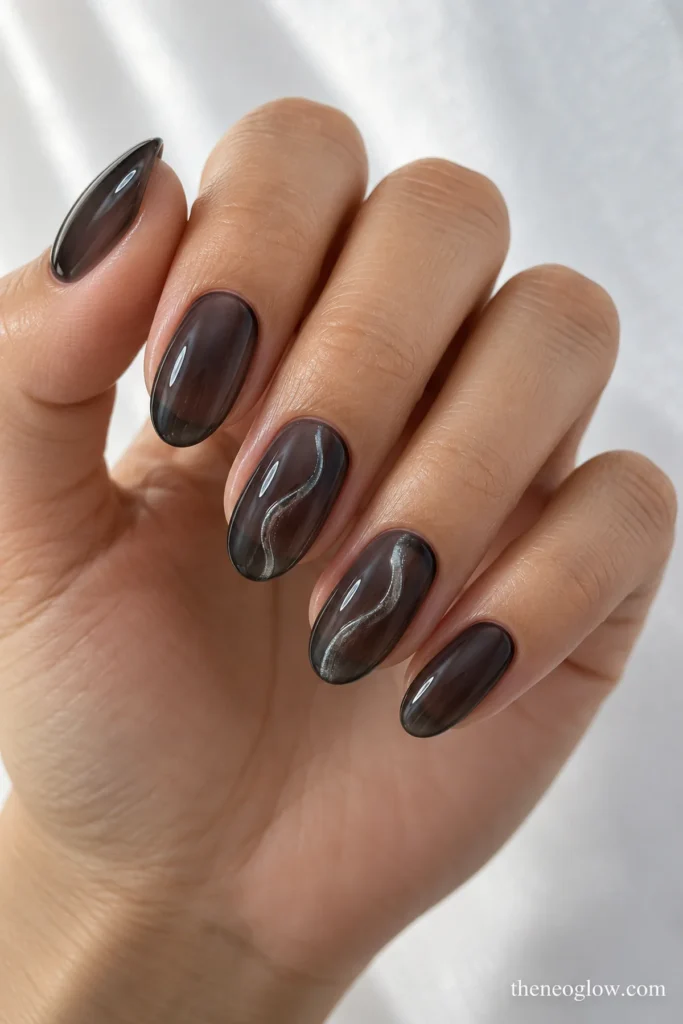
A medium oval nail receives one delicate metallic-silver wavy line on the middle and ring fingers, running lengthwise just off center. Cover the finished line with a translucent charcoal-black jelly layer that softens—but does not hide—the silver. The remaining nails use the same clear-dark jelly without art. A glossy top surface makes the wave appear suspended beneath tinted glass rather than painted onto opaque black.
Magnetic Silver and Statement Tips
17. Narrow Silver Magnetic Slash
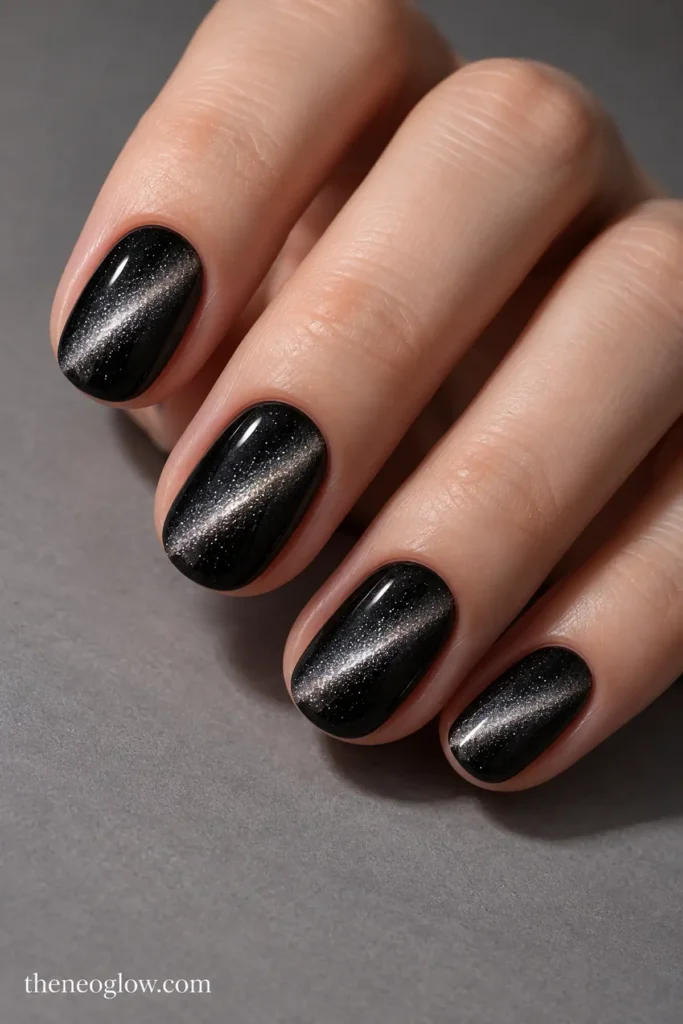
On short oval nails, place a sharply defined diagonal silver magnetic beam inside a deep-black magnetic-polish field. The brightest reflection travels from the lower-left side toward the upper-right edge, with black clearly visible on both sides. There is no painted silver stripe on top. The moving highlight should be the main feature, which makes this different from the fixed zigzag line in Idea 5.
18. Black-Framed Silver Velvet Accents
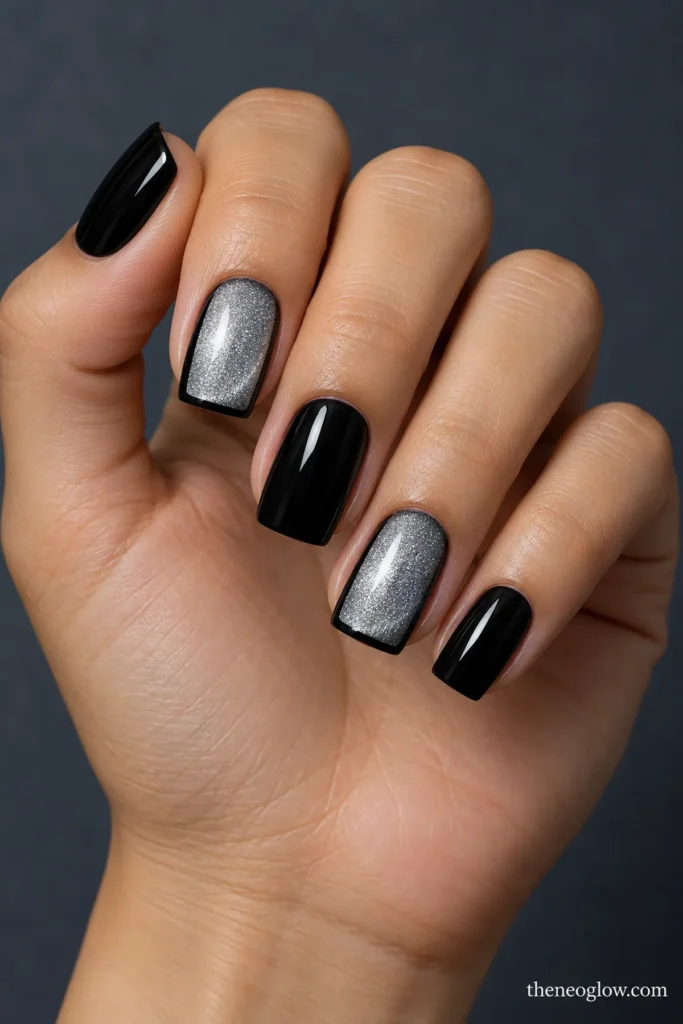
Give medium square nails three solid glossy-black fingers and two silver magnetic-velvet accents on the index and ring. On each accent, spread the magnetic silver glow broadly with no hard central beam, then retain a slender opaque-black perimeter around the side edges and tip. The soft interior reflection contrasts with the crisp frame; the black border keeps the palette connected even on the silver-forward nails.
19. Scalloped Silver Shield Tips
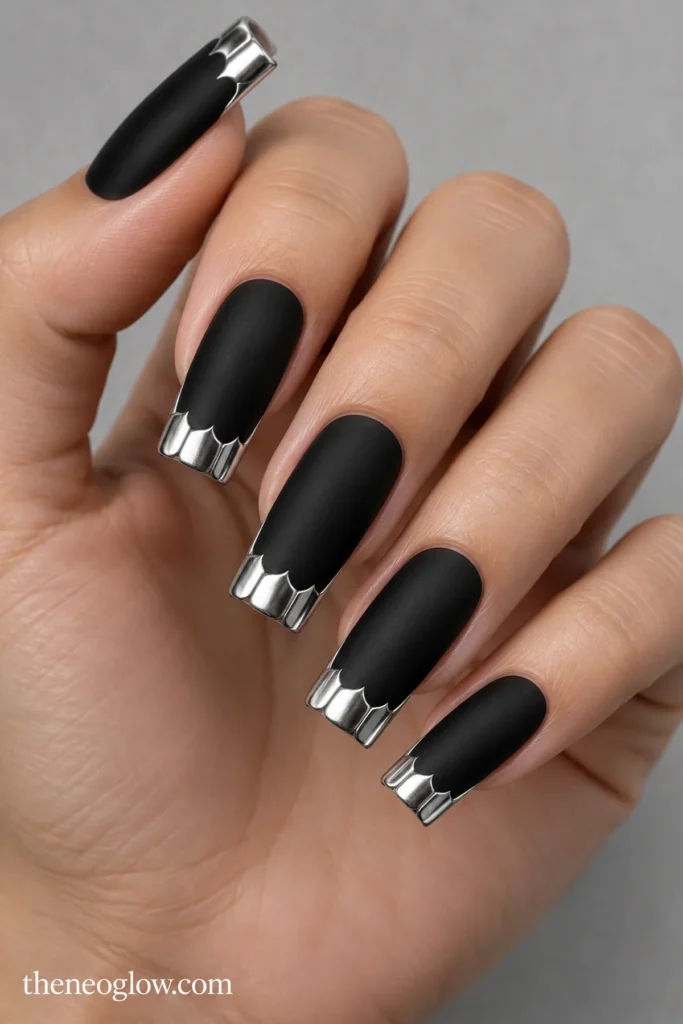
Long tapered-square nails carry matte jet black beneath a reflective silver tip construction made from three overlapping rounded scallops. Place the metallic scallops across the free edge so their curved lower boundaries descend slightly into the black, like small armor plates. They should remain flat and clearly separated, not turn into silver drips or raised beads. This is the most decorative choice, best when the longer shape is genuinely practical for you.
Which Finish Matches Your Routine?
For regular polish at home: The alternating solids in Idea 1, sharp micro edge in Idea 2, side windows in Idea 4, and lightning accents in Idea 5 are more straightforward than a highly reflective chrome or magnetic construction. A detail brush or carefully placed striping aid can help, but clean color boundaries matter more than tiny ornaments.
For chrome: A mirror-like silver patch is not the same as silver shimmer. Application depends on the product system and base; NeoGlow’s chrome nails comparison explains the wider range of mirror, pearl, and partial finishes. Confirm the finish and placement before a salon begins, especially for Ideas 7, 11, and 13.
For cat-eye: Ideas 17 and 18 require magnetic particles and deliberately different light patterns. Cirque Colors’ magnetic-polish application directions provide a real lacquer example in which the magnet is used while the color is wet. Gel systems may use different steps and curing requirements, so follow the instructions for your exact products. For more beam and velvet comparisons, see NeoGlow’s cat-eye nail designs.
Make the Design Last Beyond One Night
Black polish shows a strong boundary when the free edge chips; bright metallic surfaces make scuffs easier to notice. If low-effort upkeep matters most, try a short flat design with silver confined to a controlled area, rather than a long mirror-covered edge. For New Year’s Eve, you can bring in more glitter or shine without adding fireworks or date-specific symbols, so the manicure still feels wearable in January.
If you choose a gel system, resist peeling or prying off lifted product. The American Academy of Dermatology’s gel manicure nail-health guidance explains manicure hygiene, UV-protection choices, and precautions around removal. Ask your nail professional about the actual system used; a soak-off gel and a hard enhancement may not have the same removal method.
Compare the polish against your everyday jewelry and clothing in ordinary lighting. Icy platinum can look sharp with crisp black, while deeper steel silver feels softer. Neither combination has a universal skin-tone rule; the useful test is which degree of contrast you enjoy on your own hands.
Save the Black-and-Silver Look You Can Actually Wear
For the simplest route, save Idea 1 or 2. Choose Idea 6 or 10 if precise two-color geometry is the attraction, or Idea 17 if shifting magnetic light is worth the extra application planning. When you save your reference, include the number, your actual nail length and shape, whether black or silver leads, and whether the metallic finish should be satin, glitter, chrome, or magnetic. That short description makes the picture far more useful at your next manicure.