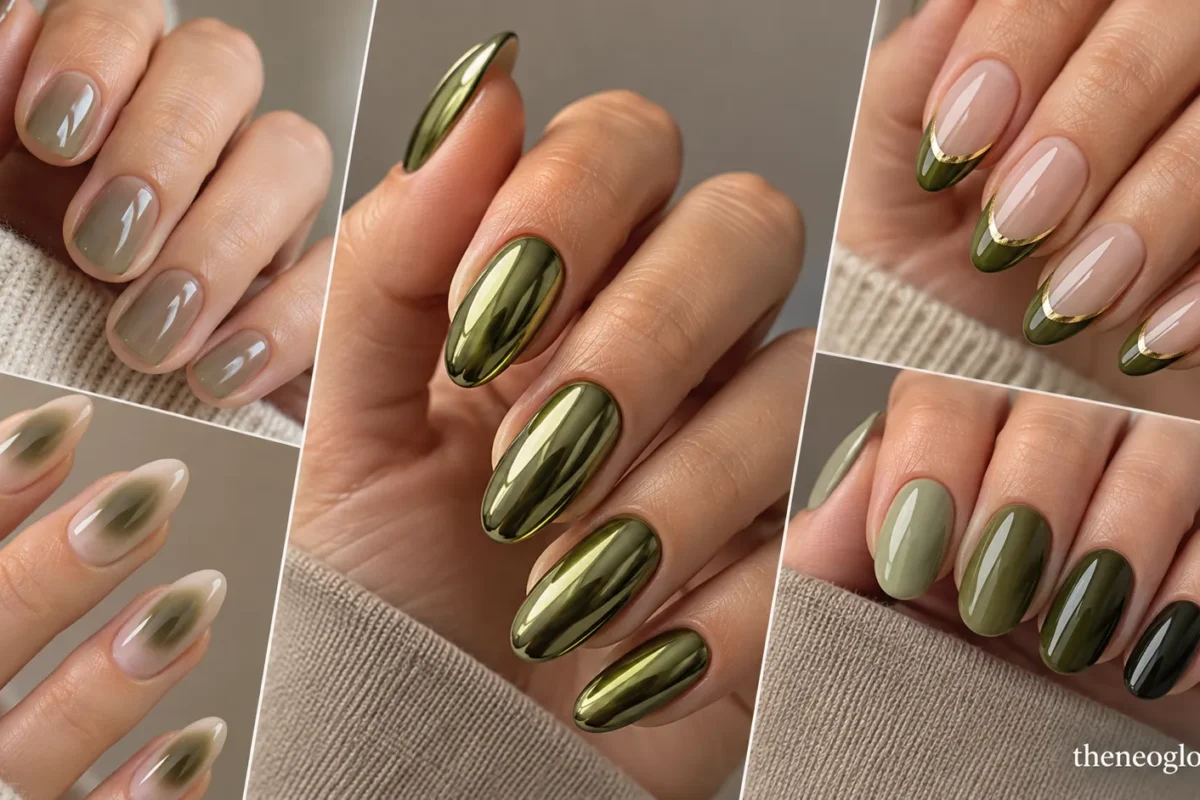
Olive green nails can look almost neutral, softly earthy, or sharply reflective depending on the depth and finish you choose. The useful decision is not simply “light or dark green.” A gray-leaning loden, yellow-olive cream, deep moss, translucent wash, chrome surface, and gold-accented tip can all create very different manicures.
This guide stays inside the olive-to-moss color family and gives you 20 distinct routes to compare. You will also find a quick shade-and-finish guide, short-nail adjustments, and clearer ways to describe the look you want without assuming one undertone is universally best.
Choose the Olive Depth and Finish First
| Route | What it looks like | Good starting finish | What to notice |
|---|---|---|---|
| Soft loden or gray-olive | Muted, lighter, less yellow | Sheer or satin | Gentle contrast and easy layering |
| Classic olive | Balanced earthy green | Cream or high gloss | Clear olive identity without extra art |
| Moss | Deeper and slightly woodland-toned | Satin, shimmer, or gloss | More depth without becoming near-black |
| Blackened olive | Very deep green that can read almost charcoal | Gloss | High contrast and more visible edge wear |
| Reflective olive | Base color shifts as light moves | Chrome, pearl, or fine shimmer | Surface finish becomes as important as shade |
Use undertone as a description, not a rule. If one olive looks too yellow for your taste, move toward gray, moss, or a cooler smoky green. If a muted shade looks flat, try a clearer mid-olive or add reflection through gloss, pearl, or metallic detail.
Soft and Solid Olive Green Nails
1. Loden Tea Sheer Soft Squares
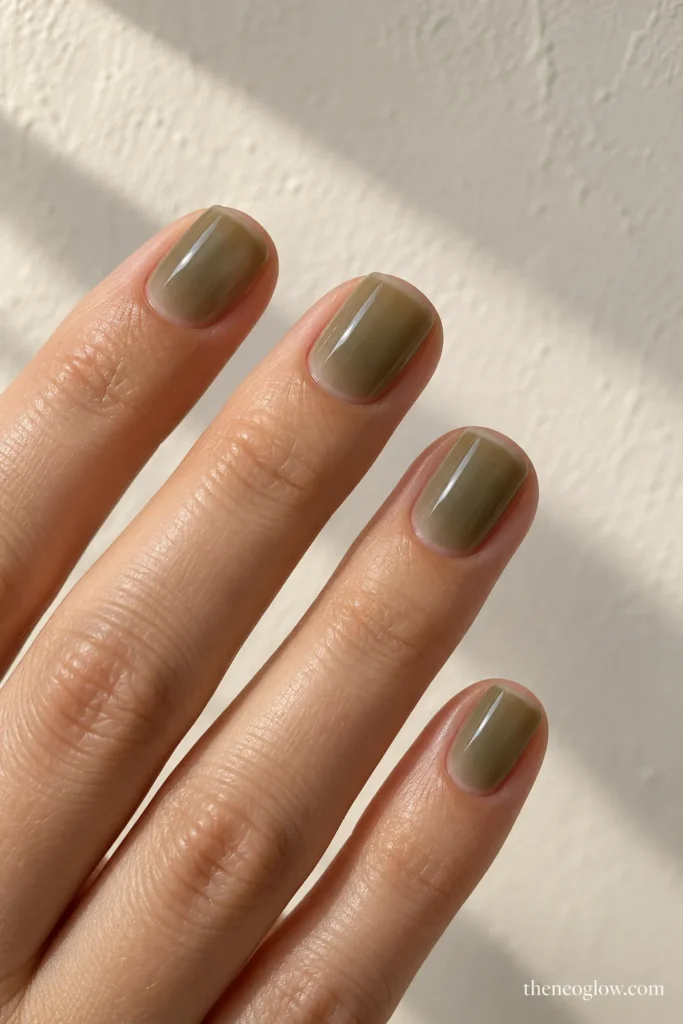
Start with a translucent gray-olive wash on short soft-square nails. The natural nail should remain faintly visible, giving the color a tea-stained effect instead of a dense cream finish. Keep the edges tidy and the surface glossy so the muted green looks intentional rather than cloudy.
2. Celery-Olive Cream Ovals
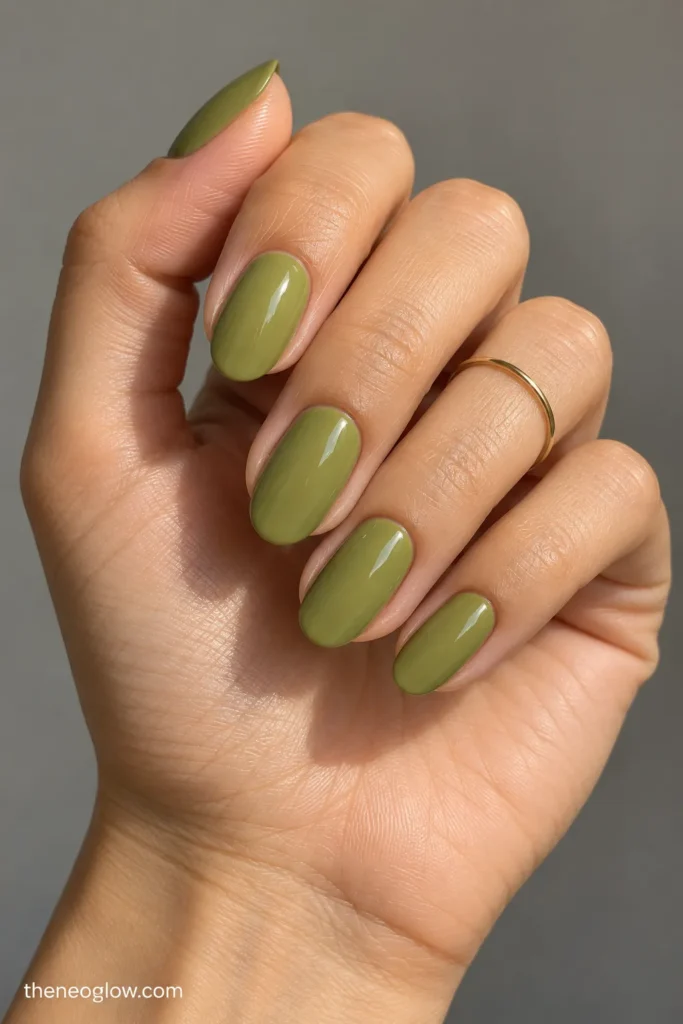
Choose a pale olive with a noticeable soft-yellow cast, then wear it as an opaque cream on medium ovals. This is the lightest solid route in the list, so it reads fresher than moss without drifting into mint or pistachio. Skip extra art and let the unusual color do the work.
3. Classic Olive Glass Gloss
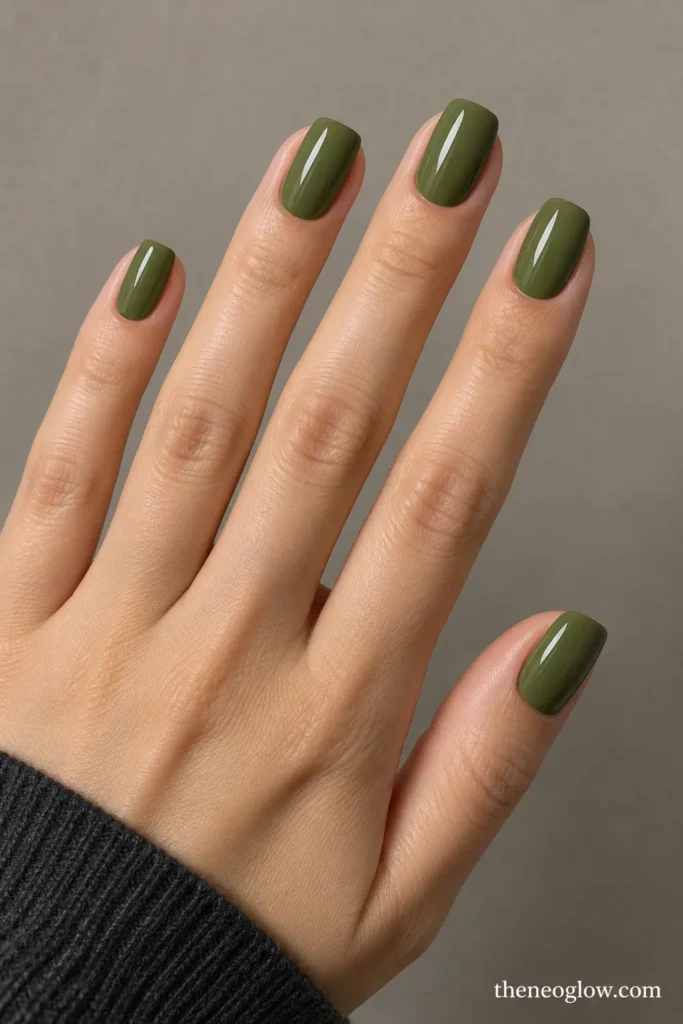
Use a balanced mid-olive on medium rounded-square nails with a very shiny top finish. The clean shape and reflected surface keep the shade polished and simple. This is a useful reference when you want the manicure to read unmistakably olive without chrome, French placement, gold, or motifs.
4. Smoked Moss Satin Squovals
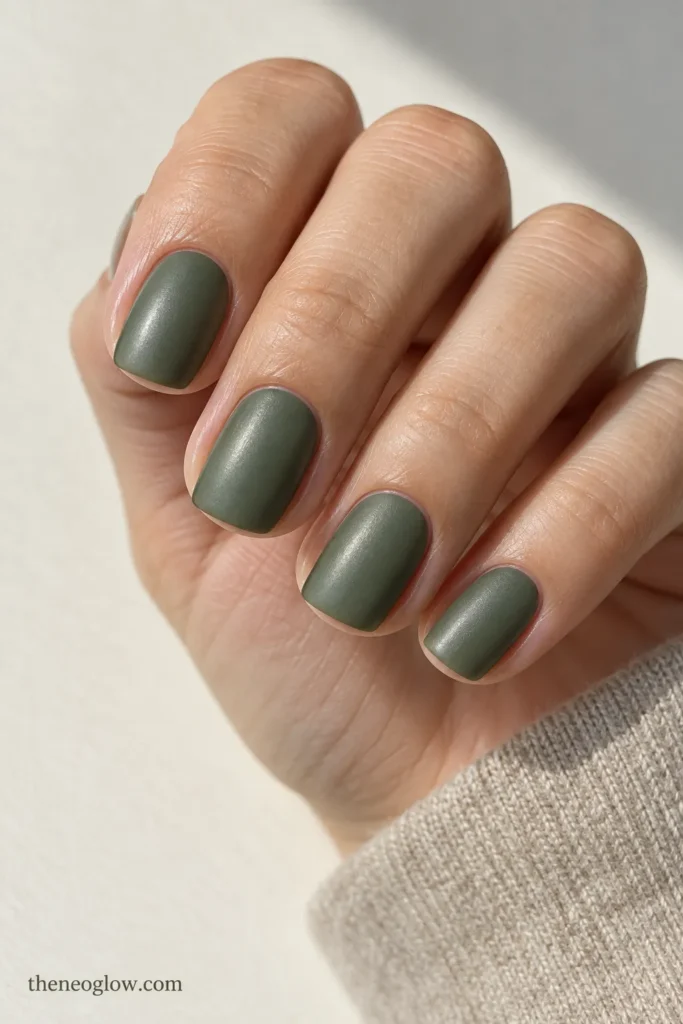
Move deeper with moss green softened by gray, then use a satin finish on short-to-medium squovals. Satin should reflect less sharply than gloss but still look smooth, not chalky. The combination gives the color more visual texture while staying flat and practical for everyday wear.
5. Blackened Olive High-Gloss Rounds
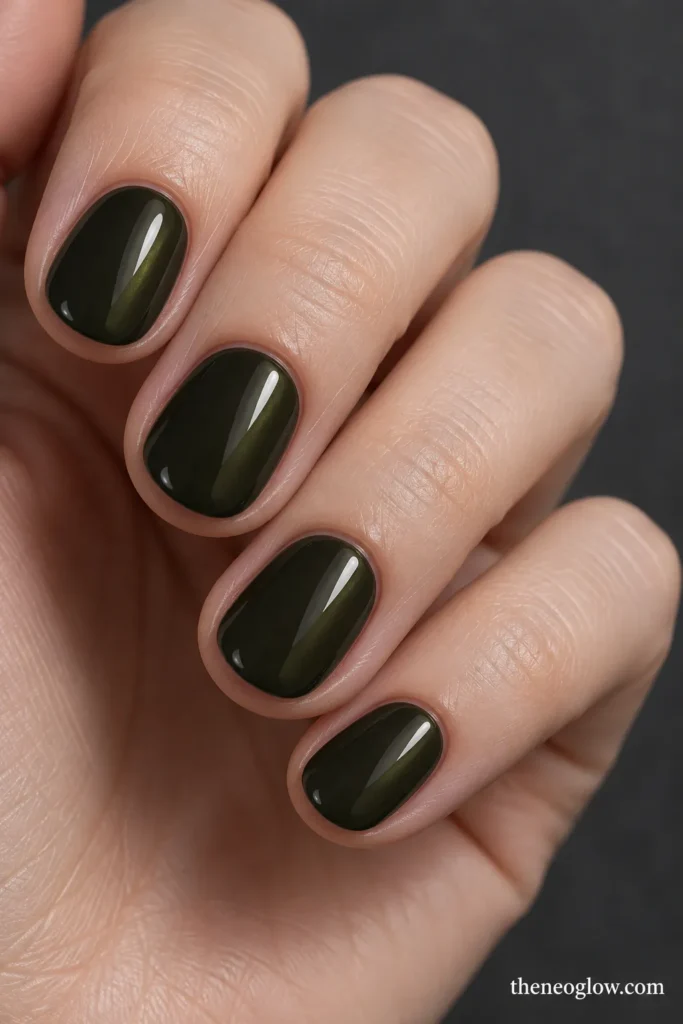
Pick an olive so deep that it approaches charcoal indoors but still shows green in brighter light. Short round nails keep the dark color compact, while high gloss prevents the surface from looking dull. Save this route if you like near-black manicures but want a visible earthy undertone.
Olive Placement Ideas With Negative Space
6. Sage-to-Olive Soft Ombré
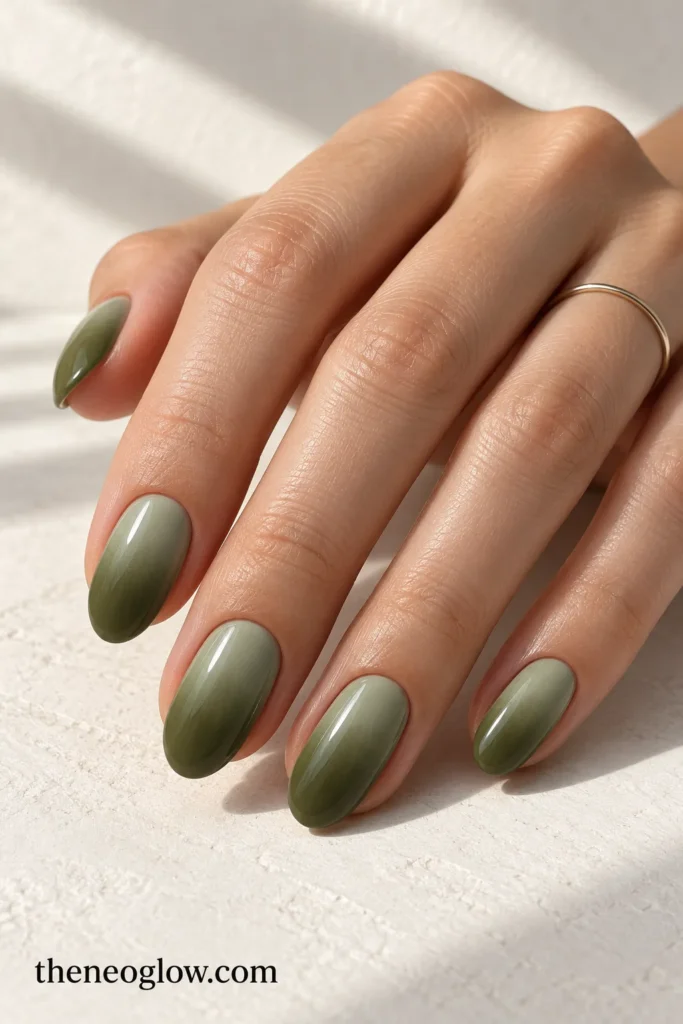
Blend a muted sage near the cuticle into a richer olive toward the free edge on medium ovals. Keep both colors in the same subdued family so the transition looks tonal rather than multicolor. The gradient gives you two depths without introducing a second unrelated shade.
7. Olive Aura on a Milky Base
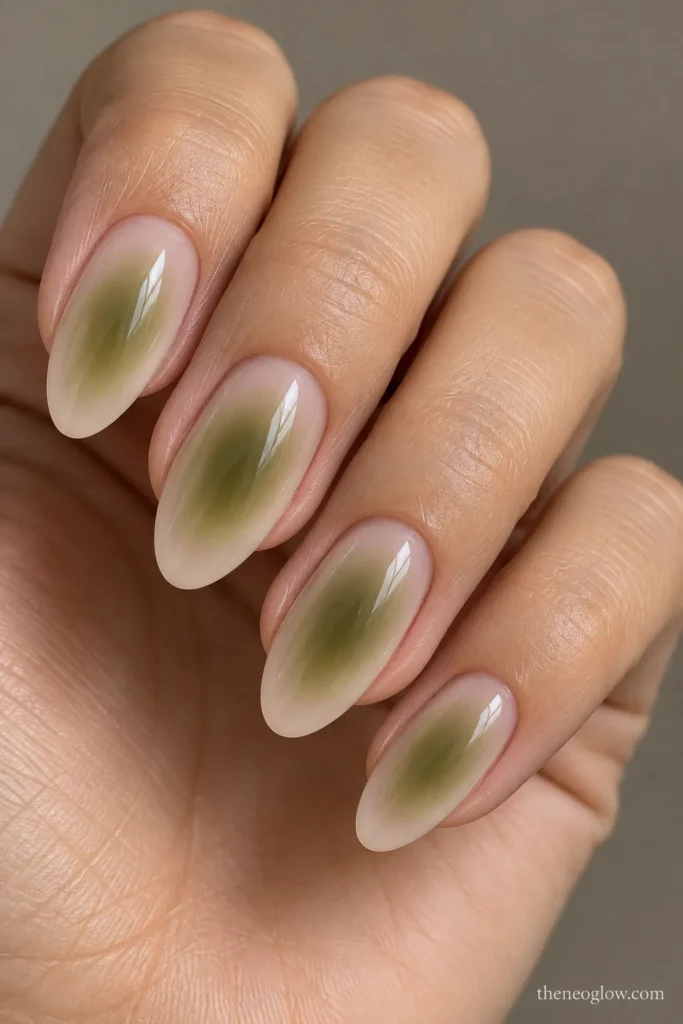
Use a translucent beige-pink or milky neutral base, then diffuse muted olive through the center of each medium almond nail. Leave the perimeter lighter so the green appears softly suspended rather than fully opaque. This creates depth through placement instead of metallic shine.
8. Floating Olive Tip Bars
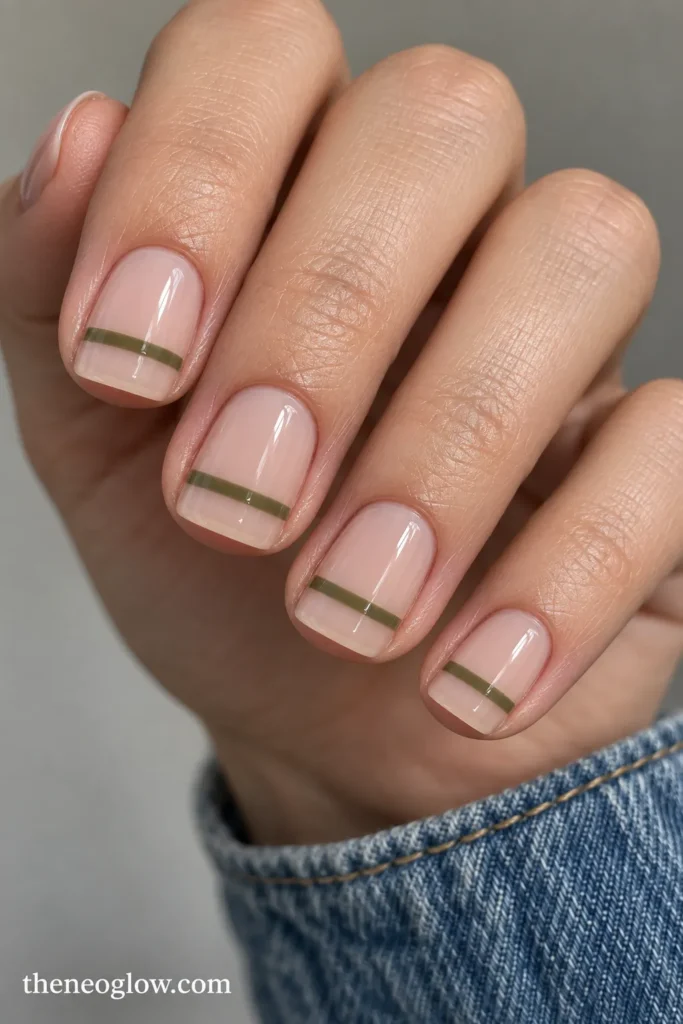
On short square nails, place one slim horizontal olive bar just below the free edge while leaving the actual tip sheer. Center the bar rather than running it sidewall to sidewall. The small gap above it makes the color appear to float, so the design reads differently from a French edge or a full stripe.
9. Open-Center Olive Rail Tips
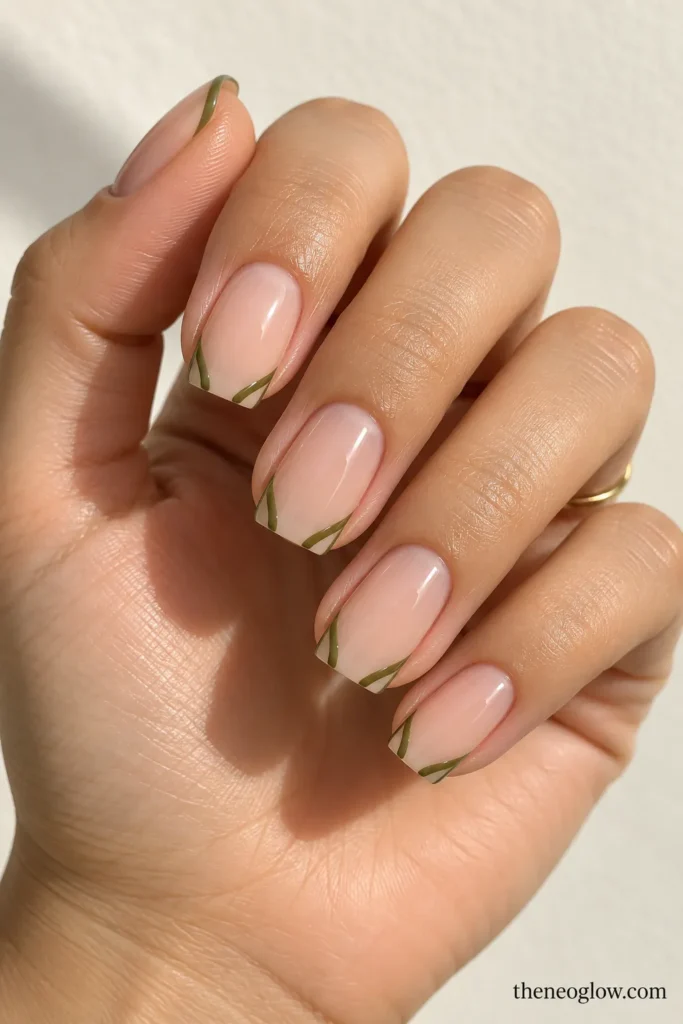
Trace two slim olive lines upward from the outer corners of a sheer nail, stopping before they meet in the center. Medium squovals give the paired rails enough width to read clearly. The empty center separates this from a micro French or full outline and makes the tip feel architectural.
10. Cream Nails With Olive Reverse Arches
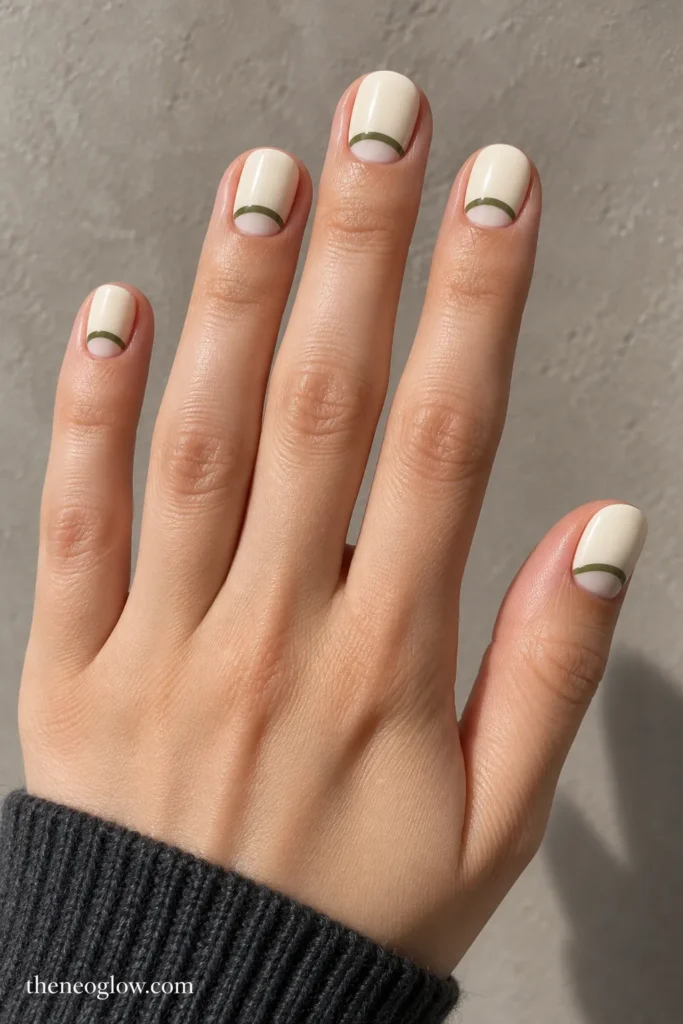
Paint short ovals a soft cream, then add one shallow olive arch just above the cuticle line on each nail. Keep the arch narrow and leave a small strip of cream visible below it. The opaque base changes the balance completely from a sheer half-moon design and gives olive a precise accent role.
Chrome, Pearl, and Light-Reflective Olive Finishes
11. Full Olive Chrome Almonds
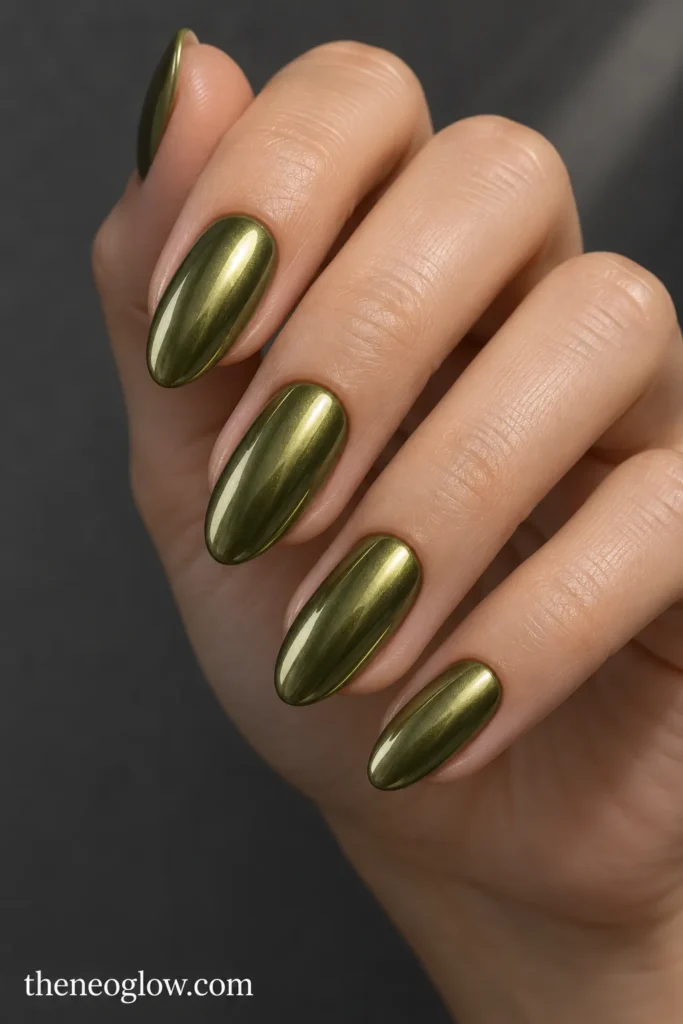
Use a medium olive base under a smooth metallic chrome effect on medium almonds. Aim for an olive reflection rather than silver chrome with a green tint. Because the surface is the main feature, keep every nail the same and avoid adding gems or competing linework.
12. Olive Chrome Crescent Tips
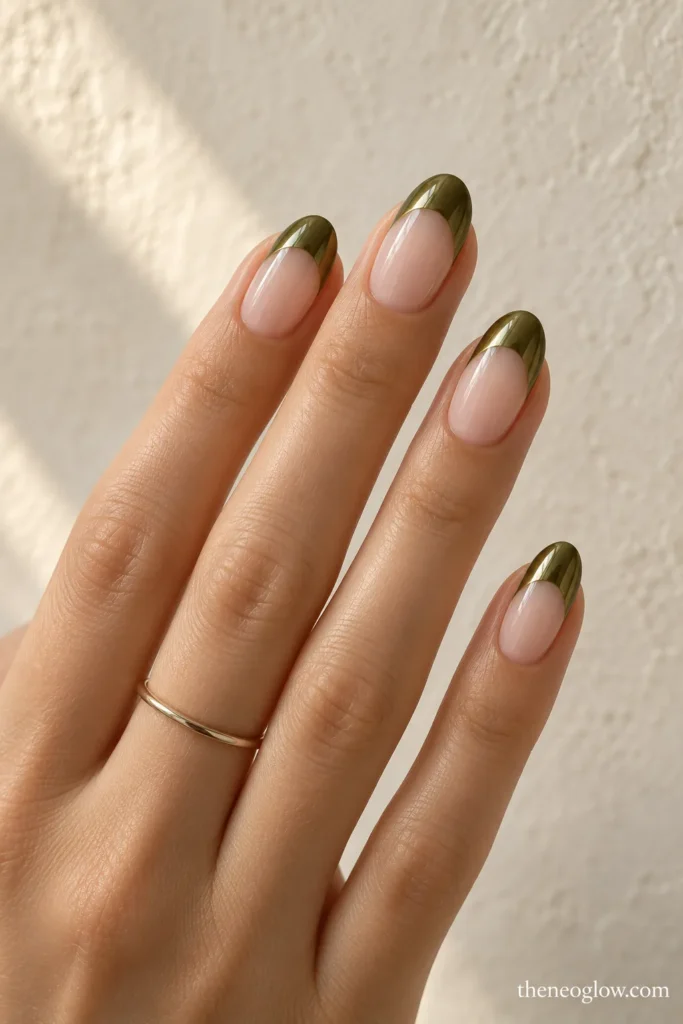
Keep the base translucent and place reflective olive chrome only across a broad curved tip on medium ovals. The chrome should occupy more space than a hairline French but stop well below the center of the nail. This gives you a readable metallic section without making the entire set mirror-like.
13. Smoky Olive Pearl Veil
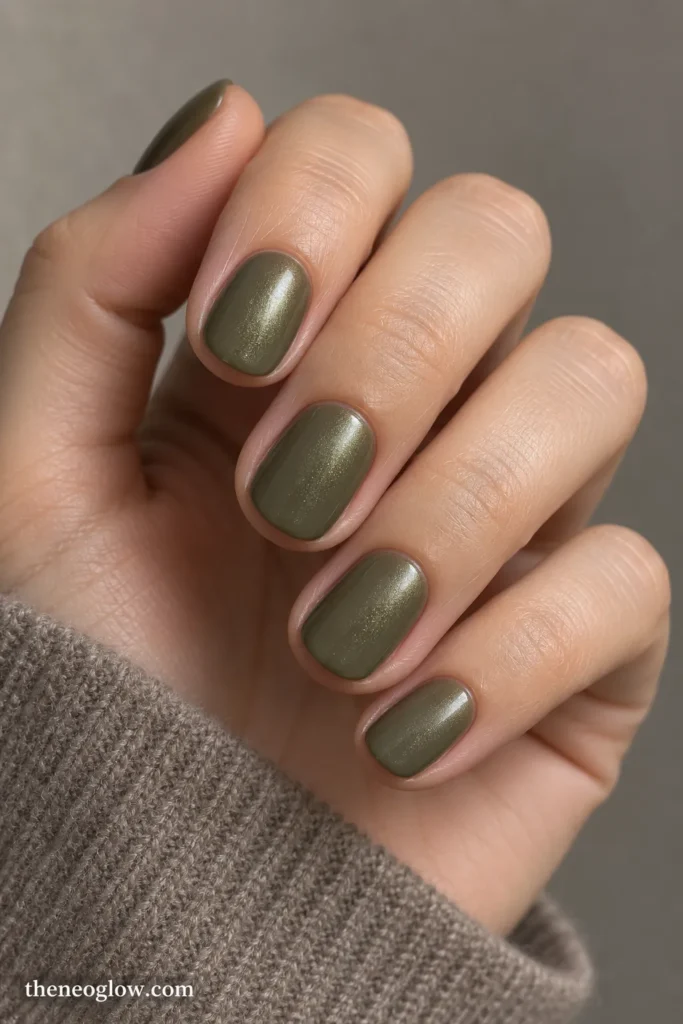
Layer a restrained pearl effect over smoky olive cream on short ovals. The finished nail should glow softly when it turns rather than reflect like a mirror. If you are comparing pearl, mirror, and colored metallic effects, NeoGlow’s goes deeper on how those finishes differ.
14. Moss Micro-Shimmer Tapered Squares
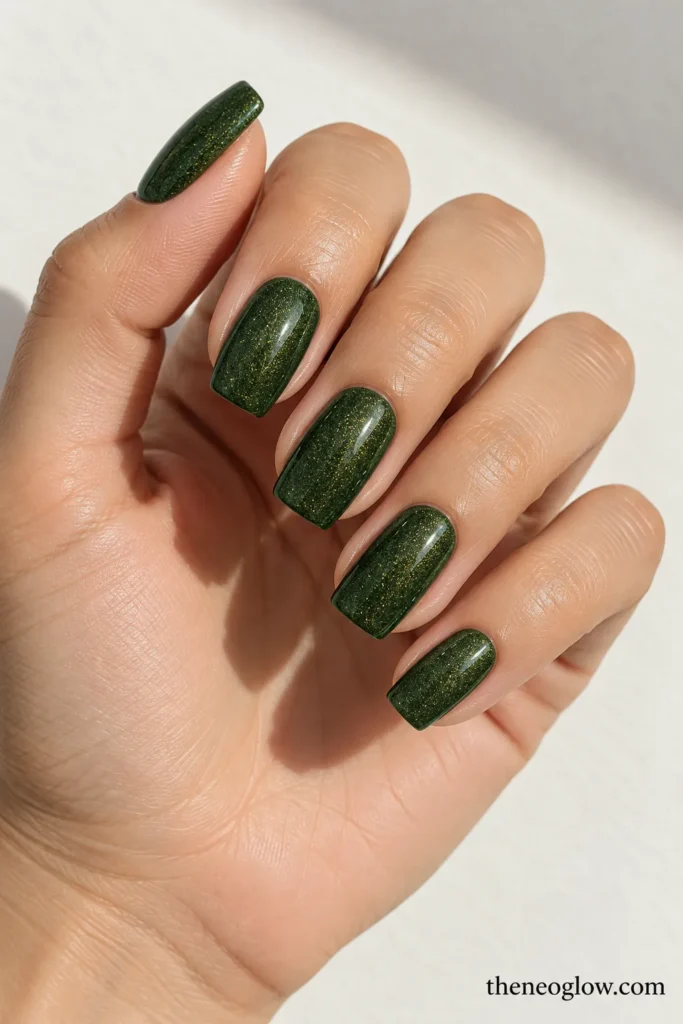
Choose deep moss filled with very fine gold-green shimmer and use it on medium tapered-square nails. The particles should look evenly distributed and smooth from normal viewing distance. This gives dark olive movement without the strong surface reflection of chrome or the beam effect of magnetic polish.
15. Olive Matte With Glossy Side Panels
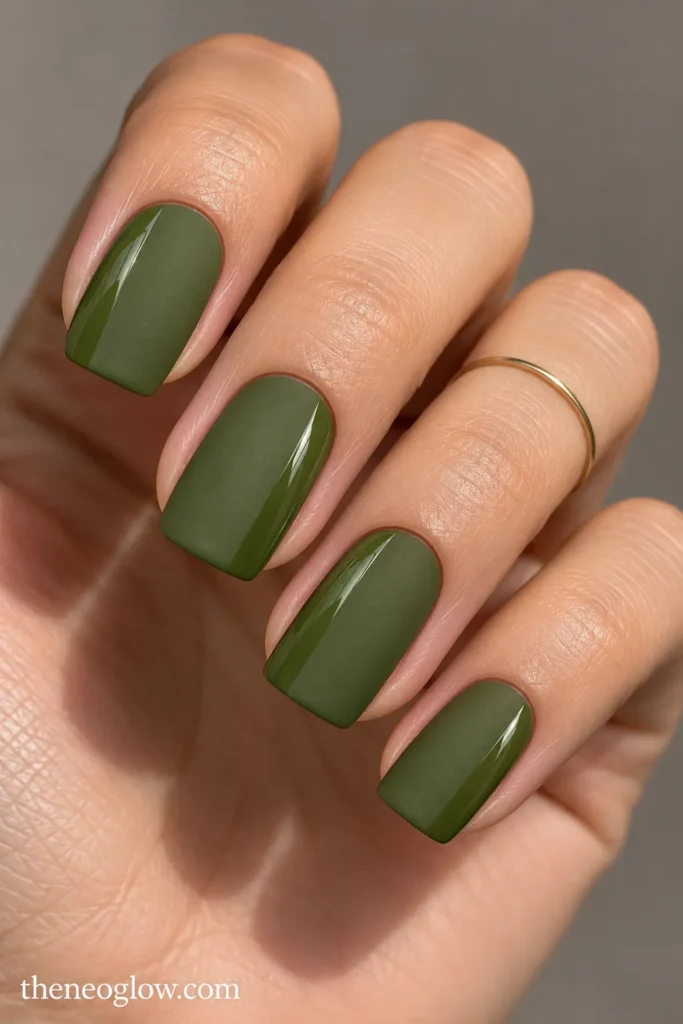
Paint medium squovals in matte olive, then add one slim glossy panel along alternating sidewalls using clear shine over the same base color. The design changes only the finish, not the pigment. In direct light, the glossy strip appears; straight on, the set stays understated and tonal.
Olive Green and Gold Nails With Controlled Detail
16. Olive Tips With Antique-Gold Underlines
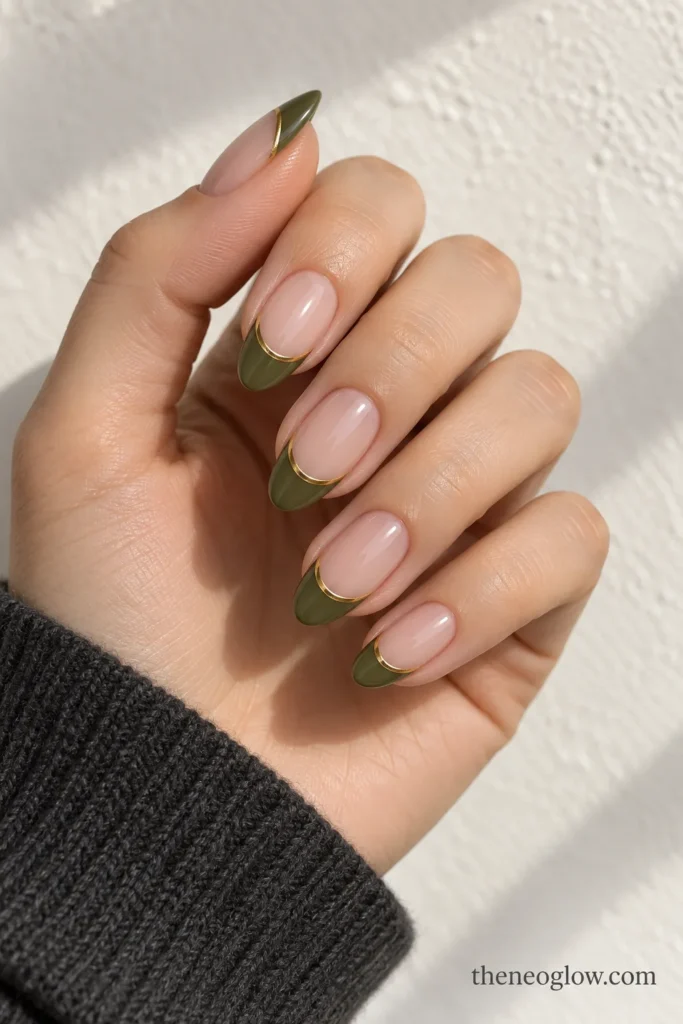
Use a sheer neutral base with medium-depth olive French tips, then trace a hairline antique-gold curve directly beneath the green. Medium almond nails provide enough room for two distinct lines. Keep the gold thin so it behaves like jewelry detail rather than turning the tip into a glitter band.
17. Moss Gloss With Gold Tip Scatter
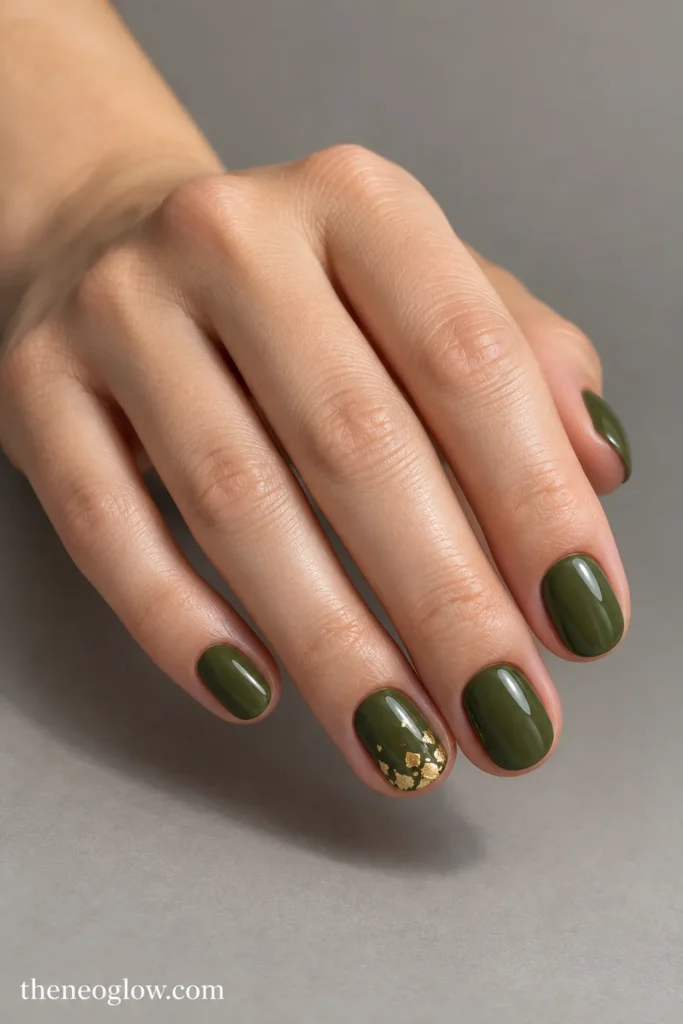
Paint short ovals in glossy moss, then place a few tiny flat gold flecks near the free edge of two accent nails. Concentrate the metallic pieces at the tip and let them disperse toward the center. Limiting the foil to two nails keeps the design distinct from an all-over glitter manicure.
18. Olive Terrazzo Accent Pair
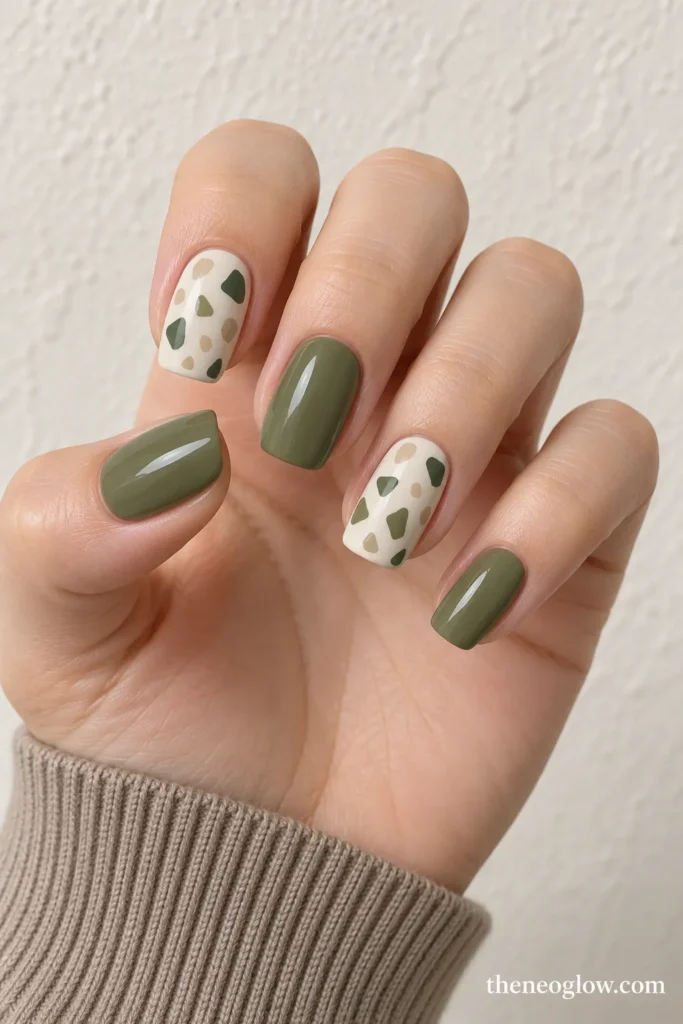
Keep three nails solid muted olive, then use warm-cream bases on two accents with a sparse mix of irregular olive, moss, and pale-beige chips. Leave breathing room between the shapes and keep them flat and graphic rather than marbled. The pair gives you pattern without turning the full manicure into a print.
19. Five-Depth Olive Swatch Set
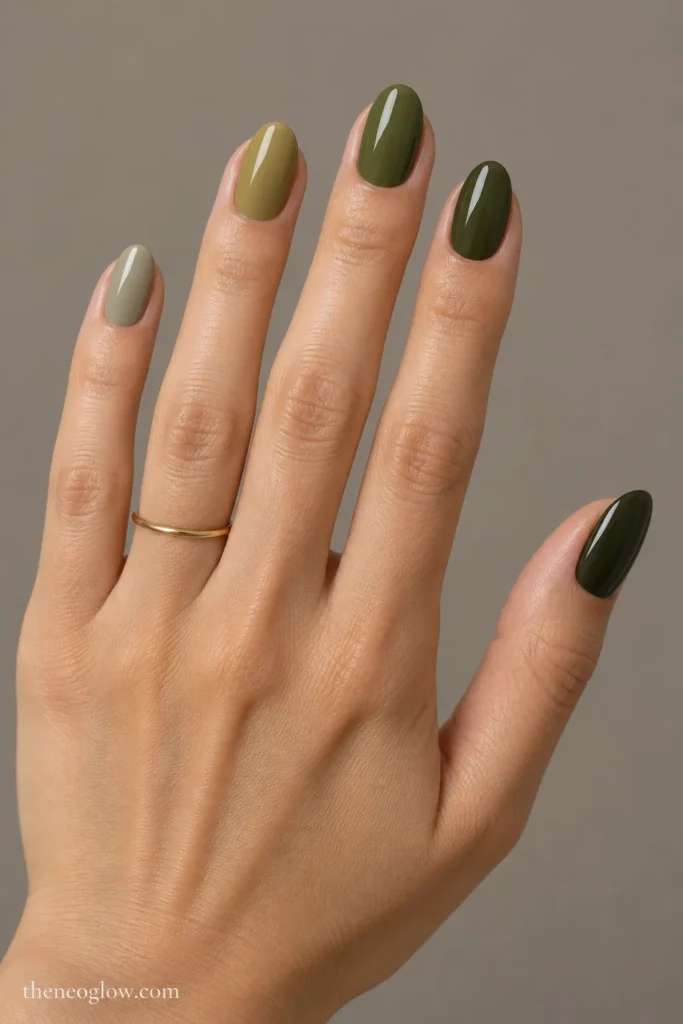
Give each nail one solid glossy depth: pale loden, soft warm-olive, classic olive, moss, and blackened olive. Keep the shape and finish identical so color depth is the only changing variable. This is especially useful when you want to compare the family on your own hand before committing to one shade next time.
20. Olive Marble With Fine Gold Veins
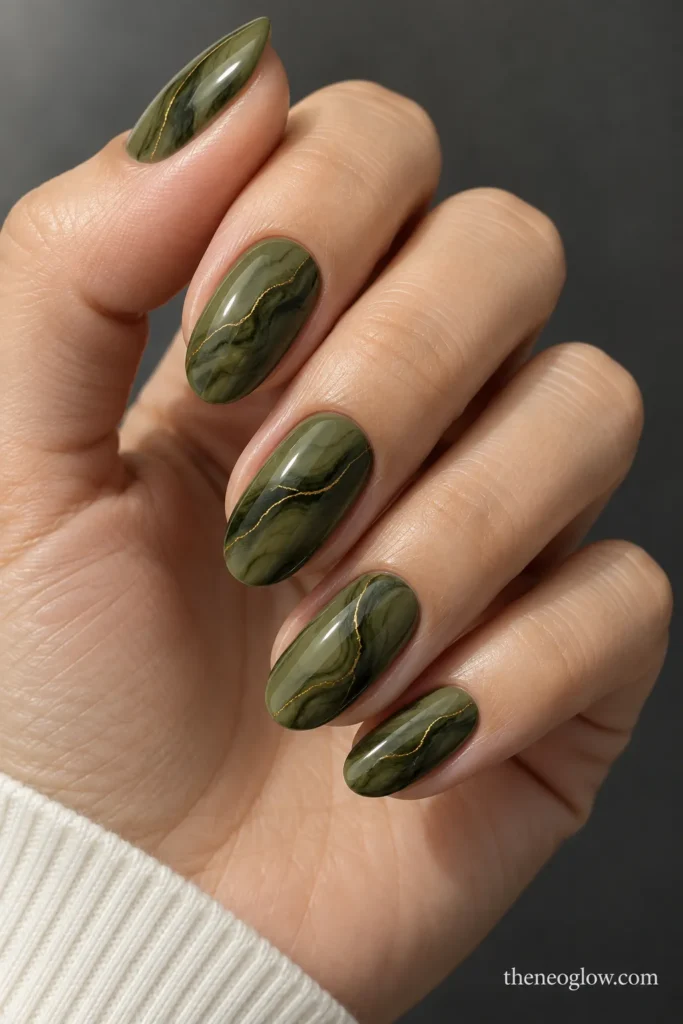
Use a muted olive base on medium oval nails and add restrained darker-moss marbling with a few very thin antique-gold veins. Keep the movement broad and irregular rather than drawing literal leaves or stone props. Limit the gold to narrow lines so the olive family remains visually dominant.
How to Adapt Olive Green Nails for Short Nails
Short nails do not require pale color. What matters is how much space the design uses. Solid gloss, satin, pearl, and fine shimmer can cover a short plate easily. For artwork, reduce the width of tip lines, keep negative-space sections simple, and use one controlled zone rather than squeezing several details onto one nail.
Soft square, squoval, round, and shallow oval shapes all give olive different edges to work with. If you are deciding what your current free edge can realistically support, NeoGlow’s compares the structure and tradeoffs before you choose the design.
Keep the Finish Looking Intentional
Very dark olive and high-reflection finishes make uneven edges, chips, and surface texture easier to notice, while sheer washes and negative-space designs usually hide small changes more softly. Choose the finish based on how much contrast you want to maintain, not on a promised wear time.
If you paint or remove polish at home, keep the surrounding skin comfortable and avoid overworking the cuticle area. The American Academy of Dermatology’s recommends moisturizing nails after polish removal and avoiding cutting or forcefully pushing back cuticles.
Choose Your Olive Route
Start with the feature you want to notice first. Choose loden, classic olive, moss, or blackened olive when depth matters most. Pick sheer, satin, gloss, pearl, chrome, shimmer, or matte when the surface finish is the deciding factor. Use French placement, negative space, or gold only when you want the design structure to become part of the look.
Save two or three references that use different olive depths, then compare them with your usual nail length and wardrobe. If you want to move beyond this single color family, browse NeoGlow’s for a broader seasonal palette.