Simple Halloween nails for short nails look strongest when the design is edited before it is painted. On a very short natural nail, one narrow dark edge, a clear window, or a single tiny symbol can read more clearly than several miniature details competing for room.
This list treats “simple” as a visual aesthetic: calm spacing, one-accent placement, flat details, sheer or muted bases, and artwork scaled for short round and squoval nails. It is not a beginner tutorial. If you want tools, timing, shortcuts, and step-by-step execution, use NeoGlow’s Easy Halloween Nails guide instead.
Keep the Design Smaller Than the Nail
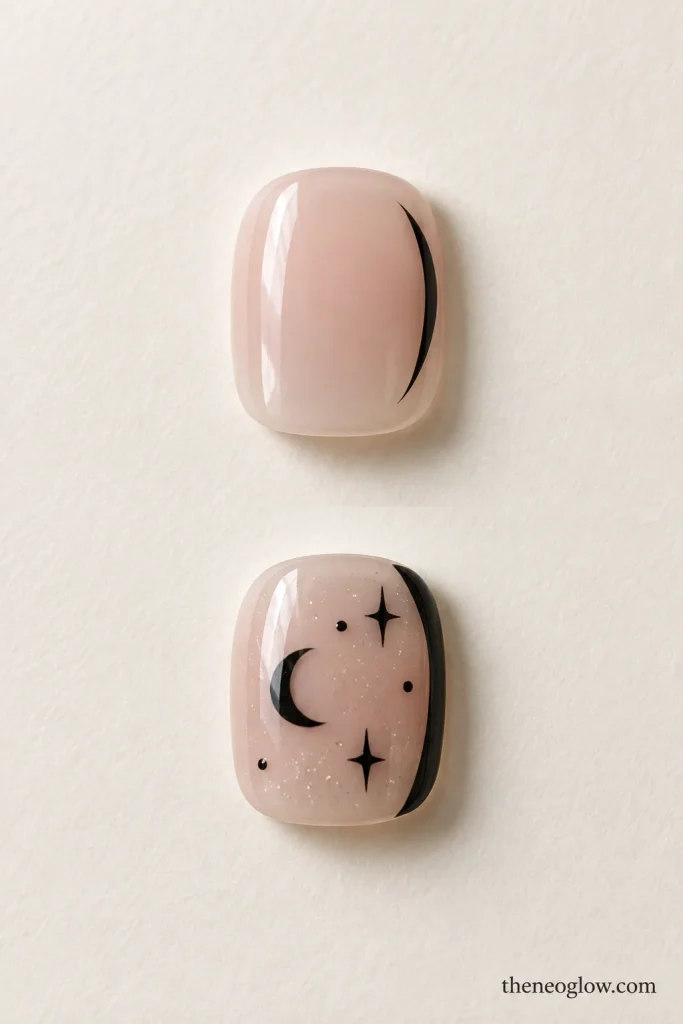
Very short nails do not need to imitate long-nail compositions. Choose one focal area—tip, cuticle, sidewall, or center—and let the rest of the nail stay visually quiet.
| If you want | Keep | Skip |
|---|---|---|
| Barely spooky | Sheer base + one dark mark | Several motifs on every nail |
| Graphic | One edge, line, notch, or window | Tip + motif + glitter together |
| Character detail | One tiny symbol on one or two accents | A different character on each finger |
| Dark minimal | One deep shade + finish contrast | Raised charms or heavy texture |
For the cleanest canvas, keep your natural shape consistent rather than forcing extra length. NeoGlow’s Best Nail Shape for Short Nails guide compares square, squoval, oval, and short almond based on the free edge you actually have. If you are trimming at home, the American Academy of Dermatology’s nail-trimming guidance recommends cutting fingernails almost straight across, slightly rounding the corners, smoothing rough edges with a file, and leaving cuticles alone.
Choose the Base Before the Detail
A translucent base preserves breathing room because the natural nail remains part of the design. Rosy pink, beige, peach, caramel, cocoa, smoky gray, and taupe can all work; choose the contrast you prefer rather than treating one “nude” as universal.
Opaque color can still look minimal, but the detail should become even simpler. On black, plum, or charcoal, let finish contrast or one tiny pale mark do the work. On cream or milky beige, use one dark micro symbol and stop there.
Shape changes the available placement more than it changes the idea. Very short squoval nails suit corner edges, side marks, and small geometry. Short round nails soften tiny symbols and negative-space curves. If your nail has almost no free edge, favor sidewall or center placement instead of squeezing a deep tip onto the plate.
Minimal Halloween Color and Negative Space
1. Black Side-Slash Sheer Nails
Use a transparent pink-beige, peach-beige, caramel, or cocoa base and place one narrow black slash close to the outer sidewall. Repeat the direction across the hand. The line gives a quiet gothic cue without turning into a stripe-heavy graphic set.
2. Charcoal Corner Micro Edges
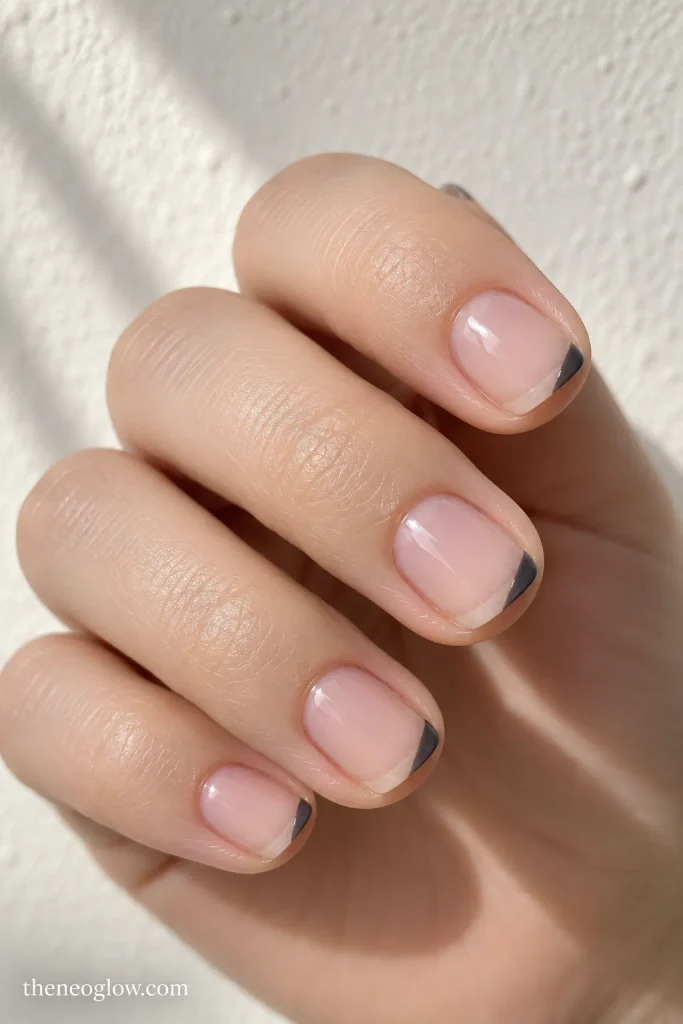
Paint only the outer corner of each free edge in charcoal rather than tracing the full tip. Keep the opposite side bare. This gives you a micro-tip effect without copying a conventional French band or needing extra length.
3. Smoky Gray With a Clear Center Stripe
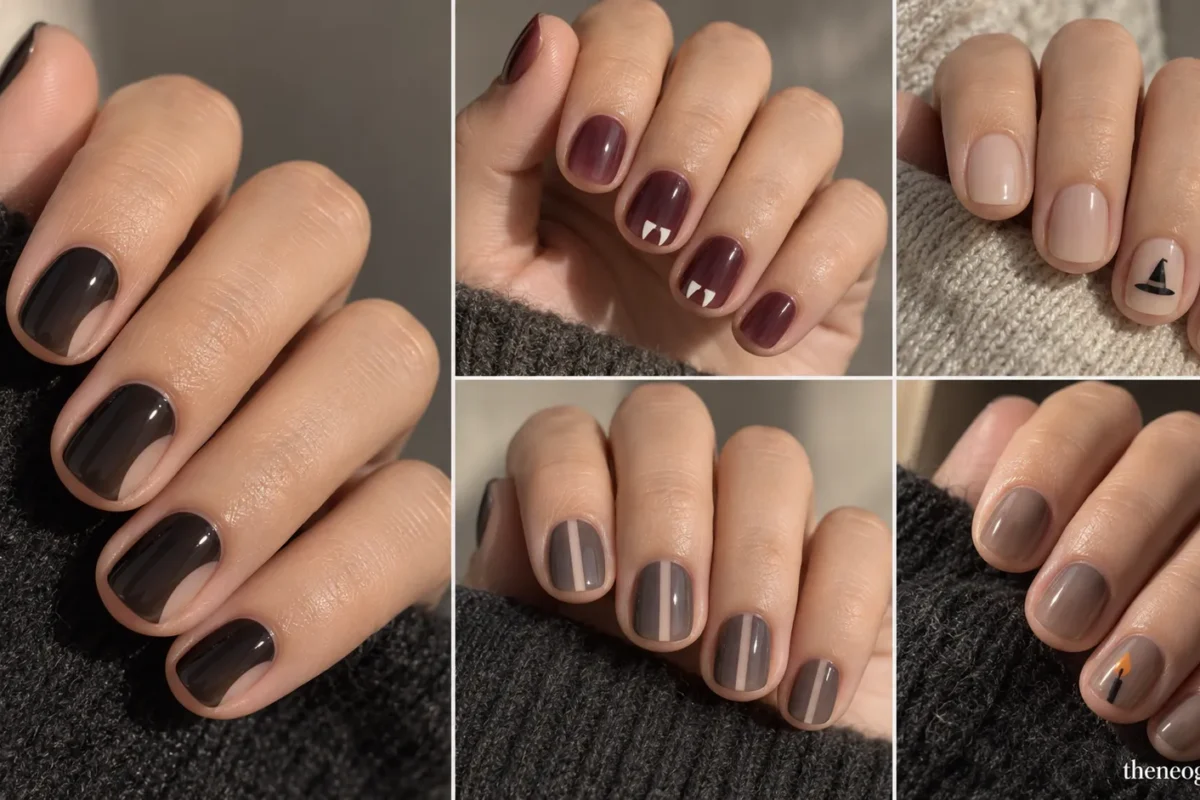
Cover the nail in translucent smoky gray while preserving one slim vertical clear strip through the center. The open line breaks up the dark color and prevents a very short nail from feeling visually dense.
4. Black Jelly With a Bare Side Window
Use translucent black over most of the nail but leave a small curved window of bare or sheer base along one side. Keep the window in the same position on every finger so the set looks deliberate rather than randomly unfinished.
5. Matte Charcoal With One Glossy Vertical Line
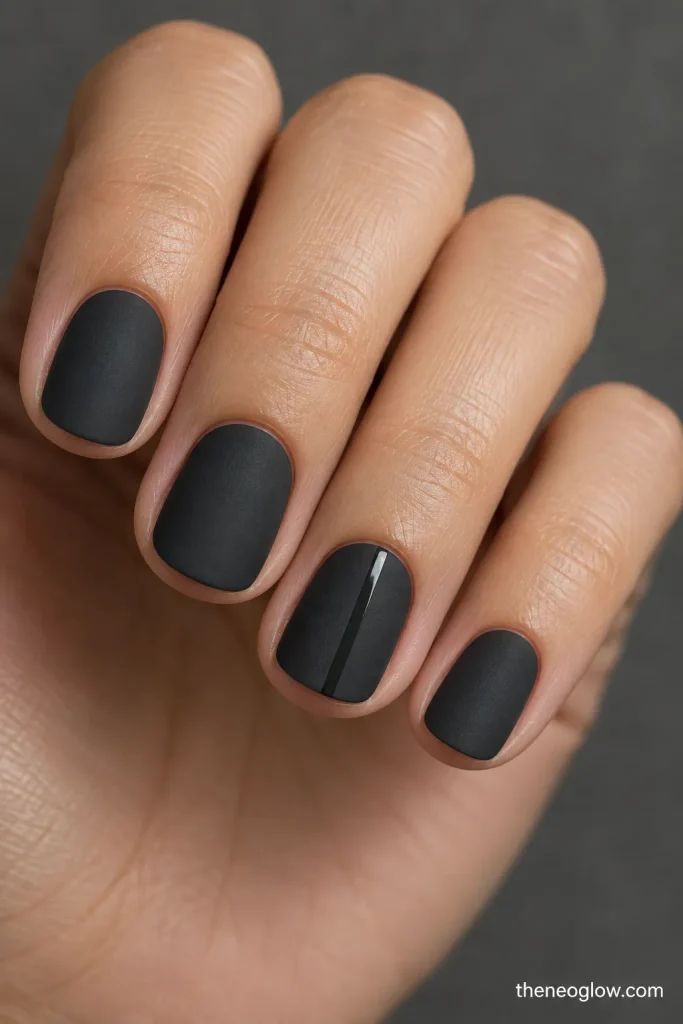
Finish short charcoal nails in matte, then add a single narrow clear-gloss line down one accent nail. The design changes only when light moves across it, giving the set texture without glitter, metallics, or extra color.
6. Deep Plum With a Clear Diagonal Corner
Paint a translucent deep-plum veil over each nail but leave one small diagonal corner clear. Mirror the direction across the opposite hand. The color feels seasonal while the bare corner keeps the shape open and graphic.
7. Cream-and-Black Vertical Split
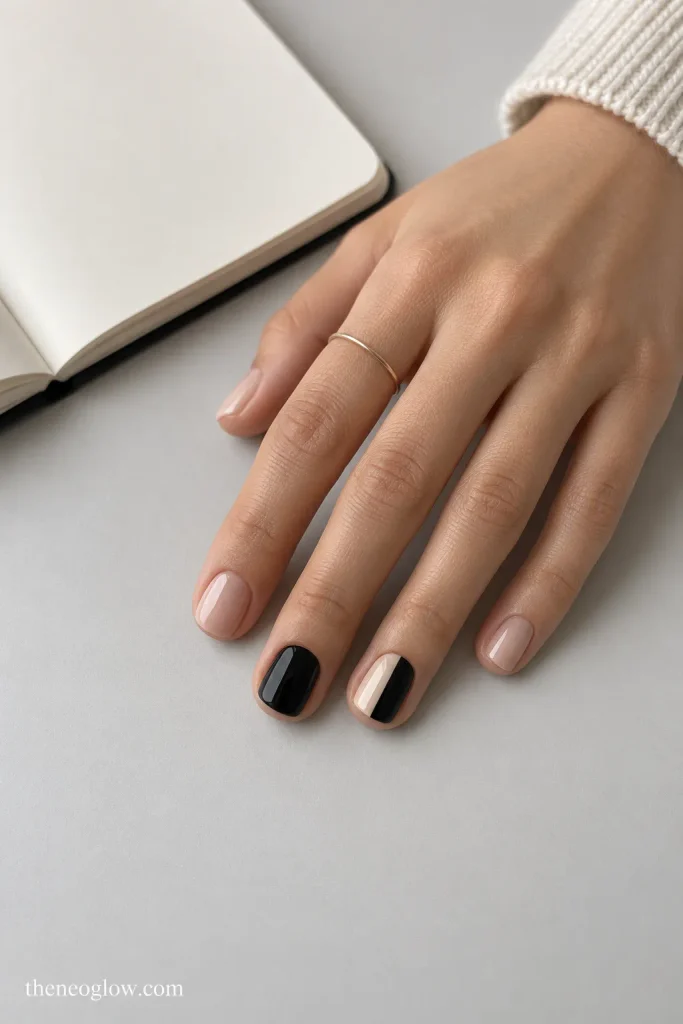
Divide one or two accent nails vertically: one half creamy beige, one half glossy black. Leave the remaining nails sheer or black. A straight split gives strong Halloween contrast without adding any literal motif.
8. Black Gloss With a Tiny Clear Square
Use glossy black on short squoval nails and preserve one miniature square of clear base near the side of a single accent. The small geometric window becomes the detail, so no additional art is needed.
One-Accent Spooky Symbols
9. Single Coffin Outline
Place one narrow coffin-shaped outline in black or charcoal on a milky beige accent nail. Keep the remaining nails sheer or glossy black. The geometry gives a gothic Halloween reference without lettering, crosses, or dimensional decoration.
10. Ivory Fang Pair on Sheer Plum
Use a translucent plum accent nail and place two miniature ivory triangles at the free edge. Keep the rest of the hand sheer plum or nude. The small fang pair reads as vampire-inspired without blood drips or a full character illustration.
11. Twin Vampire Bite Dots
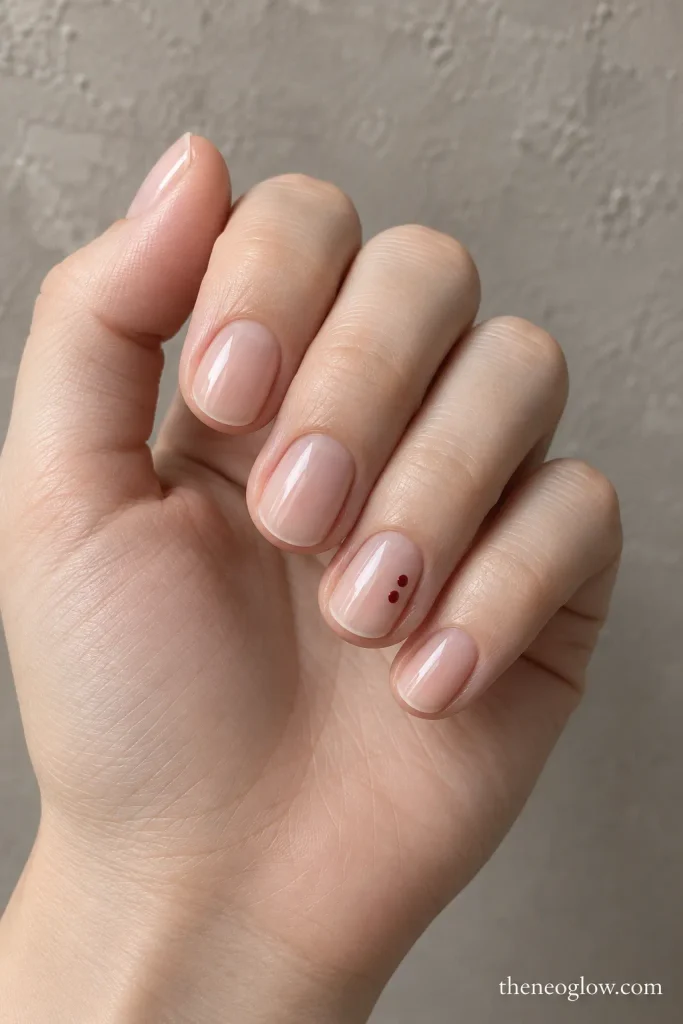
Add two closely spaced oxblood dots near one side of a sheer nude accent nail. Keep every other nail plain or softly tinted. The pair suggests a vampire-bite reference while using almost no nail space.
12. Tiny Devil-Horn Pair
Place two slim black horn curves at the outer corner of one sheer accent nail, with no face, eyes, or lettering. Cropping the shapes to the edge keeps the reference subtle and leaves most of the natural nail visible.
13. Tiny Tombstone Silhouette
Place one miniature charcoal tombstone low on a sheer gray accent nail, leaving generous clear space around it. Keep the top rounded and the body plain—no lettering, grass, moon, or cemetery scene.
14. Mini Witch-Hat Triangle
Use a tiny black triangle with one short horizontal brim on a milky or sheer beige accent. Position it slightly off-center and leave the rest of the nail empty. The simplified silhouette is enough to read as a witch-hat reference.
15. Black Keyhole Accent
Paint one small black keyhole shape near the center of a nude accent nail and leave the remaining fingers in a sheer neutral. It gives a haunted-house mood without doors, keys, lettering, or scene-based art.
16. White Claw-Scratch Pair
Place two short ivory diagonal slashes on one black or charcoal accent nail. Keep the marks parallel and compact rather than extending them across the full plate. The pair adds a creature-like cue with almost no illustration.
17. Single Gothic Cross
Use one thin black cross on a translucent taupe or gray ring finger, then keep every other nail plain. A narrow, centered shape is easier to read on a very short plate than ornate crosswork or multiple metallic details.
18. Tiny Candle-Flame Accent
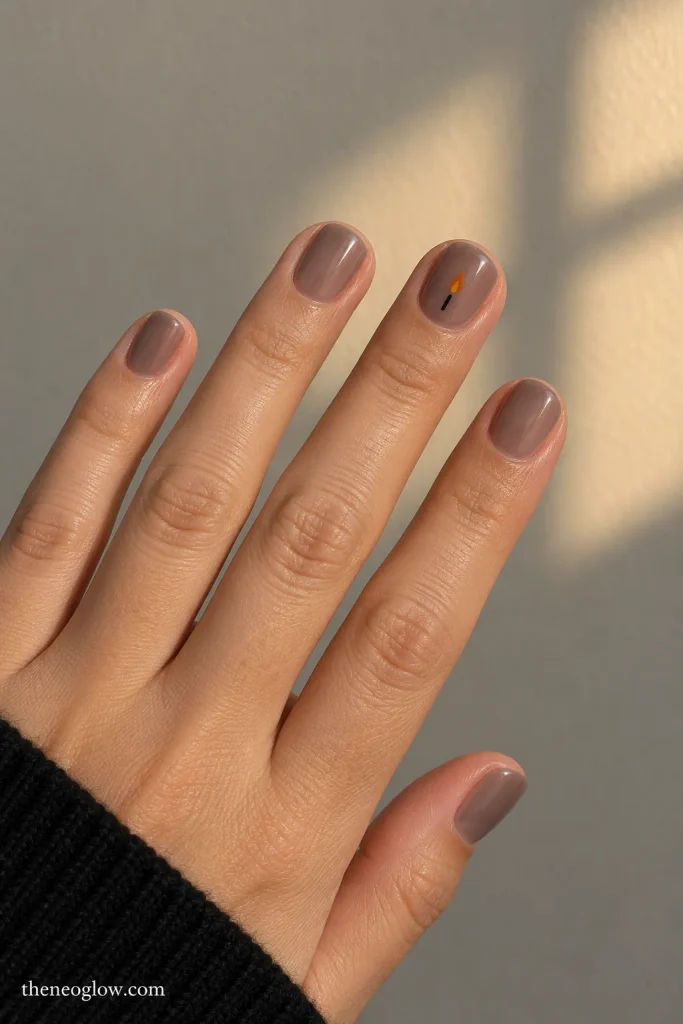
Place one miniature muted-orange teardrop above a short black wick on a sheer smoky nail. Use the flame on only one finger per hand. The warm point of color gives a haunted-candle reference without adding wax drips or surrounding stars.
How to Keep a Minimal Halloween Manicure Looking Clean
The easiest way to lose the minimal effect is to keep adding “just one more” detail. If a nail already has a symbol, let the tip and cuticle stay quiet. If the manicure already uses a clear window or dark edge, skip extra dots, decals, and glitter.
Use one repeated rule across both hands: the same accent finger, the same sidewall direction, the same line weight, or the same base opacity. Small differences in handmade art are less distracting when the overall spacing system stays consistent.
This page is about choosing the composition, not teaching the technique. After you save your preferred placement, NeoGlow’s Easy Halloween Nails guide covers beginner tools, shortcuts, decals, wraps, and step-by-step execution.
Which Minimal Structure Should You Save?
Choose the design according to what you want noticed first. For almost invisible Halloween styling, use the side slash, negative-space stripe, clear window, or glossy-on-matte line. For one recognizable symbol, save the coffin, fangs, horn pair, tombstone, witch hat, or candle flame. For the smallest possible detail, choose the bite dots or claw marks.
If you decide you want more color, texture, press-ons, or party-level art after all, NeoGlow’s Halloween Nails 2026 guide covers the broader seasonal range. For this manicure, keep the rule simple: one focal point, enough open space to see it, and no extra detail added just because there is room.